Garmin GPS GPS 60 Owner's Manual
Garmin owner's manual navigator gps 60
Hide thumbs
Also See for GPS GPS 60:
- Quick start manual (2 pages) ,
- Declaration of conformity (1 page) ,
- Manual (16 pages)
Table of Contents
Advertisement
Quick Links
Advertisement
Table of Contents

Related Manuals for Garmin GPS GPS 60


Summary of Contents for Garmin GPS GPS 60
- Page 1 GPS 60 navigator owner’s manual...
- Page 2 Information in this document is subject to change without notice. Garmin reserves the right to change or improve its products and to make changes in the content without obligation to notify any person or organization of such changes or improvements. Visit the Garmin web site (www.garmin.com) for current updates and supplemental information concerning the use and...
-
Page 3: Introduction
Serial Number: Contact Garmin If you should encounter any difficulty while using your GPS 60, or if you have any questions, in the U.S.A. contact Garmin Product Support by phone: 913/397-8200 or 800/800-1020, Monday – Friday, 8 am – 5 pm Central Time;... -
Page 4: Table Of Contents
Getting Started ... 1 Installing Batteries ... 1 Learning Key Functions ... 2 Start Up and Initialization... 4 Initializing the GPS Receiver ... 4 The Main Page Sequence... 5 Status Bar, Backlighting, and Contrast... 6 The Satellite Page... 7 GPS Navigation ... 7 The Map Page... - Page 5 The Setup Menu ... 39 Saving Battery Life ... 39 System Setup ... 40 Display Setup ... 41 Interface Setup ... 41 Tones Setup ... 44 Page Sequence Setup ... 44 Using the Map Setup Feature ... 45 Map Setup—General Settings ... 45 Map Setup—Tracks Settings ...
-
Page 6: Software License Agreement
Title, ownership rights, and intellectual property rights in and to the Software remain in Garmin. You acknowledge that the Software is the property of Garmin and is protected under the United States of America copyright laws and interna- tional copyright treaties. -
Page 7: Fcc Compliance Information
FCC Compliance Information NOTE: The GPS 60 does not contain any user-serviceable parts. Repairs should only be made by an authorized Garmin service center. Unauthorized repairs or modifica- tions could result in permanent damage to the equipment, and void your warranty and your authority to operate this device under Part 15 regulations. -
Page 8: Warnings And Precautions
Introduction Warnings and Precautions viii CAUTION: Use the GPS 60 at your own risk. To reduce the risk of unsafe operation, carefully review and understand all aspects of this Owner’s Manual and thoroughly practice operation using the Demo Mode (GPS off) prior to actual use. When in actual use, carefully compare indi- cations from the GPS 60 to all available navigation sources, including the information from other NAVAIDs, visual sightings, charts, etc. - Page 9 MAP DATA INFORMATION: One of the goals of Garmin is to provide customers with the most complete and accurate cartography that is available to us at a reasonable cost. We use a combination of govern- mental and private data sources, which we identify as required in product literature and copyright messages displayed to the consumer.
- Page 10 Introduction Warnings and Precautions Important Because the Garmin GPS 60 can be used for vehicular navigation, important safety considerations must be observed. Please read and observe the instructions on this page. Do Not Mount Where Do Not Place Unsecured Driver’s Field of...
-
Page 11: Getting Started
Installing the Batteries The GPS operates on two “AA” batteries (not included). Alkaline or NiMH batteries may be used (see p. 40 to set the battery type). Stored data will not be lost when batteries are removed. To install batteries: 1. -
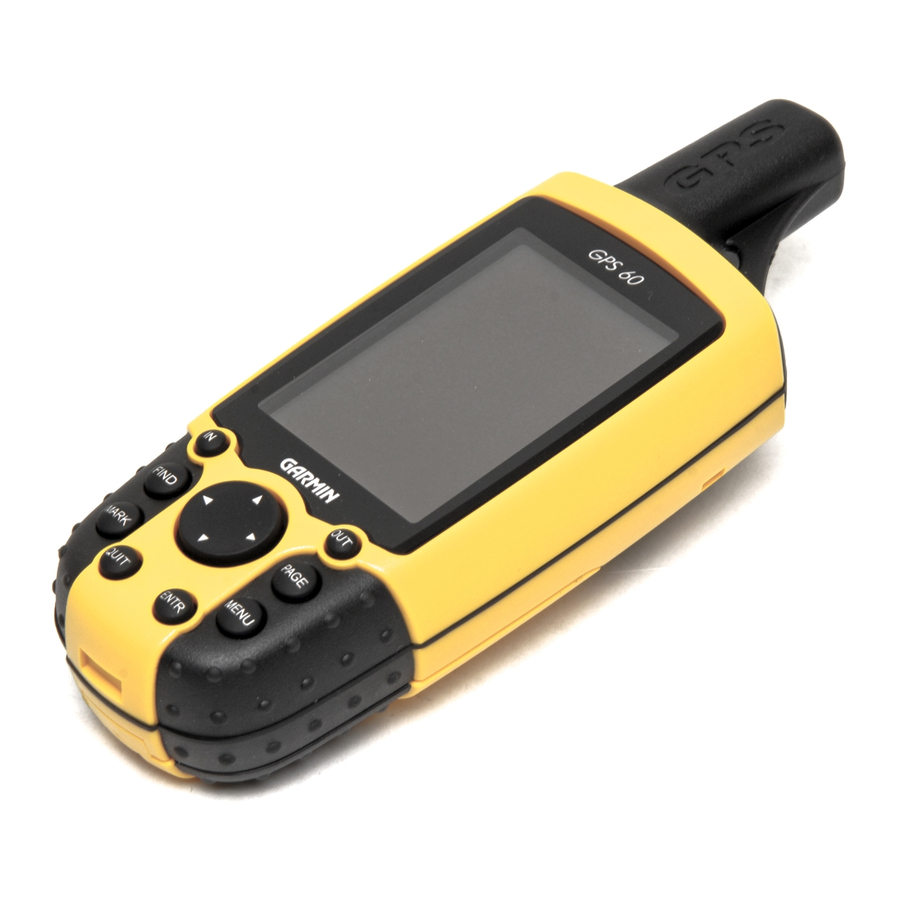
Page 12: Learning Key Functions
Getting Started Learning Key Functions IN/OUT Zoom Keys • From the Map Page, press and release to zoom in or out. • From any other page, press to scroll up or down a list. FIND Key • Press and release at any time to view the Find Page. - Page 13 Belt Clip/Auxiliary Connector Mount • Provides convenient access when hiking or walking. Auxiliary GPS Antenna Connector (under weather cover) • Provides connection to a remote GPS antenna. USB Connector Port (under weather cover) • Provides interface to a PC for faster data transfer.
-
Page 14: Start Up And Initialization
The Satellite Page Initializing the GPS Receiver Each time you turn on the GPS 60, it will begin searching for satellite signals. The first time you turn on the unit, you must wait for the GPS to initialize. -
Page 15: The Main Page Sequence
Getting Started The Main Page Sequence The Main Page Sequence When you turn on your GPS 60, you will see the Welcome Page and then the Satellite Page. The Satellite Page is the first in the sequence of five Main Pages: Satellite Page, Trip Computer Page, Map Page, Compass Page, and Main Menu Page. -
Page 16: Status Bar, Backlighting, And Contrast
Getting Started Status Bar, Backlighting, and Contrast Status Bar The Status Bar appears at the top of the each Main Page and contains icons that represent GPS 60 functions (see below). Using Battery Power Using Auxiliary Power Acquiring Satellites 2-Dimensional Navigation 3-Dimensional Navigation Backlight is On Alarm is Set... -
Page 17: The Satellite Page
The Satellite Page The Satellite Page displays information about the satellite signals the GPS 60 is receiving. In the middle of the page, you can see a number of satellite icons with numbers; each number represents a specific satellite in space. -
Page 18: The Map Page
GPS Navigation The Map Page Compass Pointer Position Arrow Zoom Scale The Map Page Accuracy Circle Panning Arrow Using the Map Page The Map Page is the primary navigation feature of the GPS 60. You can use the Map Page to do the following: •... -
Page 19: Changing The Map Page Display
Changing the Map Page Display You can display the Map Page in Track Up or North Up orientation (see p. 45 to change orientation). Track Up means the map is always ori- ented with the direction you are traveling at the top of the page. North Up means that no matter what direction you are traveling, the map is always oriented with North at the top of the page. - Page 20 GPS Navigation GPS Navigation The Map Page Changing Data Fields Use the ROCKER key to scroll through the list of possible data fields. When you find a data field you want to display, highlight it and press ENTER. To change which data fields appear: 1.
-
Page 21: Measuring Distance
Measuring Distance This Map Page option allows you to determine the distance between two points on the Map Page. Distances are measured in straight lines. To measure distance: 1. Press until you see the Map Page. PAGE 2. Press the key to display the Map Page Options Menu. -
Page 22: The Compass Page
GPS Navigation GPS Navigation The Compass Page Data Fields The Compass Page Course The Course Pointer indicates your course of travel and the distance you drift off Using the Compass Page The Compass Page uses traditional navigation to display your current direction of travel and keep headed toward your destination. - Page 23 To display the Course Pointer or Bearing Pointer: 1. From the Compass Page, press the MENU to highlight ‘Course Pointer’ and press 2. To view the Bearing Pointer, press MENU and press ENTER To display data fields: 1. From the Compass Page, press the MENU to highlight ‘Data Fields’...
-
Page 24: The Trip Computer Page
GPS Navigation The Trip Computer Page The Trip Computer Page You can change which data fields appear, use big numbers to view data, or reset data fields with the Trip Computer Page Trip Computer Page Menu Using the Trip Computer Page The Trip Computer Page displays a wide variety of travel data that is useful for navigating long distances. -
Page 25: The Main Menu Page
About the Main Menu You can access the following pages from the Main Menu Page: • Tracks—Maintains a record of your movements (track log). Routes—Use to create and save a list of points you want to navi- • gate to in a specific order. Highway—A useful graphic perspective for navigating a route. -
Page 26: Waypoints
GPS Navigation GPS Navigation Waypoints MARK Press the MARK key to create a waypoint at your current location. The waypoint appears on the Map Page with a name and ‘Symbol’ field Select to view waypoint on Map Page. Select to average waypoint The Mark Waypoint Page... -
Page 27: Creating A Man Overboard Waypoint
To create a waypoint with the map panning arrow: 1. On the Map Page, press the ROCKER the map panning arrow to the place where you want to save a waypoint. 2. Press to mark a waypoint. If there is no map information ENTER at that point, a message appears: ‘Do you want to create a user waypoint here?’... -
Page 28: Averaging Waypoint Location
GPS Navigation GPS Navigation Waypoints The Average Location Page As you wait, the waypoint position becomes more accurate. Averaging Waypoint Location The GPS 60 can calculate an average position for a waypoint over time to makes the waypoint location more accurate. You can also average waypoint location at any time from the Waypoint options menu. - Page 29 To edit or delete a waypoint: 1. Press , use the key to highlight ‘Waypoints,’ and press FIND ROCKER ENTER 2. Select the waypoint you want to edit from the list and press The Waypoint Information Page appears. 3. Make any necessary changes to the name, symbol, or elevation fields as described previously.
-
Page 30: Projecting A Waypoint
GPS Navigation GPS Navigation Waypoints Project Waypoint Page Projected Waypoint on the Map Projecting a Waypoint You can create a waypoint that is located a certain distance and bear- ing away from an existing waypoint or other point on the map. Creating a waypoint in this way is called projecting a waypoint. -
Page 31: Proximity Waypoints
Proximity Waypoints The Proximity Waypoints Page allows you to designate waypoints that have alarm circles around them at specified distances. The alarm helps you avoid locations that are restricted or dangerous. To create a proximity waypoint: 1. Press PAGE until you see the Main Menu Page. Highlight ‘Proximity’ and press ENTER 2. -
Page 32: Finding Places
GPS Navigation Finding Places The Find Page without Optional MapSource Data The Find Page with Optional MapSource Data Using the Find Page Use the Find Page to search for waypoints, geocache points, cities, and recently found places. If you have loaded optional MapSource Points of Interest data, you can also search for restaurants, lodging, exits, ser- vices, and more. -
Page 33: Finding Waypoints
Finding Waypoints Use the Find Page to locate waypoints quickly and easily. All waypoints are listed in alphabetical order. Once you select a waypoint, you can view it on the map, edit the waypoint, or create a route to it from your current location. -
Page 34: Finding Geocache Points
For more information on geocache points, see p. 47, or visit our website, http://www.garmin.com/outdoor/geocaching. NOTE: Before setting up and placing physical geocache stations on public or private land, be certain you are not in violation of ordinances or laws governing use of these properties. -
Page 35: Finding Cities
Finding Cities The Find Cities feature allows you to search for cities all over the world. Once you find a city, you can view it on the map or create a route to it. To find a city: 1. From the Find Page, use the ROCKER and press ENTER... -
Page 36: Finding Points Of Interest
GPS Navigation Finding Places The Find Page—Detailed When you find a Point of Interest, press ENTER to view address and telephone number or to create a route to that Finding Points of Interest If you have loaded optional MapSource Points of Interest (POI) data, you can search for all Points of Interest, including restaurants, interstate exits, lodging, services, and more. -
Page 37: Finding A Recently Found Place
Finding a Recently Found Place The Recent Finds Page saves all of your most recent searches in a list. The place you found most recently appears at the top of the list. When you exceed the number of entries the list can hold, the oldest entries are deleted. - Page 38 GPS Navigation Finding Places Use the ‘Change Reference’ option to calculate the distance and bearing from another point on the map to the waypoint. The ‘From Current Location’ field changes to ‘From Map • Average Location—Used with waypoints only, it samples a waypoint location over time and averages the result for a more accurate position reference (see p.
-
Page 39: Tracks
Using a Track Log The Tracks feature creates an electronic trail on the Map Page as you move. This trail is called a Track Log, and it contains information about points along its path, including time, position, and elevation. You can use a Track Log to do the following: •... - Page 40 GPS Navigation Tracks Choose whether you want to save the entire track or part of a track. Saving Part of a Track Choose the beginning point and ending point for the saved track. Then select ‘OK’ to save. 4. Highlight the ‘Record Method’ field and press ‘Distance,’...
-
Page 41: The Saved Track Page
The Saved Track Page From the Saved Track Page, you can rename a track, view the track distance, and calculated the area encompassed by the track (you can calculate area even if the track is open ended). On-screen buttons at the bottom of the page allow you to save (OK), delete, view the track on the Map Page, and navigate the track in reverse (TracBack). - Page 42 GPS Navigation Tracks Select the point you want to TracBack to and then press ENTER to begin navigating your track in reverse. To use the TracBack feature: 1. From the Tracks Page or Saved Tracks Page, highlight ‘TracBack’ and press ENTER 2.
-
Page 43: Creating And Using A Route
Creating and Using a Route A route gives you straight-line directions from one point to another, or from one point to several others. The GPS 60 can store fifty routes that contain up to 250 points each. You can create routes that include waypoints or points of interest with the Routes Page. -
Page 44: Creating Routes With A 'Go To
GPS Navigation GPS Navigation Routes Starting and Stopping Navigation Creating a Route with a ‘Go To’ To activate a saved route: 1. From the Main Menu Page, use the ‘Routes’ and press ENTER 2. Highlight the route in the list that you want to use and press 3. -
Page 45: Editing Routes
Editing Routes Once you have created a route, it is automatically saved in a list on the Routes Page. Your GPS 60 names the route using the names of the first and last waypoints. Highlight a route and press ENTER to view a list of all the points included in the route. -
Page 46: Using The Route Detail Page Menu
GPS Navigation Routes Deleting a Route The Route Detail Page Menu To replace one point in a route with another: 1. Highlight a saved route on the Routes Page and press highlight a waypoint or point in the route and press 2. -
Page 47: Advanced Feature: Changing Route Transition
Advanced Feature: Changing Route Transition If you include several points in a route, you may want to use the Route Transition feature to tell your GPS 60 when you want it to direct you to a new waypoint in the route. By default, the GPS 60 automati- cally directs you to the next waypoint;... -
Page 48: The Highway Page
GPS Navigation The Highway Page The Highway Page Press MENU to access a list of options for the Highway Page. Navigating with the Highway Page The Highway Page is a three-dimensional view of the route you are currently navigating. To access the Highway Page, highlight Highway on the Main Menu Page and press ENTER. -
Page 49: The Setup Menu
The Setup Menu The Setup Menu allows you to customize the GPS 60 to your personal preferences. Using the Setup Menu, you can save battery life, and you can change almost any setting on your GPS 60. To access the Setup Menu, highlight Setup from the Main Menu Page and press ENTER. -
Page 50: System Setup
GPS Navigation The Setup Menu Battery Saver Mode System Setup Page To mute beep tones: 1. From the Setup Menu, highlight ‘Tones’ and press 2. Highlight the ‘Mute’ checkbox and press To put GPS in battery-saver mode: 1. From the Setup Menu, highlight System and press 2. -
Page 51: Display Setup
MapSource data with a PC. Use this option when trans- ferring data with MapSource software. GARMIN DGPS—The proprietary format used with a Garmin differ- ential beacon receiver (e.g., GBR 21). Allows you to tune the beacon receiver directly from the GPS 60. - Page 52 GPS Navigation NMEA In/NMEA Out—Supports input and output of standard NMEA 0183 version 3.01 data. Text Out—Allows ASCII text output of location and velocity informa- The Setup Menu tion. No input. RTCM In—Provides DGPS input using a standard RTCM SC-104 format.
- Page 53 Use the ROCKER key to highlight ‘Baud Rate’ and press key to highlight the desired setting and press ROCKER 4. For Garmin DGPS or RTCM In/NMEA Out, use the highlight ‘Beacon’ and press ENTER ‘Scan’ or ‘User’ and press ENTER If you select ‘Scan,’...
-
Page 54: Tones Setup
GPS Navigation The Setup Menu Choose from nineteen different tones for each field, or choose ‘Off’ to turn the tone off for that field. Tones Setup The Tones Setup Page allows you to customize the signal tones for a variety of unit features. To change or mute tones: 1. -
Page 55: Using The Map Setup Feature
Using the Map Setup Feature The map display for your GPS 60 is user-configurable. The Map Setup pages let you change map orientation, text size, track display, map item display, detailed map data display and more. You may want to wait until you are more familiar with the operation of your unit before you change Map Setup features. -
Page 56: Map Setup-Tracks Settings
GPS Navigation GPS Navigation The Setup Menu Map Setup—Tracks Map Setup—Points Map Setup—Text Map Setup—Information Map Setup—Tracks Settings The second page contains Tracks settings. You have settings for maxi- mum zoom for viewing saved tracks and active track logs. You can set the number of track points for recording a track and select either a bearing or course line for navigating a track. -
Page 57: Geocache Setup
Geocache Setup The Geocache Setup Page allows you to configure geocaching settings. Refer to the Garmin website for details and how to download geocache locations from the internet (http://www.garmin.com). To use the Geocache Setup feature: 1. From the Setup Page, highlight ‘Geocache’ and press 2. -
Page 58: Time Setup
GPS Navigation The Setup Menu Time Setup The Time Setup Page allows you to set the correct time for your geographic location. To use the Time Setup feature: 1. From the Setup Page, highlight ‘Time’ and press 2. Highlight the Time Format field and press or 24 (Military Time) hour formats. -
Page 59: Heading Setup
Heading Setup The Heading Setup Page allows you to specify the type of heading display and the type of North Reference used to calculate your heading. Unless you have a working knowledge of Headings and North Referenc- ing, we recommended that you use the default values. To use the Heading Setup feature: 1. -
Page 60: Gps Features
GPS Features Calendar The Calendar Page— Week Format On each day page, you can view sunrise and sunset times, hunting and fishing information and wapoints associated with that day. Calendar The Calendar allows you to view Sunrise/Sunset times, moon phase, and Hunt and Fish probabilities on a given day. -
Page 61: Alarm Clock And Calculator
Alarm Clock The Alarm Clock Feature turns your GPS 60 into an alarm clock. You can choose from different alarm tones and use the “Snooze” feature to delay the alarm for an additional seven minutes. To set the Alarm Clock: 1. -
Page 62: Stopwatch
GPS Features Stopwatch Stopwatch Page Distance Setting Lap By Distance Stopwatch This feature allows you to use the GPS 60 as a stopwatch, which includes a lap timer. You may also have the unit record the lap time based on distance. From the Main Menu, highlight ‘Stopwatch’ and press ENTER. -
Page 63: Sun And Moon
Sun and Moon The Sun and Moon Tables show you the positions of the sun and moon relative to the Earth. You can view sun and moon positions for any time, date and location on Earth. The Sun and Moon Page also displays sunrise, sunset, moonrise and moonset times for the selected time, date and location. -
Page 64: Hunt And Fish
GPS Features Hunt and Fish Hunt and Fish Page Hunt and Fish The Hunt and Fish Tables provide you with a listing of predicted best times for hunting and fishing for a chosen date and location. Keep in mind that these times are just an estimate based on the position of the moon. -
Page 65: Games
Games The GPS 60 includes games as an entertainment feature. Most of these games are GPS-based, and all of them are fun! Note: When playing any of the virtual games (where you are moving about on a real playing field), use reasonable and prudent caution in selecting an area free of hazards such a holes, obstruc- tions or proximity to vehicular traffic. -
Page 66: Virtua Maze
GPS Features Games To adjust the Grid or Square Size in custom mode: 1. Highlight the ‘Grid Size’ or ‘Square Size’ field and press select from the options lists. Press 2. Highlight ‘Start’ and press ENTER 3. Highlight ‘Re-Center’ and press ENTER middle of the game board. -
Page 67: Nibbons
Field size choices are small, medium and large, with small fields being roughly 20 yards by 30 yards and large fields being 60 yards by 90 yards (about the size of an American football field). The difficulty levels are Easy, Normal and Hard. These levels de- termine how often Gekos appear. -
Page 68: Beast Hunt
GPS Features Games Beast Hunt Although not a true GPS game, Beast Hunt requires some navigation skills. You must find and defeat the dragon with an arrow (before the dragon gets you!) while navigating a maze of platforms. From time to time you will be transported by slides that curve or move you diagonally. -
Page 69: Appendices
Accessories (included with the unit) Wrist Strap—Provides convenient method for carrying the unit. Belt Clip—Attaches to the back of the unit and clips to belt or waist- band. USB Interface Cable—Provides connection to a PC for data transfer. Also includes MapSource Trip and Waypoint Manager CD-ROM with USB Drivers. - Page 70 Appendices PC Interface Cable—Provides connection to a PC for data transfer. PC Interface Cable with Auxiliary Power Supply—Provides connec- tion to a PC for data transfer. Appendix A: Accessories Interface Cable—Wiring harness. Bare wire connections for data input/output. Carrying Case—Provides protection during transport of the unit. Auto Mount Kit—Allows installation on a vehicle dash.
- Page 71 Appendices Installing the Belt Clip and Wrist Strap Appendix A: Accessories Wrist Strap Installation Belt Clip Knob Suction Mount Kit twist left (counterclockwise) to remove from back of unit Auto Dash Mount Kit Slide belt clip on or off the Belt Clip Knob Marine Mount Kit Belt Clip...
-
Page 72: Appendix B: Specifications
Appendices Appendices Appendix B: Specifications Physical Case: Rugged, fully gasketed, water resistant, IEC-60529 IPX7 (Submersible 1 meter @ 30 minutes) Size: 6.1”H x 2.4”W x 1.3”D Weight: 5.2 ounces (147 g) without batteries installed 7.0 ounces (198 g) with batteries Display: 1.4”W x 2.1”H, high-contrast, 4-level gray LCD with... - Page 73 2. Subject to accuracy degradation to 100m 2DRMS under the U.S. DoD imposed Selective Availability (SA) Program. 3. With optional Garmin GBR 21 Beacon Receiver input. 4. Alkaline batteries lose a significant amount of their capacity as the temperature decreases. Use Lithium batter- ies when operating the GPS 60 in below-freezing condi- tions.
-
Page 74: Appendix C: Data Field Options
Appendices Appendices Appendix C: Data Field Options The following list provides a brief description of each data field op- tion. Some of these options are supported only by devices interfaced to your GPS 60. Accuracy GPS—The current accuracy of your GPS determined location. Bearing—The compass direction from your current position to a destina- tion point. - Page 75 Appendices Appendices Glide Ratio To Dest—The glide ratio required to descend from your pres- ent position and elevation to the destination’s elevation. Heading—Your direction of travel as indicated by a compass, in degrees Appendix C: or cardinal letters (N,S,E,W). Data Field Options Odometer—The total distance you have traveled for all trips.
- Page 76 Appendices Speed–Overall Avg.—The average speed determined by both the moving and stopped time and speed. Sunrise—The time of sunrise for the current date and location. Appendix C: Sunset—The time of sunset for the current date and location. Data Field Options Time To Destination—The estimated time enroute to your final destina- tion, if you maintain your current speed and course.
- Page 77 Appendices Trip Time–Total—The total time the unit has been tracking since the Trip Computer was reset. Turn—The direction of, and distance to, the next turn on an active route. Appendix C: Velocity Made Good—The rate of closure on a destination based upon Data Field Options your current speed and course of travel.
-
Page 78: Appendix D: Interfacing And Loading Map Data
USB port, use the port on the back of your computer for best results. 3. Set your GPS 60 interface setting to GARMIN format (see p. 43). Lift Cover To connect with a Serial Port connector: 1. - Page 79 POI MapSource products. It is not possible to transfer 3rd party maps into Garmin products. POI data transfer requires the use of a PC, a Garmin MapSource CD- ROM, and the Universal Service Bus (USB) cable supplied with this unit.
-
Page 80: Appendix E: Utc Offset Chart
Appendices Appendix E: UTC Offset Chart Longitudinal Zone Offset E007.5° to E022.5° +01.00 E022.5° to E037.5 +02.00 E052.5° to E067.5° +03.00 E067.5° to E082.5° +04.00 E082.5° to E097.5° +05.00 E097.5° to E112.5° +06.00 E112.5° to E122.5° +07.00 E122.5° to E127.5° +08.00 E127.5°... -
Page 81: Appendix F: Map Datums And Position Formats
Your current location can be viewed on the GPS in the form of coor- dinates. Since different maps and charts use different location formats, Garmin GPS units allow you to choose the correct coordinate system for the type of map you are using. The most common format is latitude and longitude, which is utilized by all Garmin units. -
Page 82: Appendix G: Waas And Dgps
Appendices Appendix G: WAAS and DGPS What is WAAS? The Wide Area Augmentation System (WAAS) is an F.A.A. funded project to improve the overall integrity of the GPS signal. It is a space- based system that broadcasts integrity information and correction data as determined by ground reference stations (see DGPS below). -
Page 83: Appendix H: Interface Wiring Diagram
PSLIB (beacon receiver control) DGPS (Differential GPS) corrections are accepted in RTCM SC-104 version 2.0 format through the ‘Data In’ line. The Garmin GBR 21 is the recommended beacon receiver for use with the GPS 60. Other beacon receivers with the correct RTCM format may be used, but may not cor- rectly display status or allow tuning control from the GPS unit. - Page 84 Garmin retains the exclusive right to repair or replace the unit or software or offer a full refund of the purchase price at its sole discretion. SUCH REMEDY SHALL BE YOUR SOLE AND EXCLUSIVE REMEDY FOR ANY BREACH OF WARRANTY.
-
Page 85: Index
Belt Clip 3, 61 Calculator 51 Calendar 50 Cities finding 25 Compass Page 5, 12 Connecting to a Computer 68 Contact Garmin i Contrast 6 Course Pointer 12 Data Field Options 64 Declutter 11 DGPS 72 ENTER Key 2 FCC Compliance v... - Page 86 Index Index Main Pages 5 MapSource 22 loading data 69 Map Datums 71 Map Page 5, 8 decluttering 11 display 9 orientation 9, 45 panning 8 zooming 8 Map Setup 45 general 45 information 46 points 46 text 46 tracks 46 Mark Key 2 Measuring Distance 11 Memory Race 55...
- Page 87 interface 41 marine 47 page sequence 44 system 40 time 48 units 48 welcome message 49 Specifications 62 Status Bar 6 Stopwatch 52 Sun and Moon 53 Time changing 48 UTC offset 70 Tones 44 changing 44 muting 40 TracBack 32 Tracks 29 calculating area with 31 creating waypoint on 32...
-
Page 89: Declaration Of Conformity
Garmin service center in the United Kingdom, the United States, Canada, or Taiwan for service. The Garmin GPS 60 has no user-serviceable parts. Should you ever encounter a problem with your unit, please take it to an autho- rized Garmin dealer for repairs. - Page 90 For the latest free software updates (excluding map data) throughout the life of your Garmin products, visit the Garmin web site at www.garmin.com © Copyright 2006 Garmin Ltd. or its subsidiaries Garmin International, Inc. 1200 East 151 Street, Olathe, Kansas 66062, U.S.A.