
Related Manuals for KitchenAid Kitchen Aid KAR-19


Summary of Contents for KitchenAid Kitchen Aid KAR-19
-
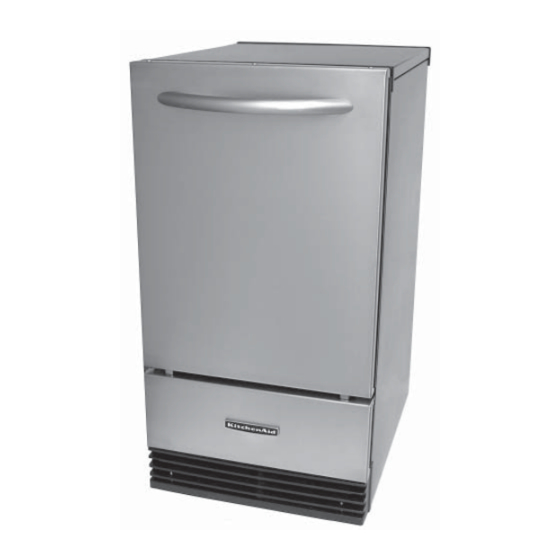
Page 1: Ice Makers
KAR-19 TECHNICAL EDUCATION 2007 DESIGN 15 & 18 AUTOMATIC ICE MAKERS KUIA15NRH*11 KUIA18NNJ*11 KUIA15PRL*11 KUIA18PNL*11 KUIA15NLH*11 KUIA15PLL*11 Intoductory Models Denotes Color Designation JOB AID 4317408... - Page 2 • Successfully perform necessary repairs. • Successfully return the ice maker to its proper operational status. WHIRLPOOL CORPORATION assumes no responsibility for any repairs made on our products by anyone other than In-Home Service Professionals. Copyright © 2007, Whirlpool Corporation, Benton Harbor, MI 49022...
-
Page 3: Table Of Contents
TABLE OF CONTENTS Page GENERAL ..........................1-1 Ice Maker Safety ........................ 1-1 KitchenAid Model & Serial Number Designations .............. 1-2 Model & Serial Number Label Location................1-3 Specifi cations ........................1-4 INSTALLATION INFORMATION .................... 2-1 Electrical Supply Requirements ..................2-1 Water Supply And Drain Connections ................ - Page 4 Page DIAGNOSTICS & TROUBLESHOOTING ................6-1 Water And Its Effect On Making Ice ................... 6-1 Troubleshooting Chart ......................6-2 Diagnostic Flow Chart For Ice Maker Control Board ............6-5 WIRING DIAGRAM & STRIP CIRCUITS ................7-1 Wiring Diagram ........................7-1 Strip Circuits ........................
-
Page 5: General
GENERAL ICE MAKER SAFETY Your safety and the safety of others are very important. We have provided many important safety messages in this manual and on the appliance. Always read and obey all safety messages. This is the safety alert symbol. This symbol alerts you to potential hazards that can kill or hurt you and others. -
Page 6: Kitchenaid Model & Serial Number Designations
KITCHENAID MODEL & SERIAL NUMBER DESIGNATIONS MODEL NUMBER MODEL NUMBER K UI A 15 NR H S INTERNATIONAL SALES IND. OR MARKETING CHANNEL IF PRESENT PRODUCT GROUP K = KITCHENAID PRODUCT IDENTIFICATION UI = UNDERCOUNTER ICE MAKER MERCHANDISING SCHEME A = ARCHITECT C = CULINARY &... -
Page 7: Model & Serial Number Label Location
MODEL & SERIAL NUMBER LABEL LOCATION The Model/Serial Number label location is shown below. Model & Serial Number Location... -
Page 8: Specifi Cations
SPECIFICATIONS AC Power Supply ......97 to 127 VAC (rated 115VAC), 60 Hz Amperage . -
Page 9: Installation Information
INSTALLATION INFORMATION ELECTRICAL SUPPLY REQUIREMENTS IMPORTANT: If this product is connected to WARNING WARNING a GFCI (Ground Fault Circuit Interrupter) pro- tected outlet, nuisance tripping of the power supply may occur, resulting in the loss of cool- ing. Ice quality may be affected. If nuisance tripping has occurred, and if the condition of the ice appears poor, dispose of it. -
Page 10: Water Supply And Drain Connections
WATER SUPPLY AND DRAIN CONNECTIONS CONNECTING THE WATER LINE Use 1/4" (6.35 mm) O.D. copper tubing for the cold water supply and: Turn off the main water supply. a) Measure from the connection at the Turn on the nearest faucet and allow it to back of the ice maker to the cold water run long enough to clear line of water. - Page 11 11. Thread the nut onto the coupling at the SIDE VIEW end of the copper tubing. Tighten the nut by hand. Then tighten it with a wrench two more turns. Do not overtighten. 15" Models CONNECTING THE DRAIN Gravity Drain System 18"...
- Page 12 Drain Pump System (On Some Models) 1. Plug in ice maker or reconnect power. Connect the ice maker drain to your drain in accordance with the International Plumbing WARNING WARNING Code and any local codes and ordinances. NOTE: If the drain hose becomes twisted and Excessive Weight Hazard water cannot drain, the ice maker will not oper- ate.
-
Page 13: Theory Of Operation
THEORY OF OPERATION OPERATING SYSTEMS There are three operating systems in the ice There are two very important additions to the maker: refrigeration system in the ice maker: the Hot Gas Valve, and the Condenser Accumulator • Refrigeration System Tube. The components operate as follows: •... - Page 14 WATER SYSTEM A water softener, or poly phosphate feeder, will not cure all of the problems associated with hard The water system provides: water, but they can be used to reduce scale • Fresh water for ice production buildup in the ice maker. NOTE: Some poly •...
- Page 15 WATER SYSTEM COMPONENT LOCATIONS Water Distributor Evaporator Water Level Sensor Water Return Tube Water Recirculation Pump Reservoir Pan Manual Drain Reservoir Drain Pump Drain Overfl ow Water Valve Outlet Tube Bin Drain Measured Fill Water Inlet Valve From Water Supply...
- Page 16 ELECTRICAL SYSTEM The ice maker’s electrical system provides power for the refrigeration and water systems, and controls the operation of each component.
-
Page 17: Operational Modes
OPERATIONAL MODES During the Freeze mode, some of the hot gas There are four main operational modes for the that is in the condenser accumulating tube, ice maker (more detailed operation is found in condenses to a liquid, and remains in the ac- the fl... - Page 18 HARVEST MODE The electronic control board operates the vari- ous components and systems in the ice maker Electrical System for each of the Freeze and Harvest modes. When the water level in the reservoir drops CLEAN MODE below the water level sensor it signals the electronic control to terminate power to the Electrical System condenser fan, and then the water recirculating...
- Page 19 Diagnostic Chart After pressing any button to enter manual diagnostics all LEDs will illuminate for 5 seconds. The controls will then automatically move to the fi rst component. Order Component On/Off LED Service LED Clean LED Feature Light (for (On for some (Off for some some models) models)
-
Page 20: Models With Internal Drain Pumps
MODELS WITH INTERNAL DRAIN PUMPS The power cord on the internal drain pump is into the pump inlet, and then into the drain pump connected to a 120 VAC wall outlet. The ice chamber. As the water level rises, it bridges the maker is then connected to the 120 VAC outlet “full”... -
Page 21: Component Access
COMPONENT ACCESS This section instructs you on how to service each component inside the 2007 Design 15” & 18” Automatic Ice Makers. The components and their locations are shown below. COMPONENT LOCATIONS Electronic Control Board Light Switch Push-button Dual Transformer Switch Evaporator NOTE: The Evaporator... -
Page 22: Removing The Bin Thermistor, Cutter Grid, Evaporator Thermistor, & Water Distributor
REMOVING THE BIN THERMISTOR, CUTTER GRID, EVAPORATOR THERMISTOR, & WATER DISTRIBUTOR To remove the bin thermistor: WARNING WARNING a) Disconnect the bin thermistor connector from the bottom of the control hous- ing. b) Pull the bin thermistor out of the retain- ing clamp and remove it. - Page 23 c) Slide the cutter grid forward and out of To remove the evaporator thermistor: the unit and place it on a work surface. a) Remove the cutter grid from the unit Be careful not to scratch the ice maker (see step 7 on page 4-2 for the proce- liner.
- Page 24 To remove the water distributor: Water Distributor a) Remove the cutter grid from the unit Water Hose (see step 7 on page 4-2 for the proce- dure). b) Pull out on the left and right water dis- tributor retainers, and remove the tabs from the slots in the evaporator.
-
Page 25: Removing The Electronic Control Housing Components
REMOVING THE ELECTRONIC CONTROL HOUSING COMPONENTS NOTE: The control housing components con- WARNING WARNING sist of: • (1) Electronic control board • (2) Dual transformer • (3) Light switch • (4) Push-button switch assembly Electrical Shock Hazard Disconnect power before servicing. Replace all parts and panels before operating. - Page 26 To remove the dual transformer: NOTE: If the switch assembly or light switch is replaced, the replacement part and decora- a) Disconnect the six pin wire connector tive overlay must be ordered using the model from harness. number of the ice maker. The service replace- b) Remove the two mounting screws from ment switch is not supplied with a decorative the transformer bracket.
-
Page 27: Removing The Water Recirculation Pump
REMOVING THE WATER RECIRCULATION PUMP Remove the hex-head screw from the water WARNING WARNING recirculation pump shield and remove the shield (see the lower left photo). Disconnect the water fi ll tube from the pump mounting bracket. Disconnect the two wire recirculation and drain pump connectors from the harness block. -
Page 28: Removing The Reservoir Drain Pump & Water Level Sensor
REMOVING THE RESERVOIR DRAIN PUMP & WATER LEVEL SENSOR To remove the water level sensor: WARNING WARNING a) Disconnect the water level sensor elec- trical connection. b) Remove the retaining clips, if present. c) Pull the sensor up and out of the bracket. -
Page 29: Removing The Condenser Fan Motor
REMOVING THE CONDENSER FAN MOTOR Remove the two 5/16” screws from the WARNING WARNING front of the cabinet. Remove two hex-head screws from the measured fi ll water valve bracket. Allow the valve to drop down out of the way. Electrical Shock Hazard Disconnect power before servicing. - Page 30 10. Disconnect the inlet tube and the vent tube 12. Disconnect the wire connector from the from the internal drain pump. condenser fan motor. 13. Remove the four screws (two bottom and two side) from the condenser fan motor shroud. Slide the shroud assembly back towards the compressor, and then lift and Tubing remove the assembly from the unit.
- Page 31 14. Remove condenser fan motor blade by 15. Remove the two hex-head screws from the pulling the fan blade straight off the shaft. condenser fan motor and remove it from NOTE: Make sure when reinstalling the fan the shroud. blade that the blade is seated completely on motor shaft.
-
Page 32: Removing The Evaporator
REMOVING THE EVAPORATOR Remove the two 5/16” hex-head screws WARNING WARNING from the top hinge and remove the hinge. Hinge Screws Electrical Shock Hazard Disconnect power before servicing. Replace all parts and panels before operating. Failure to do so can result in death or electrical shock. - Page 33 10. 18˝ Models Only: Remove the six screws 13. Cut the tie wrap from around the tubing from the counterbalance plate and remove and wire harness inside the channel. the plate from the rear of the unit. 11. From the rear of the unit, remove the six hex-head screws from the channel cover and remove the cover.
- Page 34 15. Remove the hex-head screw from the water recirculation pump shield and remove the shield. 16. Remove the water fi ll tube from the notch in the water recirculation pump bracket, Retainer and pull the free end of the water line up, out of the unit.
- Page 35 20. Lift the cabinet top off the unit and stand REASSEMBLY NOTES: it on the fl oor near the rear of the unit. • When installing the new evaporator, use a 21. Lift the evaporator and its connecting tub- generous amount of thermal heat trap paste ing high enough from the unit to access between the hot gas valve, and the evapora- the tubing underneath.
-
Page 36: Removing The Measured Fill Water Valve
REMOVING THE MEASURED FILL WATER VALVE WARNING WARNING Measured Fill Valve Electrical Shock Hazard Disconnect power before servicing. Replace all parts and panels before operating. Remove the two hex-head screws from the measured fi ll water valve bracket. Failure to do so can result in death or electrical shock. -
Page 37: Removing The Hot Gas Valve & Solenoid
REMOVING THE HOT GAS VALVE & SOLENOID 2-Wire Connector 7mm Nut WARNING WARNING Electrical Shock Hazard Disconnect power before servicing. Replace all parts and panels before operating. Failure to do so can result in death or Hot Gas Valve Solenoid electrical shock. -
Page 38: Removing The Condenser
REMOVING THE CONDENSER Remove the four condenser fan motor WARNING WARNING screws from the fan motor shroud and pull the motor assembly back away from the condenser as far as possible, but do not remove it (see step 13 on page 4-10 for the procedure). -
Page 39: Removing The Compressor
REMOVING THE COMPRESSOR Remove the terminal cover using a stan- WARNING WARNING dard screwdriver. Insert the screwdriver into the cover slot, and press down to unsnap and remove it. Compressor Electrical Shock Hazard Disconnect power before servicing. Replace all parts and panels before operating. - Page 40 Pull the two clips off the rear studs of the 15. Pull the two clips off the front compressor compressor. mounting studs. 16. Lift the compressor off the four mounting Clip On Stud studs and remove it from the unit. Remove the four metal spacers and rubber isolators from the compressor stud locations.
-
Page 41: Removing The Internal Drain Pump
REMOVING THE INTERNAL DRAIN PUMP Loosen the clamps and pull the ends of WARNING WARNING the three water lines from the internal drain pump. Disconnect the power cord plug from the internal drain pump. Remove the two mounting screws from the internal drain pump. -
Page 42: Removing The Ice Maker Door & Gasket (15" Models)
REMOVING THE ICE MAKER DOOR & GASKET (15˝ MODELS) To remove the door, remove the top door To remove the door gasket: screw from the ice maker door, and pull a) Open the ice maker door. the door off the bottom hinge. b) Pull the gasket out of the door track. -
Page 43: Removing The Ice Maker Door & Gasket (18" Models)
REMOVING THE ICE MAKER DOOR & GASKET (18˝ MODELS) The 18˝ Ice Maker has a spring-loaded, drop- Remove the end of the spring from the door down door. Since the door design is somewhat bracket and the screw (on some models) unique, accessing procedures are included from the bottom of the door hinge. - Page 44 Remove the two screws from the bottom Remove the six screws from the inner door door cap. panel and remove the panel. Bottom Door Cap Screws Remove the three screws from the door handle and the top door cap and remove Inner Door Panel the handle and cap from the door.
- Page 45 Slide the bottom door cap and channel 10. Slide the bottom door cap off the channel supports out of the outer door panel. supports. Channel Supports Door Hinge Outer Door Panel Bottom Door Cap & Channel Supports Hinge Pin Channel Support 11.
- Page 46 REASSEMBLY NOTES: When you reinstall the inner door panel, slide the edge under the door handle, as To reassemble the unit, reverse the disas- shown below. sembly procedure. Door Handle Slide the edge of the outer door panel between the tabs and the inside edge of the top door cap.
-
Page 47: Component Testing
COMPONENT TESTING Before testing any of the components, perform • Check all connections before replacing com- the following checks: ponents, looking for broken or loose wires, • Control failure can be the result of corrosion failed terminals, or wires not pressed into on connectors. -
Page 48: Cutter Grid
WARNING WARNING Electrical Shock Hazard Disconnect power before servicing. Replace all parts and panels before operating. Failure to do so can result in death or electrical shock. CUTTER GRID DUAL TRANSFORMER Refer to page 4-2 for the procedure for access- ing the cutter grid. -
Page 49: Water Recirculation Pump
WARNING WARNING Electrical Shock Hazard Disconnect power before servicing. Replace all parts and panels before operating. Failure to do so can result in death or electrical shock. RESERVOIR DRAIN PUMP WATER RECIRCULATION PUMP Refer to page 4-7 for the procedure for access- Refer to page 4-8 for the procedure for access- ing the water recirculation pump. -
Page 50: Water Level Sensor
WARNING WARNING Electrical Shock Hazard Disconnect power before servicing. Replace all parts and panels before operating. Failure to do so can result in death or electrical shock. CONDENSER FAN MOTOR WATER LEVEL SENSOR Refer to page 4-8 for the procedure for access- ing the condenser fan motor. -
Page 51: Measured Fill Water Valve
WARNING WARNING Electrical Shock Hazard Disconnect power before servicing. Replace all parts and panels before operating. Failure to do so can result in death or electrical shock. MEASURED FILL WATER VALVE HOT GAS VALVE SOLENOID Refer to page 4-17 for the procedure for ac- cessing the hot gas valve solenoid. -
Page 52: Compressor, Overload Protector, & Relay
WARNING WARNING Electrical Shock Hazard Disconnect power before servicing. Replace all parts and panels before operating. Failure to do so can result in death or electrical shock. COMPRESSOR, OVERLOAD b) Touch one of the ohmmeter test leads to PROTECTOR, & RELAY the Common (C) pin, and the other lead to the Run (M) pin. -
Page 53: Diagnostics & Troubleshooting
DIAGNOSTICS & TROUBLESHOOTING WATER AND ITS EFFECT ON MAKING ICE Quality ice is defi ned as solid, clear, and free ice is pure, and free of mineral contamination. of taste or odor. All ice makers can provide this The following charts show some of the problems type of ice only if the water used to produce the that can affect ice production. -
Page 54: Troubleshooting Chart
TROUBLESHOOTING CHART P roblem P robable C aus e T es t P roc edure-Ac tion C heck circuit No power at wall outlet breaker/fus es C heck for kinked drain No power at hos e, blocked s creen or auxilary drain blocked vent outlet or pump power outlet... - Page 55 P roblem P robable C aus e T es t P roc edure-Ac tion S lab will not releas e C lean the evaporator during harves t due to plate(s ee procedure on s cale build up page 8-1) W ill not make ice Defective or T es t and repair or replace W ater res ervoir is...
- Page 56 P roblem P robable C aus e T es t P roc edure-Ac tion Defective bin T oo much ice in bin R eplace thermis tor T he s lab dropping off the plate and ice dropping B anging s ound from the cutter grid into an empty bin are normal s ounds...
-
Page 57: Diagnostic Flow Chart For Ice Maker Control Board
DIAGNOSTIC FLOW CHARTS FOR ICE MAKER CONTROL BOARD OVERVIEW... - Page 58 Flush Mode: (6 minutes maximum) The Flush Mode begins every time the user interface is changed to “On” from “Off”, “Clean” or “Holiday”. This will be the initial time it is turned on, or when the ice maker is turned on after the completion of the Clean or Holiday Modes, or (drain pump models only) when operation resumes after the ice maker is shut down by the drain pump.
- Page 59 Freeze Mode: Time in this mode is dependent on the water level in the reservoir. There is no minimum time and the maximum time is 25 minutes.
- Page 60 Harvest Mode: Time in this mode will be 2 to 17 minutes, dependent on the condition of the evaporator thermistor.
- Page 61 Harvest Bin Not Full...
- Page 62 Harvest Bin Full 6-10...
- Page 63 Idle Mode: Time in this mode is dependent on the temperature at the bin thermistor. NOTE: “Bin Full” set point is 36°F. The ice maker will stay in the “Idle Mode” as long as the ice in the bin touches the bin thermistor and keeps it lower than 36°F. 6-11...
- Page 64 Failure Mode: This mode will last indefi nitely until the failure is corrected. The Service Button, (not on all models) will reset the failure mode. NOTE: If the Clean LED is fl ashing 3 blinks, look for an evaporator thermistor that has not reached 52°F.
- Page 65 Clean Mode: (70 minutes) The Clean Mode may only be selected while the ice maker is turned off at the user interface. NOTE: At the end of the Clean Mode, the ice maker will stay OFF. The reservoir is to be drained by the consumer prior to restarting the ice maker.
- Page 66 — NOTES — 6-14...
-
Page 67: Wiring Diagram & Strip Circuits
WIRING DIAGRAM & STRIP CIRCUITS WIRING DIAGRAM MEASURED FILL WATER VALVE... -
Page 68: Strip Circuits
STRIP CIRCUITS FLUSH MODE Electronic Smart Valve Water Valve Electronic Control Rd/Bk Water Recirculation Pump Bu/Yl Rd/Bk Transformer Reservoir Drain Pump Water Valve Electronic Smart Valve ICE MAKING MODE Electronic Control Rd/Bk Water Recirculating Pump Transformer Condenser Fan Overload Compressor Relay... -
Page 69: Harvest Mode
HARVEST MODE Electronic Control Bu/Yl Rd/Bk Reservoir Drain Pump Transformer Hot Gas Solenoid Overload Compressor Relay Water Valve Electronic Smart Valve CLEAN MODE Electronic Control Rd/Bk Water Recirculation Pump Transformer Hot Gas Solenoid Overload Compressor Relay Electronic Control Bu/Yl Rd/Bk Reservoir Drain Pump Transformer... - Page 70 — NOTES —...
-
Page 71: Tech Tips
TECH TIPS CLEANING THE ICE MAKER CLEANING THE WARNING WARNING EVAPORATOR PLATE NOTE: Use one 16 oz (473 ml) bottle of Ice Machine Cleaner, Part Number 4396808. For best performance, do not use any other type of ice machine cleaner in the ice maker. Press and hold the OFF keypad to turn Electrical Shock Hazard the unit off. - Page 72 5. Read and follow all of the handling informa- Pour the remaining solution from the bottle into the water reservoir. Using the empty tion that was supplied with the ice machine bottle, fi ll the reservoir with clean water cleaner. to within 1/4"...
-
Page 73: Product Specifications
PRODUCT SPECIFICATIONS WARRANTY INFORMATION SOURCES IN THE UNITED STATES: FOR PRODUCT SPECIFICATIONS AND WARANTY INFORMATION CALL: FOR WHIRLPOOL PRODUCTS: 1-800-253-1301 FOR KITCHENAID PRODUCTS: 1-800-422-1230 FOR ROPER PRODUCTS: 1-800-447-6737 FOR TECHNICAL ASSISTANCE WHILE AT THE CUSTOMER’S HOME CALL: THE TECHNICAL ASSISTANCE LINE: 1-800-832-7174...