Table of Contents
Advertisement
Quick Links
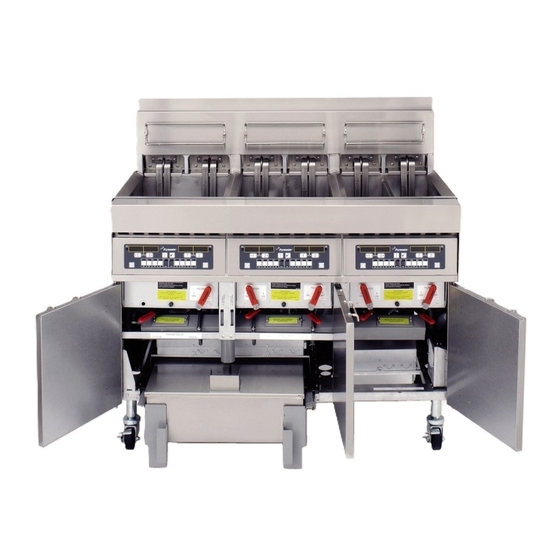
OPERATOR'S MANUAL
FRYMASTER BIH/MH14 SERIES
ELECTRIC FRYER
This equipment chapter is to be
FOR YOUR SAFETY
installed in the Fryer Section of the
Do Not Store or use gasoline or other
Equipment Manual.
flammable vapors and liquids in the
vicinity of this or any other appliance.
MANUFACTURED
BY
P.O. BOX 51000
SHREVEPORT, LOUISIANA 71135-1000
PHONE: 1-318-865-1711
TOLL FREE: 1-800-551-8633
1-800-24 FRYER
FAX: 1-318-219-7135
TABLE OF CONTENTS
WARRANTY STATEMENT ..................................................................................................Page i
INTRODUCTION ..................................................................................................................Page 1-1
INSTALLATION INSTRUCTIONS .......................................................................................Page 2-1
OPERATING FRYERS WITH THERMOSTAT CONTROLLERS ........................................Page 3-1
OPERATING THE BUILT-IN FILTRATION SYSTEM ..........................................................Page 4-1
PREVENTIVE MAINTENANCE AND TROUBLESHOOTING..............................................Page 5-1
Frymaster L.L.C., 8700 Line Avenue 71106
P.O. Box 51000, Shreveport, Louisiana 71135-1000
PHONE 318-865-1711
FAX 318-219-7135
SERVICE HOTLINE 1-800-24-FRYER
PRINTED IN THE UNITED STATES
819-5569 08/2002
Advertisement
Table of Contents

Related Manuals for Frymaster BIH14 Series


Summary of Contents for Frymaster BIH14 Series
-
Page 1: Table Of Contents
INSTALLATION INSTRUCTIONS ...Page 2-1 OPERATING FRYERS WITH THERMOSTAT CONTROLLERS ...Page 3-1 OPERATING THE BUILT-IN FILTRATION SYSTEM ...Page 4-1 PREVENTIVE MAINTENANCE AND TROUBLESHOOTING...Page 5-1 Frymaster L.L.C., 8700 Line Avenue 71106 P.O. Box 51000, Shreveport, Louisiana 71135-1000 PHONE 318-865-1711 FAX 318-219-7135 SERVICE HOTLINE 1-800-24-FRYER... - Page 2 State of California to cause cancer. Inhalation of carbon monoxide is known to the State of California to cause birth defects or other reproductive harm. FRYMASTER ELECTRIC FRYERS ARE MANUFACTURED FOR USE WITH THE TYPE VOLTAGE SPECIFIED ON THE FRYER RATING PLATE LOCATED ON THE FRYER DOOR. FOR PROPER INSTALLATION PROCEDURES IN THE UNITED STATES, REFER TO THE LATEST EDITION OF THE NATIONAL ELECTRIC CODE ANSI/N.F.P.A.
-
Page 3: Warranty Statement
3. If any parts, except fuses, become defective during the first year after installation date, Frymaster will also pay straight-time labor costs to replace the part, plus up to 100 miles/160 km of travel (50 miles/80 km each way). - Page 4 E. PARTS RETURN All defective in-warranty parts must be returned to a Frymaster Authorized Factory Service Center within 60 days for credit. After 60 days, no credit will be allowed. F. WARRANTY EXCLUSIONS This warranty does not cover equipment that has been damaged due to misuse, abuse, alteration, or accident such as: •...
-
Page 5: Introduction
Read the instructions in this manual thoroughly before attempting to operate this equipment. This manual covers all configurations of models MH14 and BIMH14 fryers built since September, 2001. Models designated MH14 do not have built-in filtration systems. Models designated BIH14 are equipped with FootPrint III built-in filtration systems. -
Page 6: Computer Information
Computer Information This equipment has been tested and found to comply with the limits for a Class A digital device, pursuant to Part 15 of the FCC rules. While this device is a verified Class A device, it has been shown to meet the Class B limits. -
Page 7: Service Information
McDonald’s store personnel perform routine maintenance. For non-routine maintenance or repairs, or for service information, contact your local Frymaster Authorized Service Center (FASC). Service information may also be obtained by calling the Frymaster Technical Services Department (1-800- 24FRYER). The following information will be needed in order to assist you efficiently:... -
Page 8: Installation Instructions
Do not store or use gasoline or other flammable vapors and liquids in the vicinity of In the event of a power failure, the fryer(s) will automatically shut down. If this occurs, turn the power switch OFF. Do not attempt to start the fryer(s) until power is restored. -
Page 9: Power Requirements
Adjust casters so that fryers are level and at the proper height in the fry station hood. If necessary, level the fryer(s) by loosening the locking screw on the caster leg and screwing the caster in or out. When fryer is level and at proper height, retighten the locking screw on the caster leg. - Page 10 Also, after the fryer has been in use for a period of time, a hard film of caramelized vegetable oil will form on the inside of the frypot. This film should be periodically removed by following the boil-out procedure.
-
Page 11: Equipment Setup And Shutdown Procedures
The analog controller, illustrated on the following page, is used to adjust and maintain oil at the temperature indicated by the thermostat knob. The fryer has two built-in high-limit protection features. If the temperature in the frypot reaches approximately 410°F (210°C), the computer opens the heat relay circuit, turning the elements off. - Page 12 Hi-Limit Test Switch, Right Vat - Tests high-limit thermostat for right vat. Second Hi-Limit Test Light, Left or Full-Vat - Indicates fryer is in second high-limit test mode. Second Hi-Limit Test Light, Right Vat - Indicates fryer is in second high-limit test mode.
- Page 13 4. When the oil temperature reaches the thermostat knob setpoint, the elements will cycle OFF and the heating mode light will go off, indicating that the fryer is ready for the cooking process to begin. WARNING...
-
Page 14: Operating The Built-In Filtration System
CHAPTER 4: OPERATING THE BUILT-IN FILTRATION SYSTEM (BIH14 ITEM DESCRIPTION Filter Base Assembly Filter Pan Assembly Filter Paper Hold-down Ring O-ring, Filter Pan Pan Cover Screw, Pan Cover Hinge Filter Base Handle Filter Paper Screen Crumb Screen * Not Illustrated... - Page 15 4.1 STEP-BY-STEP FILTRATION INSTRUCTIONS Switch computer to OFF. Slide the filter pan from the fryer cabinet. Open the filter-cover, and remove and clean the crumb tray. Note: The fryer must be at operating temperature prior to filtering. Remove and clean the hold-down ring.
- Page 16 INCORRECT CORRECT The filter pad is placed in the pan with the heavily textured side facing up. When filter paper is used, one sheet is placed over the screen and 8-ounces of filter powder is spread evenly on the top of the paper. WARNING: Do Not Use Filter Powder on Filter Pads Place pad evenly on filter screen.
- Page 17 Replace crumb screen inside the filter pan. It's imperative that the crumb screen is installed prior to filtering, for optimum filter- system performance. Slide the filter pan back inside fryer cabinet. Important: Filter operating temperature. Filtering at the end of the day ensures that the oil is at proper temperature.
- Page 18 When frypot empties into filter pan, turn return handle to ON. activate. The oil moves through the filter, the frypot and out the open frypot-drain during filtering. Allow the oil to circulate through the pot for 5 minutes. This process is called polishing the oil.
- Page 19 When the filter pan empties, bubbles will form in the frypot. Allow bubbling to continue 15-20 seconds to ensure the oil return lines are clear of residual oil. Turn off filter pump. Top up oil level. Some oil may be lost in filtering process.
- Page 20 Frymaster recommends that a Frymaster filter cone holder and filter cone be used when a filter machine is not available. If you are using a Frymaster filter cone holder, be sure that the cone holder rests securely on the metal container.
- Page 21 BE CAREFUL, this material may still cause severe burns if it comes in contact with bare skin. 5. After the fryer is empty, drain the frypot and close the drain valve. Fill the frypot to the bottom OIL LEVEL line with water and the correct amount of McD All Purpose Concentrate (APC) Cleaner HSC.
- Page 22 Hot cooking-oil is dangerous and will cause severe burns. Handle with extreme caution. When discarding old cooking oil, drain from the fryer into an Oil Disposal Unit (MSDU50) - available from your local distributor. The disposal unit should be...
-
Page 23: Preventive Maintenance And Troubleshooting
5569. To order both the card set and the Service Manual, use part number 819-5625. In addition to maintenance referenced in MRC cards, Frymaster recommends that the fryer be inspected at least annually by a Factory Authorized Service Technician as follows: •... -
Page 24: Fryer Troubleshooting
♦ Is the drain valve completely closed? ♦ Is the face of the fryer’s power plug flush with the outlet plate (i.e., no part of the prongs visible)? ♦ Is the circuit breaker set in the ON position and are fuses OK? ♦... - Page 25 Although the chapter covers the most common problems reported, you may encounter problems that are not covered. In such instances, the Frymaster Technical Services staff will make every effort to help you identify and resolve the problem.
- Page 26 Attempt to activate the pump. B. Failed filter-handle microswitch. Pump won’t start. Test: If this is a multi-pot fryer, attempt to operate the pump using a different handle. If the pump starts, the handle microswitch is either out Pump stops during of alignment or has failed.
- Page 27 A. Cooking oil/shortening is too cold for filtering. B. Improperly installed or prepared filter pan components. Test: Close the drain valve. Move the filter handle to the OFF position, pull the filter pan (and Power Shower, if so equipped) from the Pump starts, but no unit.