Table of Contents
Advertisement
Quick Links
Owners &
Installation
LISTINGS AND CODE APPROVALS
These gas appliances have been tested in
accordance with AG 103, NZS 5262 and
have been certifi ed by the Australian Gas
Association for installation and operation
as described in these Installation and
Operating Instructions.
Your unit should be serviced annually
by an authorised service person.
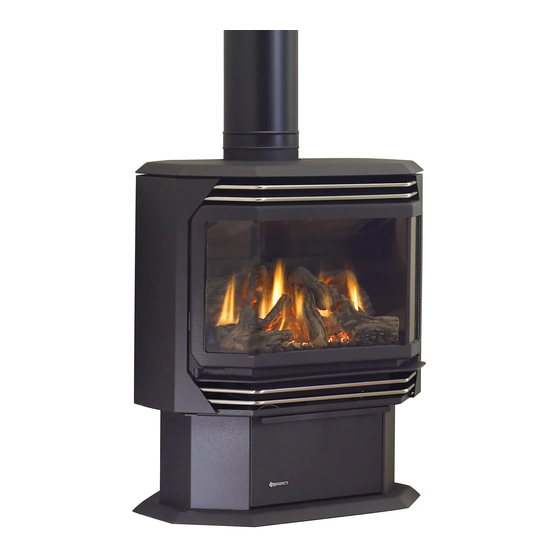
Freestanding Gas Stove
PLEASE KEEP THESE INSTRUCTIONS
FOR FUTURE REFERENCE
WARNING:
Improper installation, adjustment, altera-
tion, service or maintenance can cause
injury or property damage. Refer to this
manual. For assistance or additional in-
formation consult an authorized installer,
service agency or the gas supplier.
FOR YOUR SAFETY
Do not store or use gasoline or other fl am-
mable vapours and liquids in the vicinity of
this or any other appliance.
Installation and service must be performed
by an authorized installer, service agency or
the gas supplier.
918-535
Models: F39-NG
F39-LPG
FOR YOUR SAFETY
What to do if you smell gas:
Do not try to light any appli-
ance
Do not touch any electri-
cal switch: do not use any
phone in your building.
Immediately call your gas
supplier from a neighbour's
phone. Follow the gas sup-
plier's instructions.
If you cannot reach your
gas supplier, call the fi re
department.
05/18/06
Advertisement
Table of Contents

Related Manuals for Regency F39-NG


Summary of Contents for Regency F39-NG
- Page 1 Owners & Installation Freestanding Gas Stove Models: F39-NG F39-LPG PLEASE KEEP THESE INSTRUCTIONS FOR FUTURE REFERENCE WARNING: FOR YOUR SAFETY Improper installation, adjustment, altera- What to do if you smell gas: tion, service or maintenance can cause Do not try to light any appli- injury or property damage.
-
Page 2: Unit Specifi Cations
Gas Series of hand crafted appliances has been designed to provide you with all the warmth and charm of a woodstove, at the fl ick of a switch. The models F39-NG and F39-LPG of this series has been approved by Warnock Hersey for both safety and effi ciency. As it also bears our own mark, it promises to provide you with economy, comfort and security for many trouble free years to follow. -
Page 3: Table Of Contents
Optional Wall Thermostat ...........20 Optional Remote Control ..........20 PARTS LIST Final Check ..............20 Wiring ................21 F39 Main Assembly .............28 F39 Burner & Log Assembly ........29 F39 Door Assemblies ..........30 WARRANTY Warranty ..............31 Regency ® F39 Room Sealed Freestanding Gas Stove... -
Page 4: Safety Label
The data plat is located on NOTE: Regency ® units are constantly being REGENCY F39 Room Sealed Freestanding Gas the inside of the drop down pedestal door. improved. Check the label on the unit and if Stove. We have printed a copy of the contents there is a difference, the label on the unit is the correct one. -
Page 5: Installation
SPECIFICATIONS PLACE GLASS, AND SHOULD INFORMATION STAY AWAY TO AVOID BURNS Fuels: F39-NG is approved for use with NG. OR CLOTHING IGNITION. 1) The appliance shall be installed in accord- ance with the manufacturer's installation F39-LPG is approved for use with lique- YOUNG CHILDREN SHOULD instructions,local gas fi... -
Page 6: Installation Checklist
50 mm A) Cross Corner B) Room Divider 8) Install Front Door. Refer to the "Front Door F39-NG & F39-LPG Reference Dimensions C) Island Installation" section. C Back Wall to Flue Centerline 11" / 280 mm D) Flat on Wall... -
Page 7: Ventilation Air
® with the Regency Room Sealed Freestanding hazard. Do not fi ll air spaces with Gas Stove, F39-NG, and F39-LPG, have been insulation. tested and listed as direct fl ue heater systems by AGA. Be sure to check the fl ue termination clearance For fl... -
Page 8: Exterior Flue Termination Locations
(IV) A fl ue terminal of this type shall not be located under a roofed area unless the roofed area is fully open on at least two sides and a free fl ow of air at the appliance is achieved. Regency ®... -
Page 9: Fluing Arrangements
To set the Flue restriction as indicated in the diagram, simply loosen the screws and push the fl ue restrictor plate to the correct position. Tighten the screws. Flue Restrictor setting at Flue Restrictor setting at 31 Mj/h 40 Mj/h Regency ® F39 Room Sealed Freestanding Gas Stove... -
Page 10: Dv Stove Horizontal Flue Kit
Be sure to check fl ue termination area after d) Cut the 2 ft. section of rigid pipe to snow falls, and clear to prevent accidental length. Ensure that the pipe length blockage of fl uing system. When using Regency ® F39 Room Sealed Freestanding Gas Stove... - Page 11 NOTE: All inner joints must be sealed with 13) Install the spring spacers onto the pipe sec- concrete, or other types of sidings. Mill-Pac. tions. All outer joints may be sealed with high temperature silicone. Regency ® F39 Room Sealed Freestanding Gas Stove...
-
Page 12: Dura-Flue Termination Kit
COMPONENTS Pipe Length You will require the following components with ® your new Regency Room Sealed Freestand- ing Gas Stove. Please review your product to make sure you have everything you need. In the efl ue that you are missing any part, contact your dealer. - Page 13 7) Install the Wall Thimble in the center of the indentations so they match and slide in 10" square and attach with wood screws. to the four entry slots on the male ends Diagram 2 Regency ® F39 Room Sealed Freestanding Gas Stove...
- Page 14 fl oor, and any subsequent to offset, as shown in diagram 9 to avoid fl oor. Diagram 13. The opening should cutting load bearing members. be framed to 10 " x 10" inside dimen- Regency ® F39 Room Sealed Freestanding Gas Stove...
-
Page 15: Gas Connection
Regency ® F39 Room Sealed Freestanding Gas Stove... -
Page 16: Aeration Adjustment
2) Loosen the "IN" and/or "OUT" pressure F39 with 40mj tap(s), turning counterclockwise with a 1/8" F39-NG Full open wide fl at screwdriver. F39-LPG LPG: Full open 3) Attach manometer to "IN" and/or "OUT"... -
Page 17: Conversion Kit #731-968 From Ng To Lpg
23) Check operation of fl ame control. 15) Using the Allen wrench as shown in Fig.4, 24) Check for proper fl ame appearance and rotate the screw clock- glow on logs. wise until snug, do not overtighten. Fig.4 Regency ® F39 Room Sealed Freestanding Gas Stove... -
Page 18: Conversion To Lower Btu Rating
2 screws. 13) Check operation of fl ame control. Check for proper fl ame appearance on logs. Embers Embers Position the Log Bracket Restrictor between the Rear Log Bracket and the burner. Regency ® F39 Room Sealed Freestanding Gas Stove... - Page 19 10) Place the notch in Center Log F)02-47 over B)02-56 6) Place Front Left Log C)02-44 onto the 2 E)02-45 Log E)02-45 and across the cutout on Log front pins as shown. C)02-44 A)02-65. F)02-47 A)02-65 C)02-44 E)02-45 Notch Cutout Regency ® F39 Room Sealed Freestanding Gas Stove...
-
Page 20: Front Door Installation
If it slips out easily, then the door is not properly sealed. Tighten or loosen the latch. ® Use the Regency Remote Control Kit approved See diagram 3. for this unit. Use of other systems may void your warranty. -
Page 21: Wiring
This appliance is equipped with a three pronged (grounding) plug for your protection against shock hazard and should be plugged directly into a properly grounded three-prong receptacle. Do not cut or remove the grounding prong from Regency ® F39 Room Sealed Freestanding Gas Stove... -
Page 22: Operating Instructions
If you smell gas, DO NOT BURN THE APPLIANCE follow the instructions on the front of this WITHOUT THE GLASS FRONT IN manual. If you don't smell gas continue on PLACE. to the next step. Regency ® F39 Room Sealed Freestanding Gas Stove... -
Page 23: Copy Of The Lighting Plate Instructions
Blower: ® Regency gas appliances use high tech blowers to push heated air farther into the room. It is not unusual for the fan to make a "whirring" sound when ON. -
Page 24: Maintenance
Note: If you have an incorrect fl ame pat- 6) Keep the area near the appliance clear and ® tern, contact your Regency dealer free from combustible materials, gasoline, 4) Inspect joints, to verify that no pipe sections for further instructions. -
Page 25: Log Replacement
In the efl ue that you break your glass 1) Install both center by impact, purchase your replacement door from and side glass ® an authorized Regency dealer only, and follow onto extrusions our step-by-step instructions for replacement. as per diagram. -
Page 26: Fan Maintenance
(grounding) plug for your protection against shock hazard and should be plugged directly into a properly grounded three-prong receptacle. Do not cut or remove the grounding prong from this plug. Regency ® F39 Room Sealed Freestanding Gas Stove... -
Page 27: Removing Valve
See diagram below. Note: Use a magnetic type screwdriver if possible. 8) Remove all 18 screws holding the burner tray assembly in place. 9) Carefully lift the burner tray assembly out. Regency ® F39 Room Sealed Freestanding Gas Stove... -
Page 28: Parts List
25) * Flex Pipe (3" ID) 26) * Clamp for Flex Pipe 27) 910-233 Fan Auto On/Off Thermodisc 28) * Mounting Bracket -Thermodisc 29) * Air Defl ector 30) 730-044 Rear Panel Regency ® F39 Room Sealed Freestanding Gas Stove... -
Page 29: F39 Burner & Log Assembly
Gasket - Burner Tray/ Firebox 910-386 Thermocouple 910-341 Thermopile Rear Log Left Top Log Center Log Middle Right Log Middle Left Log Front Right Log Front Left Log *Not available as a replacement part. Regency ® F39 Room Sealed Freestanding Gas Stove... -
Page 30: F39 Door Assemblies
106) 940-323/P Side Glass 107) 936-243 Glass Gasket 108) 940-322/P Centre Glass 111) Door Frame Fibre Paper 112) 750-015 Door Glass Extrusion 208) 940-325/P Wrap Glass *Not available as a replacement part. Regency ® F39 Room Sealed Freestanding Gas Stove... -
Page 31: Warranty
Regency, may nullify your warranty on this product. Electrical components such as fans, switches, wiring, thermodiscs, Regency Industries Ltd., shall in no event be liable for any special, remote control, thermopiles, thermocouples and gas valves are indirect consequential damages of any nature whatsoever which covered for one year from the date of purchase.