Table of Contents
Advertisement
Quick Links
Owners &
Installation
LISTINGS AND CODE APPROVALS
These gas appliances have been tested in
accordance with AS4553-2000, NZS 5262
and have been certifi ed by the Australian
Gas Association for installation and opera-
tion as described in these Installation and
Operating Instructions.
Your unit should be serviced annually
by an authorised service person.
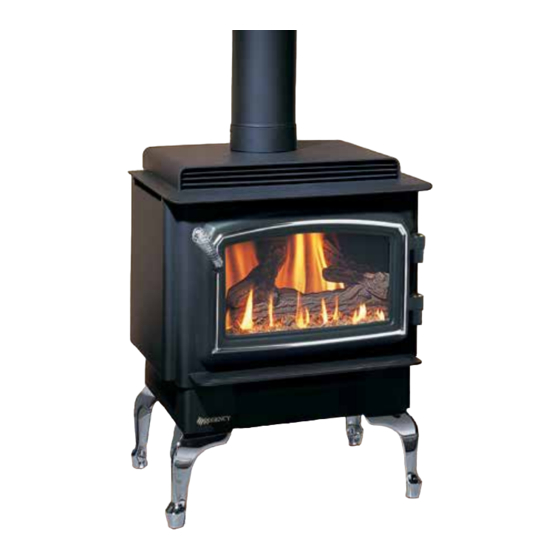
F33 Freestanding Gas Stove
PLEASE KEEP THESE INSTRUCTIONS
FOR FUTURE REFERENCE
WARNING:
Improper installation, adjustment, altera-
tion, service or maintenance can cause
injury or property damage. Refer to this
manual. For assistance or additional in-
formation consult an authorized installer,
service agency or the gas supplier.
FOR YOUR SAFETY
Do not store or use gasoline or other fl am-
mable vapours and liquids in the vicinity of
this or any other appliance.
Installation and service must be performed
by an authorized installer, service agency or
the gas supplier.
918-532a
Models:
F33-NG3
F33-LPG3
FOR YOUR SAFETY
What to do if you smell gas:
Do not try to light any appli-
ance
Do not touch any electri-
cal switch: do not use any
phone in your building.
Immediately call your gas
supplier from a neighbour's
phone. Follow the gas sup-
plier's instructions.
If you cannot reach your
gas supplier, call the fi re
department.
01/11/07
Advertisement
Table of Contents

Related Manuals for Regency F33


Summary of Contents for Regency F33
- Page 1 Gas Association for installation and opera- tion as described in these Installation and Operating Instructions. Your unit should be serviced annually by an authorised service person. F33 Freestanding Gas Stove PLEASE KEEP THESE INSTRUCTIONS FOR FUTURE REFERENCE WARNING: Improper installation, adjustment, altera- tion, service or maintenance can cause injury or property damage.
- Page 2 Gas Series of hand crafted appliances has been designed to provide you with all the warmth and charm of a woodstove, at the fl ick of a switch. The models F33-NG3 and F33-LPG3 have been approved by the Australian Gas Association for both safety and effi ciency. As it also bears our own mark, it promises to provide you with economy, comfort and security for many trouble free years to follow.
-
Page 3: Table Of Contents
Optional Remote Control Installation ... 12 Optional Wall Thermostat Installation ... 12 Thermostat Wire Table ...12 Final Check ...12 Regency ® F33-3 Freestanding Gas Stove TABLE OF CONTENTS OPERATING INSTRUCTIONS Operating Instructions ...13 Lighting Procedure ...13 Shutdown Procedure ...13 Copy of the Lighting Plate Instructions ... 14 MAINTENANCE Normal Operating Sounds of Gas Appliances ... -
Page 4: Data Badge
DATA BADGE This is a copy of the label that accompanies each Regency Freestanding Gas Stove. We have printed a copy of the contents here for your review. ® F33-3 DATA BADGE NOTE: Regency Check the label on the unit and if there is a difference, the label on the unit is the correct one. -
Page 5: Installation
(gases and other fl ammable vapours and liquids). IMPORTANT SAVE THESE INSTRUCTIONS The F33-3 Freestanding Gas Stove must be installed in accordance with these instructions. Carefully read all the instructions in this manual fi rst. Consult the "authority having jurisdiction" to determine the need for a permit prior to starting the installation. -
Page 6: Pedestal Assembly
1) For easier assembly, tip the stove on its back (preferably onto a soft surface to prevent scratching). 2) Unscrew the 4 bolts in the underside of the stove. Align the holes in the corners of the pedestal top with the corresponding holes in the base of the stove. -
Page 7: Leg And Bottom Shield Assembly
ASSEMBLY These instructions apply to the black, gold and nickel cast legs. It will be easier to attach the legs to the stove if it is tipped on its back (preferably on a soft surface to prevent scratching). 1) Remove the 4 bolts in the underside of the base and discard. -
Page 8: Wiring
NZS 5261 or any relevant local building codes. For altitudes above 610m. we recommend that a minimum fl ue height of 3.6m is used. CAUTION: Label all wires prior to disconnection when servicing controls. Wiring errors can cause improper and dangerous operation. Regency ® F33-3 Freestanding Gas Stove... -
Page 9: Gas Connection
5/16" ID hose. Regency ® F33-3 Freestanding Gas Stove 4) Light the pilot and turn the valve to "ON" position. 5) The pressure check should be carried out with the unit burning and the setting should be within the limits specifi ed on the safety label. -
Page 10: Test For Flue Spillage
6) Place the cross logs on top of the larger logs aligning the holes on the underside of the cross log with the log pins in the larger logs. See diagrams 1 & 2. Carefully push the cross logs onto the pins. Diagram 1 Regency ® F33-3 Freestanding Gas Stove... -
Page 11: Safety Latch
If so, move the obstruction and then check the fl ame fl ow again. Regency ® F33-3 Freestanding Gas Stove INSTALLATION SAFETY LATCH Secure door in the closed position using the door securing bracket and the screw provided. -
Page 12: Optional Remote Wall Switch
3) Check for proper draft. CAUTION: Any alteration to the product that causes sooting or carboning that results in damage to the unit is not the responsibility of the manufacturer and will not be covered by the warranty. Regency ® F33-3 Freestanding Gas Stove... -
Page 13: Operating Instructions
OPERATING INSTRUCTIONS 1) The FIRST FIRE in your stove is part of the paint curing process. To ensure that the paint is properly cured, it is recommended that you burn your fi replace for at least four (4) hours the fi rst time you use it with the fan on. -
Page 14: Copy Of The Lighting Plate Instructions
OPERATING INSTRUCTIONS COPY OF THE LIGHTING PLATE INSTRUCTIONS Gas Inlet Regency ® F33-3 Freestanding Gas Stove... -
Page 15: Maintenance
Regency ® F33-3 Freestanding Gas Stove 5) The appliance and fl ueing system must be inspected before use, and at least annually, by an authorised fi eld service person, to ensure that the fl ow of combustion and ventilation air is not obstructed. -
Page 16: General Flue Maintenance
Clean any fi ngerprints off before turning the unit on. GLASS REPLACEMENT Your F33-3 stove is supplied with high temperature, 5 mm Neoceram silica coated ceramic glass that will withstand the highest heat that your unit will produce. In the event that you break your glass by impact, purchase your replacement glass from an authorized Regency only, and follow our step-by-step instructions for replacement. -
Page 17: Aeration Adjustment
4) Reinstall the new ones in reverse order. REMOVING VALVE ASSEMBLY 1) Shut off gas supply. 2) If optional fan is installed, disconnect power source to stove. 3) Remove access panel. a) Front panel on pedestal model. See diagram 1. -
Page 18: Installing Valve Assembly
L200-40F T-O-D 9426 9426 Bracket 60711 60711 T-O-D T-O-D 313717 313717 Thermodisc VIEW FROM BOTTOM OF THE STOVE brass fi tting. Note orienta- Thermopile wires Orifice assembly mounting screws Orifice Thermocouple wire Gas Outlet Regency ® F33-3 Freestanding Gas Stove... -
Page 19: Fan Replacement
4 screws are loosened. Wiring Diagram Regency ® F33-3 Freestanding Gas Stove Diagram 1 6) Disconnect the 2 ground wires (green and yellow/green striped) to the ground lug as per diagram 2. Note: The #8 ground lug is a dedicated ground for mobile home use only. -
Page 20: Troubleshooting The Gas Control System
• Trace thermopile wires from valve to thermopile for possible grounding against gas appliance and/or gas valve. • Follow same steps for thermocouple. ® Troubleshooting Guide for more detailed information. ® Gas Products) Regency ® F33-3 Freestanding Gas Stove... -
Page 21: Parts List
7/8" Door Gasket Repair Kit 846-918 Hinge Cap - Gold Plated (2/set) Regency ® F33-3 Freestanding Gas Stove MAIN ASSEMBLY Part # Screw #10 - 24 x 3/4" Pan Head Washer 1/4" split lock Screw #10 - 24 x 1/2 Pan Head... -
Page 22: Burner & Log Assembly
Description Rear Log Defl ector Top - LPG Rear Burner Defl ector-Back (NG) Complete Log Set Front Log Rear Log Top Log (each) Ember Rock Wool Thermocouple Thermopile 3/8 x 12" Black Mall Nipple Regency ® F33-3 Freestanding Gas Stove... -
Page 23: Pedestal & Leg Assembly
Cast Legs - Gold 850-126 Cast Legs - Black 850-128 Cast Legs - Brush Nickel 142) 850-125 Steel Legs Regency ® F33-3 Freestanding Gas Stove PEDESTAL & LEG ASSEMBLY Part # Pedestal Assembly 490-926 ® 100) 948-216 102) 904-257 103) - Page 24 NOTES Regency ® F33-3 Freestanding Gas Stove...
- Page 25 NOTES Regency ® F33-3 Freestanding Gas Stove...
- Page 26 NOTES Regency ® F33-3 Freestanding Gas Stove...
-
Page 27: Warranty
INCORRECT INSTALLATION OR GAS PRESSURE SETTINGS ARE NOT COVERED BY WARRANTY A SERVICE OR CALLOUT FEE WILL BE CHARGED IN THESE CIRCUMSTANCES. Regency ® F33-3 Freestanding Gas Stove Exclusions: This limited Lifetime Warranty does not extend to or include paint, door ®... - Page 28 © Copyright 2007, FPI Fireplace Products International Ltd. All rights reserved. PRINTED IN CANADA...