Table of Contents
Advertisement
Quick Links
CD/HDD Receiver
BR-925UKD
Instruction Manual
Thank you for purchasing an Onkyo CD/HDD
receiver.
Please read this manual thoroughly before making
any connections and plugging it in.
Following the instructions in this manual will enable
you to obtain optimum performance and listening
enjoyment from your new CD/HDD receiver.
Please retain this manual for future reference.
Contents
Getting Started ..............................2
Connections ................................15
Turning On & First Time Setup ..22
Basic Operation...........................24
Playing & Listening
Playing CDs ..............................28
Listening to the Radio ...............32
USB Device Playback ...............44
Playing External Components ..48
Recording (Transferring Data) ...49
Playing the HDD ..........................57
Clock and Timer ..........................65
Advanced Setup ..........................71
Others...........................................73
E
n
Advertisement
Table of Contents

Related Manuals for Onkyo BR-925UKD


Summary of Contents for Onkyo BR-925UKD
- Page 1 USB Device Playback ....44 Playing External Components ..48 Recording (Transferring Data) ...49 Playing the HDD ......57 Thank you for purchasing an Onkyo CD/HDD receiver. Please read this manual thoroughly before making Clock and Timer ......65 any connections and plugging it in.
-
Page 2: Important Safety Instructions
WARNING: WARNING AVIS TO REDUCE THE RISK OF FIRE OR ELECTRIC RISK OF ELECTRIC SHOCK RISQUE DE CHOC ELECTRIQUE DO NOT OPEN NE PAS OUVRIR SHOCK, DO NOT EXPOSE THIS APPARATUS TO RAIN OR MOISTURE. The lightning flash with arrowhead symbol, within an equilateral triangle, is intended to alert the user to the CAUTION: presence of uninsulated “dangerous voltage”... -
Page 3: Precautions
If water or any other liquid gets If condensation does occur, remove all discs and inside this unit, have it checked by your Onkyo leave this unit turned on for two to three hours. By dealer. -
Page 4: Declaration Of Conformity
We, ONKYO EUROPE ELECTRONICS GmbH LIEGNITZERSTRASSE 6, 82194 GROEBENZELL, GERMANY declare in own responsibility, that the ONKYO product described in this instruction manual is in compliance with the corresponding technical standards such as EN60065, EN55013, EN55020 and EN61000-3-2, -3-3. GROEBENZELL, GERMANY K. -
Page 5: Features
• RI-Dock Compatible Remote Control (iPod Control name indicates the color. Specifications and operations are the Capable) same regardless of color. *1 VLSC and the VLSC logo are registered trademarks of Onkyo Corporation. Manufactured under license from Audyssey Laboratories. U.S. ™... -
Page 6: Before Using The Cd/Hdd Receiver
• Expired batteries should be removed as soon as possible to prevent damage from leakage or corrosion. • When replacing the batteries, use R6/AA batteries. Onkyo recommend that you use manganese dry batteries. • If rechargeable batteries are used, the remote controller may be inoperable. -
Page 7: What You Can Do With The Cd/Hdd Receiver
What You Can Do with the CD/HDD Receiver Connected Radio Components Playing CDs (page 28) Playing an external component (page 48) Listening to the radio (page 32) Recording CDs (page 51) Recording from an external component (page 53) Recording the radio (page 53) Transferring the data (page 54) USB mass storage device... -
Page 8: Handling The Hard Disk Drive (Hdd)
The HDD may fail even in normal use, for example, a sudden data loss or failure caused by electrical service interrup- tion. If the HDD fails for some reason, the data cannot be restored. Onkyo recommend that you backup the data stored in the CD/HDD receiver to your personal computer or commercially available USB hard disk drive periodically. -
Page 9: Table Of Contents
Using the Remote Controller ......... 6 Playing External Components ......48 What You Can Do with the CD/HDD Receiver..7 Making an Connection with Onkyo Handling the Hard Disk Drive (HDD)..... 8 Components............48 Getting to Know the CD/HDD Receiver ....10 Front Panel............ -
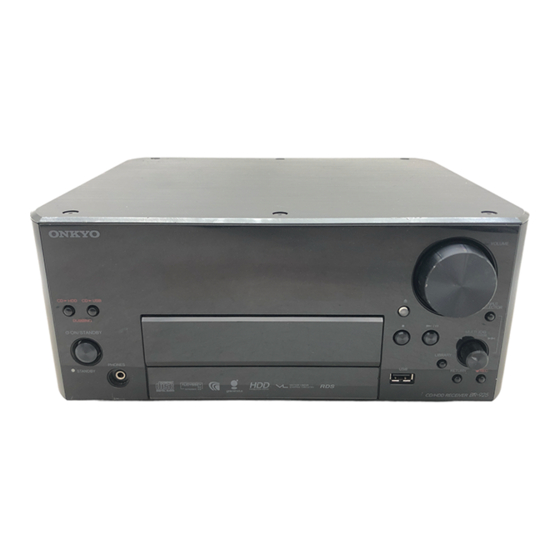
Page 10: Getting To Know The Cd/Hdd Receiver
Getting to Know the CD/HDD Receiver Front Panel bkblbm The page numbers in parentheses show where you can find the main explanation for each item. Remote control sensor (6) Play/Pause [ / ] button (28) Receives control signals from the remote controller. Starts CD playback. -
Page 11: Display
Getting to Know the CD/HDD Receiver—Continued Display bl bm Play, pause and Rec Tuning indicators indicators AUTO: Displays the playback and recording status. Lights up when Auto Tuning is selected, and disap- pears when Manual Tuning is selected. Input source indicators Displays the input source for playback. -
Page 12: Rear Panel
DOCK/CDR (LINE 3) IN/OUT (19) This analog audio input and output are for connect- AM ANTENNA (17) ing an Onkyo RI Dock. The input and output can These push terminals are for connecting an AM also be connected to a CD recorder or recording antenna. -
Page 13: Remote Controller
Fast Reverse/Fast Forward [ ] and TUNING [ ]/[ ] buttons: Used to fast reverse or fast forward CD playback. Can also be used with an Onkyo RI Dock, CD recorder or MD recorder. Also used to tune the radio frequency. - Page 14 DISPLAY button (29, 76) Used to change the information shown on the dis- play. With an Onkyo RI Dock, it works as a back- light button. REPEAT button (31, 76) Sets repeat playback. Can also be used with an Onkyo RI Dock.
-
Page 15: Connections
(Plug type varies from country to country.) Recording device such as an MD recorder, a page 22 cassette deck or a CD recorder, or an Onkyo Don't connect the power cord RI dock until you've completed and dou- page 19... -
Page 16: Connecting Speakers
Connections—Continued Connecting Speakers • Connect the right speaker to the CD/HDD receiver’s right (R) SPEAKERS terminals. Connect the left speaker to the left (L) SPEAKERS terminals. • Connect the positive (+) terminal on each speaker to the corresponding positive (+) terminal on the CD/HDD receiver. Connect the negative (–) terminal on each speaker to the corresponding negative (–) terminal on the CD/HDD receiver. -
Page 17: Connecting Antennas
Connections—Continued Connecting the AM Loop Antenna Connecting Antennas The supplied indoor AM loop antenna is for indoor use This section explains how to connect the supplied indoor only. FM antenna, AM loop antenna, and DAB antenna, and how to connect commercially available outdoor FM and AM antennas. - Page 18 Connections—Continued Connecting the DAB Antenna Connecting an Outdoor FM Antenna If you cannot achieve good reception with the supplied Screw the supplied DAB antenna’s plug indoor FM antenna, try a commercially available out- onto the DAB antenna jack. door FM antenna instead. Once the CD/HDD receiver is ready for use, you’ll need to tune into a DAB station and adjust the position of the DAB antenna to achieve the...
-
Page 19: Connecting Other Components
Connect the CD/HDD receiver’s MD/TAPE IN jacks to the OUTPUT (PLAY) jacks of the MD recorder or cassette deck. Connecting a CD recorder or an Onkyo RI Dock Connect the CD/HDD receiver’s DOCK/CDR OUT jacks to the AUDIO INPUT jacks of the CD recorder or Onkyo RI Dock. -
Page 20: Connecting A Subwoofer
Connections—Continued Connecting a Subwoofer The CD/HDD receiver has SUBWOOFER PRE OUT jack for connecting a powered active subwoofer (i.e., a subwoofer with a built-in amplifier). Powered active CD/HDD receiver’s rear panel subwoofer : Signal flow Connecting a Component with a Digital Audio Output The following diagram shows how to connect a component with an optical digital audio output, such as a games console, satellite tuner, or personal computer. -
Page 21: Hooking Up To The Internet
Connections—Continued • The CD/HDD receiver does not support PPPoE settings, Hooking Up to the Internet so if you have a PPPoE-type Internet connection, you must use a PPPoE-compatible router. The CD/HDD receiver is network-ready, which means • Depending on your ISP, you may need to specify a proxy you can hook it up to your home network with a standard ®... -
Page 22: Turning On The Cd/Hdd Receiver
Tip: When you start playback on (or turn on) an Onkyo RI Dock, CD recorder, MD recorder, or cassette deck that’s connected to the CD/HDD receiver with an cable and analog audio cable, the CD/HDD receiver turns on automatically. Similarly, when... -
Page 23: First Time Setup
First Time Setup Setting the Clock with the AccuClock Function To use the AccuClock function, the CD/HDD receiver must be able to receive RDS radio stations, which means an FM antenna must be connected. Be sure to connect an FM antenna before attempting to use this function (see page 17). The very first time you turn on the CD/HDD receiver, the AccuClock function automatically sets the CD/HDD receiver’s clock based on the CT (Clock Time) information present in an RDS radio broadcast. -
Page 24: Basic Operations
• Do not connect the audio output jack of any other device to the PHONES jack, because it may cause a malfunction of the device. • When you use headphones, Onkyo recommend that you deactivate Audyssey EQ™. About Audyssey EQ™, see page 26. -
Page 25: Adjusting The Tone
Adjusting the Tone You can use the following buttons on the remote controller to adjust the tone. Using the Direct Function Press the [DIRECT] button. DIRE When the Direct function is on, the tone TONE controls are bypassed, so you can enjoy a S.BA pure sound, and the DIRECT indicator MUTI... -
Page 26: Using Audyssey Eq™ And Audyssey Dynamic Eq
Using Audyssey EQ™ and Audyssey Dynamic EQ™ Audyssey EQ™ optimizes the audio quality set for the Deactivating Audyssey Dynamic EQ™ recommended Onkyo speakers. The recommended speakers are D-112E and D-N10BX. Press the [TOOLS] button. With Audyssey EQ™ enabled, Audyssey Dynamic EQ™ becomes enabled by default. -
Page 27: Operation Of Music Data
Operation of Music Data This section explains how the CD/HDD receiver deals with the music data saved in the HDD and USB devices. When copying (recording) or deleting music data, you must first press the [LIBRARY] button on the CD/HDD receiver or remote controller to read the contents and display the list. -
Page 28: Playing Cds
Playing CDs Basic Operations of Playback The CD/HDD receiver can playback Audio CDs and CD-R/RW (data CDs) in which MP3/WMA/AAC/WAV files are recorded. For the supported formats, see page 73. Disc tray Switch the input source to CD (see page 24). OPEN/CLOSE Load the CD. -
Page 29: Playing Selected Tracks
Playing CDs—Continued During stop Playing Selected Tracks Artist name Track number/Total tracks Switch the input source to CD. Artist name Press the INPUT [ ]/[ ] buttons. You Track01 can also use the [INPUT SELECTOR] 00:00 1/14 button to select the input source. Format Track name Album name... -
Page 30: Retrieving Audio Cd Information
Playing CDs—Continued ■ Retrieving CD information manually Retrieving Audio CD Information If track information is wrong, you can retry the search The CD/HDD receiver initially embeds the information manually. on approximately 350,000 albums among the CD data- ® base provided by Gracenote music recognition ser- Switch the input source to CD. -
Page 31: Random Playback
Playing CDs—Continued Random Playback Repeat Playback With random playback, all of the tracks on the disc are With repeat playback, you can play an entire CD repeat- played in random order. edly, play one track repeatedly. You can combine repeat playback with random playback to play all of the tracks repeatedly. -
Page 32: Listening To The Radio
Listening to the Radio Tuning into AM/FM Radio Stations The CD/HDD receiver won’t pick up any radio signals without an antenna connected, so you must connect the antenna to use the tuner (see page 17). Switch the input source to FM or AM (see page 24). -
Page 33: Displaying Radio Information
*1 If the selected preset has no name, “No Name” appears briefly and then the frequency is displayed. See “Nam- ing Presets” on page 42. ONKYO-FM 6ch Preset name Receiving RDS RDS is only available in areas where RDS broadcasts are available. -
Page 34: Listening To Dab Digital Radio
The number of stations found and the scanning progress repeatedly to select “DAB”. are shown on the display. Scan 18 42% When tuned into a DAB station, the To cancel Auto Tuning, press the [ENTER] or Tuned indicator appears. [RETURN] button. Tuned indicator ONKYO S1 --ch Station name... - Page 35 Press the Fast Forward [ ] button to listen to the secondary service. 48kbps Mono ONKYO S1 F 4 Signal Quality Displays the signal quality. 0–59: Poor reception While the secondary service is selected, 60–79: Good reception a left angle bracket (<) is displayed.
- Page 36 Listening to the Radio—Continued ■ Preset Write DAB Setup Select this to preset the current DAB station. See “Pre- setting AM/FM/DAB Stations Manually” on page 38 for more information. ■ Tuning Mode BAND TOOLS With this setting, you can sort the available stations ENTER alphabetically, by multiplex, favorites, or active stations.
-
Page 37: Presetting Fm Stations Automatically (Auto Preset)
Listening to the Radio—Continued Presetting FM Stations Automatically (Auto Preset) With the Auto Preset function, you can automatically Use the Up and Down [ ]/[ ] but- preset all of the FM radio stations available in your area tons to select “OK”, and then in one go. -
Page 38: Presetting Am/Fm/Dab Stations Manually
Listening to the Radio—Continued Presetting AM/FM/DAB Stations Manually With the Preset Write function, you can manually preset To store the station, press individual AM, FM and DAB radio stations. Presets [ENTER]. make it easy to select your favorite stations and eliminate If no station has yet been stored to the the need to tune the radio manually each time you want selected preset, “Complete!”... -
Page 39: Selecting Preset Stations
Listening to the Radio—Continued Selecting Preset Stations Tuning into weak stereo FM stations BAND FM 87.50 MHz 1 ch AUTO indicator FM 87.50 MHz 1 ch (PRESET You must store some presets before you can select them (see pages 37 and 38). If the signal from a stereo FM station is weak, it may be impossible to get good reception. -
Page 40: Editing Presets
Listening to the Radio—Continued Editing Presets Using the two basic functions of copying and deleting, Use the Up and Down [ ]/[ ] but- you can copy a radio station preset to a channel to tons to select the destination pre- another channel, change a channel number, and delete an set, and then press [ENTER]. - Page 41 Listening to the Radio—Continued Erasing Presets BAND TOOLS ENTER (PRESET Select the preset you want to erase (see page 39). Press the [TOOLS] button and then press [ENTER] with “Tool” selected. Tool Record Audio Use the Up and Down [ ]/[ ] but- tons to select “PresetErase”, and then press [ENTER].
-
Page 42: Naming Presets
Listening to the Radio—Continued Naming Presets Selecting letters: Press the number buttons repeatedly to You can name presets for easy identification using alpha- select the available letters. For example, betic, numeric, marks and symbols. The preset name press the [2] button repeatedly to select: may contain up to eight characters. - Page 43 Listening to the Radio—Continued Editing Characters Erasing a Preset’s Name If the character input mode is not currently selected, per- 1 Switch the input source to FM or AM (see form steps 1 to 3 of “Naming Presets” on page 42. page 24).
-
Page 44: Usb Device Playback
Update the iPod soft- ware to the latest version before using. • Onkyo accepts no responsibility whatsoever for the loss or damage to data stored on the iPod or USB device when that device is used with the CD/HDD receiver. Onkyo recommend that you back up your important music files beforehand. -
Page 45: Basic Operations Of Playback
00:00 1/ 1 Track name Format The track information appears on the dis- play of the CD/HDD receiver . (ONKYO logo appears on the display of the iPod.) Start playback. Press the Play/Pause [ / ] or Play Album name... -
Page 46: Playing Selected Tracks
USB Device Playback—Continued Switching the Display Playing Selected Tracks You can switch the display by pressing the remote con- Switch the input source to USB. troller’s [DISPLAY] button repeatedly. Press the INPUT [ ]/[ ] buttons. You During the list display can also use the [INPUT SELECTOR] button to select the input source. -
Page 47: Repeat/Random Playback
USB Device Playback—Continued Repeat/Random Playback REPEAT RANDOM With random playback, the tracks recorded on the USB device are played in random order. With repeat playback, you can play a group of tracks repeatedly or play one track repeatedly. See page 31 for details on repeat and random playback. Press the [REPEAT] or [RANDOM] button repeat- edly to set random or repeat playback. -
Page 48: Playing External Components
PC/dig By making an (remote interactive) connection *1 This should be selected if you connect an audio processor such as the Onkyo UE-205. with an Onkyo -capable component and speci- To cancel changing the selector name, fying the selector name of the component, the com- press the [RETURN] button. -
Page 49: Recording (Transferring Data)
• When the AC power adapter is attached to the digital audio player or the USB storage device, Onkyo recom- mend that you connect the AC power adapter to the domestic power supply. When using the batteries, check that the remaining battery level is sufficient. -
Page 50: Setting For Recording
Recording (Transferring Data)—Continued Setting for Recording Use the Up and Down [ ]/[ ] but- tons to select the record mode, Before starting the recording, set the format and bit rate. and then press [ENTER]. Format is a data form of tracks to be recorded. Bit rate When the destination of recording is means the quantity of information for recording. -
Page 51: Recording Cds
Recording (Transferring Data)—Continued Recording CDs The CD/HDD receiver can record audio CDs into its HDD at a speed of 4X Max. In addition, recording into the USB devices is available. See “Setting for Recording” on page 50 for setting before the operation. Recording All Tracks (CD Recording with One-touch Button) Disc tray You can easily record an entire CD with the [CD... - Page 52 Recording (Transferring Data)—Continued Recording Tracks One-by-one Recording Using the Remote Controller You can select one track you want to record. You can use the remote controller for recording as below. LIBRARY ENTER MULTI JOG LIBRARY Load the CD. When the CD has been loaded, switch Load the CD.
-
Page 53: Recording From Tuner
Recording (Transferring Data)—Continued Recording from Tuner Recording from Line Input You can record broadcasting program. You can record audio from external components connected to LINE1, LINE2, or LINE3. You can't record audio from external components connected Switch the input source. to DIGITAL OPTICAL IN. -
Page 54: Transferring Data
Recording (Transferring Data)—Continued Transferring Data USB Connection Use the Up and Down [ ]/[ ] but- tons to select either of the follow- Digital audio ing, and then press [ENTER]. storage player When transferring all tracks in the folder onto the HDD, select “HDD ALL COPY”. - Page 55 Recording (Transferring Data)—Continued FTP Connection Select “Open?” and then press [ENTER]. Personal computer FTP Open/Close <ftp://xxx.xxx.xxx.xxx> :Open? After “FTP Starting…” is displayed, “FTP Stop” appears. Via FTP connection, you can access the CD/HDD Start Windows Explorer on your computer, access the CD/HDD receiver from your computer and transfer the data from the HDD to computer and vice versa.
-
Page 56: Erasing Data From Usb Device
Recording (Transferring Data)—Continued Erasing Data from USB Device Erasing one track or one folder: Use the Up and Down [ ]/[ ] buttons to The CD/HDD receiver can erase the music track or select “1 Erase?”, and then press album stored on the USB device. For erasing music track [ENTER]. -
Page 57: Playing The Hdd
Playing the HDD Basic Operations of Playback Switch the input source to HDD (see page 24). Start playback. Album name Press the Play/Pause [ / ] button or Play [ CD/HDD receiver button. Album name Track01 The track you played or recorded the last time is played. 01:12 Tip: Elapsed time of... -
Page 58: Playing Selected Tracks
Playing the HDD—Continued Using Alphabetic Search Playing Selected Tracks During the list display, you can search tracks in the Among enormous recorded music files in the HDD of alphabetic order by pressing the remote controller’s the CD/HDD receiver, you can easily search the desired number buttons. -
Page 59: Switching The Display
Playing the HDD—Continued Switching the Display You can switch the display by pressing the remote con- troller’s [DISPLAY] button repeatedly. During the list display 2-line display Track 01 Track 02 3-line display Track 01 Track 02 Track 03 During stop Track number/ Artist name Total tracks... -
Page 60: Various Playback Modes
Playing the HDD—Continued Various Playback Modes Creating and Playing the Playlist PLAYLIST REG You can select your favorite tracks in numerous music files in the HDD and add them to the playlist. BGM MODE ■ Adding a track to the playlist ENTER Select a track (in the HDD) you want to add to the playlist. -
Page 61: Editing Tracks And Playlists In The Hdd
Editing Tracks and Playlists in the HDD The tracks saved in the HDD can be edited as follows. Erasing one track: • Erasing music track or album Use the Up and Down [ ]/[ ] buttons • Editing track information to select “1 Erase?”, and then press •... - Page 62 Editing Tracks and Playlists in the HDD—Continued Use the Up and Down [ ]/[ ] but- Uppercase letters tons to select “Edit Name Tag”, Lowercase letters and then press [ENTER]. Numbers and symbols £ Umlaut letters and symbols Tool [Rename Playlist] Edit Name Tag Selecting letters: Press the number buttons repeatedly to...
-
Page 63: Removing Tracks From The Playlist
Editing Tracks and Playlists in the HDD—Continued Removing Tracks from the Playlist Use the Up and Down [ ]/[ ] but- tons to select “Clear Playlist”, Even when a track in the playlist is removed, the music and then press [ENTER]. file itself is not deleted. -
Page 64: Editing A Playlist Name
Editing Tracks and Playlists in the HDD—Continued Editing a Playlist Name Uppercase letters Although a playlist is initially named as PlayList 1, Play- List 2…, PlayList 23, the name can be changed as you Lowercase letters like. Numbers and symbols £... -
Page 65: Setting The Clock
Setting the Clock Setting AccuClock to Use a Specific Station The AccuClock function normally uses the FM station with the strongest signal to set the clock. However, if the clock cannot be set properly using that station, you can specify which FM station the AccuClock function should use. This must be an FM station that supports RDS CT (Clock Time) information. -
Page 66: Setting The Clock Manually
Setting the Clock—Continued Setting the Clock Manually The time can be displayed in 24-hour format. Press [ENTER]. The time setting procedure starts. TIMER Number buttons Use the remote controller’s num- ber buttons to set the time. Enter a four-digit number, hour(00-23) and minute(00-59). -
Page 67: Using The Timers
Up to four programmable timers are available for the while listening to music. play and record timers. The timers can be used with other Onkyo components Press the [SLEEP] button repeat- that are connected to the CD/HDD receiver via edly to select the required sleep for hookup details). -
Page 68: Using The Play Timer
Using the Timers—Continued Set the day and time. Using the Play Timer Use the Up and Down [ ] buttons With the play timer, you can automatically turn on the to select “Once” or”Every”, and then press [ENTER]. CD/HDD receiver, start playback, and turn off the CD/ Select “Once”... -
Page 69: Using The Record Timer
Using the Timers—Continued Set the day and time. Using the Record Timer Use the Up and Down [ ] buttons With the record timer, you can automatically turn on the to select “Once” or “Every”, and then CD/HDD receiver, start recording, and turn off the CD/ press [ENTER]. - Page 70 Using the Timers—Continued Canceling a Running Play/Record Timer The play or record timer can be canceled during a pro- cess of timer playback or timer recording, without stop- ping the playback or recording. 1 Press the [TIMER] button. 2 Select the timer you want to cancel, and then press the [ENTER].
-
Page 71: Advanced Setup
Advanced Setup Network Configuration When your computer cannot be connected to the Internet, or you want to set the IP address manually, set the following network configuration. When setting it manually, input the values (alphanumeric characters) according to the setting of your broadband router currently in use. -
Page 72: Setting The Proxy
Advanced Setup—Continued Entering DHCP Settings Manually Setting the Proxy You can enter DHCP settings such as the IP address, sub- Configure the Proxy setting when your ISP specifies it. net mask, default gateway, or DNS server manually. Fol- If not specified, the Proxy setting is not necessary. low these steps when you want to assign the fixed IP 1 Press the [TOOLS] button. -
Page 73: Disc Notes
Disc Notes Supported Discs Disc Content Organization The CD/HDD receiver supports the following discs ■ Audio CD (8 cm and 12 cm). Audio CDs contain tracks. Format or file Track 1 Track 2 Track 3 Track 4 Track 5 Disc Logo type Audio CD... - Page 74 Disc Notes—Continued Handling Discs Storing Discs • Never touch the underside of a disc. Always hold discs • Don't store discs in places subject to direct sunlight or by the edge, as shown. near heat sources. • Don't store discs in places subject to moisture or dust, such as in a bathroom or near a humidifier.
-
Page 75: Playable Formats
(not limited to music audio bit streams encapsulated in ASF files), it may take a long time to read the disc. Onkyo container and backward compatible recommend that you include only music files on your with WMA4, WMA4.1, WMA7 &... -
Page 76: Controlling External Components
Controlling External Components Explanation of buttons for using the Onkyo MD recorder, cassette deck, CD recorder, or RI Dock, when con- nected to the MD/TAPE jack, DOCK/CDR jack or DIGITAL IN jack of the CD/HDD receiver. • See page 19 for instructions on connecting the components. -
Page 77: Troubleshooting
If you have any trouble using the CD/HDD receiver, look for a solution in this section. If you can’t resolve the issue yourself, try resetting the CD/HDD receiver before contacting your Onkyo dealer. To reset the CD/HDD receiver while holding down the [ON/STANDBY] button, turn the [MULTI JOG] dial. - Page 78 Troubleshooting—Continued Audio output is intermittent when the CD/HDD receiver is subjected to vibration. • The CD/HDD receiver is not a portable device. Use it in a location that’s not subject to shock or vibration. Headphone output is intermittent or there’s no sound. •...
- Page 79 • If Audyssey EQ™ is active, you cannot perform recording to an external component. Deactivate Audyssey EQ™ (see page 26). Interactive control with other Onkyo -capable components is not working. • Make sure the cables and analog audio cables are connected correctly (see page 19).
- Page 80 Troubleshooting—Continued Timers Timer playback or recording doesn’t work. • Make sure the clock has been set correctly (see page 65). • The timer may overlap with another timer. If you program several timers, make sure they don’t overlap (see page 67). •...
- Page 81 • When changing the Input Selector from DOCK (RI dock) to another, be sure to stop the iPod. Onkyo is not responsible for damages (such as CD rental fees) due to unsuccessful recordings caused by the unit’s malfunction. Before you record important data, make sure that the material will be recorded correctly.
-
Page 82: Specifications
Specifications General Power Supply: AC 230 V, 50 Hz Power Consumption: 77 W Stand-by Power Consumption: 0.6 W × × Dimensions 313 mm × × Weight: 7.6 kg (16.8 lbs.) Audio Inputs Analog Inputs: 3 (LINE1, DOCK/CDR IN, MD/TAPE IN) Digital Input: 1 (Optical) Audio Outputs... -
Page 83: Trademark And Other Proprietary Notices
Trademark and Other Proprietary Notices * This product is manufactured under license from use of the Gracenote Data, the Gracenote Software, and Dolby Laboratories. Gracenote Servers. Gracenote reserves all rights in Gracenote Data, the Gracenote Software, and the * Microsoft and Windows are registered trademarks or Gracenote Servers, including all ownership rights. - Page 84 Unit 1&12, 9/F, Ever Gain PlazaTower 1, 88, Container Port Road, Kwai Chung, N.T., HONG KONG Tel: 852-2429-3118 Fax: 852-2428-9039 http://www.ch.onkyo.com/ Y0809-1 SN 29344842 (C) Copyright 2008 ONKYO CORPORATION Japan. All rights reserved. * 2 9 3 4 4 8 4 2 *...