Onkyo TX-SR502 Instruction Manual
Onkyo av receiver instruction manual tx-sr502 tx-sr502e tx-sr8250
Hide thumbs
Also See for TX-SR502:
- Service manual (118 pages) ,
- Service bulletin (2 pages) ,
- Service manual (118 pages)
Table of Contents
Advertisement
Quick Links
TX-SR502_En.book Page 1 Friday, March 12, 2004 1:05 PM
AV Receiver
TX-SR502
TX-SR502E
TX-SR8250
Instruction Manual
Thank you for purchasing an Onkyo AV Receiver.
Please read this manual thoroughly before making
connections and plugging in the unit.
Following the instructions in this manual will enable
you to obtain optimum performance and listening
enjoyment from your new AV Receiver.
Please retain this manual for future reference.
Contents
Introduction ..................................... 2
Connection .................................... 16
Turning On & First Time Setup..... 31
Basic Operation
Playing your AV components ....... 34
Using the Tuner............................ 36
Enjoying the Listening Modes ..... 40
Advanced Operation ..................... 45
Troubleshooting ............................ 56
E
n
Advertisement
Table of Contents
Troubleshooting

Related Manuals for Onkyo TX-SR502


Summary of Contents for Onkyo TX-SR502
- Page 1 TX-SR502 TX-SR502E TX-SR8250 Instruction Manual Thank you for purchasing an Onkyo AV Receiver. Please read this manual thoroughly before making connections and plugging in the unit. Following the instructions in this manual will enable you to obtain optimum performance and listening enjoyment from your new AV Receiver.
-
Page 2: Introduction Important Safety Instructions
TX-SR502_En.book Page 2 Friday, March 12, 2004 1:05 PM WARNING: TO REDUCE THE RISK OF FIRE OR ELECTRIC SHOCK, DO NOT EXPOSE THIS APPARATUS TO RAIN OR MOISTURE. CAUTION: TO REDUCE THE RISK OF ELECTRIC SHOCK, DO NOT REMOVE COVER (OR BACK). NO USER-SERVICEABLE PARTS INSIDE. -
Page 3: Precautions
We, ONKYO EUROPE ELECTRONICS GmbH LIEGNITZERSTRASSE 6, 82194 GROEBENZELL, GERMANY declare in own responsibility, that the ONKYO product described in this instruction manual is in compliance with the corresponding technical standards such as EN60065, EN55013, EN55020 and EN61000-3-2, -3-3. GROEBENZELL, GERMANY ONKYO EUROPE ELECTRONICS GmbH I. -
Page 4: Supplied Accessories
TX-SR502_En.book Page 4 Friday, March 12, 2004 1:05 PM Precautions —Continued For U.S. models Note to CATV system installer: This reminder is provided to call the CATV system installer's attention to Section 820-40 of the NEC which provides guidelines for proper grounding and, in partic- ular, specifies that the cable ground shall be connected to the grounding system of the building, as close to the point of cable entry as practical. -
Page 5: Table Of Contents
TX-SR502_En.book Page 5 Friday, March 12, 2004 1:05 PM Features • 6-channel amplifier • 75 watts per channel min. RMS at 8 Ω , 2 channels driven from 20 Hz to 20 kHz with no more than 0.08% total harmonic distortion •... -
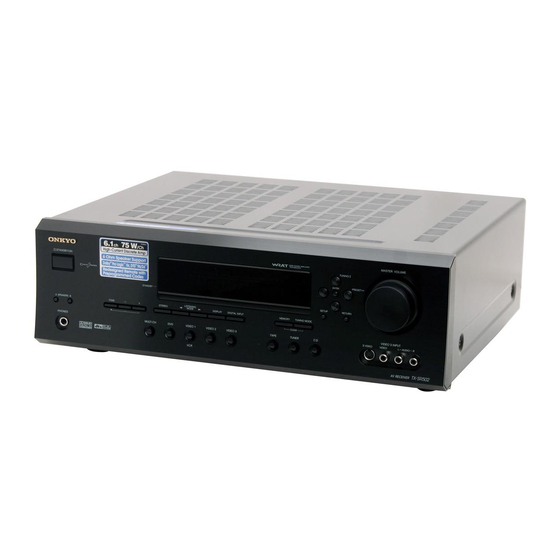
Page 6: Front Panel
TX-SR502_En.book Page 6 Friday, March 12, 2004 1:05 PM Front & Rear Panels Front Panel American Model STANDBY/ON STANDBY SPEAKERS B TONE PHONES Other Models STANDBY/ON PURE AUDIO POWER STANDBY SPEAKERS B TONE For detailed information, refer to the pages in parenthesis. - Page 7 TX-SR502_En.book Page 7 Friday, March 12, 2004 1:05 PM Front & Rear Panels —Continued Remote control sensor (9) This sensor receives control signals from the remote controller. Arrow buttons These buttons are used to select and adjust settings. TUNING [ ] [ ] buttons These buttons are used to tune into radio stations.
-
Page 8: Rear Panel
AV Receiver and the other component, even if they are connected digitally. Note: can only be used with Onkyo components. VIDEO 1 IN/OUT & VIDEO 2 IN (24, 25, 45) The VIDEO 1 S-Video, composite video, and audio inputs and outputs can be used to connect a VCR. -
Page 9: Before Using The Av Receiver
TX-SR502_En.book Page 9 Friday, March 12, 2004 1:05 PM Before Using the AV Receiver Setting the Voltage Selector (Worldwide model only) The Worldwide model has a voltage selector for compat- ibility with power systems around the world. Before you plug in this model, make sure that the voltage selector is set to the correct voltage for your area. -
Page 10: Remote Controller
Receiver and an Onkyo cassette recorder connected via ■ DVD, CD, MD & CDR Modes REMOTE MODE With these modes you can control an Onkyo DVD player, CD player, MiniDisc recorder, or CD recorder connected via (the remote controller should be pointed at the AV Receiver). - Page 11 This button is used to select the Direct listening mode. DSP] & [DSP ] buttons These buttons are used to select the Onkyo original DSP (digital signal processor) listening modes. TEST TONE, CH SEL, LEVEL- & LEVEL+ buttons These buttons are used to adjust the level of each speaker individually.
-
Page 12: Dvd Mode
L NIGHT CINE FLTR RC - 567M DVD Mode DVD mode is used to control an Onkyo DVD player con- nected to the AV Receiver via To set the remote controller to DVD mode, press the [DVD] mode button. Before selecting DVD mode and starting play-... - Page 13 CD Mode CD mode is used to control an Onkyo CD player con- nected to the AV Receiver via To set the remote controller to CD mode, press the [CD] mode button.
- Page 14 L NIGHT CINE FLTR RC - 567M MD Mode & CDR Mode MD mode is used to control an Onkyo MiniDisc recorder connected to the AV Receiver via used to control an Onkyo CD recorder connected to the AV Receiver via To select MD mode, press the [MD] mode button.
-
Page 15: Tape Mode
Tape Mode Tape mode is used to control an Onkyo cassette recorder connected to the AV Receiver via To set the remote controller to Tape mode, press the [AMP] mode button. -
Page 16: Connecting Your Speakers
TX-SR502_En.book Page 16 Friday, March 12, 2004 1:05 PM Connecting Your Speakers Enjoying Home Theater You can use two sets of speakers with the AV Receiver: speaker set A and speaker set B. Speaker set A should be installed in your main listening room and can be used with Dolby Digital and DTS surround material. - Page 17 Connecting Your Speakers —Continued Connecting Your Speakers Before you connect your speakers, read the following: • Disconnect the power cord from the wall outlet. • Read the instructions supplied with your speakers. • Pay close attention to speaker wiring polarity. In other words, connect positive (+) terminals only to positive (+) terminals, and negative (–) terminals only to nega- tive (–) terminals.
-
Page 18: Connecting Antenna
TX-SR502_En.book Page 18 Friday, March 12, 2004 1:05 PM Connecting Antenna Connecting Antenna This chapter explains how to connect the supplied indoor FM antenna and AM loop antenna and how to connect commercially available outdoor FM and AM antennas. The AV Receiver won’t pick up any radio signals with- out any antenna connected, so you must connect the antenna to use the tuner. - Page 19 TX-SR502_En.book Page 19 Friday, March 12, 2004 1:05 PM Connecting Antenna —Continued Connecting an Outdoor FM Antenna If you cannot achieve good reception with the supplied indoor FM antenna, try a commercially available out- door FM antenna instead. Notes: • Outdoor FM antennas work best outside, but usable results can sometimes be obtained when installed in an attic or loft.
-
Page 20: Connecting The Av Receiver
TX-SR502_En.book Page 20 Friday, March 12, 2004 1:05 PM Connecting the AV Receiver Before Making Any Connections • Read the manuals supplied with your AV components. • Don’t connect the power cord until you’ve completed and double-checked all audio and video connections. Optical Digital Inputs The AV Receiver’s optical digital inputs have shutter- type covers that open when an optical plug is inserted... -
Page 21: Which Connections Should I Use
TX-SR502_En.book Page 21 Friday, March 12, 2004 1:05 PM Connecting the AV Receiver —Continued Connection Guide ■ Inputs Up to five AV components can be connected to the AV Receiver’s rear panel inputs, and one to its front panel input. The following table lists the type of component that you can connect to each input. -
Page 22: Connecting Your Tv Or Projector
TX-SR502_En.book Page 22 Friday, March 12, 2004 1:05 PM Connecting the AV Receiver —Continued Connecting Your TV or Projector Monitor Out ■ Using Composite Video Use a composite video cable to connect the AV Receiver’s VIDEO MONITOR OUT to a composite video input on your TV, as shown. -
Page 23: Connecting A Dvd Player
TX-SR502_En.book Page 23 Friday, March 12, 2004 1:05 PM Connecting the AV Receiver —Continued Connecting a DVD player Video Connections You only need to use one of the following video connec- tion methods. ■ Using Composite Video Use a composite video cable to connect the AV Receiver’s VIDEO DVD IN to the composite video out- put on your DVD player, as shown. -
Page 24: Connecting The Av Receiver —Continued
TX-SR502_En.book Page 24 Friday, March 12, 2004 1:05 PM Connecting the AV Receiver —Continued DVD Multichannel Connection If your player supports multichannel audio formats such as DVD-Audio and Super Audio CD, and it has multi- channel analog audio outputs, you can enjoy DVD-Audio and Super Audio CD playback. - Page 25 TX-SR502_En.book Page 25 Friday, March 12, 2004 1:05 PM Connecting the AV Receiver —Continued Connecting a D-VHS VCR for Playback Video Connections Use a component video cable to connect the AV Receiver’s COMPONENT VIDEO 1/2/3 IN to the com- ponent video output on your D-VHS VCR, as shown. Your TV must also be connected via component video.
-
Page 26: Connecting Other Video Sources
TX-SR502_En.book Page 26 Friday, March 12, 2004 1:05 PM Connecting the AV Receiver —Continued Connecting Other Video Sources— Satellite, Cable, Set-top box, LD Player, etc. Video Connections You only need to use one of the following video connec- tion methods. ■... - Page 27 TX-SR502_En.book Page 27 Friday, March 12, 2004 1:05 PM Connecting the AV Receiver —Continued ■ Using Analog Connections If your video component doesn’t have digital audio out- puts, or you want to record from it, you’ll need to make the following analog audio connections. Use an analog audio cable to connect the AV Receiver’s VIDEO 2 IN L/R inputs to the analog audio outputs on your video component, as shown.
-
Page 28: Connecting A Cd Player
TX-SR502_En.book Page 28 Friday, March 12, 2004 1:05 PM Connecting the AV Receiver —Continued Connecting a CD Player Note: Initially, the CD input source is assigned to the COAX- IAL DIGITAL IN. If you connect your CD player to a different digital input, or you connect it to only the ana- log CD IN, you’ll need to change the input assignment (see page 31). -
Page 29: Connecting A Turntable
TX-SR502_En.book Page 29 Friday, March 12, 2004 1:05 PM Connecting the AV Receiver —Continued ■ Using a Coaxial or Optical Connection (playback only) • Use an optical digital audio cable to connect the AV Receiver’s DIGITAL IN OPTICAL 3 to the optical output on your recorder, as shown. -
Page 30: Connecting The Power Cord
With (Remote Interactive) you can control your -compatible Onkyo CD player, DVD player, and so on with the AV Receiver’s remote controller, and use the following special functions: Auto Power On/Standby... -
Page 31: Turning On
TX-SR502_En.book Page 31 Friday, March 12, 2004 1:05 PM Turning On • American • Other model models STANDBY/ON STANDBY/ON STANDBY/ON STANDBY/ON POWER SPEAKERS B SPEAKERS B PHONES PHONES POWER Turning On the AV Receiver Set the [POWER] switch to the ON position ( ). - Page 32 TX-SR502_En.book Page 32 Friday, March 12, 2004 1:05 PM First Time Setup —Continued Speaker Configuration This section explains how to specify which speakers are connected and their sizes. For speakers with a cone diameter larger than 6-1/2 inches (16 cm), specify Large .
- Page 33 (see page 32). Changing the TAPE/MD/CDR Display If you connect an -compatible Onkyo MiniDisc ] buttons to recorder or CD recorder to the TAPE IN/OUT sockets, to work properly, you must change this setting.
-
Page 34: Playing Your Av Components
TX-SR502_En.book Page 34 Friday, March 12, 2004 1:05 PM Playing Your AV Components This chapter explains how to use the AV Receiver with your other AV components. STANDBY INPUT Input MULTI CH TV CH selector TAPE TUNER T V VOL buttons + 10 CLEAR... -
Page 35: Playing Your Av Components
TX-SR502_En.book Page 35 Friday, March 12, 2004 1:05 PM Playing Your AV Components —Continued Displaying Source Information You can display various information about the current input source as follows. Press the [DISPLAY] button repeatedly to cycle through the available information. DISPLAY The following information can typically be displayed for input sources. -
Page 36: Using The Tuner
TX-SR502_En.book Page 36 Friday, March 12, 2004 1:05 PM Using the Tuner With the built-in tuner you can enjoy AM and FM radio stations. You can store your favorite stations as presets for quick selection. MASTER VOLUME PRESET TUNING DISPLAY STANDBY/ON STANDBY LISTENING... - Page 37 TX-SR502_En.book Page 37 Friday, March 12, 2004 1:05 PM Using the Tuner —Continued Presetting Radio Stations You can store up to 30 of your favorite radio stations as presets. Tune into the station that you want to store as a preset. Press the [MEMORY] button.
-
Page 38: Common Functions
TX-SR502_En.book Page 38 Friday, March 12, 2004 1:05 PM Common Functions This chapter explains functions that can be used with any input source. Before performing any of the procedures in this chapter, press the [AMP] button first to select AMP mode. STANDBY INPUT MULTI CH... -
Page 39: Muting The Av Receiver
TX-SR502_En.book Page 39 Friday, March 12, 2004 1:05 PM Common Functions —Continued Muting the AV Receiver With this function you can temporarily mute the output of the AV Receiver. Press the remote controller’s [MUTING] button. MUTING The output is muted and the MUTING indicator flashes on the display, as shown. -
Page 40: Using The Listening Modes
DTS-ES Discrete DTS-ES Matrix DTS+Neo:6 DTS+Dolby EX ❍ Orchestra ❍ Unplugged Onkyo ❍ original Studio-Mix ❍ TV Logic ❍ All Ch Stereo *1: Available when the Surr Back setting in the Speaker Configuration is set to None (see page 32). -
Page 41: Selecting Listening Modes
(see page 38). ■ [ DSP] & [DSP These buttons select the Onkyo original DSP modes. ■ [All ST] button This button selects the All Ch Stereo listening mode. SP A... - Page 42 TX-SR502_En.book Page 42 Friday, March 12, 2004 1:05 PM Using the Listening Modes —Continued About the Listing Modes The AV Receiver’s surround indicators show which speakers are active in each listening mode. Front left Center Front right Surround Surround Surround left back right...
- Page 43 DTS 5.1-channel material. Use it with CDs, DVDs, and LDs that bear the DTS or DTS 96/ 24 logo. Onkyo Original DSP Modes Orchestra Suitable for classical or operatic music. The center speaker is turned off and the surround channels are emphasized in order to widen the stereo image.
- Page 44 TX-SR502_En.book Page 44 Friday, March 12, 2004 1:05 PM Using the Listening Modes —Continued Dolby Digital/DTS setting (5.1 or 6.1-channel playback) If the Surr Back setting is set to anything other than None in the Speaker Configuration (page 32), and if the sur- round information in the current input signal is “...
-
Page 45: Recording
TX-SR502_En.book Page 45 Friday, March 12, 2004 1:05 PM Recording This chapter explains how to record the selected input source to an AV component with recording capability, and how to record audio and video from two different sources. Recording the Input Source You can record only to AV components that are con- nected to the TAPE OUT or VIDEO 1 OUT sockets. -
Page 46: Advanced Function
TX-SR502_En.book Page 46 Friday, March 12, 2004 1:05 PM Advanced Function Using the Audio Adjust Functions These functions only work with speaker set A. Audio Adjust provides various functions for adjusting the sound. TUNER/ TONE TAPE REMOTE MODE CABLE DIMMER SLEEP ENTER INPUT... -
Page 47: Digital Input Signal Formats
TX-SR502_En.book Page 47 Friday, March 12, 2004 1:05 PM Advanced Function —Continued 0 to 5 : Adjustable range. When set to 5, nothing is subtracted from the left and right channels. When set to 0, the left and right chan- nel levels are halved (–6 dB), making the center channel more dominant, particularly useful when the listener is off-center. -
Page 48: Advanced Setup
TX-SR502_En.book Page 48 Friday, March 12, 2004 1:05 PM Advanced Setup Crossover Frequency To get the best bass performance from your speaker sys- tem, you need to set the crossover frequency according to the size and frequency response of your subwoofer and other speakers (front, center, and surround). -
Page 49: Speaker Levels
TX-SR502_En.book Page 49 Friday, March 12, 2004 1:05 PM Advanced Setup —Continued Use the Left and Right [ buttons to specify the distance for “Front,” then press the Down ENTER ] button to select the next speaker. Repeat step 5 for all speakers. Note: Speakers that you set to No or None in the Speaker Configuration (page 32) -
Page 50: Controlling Other Components
If not, try again or try another code. Codes for Onkyo DVD Players The remote control code for an Onkyo DVD player depends on whether it’s connected via STANDBY 5001: Use this code if you’ve connected an and an analog audio cable (RCA) to your DVD player. - Page 51 5009 Integra 5001, 5002 Integra Research 5001, 5002 5023 Kenwood 5017 Magnavox 5004, 5021 Marantz 5025, 5026 Mitsubishi 5005 Onkyo 5001, 5002 Panasonic 5011, 5017, 5020 Philips 5004, 5021, 5028 Pioneer 5006 Proscan 5003 5003 Sanyo 5012 5007, 5013, 5018,...
- Page 52 TX-SR502_En.book Page 52 Friday, March 12, 2004 1:05 PM Controlling Other Components —Continued SAT (satellite receiver) Manufacturer Control code Tristar 4016 Unisat 4013 Universum 4021, 4024 Vortec 4017 Wela 4025 Zehnder 4020 Zenith 4032 CBL (cable receiver) Manufacturer Control code 3001, 3002, 3021 Archer 3006...
- Page 53 TX-SR502_En.book Page 53 Friday, March 12, 2004 1:05 PM Controlling Other Components —Continued Manufacturer Control code 2001, 2002, 2003, 2008, 2010, 2013, 2021, 2023, 2025, 2026, 2027 2007, 2008, 2010, 2011, Realistic 2012, 2017 2048 Roadstar 2033, 2043 Runco 2019 Saba 2040, 2048 Saisho...
- Page 54 TX-SR502_En.book Page 54 Friday, March 12, 2004 1:05 PM Controlling Other Components —Continued Manufacturer Control code Loewe 1014, 1040, 1055 Luxman 1004, 1006 1001, 1006, 1010, 1014, 1016, 1017, 1034 M Electronic 1035, 1053, 1062, 1063 Magnadyne 1040, 1067, 1068 Magnafon 1067 1004, 1006, 1008, 1014,...
- Page 55 TX-SR502_En.book Page 55 Friday, March 12, 2004 1:05 PM Controlling Other Components —Continued 1. Use the mode buttons to select the appropriate remote controller mode. 2. Point the remote controller at your AV compo- nent, and use the following buttons (you must enter the appropriate remote control code first).
-
Page 56: Troubleshooting
The surround speakers are not working? Possible cause The amp protection system has been acti- Contact your Onkyo dealer. vated. The AV Receiver is muted and the MUTING Unmute the AV Receiver (page 39). indicator is on. Make sure that all audio connecting plugs are pushed in all the way. -
Page 57: Troubleshooting
TX-SR502_En.book Page 57 Friday, March 12, 2004 1:05 PM Troubleshooting —Continued Symptom Possible cause The level of the surround back speaker is set at minimum. The Surround Back setting is set to None in the Speaker Configuration. The surround back speak- The selected listening mode doesn’t use the ers produce no sound? surround back speakers. - Page 58 TX-SR502_En.book Page 58 Friday, March 12, 2004 1:05 PM Troubleshooting —Continued Symptom Reception is noisy, inter- mittent, and the FM STE- REO indicator flashes? Reception is hindered by a crackling noise? AM reception is hindered by a buzzing noise, espe- cially at night or with weak signals? AM reception is hindered...
-
Page 59: Video Inputs
Specifications Amplifier Section 75 W (8 Ω , 20 Hz–20 kHz, FTC) Power output: 105 W (6 Ω , 1 kHz, DIN) All channels: 130 W (6 Ω , 1 kHz, EIAJ) 2 x 180 W (3 Ω , front) Dynamic power: 2 x 150 W (4 Ω... - Page 60 Tel: +49-8142-4401-0 Fax: +49-8142-4401-555 http://www.onkyo.net ONKYO CHINA LIMITED Units 2102-2107, Metroplaza Tower I, 223 Hing Fong Road, Kwai Chung, N.T., HONG KONG Tel: 852-2429-3118 Fax: 852-2428-9039 SN 29343629C (C) Copyright 2004 ONKYO CORPORATION Japan. All rights reserved. HOMEPAGE http://www.onkyo.com/ I0406-4...