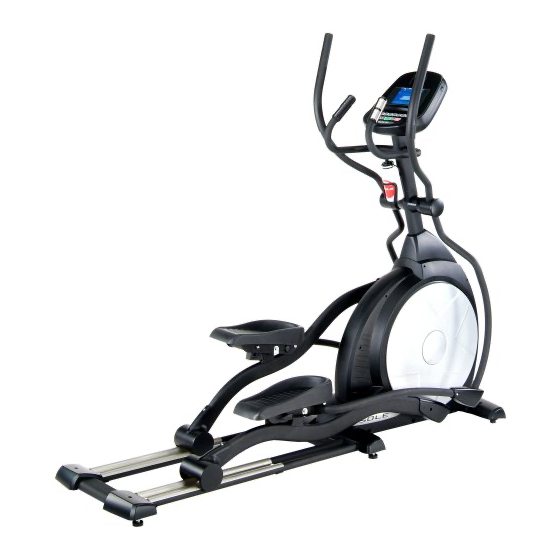
SOLE E25 Owner's Manual
Hide thumbs
Also See for E25:
- Owner's manual (37 pages) ,
- Owner's manual (34 pages) ,
- Owner's manual (32 pages)
Advertisement
Table of Contents
- 1 Record Your Serial Number
- 2 Register Your Purchase
- 3 Think Safety
- 4 Unpacking the Unit
- 5 Mast Assembly
- 6 Step 2: Handle Bar Assembly
- 7 Arm Assembly
- 8 Power Connector
- 9 Basic Information
- 10 Programming the Console
- 11 Preset Programs
- 12 Rate of Perceived Exertion
- 13 Maintenance
- 14 Warranty
- Download this manual
See also:
Owner's Manual
Advertisement
Table of Contents

Related Manuals for SOLE E25


Summary of Contents for SOLE E25
- Page 1 FmTNESS OWNER'S MANUAL PLEASE CAREFULLY READ THIS ENTIRE MANUAL BEFORE OPERATING YOUR NEW ELLIPTICAL!
- Page 2 Product Registration ..................Important Safety Instructions ................Important Electrical Information ................ Important Operation Instructions ............... E25 Assembly Instructions ................E55 Assembly Instructions ................Operation of Your New Elliptical ................ Manufacturer's Limited Warranty ............... ATTENTION-THIS ELLIPTICAL IS INTENDED FOR RESIDENTIAL ONLYAND IS WARRANTED FOR THATAPPLICATION.
-
Page 3: Record Your Serial Number
NEW ELLIPTICAL AND WELCOME TO THE SOLE FAMIL W Thank you for your purchase of this quality elliptical trainer from Sole. Your new elliptical was manufactured by one of the leading fitness manufacturers in the world and is backed by one of the most comprehensive warranties available. -
Page 4: Think Safety
• Do not operate elliptical on deeply padded, plush or shag carpet. Damage to both carpet and elliptical may result. • Keep children away from the elliptical. There are obvious pinch points and other caution areas that can cause harm. •... - Page 5 They are precision set to properly function with little finger pressure. Pushing harder is not going to make the unit go faster or slower. If you feel the buttons are not functioning properly with normal pressure, contact your Sole dealer. / E55 Elliptical...
-
Page 6: Unpacking The Unit
• UNPACKING THE UNIT 1. Using a razor knife (Box Cutter) cut the outside, bottom, edge of box along the dotted Line. Lift Box over the unit and unpack. 2. Carefully remove all parts from carton and inspect for any damage or missing parts. If damaged parts are found, or parts are missing, contact your dealer immediately. -
Page 7: Step 2: Handle Bar Assembly
Storing the excess wire back into the Console Mast, carefully install the Console onto the mounting plate of Console Mast and secure using the 4 pcs of M5 x lOm/m Phillips Head Screws. STEP 2: HANDLE BAR ASSEMBLY 1. Install the 2 pcs of 17m/m Wave Washers onto the Left and Right side of the Handle Bar axle. -
Page 8: Power Connector
POWER CONNECTOR LOCATED FRONT, LEFT HAND SIDE OF UNIT, Fransportation The elliptical is equipped with two transport wheels which are engaged when rear of the Elliptical is lifted. / E55 Elliptical... - Page 9 Step1 _,_.---Console / _Hand pulse wire harness Computer wire harness Console mast Drink bottle Console mast cover / E55 Elliptical...
- Page 10 Step2 //// //// Handle bar, left-../ Flat washer(2pcs) Handle bar axle Wave (2pcs) ,/_- ]' Handle bar, right ,,,, / E55 Elliptical...
- Page 11 Step3 Handle bar, left--.' Handle bar, right \Connecting arm(2pcs) " Pedal arm (2pcs) / E55 Elliptical...
- Page 12 Step 4 Handle bar, left ---::/" , ,,, ..Handle ,bar cover(4pcs) Handle _right Connecting armcover(4pcs) .... Front side of unit Front stabilizer Cover Foot pad (2pcs) ht side of unit "Connecting arm(2pcs) Middle stabilizer cover (2pcs) ..Wheel cover(2pcs) Rear stabilizer cover(2pcs) / E55 Elliptical...
- Page 13 • UNPACKING THE UNIT 1. Using a razor knife (Box Cutter) cut the outside, bottom, edge of box along the dotted Line. Lift Box over the unit and unpack. 2. Carefully remove all parts from carton and inspect for any damage or missing parts.
- Page 14 6. Using the two sided wrench tighten the three bolts, and the fourth bolt which is pre-installed, firmly. These bolts should be tightened as much as you possibly can. 7. Locate the electronic console and the four 1/2" X 1/4" Phillips head screws.
- Page 15 6. Align the hole in the end of the connecting arm (pivoting rod end) with the hole in the bracket of the handle bar. The rod end should be on the inside of the handle bracket. Take one of the 1-1/4" X 3/8" bolts and install it through the handle bracket and the rod end.
- Page 16 Step1 / 2 -Main wire harness pulse wire harness Bottle holder mast Bottle Console mast unit htside of unit Front stabilizer Pedal arms cover Middle stabilizer cover (2pcs) Rear stabilizer assembly o.over(2pcs) 13/14 mm Short Phillips 12 mm Wrench Screw driver Screw driver Wrench / E55 Elliptical...
- Page 17 Step3 / 4 bar, left Connecting le bar axle cover(4pc_ Handle bar, right Connecting arm1 cover(4pcs) Foot pad axle(2pcs) Foot ad(2pcs) ustment "_ pin (2pcs) Wheel cover(2pcs) / E55 Elliptical...
- Page 18 Adjustable foot pedals, and orthopedically correct foot pads E55 only Through research performed with a leading sports scientist and physical rehabilitation expert, Sole engineering has developed a breakthrough in pedal design. No other elliptical, at any price, offers these unique features.
- Page 19 Getting familiar with the control panel • E25 / E55 Console 3ooling switch ata display at matrix Display view window Program buttons/ numeric key pad Control Power up The Elliptical is supplied with an external power supply. When power is connected...
-
Page 20: Basic Information
Pressing the Enter button again will bring you back to the beginning. The E25 Elliptical has a built in heart rate monitoring system. Simply grasping the hand pulse sensors on the stationary handle bars, or wearing the heart rate transmitter, will start the Heart Icon blinking (this may take a few seconds). -
Page 21: Programming The Console
Programming the console Each of the programs can be customized with your personal information and changed to suit your needs. Some of the information asked for is necessary to ensure the readouts are correct. You will be asked for your Age and Weight. Entering your Age is necessary during the Heart Rate control programs to ensure the correct settings are in the program for your... -
Page 22: Preset Programs
the new number and proceed on to the next screen. 3. You are now asked to enter your Weight. You may adjust the Weight number using the Up and Down keys or the numeric key pad, then press enter to continue. Next is Time. - Page 23 one level, or screen. 7. If you want to increase or decrease the work load at any time during the program press the Up or Down key. This will only affect the workload for the present position in the profile. When the profile changes to the next column it will return to the preset work level.
- Page 24 The Cardio program is designed to increase your Cardio vascular function. This is, simply said, exercise for your heart and lungs. It will build up your heart muscle and increase blood flow and lung capacity. This is achieved by incorporating a higher level of exertion with slight fluctuations in work.
- Page 25 Start key. You can also go back and modify your settings by pressing the Enter key. NOTE: At any time during the editing of Data you can press the Stop key to go back one level, or screen. 7. If you want to increase or decrease the work load at any time during the program press the Up or Down key.
- Page 26 workout. The two programs, User 1 and User 2, operate exactly the same way so there is no reason to describe them separately. You can build your own custom program by following the instructions below or you can save any other preset program you complete as a custom program.
- Page 27 Heart Rate programs Before we get started, a word about Heart Rate: The old motto, "no pain, no gain", is a myth that has been overpowered by the benefits of exercising comfortably. A great deal of this success has been promoted by the use of heart rate monitors.
-
Page 28: Rate Of Perceived Exertion
TARGET HEART RATE TRAINING CHART m m== =,_=,,, = = Age of User Cardiovascular Rate of Perceived Exertion Heart rate is important but listening to your body also has a lot of advantages. There are more variables involved in how hard you should workout than just heart rate. Your stress level, physical health, emotional health, temperature, humidity, the time of day, the last time you ate and what you ate, all contribute to the intensity at which you should workout. - Page 29 The scale is as follows: Rating Perception of Effort 6 Minimal 7 Very, very light 8 Very, very light + 9 Very light 10 Very light + 11 Fairly light 12 Comfortable 13 Somewhat hard 14 Somewhat hard + 15 Hard 16 Hard + 17 Very hard 18 Very hard +...
- Page 30 2. Adjust the strap as tightly as possible as long as the strap is not too tight to remain comfortable. 3. Position the transmitter with the Sole logo centered in the middle of your body facing away from your chest (some people must position the transmitter slightly left of center).
-
Page 31: Maintenance
Heart Rate Control Program 1 & 2 (HR 1, HR 2) operation Both programs operate the same, the only difference is that HR 1 is set to 60% and HR 2 is set to 80% of maximum heart rate. They both are programmed the same way. -
Page 32: Warranty
6. Products that do not have a warranty registration card on file at Sole. Sole reserves the right to request proof of purchase if no warranty record exists for the product.