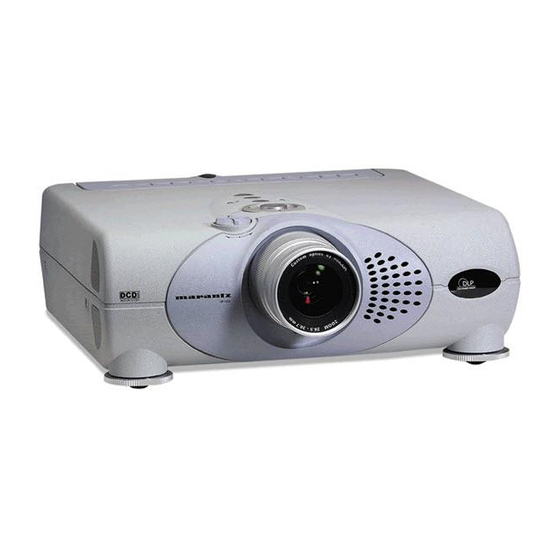
Marantz VP-12S1 User Manual
Video projector
Hide thumbs
Also See for VP-12S1:
- Service manual (58 pages) ,
- User manual (31 pages) ,
- Supplementary manual (2 pages)
Table of Contents
Advertisement
Quick Links
Advertisement
Table of Contents

Related Manuals for Marantz VP-12S1


Summary of Contents for Marantz VP-12S1
- Page 1 Model VP-12S1 User Guide Video Projector...
- Page 2 CAUTION RISK OF ELECTRIC SHOCK DO NOT OPEN CAUTION: TO REDUCE THE RISK OF ELECTRIC SHOCK, DO NOT REMOVE COVER (OR BACK) NO USER-SERVICEABLE PARTS INSIDE REFER SERVICING TO QUALIFIED SERVICE PERSONNEL The lightning symbol in the triangle, is intended to alert the user to the presence of uninsulated “dangerous voltage”...
-
Page 3: Important Safety Instructions
IMPORTANT SAFETY INSTRUCTIONS READ BEFORE OPERATING EQUIPMENT This product was designed and manufactured to meet strict quality Grounding or Polarization: Do not defeat the safety purpose of and safety standards. There are, however, some installation and the polarized or grounding-type plug. A polarized plug has two operational precautions which you should be particularly aware of. - Page 4 When the projector is mounted on the ceiling, the Ceiling Mount Kit approved by MARANTZ must be used for installation. Do not look into the lens when the projector is turned on. It could damage your eyesight.
-
Page 5: Table Of Contents
TABLE OF CONTENTS FEATURES ........................2 INTRODUCTION PROJECTOR LAYOUT AND FUNCTIONAL OVERVIEW ........... 3 Front and Top ....................3 Right Side and Rear ..................4 Bottom ....................... 5 Adjusters ......................5 Remote Controller ....................6 Preparing the Remote Controller ............... 7 INSTALLATION ...................... -
Page 6: Features
• The Marantz film detection technology: Three to Two Pull Down for NTSC and Two to Two Pull Down for PAL video Enjoy various entertainment opportunities signal, ensures to depict most natural moments of objects projected in the recorded in the film format. -
Page 7: Projector Layout And Functional Overview
PROJECTOR LAYOUT AND FUNCTIONAL OVERVIEW Front and Top i !3 !4 !5 !1 !0 VP-12S1 q IR sensor (one for each front or rear) !1 FOCUS key Press to display a focus pattern. w Lens !2 The 5 / ∞ / 2 / 3 keys e Focus ring Control the menu cursor. -
Page 8: Right Side And Rear
EXTERNAL. Otherwise select INTERNAL. ⁄5 Lamp cover . REMOTE CONTROL IN/OUT ⁄6 Lamp cover securing screw Connect to the REMOTE CONTROL connectors of other Marantz equipment. It is then possible to control the whole ⁄7 Ventilation holes system with a single Remote Controller. -
Page 9: Bottom
Bottom Ventilation hole Adjuster button Adjuster button Adjusters How to use adjuster and adjuster button. (1) Adjuster button (2) Adjuster PRESS DOWN DOWN... -
Page 10: Remote Controller
INTRODUCTION ¡0 THEATER key Remote Controller Select the Theater picture mode. The key toggles between Theater1, Theater2, Theater3 and Theater Default. ¡1 STANDARD key Select the STANDARD picture mode. The key toggles between Standard1, Standard 2, Standard 3, and Standard Default. ¡2 DYNAMIC key Select the Dynamic picture mode. -
Page 11: Preparing The Remote Controller
Preparing the Remote Controller CAUTION Open the cover. – The available battery types are limited: manganese dry cell and alkaline dry cell. – Do not mix different battery types. – Do not mix old and new batteries. – Only batteries of the same type are to be used. –... -
Page 12: Installation
Horizontal positioning Top view Ceiling Installation For ceiling installation, consult with Marantz dealer. Ceiling V P - 1 2 S 1 Projecting distance CAUTION – Do not look into the lens when the projector is turned on. -
Page 13: Distance Between The Projector And The Screen (Throw Distance)
Distance between the projector and the screen (throw distance) Screen size (Diagonal) V P - 1 2 S 1 Throw distance 16:9 screen Throw distance Screen Size Unit : mm (inches) (inches) Minimum Maximum 1,281 1,491 1,945 2,260 (89) 2,609 3,029 (102 (119... -
Page 14: The Screen Image In A Widescreen (16:9)
SET UP PROCEDURES The Screen Images in a Widescreen (16:9) • Press the ZOOM key, the NORMAL key or the FULL key on the remote controller for the 4:3 aspect ratio video source. • Press the FULL key on the remote controller for 16:9 aspect ratio video source, such as 1080I, 1035I, and 720p video systems. •... -
Page 15: Installing
INSTALLING When making connections be sure to: • Turn off all equipment before making any connections. • Use the proper cables for each connection. • Insert the plug for the cables properly. Any plugs that are not fully inserted often generate a noise. When pulling out a cable: •... -
Page 16: Connection With A Dv Commcoder
SET UP PROCEDURES Connection with a DV commcoder DV-SD OUT DV camcoder Note: DV IN connector is available for DV-SD format of i.Link(IEEE1394). INITIAL SET UP TO TURN OFF THE POWER Connect the supplied AC power cord. Press the STANDBY key on the remote controller or the The STANDBY indicator lights up and the projector POWER key on the projector. -
Page 17: Operations
OPERATIONS Menu Setting Refer to the on-screen menu for making various adjustments The following settings can be made: and settings. Press the MENU key. The menu display appears. 7 Aspect (Full, Normal, Zoom, Through) 7 High Bright (On, Off) High Bright ON: Display brightest image. 7 Cinema (Auto, Off) Cinema mode: The three to two pull down for NTSC 5 / ∞... -
Page 18: Configuration
OPERATIONS Configuration Trigger2 The following adjustments can be made: Select 12V DC or 0V from on and off at each aspect ratio. 7 OSD Position (16:9 / 4:3 / Through ) Aspect 7 Language (English/ German/ French/ Spanish/ FULL 12 V DC Portuguese/ Italian) NORMAL 12 V DC... -
Page 19: Lamp Life And Replace Lamp
When the lamp life has expired (Lamp Life 0 HOURS), Lamp Life and Replace Lamp the unit will be immediately turned off, and the WARNING indicator will blink in orange. Lamp Life The user can display the remaining lamp life at any time by pressing the INFO key on the remote controller. -
Page 20: Maintenance
• Do not loosen any screws except for those mentioned below. • The lamp may break if handled improperly. • Do not use a lamp housing other than a Marantz replacement lamp unit. Replacement parts WARNING: • The lamp itself may get hot. Be careful when handling. -
Page 21: Troubleshooting
The Remote Controller does not work. IR sensor on unit is obstructed. Remove any obstacles. The “EXTERNAL” position on the REMOTE Use MARANTZ REMOTE CONTROL or select CONTROLLER on the connector panel is INTERNAL. selected. Notes: • When the projector is installed on the ceiling and the WARNING indicator lights up or flashes, never open the lamp cover. -
Page 22: On Screen Message
ADDITIONAL INFORMATION Title ON SCREEN MESSAGE Use the list below to check the message displayed on the screen. Message Meaning Recommendation NO SIGNAL No input signal. Check the connection. IREPLACE LAMP! The lamp has reached the end of its life. Replace the lamp and reset lamp life. - Page 23 7 Timing chart V ( Hz ) H ( KHz ) System Resolution Scan NTSC 768x240 59.94 / 60 15.73 PAL-B/G 960x287.5 15.63 SECAM 960x287.5 15.63 480/60p 720x480 59.94 / 60 31.5 576/50p 720x576 31.3 1035/60i 1920x518 59.94 / 60 33.8 1080/60i 1920x540...
-
Page 24: Dimensions
ADDITIONAL INFORMATION DIMENSIONS FRONT VP-12S1 416 mm... - Page 25 Note :...
- Page 26 PASCO GmbH PO BOX 1280, Sandhausen 69200, Germany NETHERLANDS Marantz Domestic Sales A division of Marantz Europe B.V., Building SFF2, P.O. Box 80002, 5600 JB Eindhoven, The Netherlands NEW ZEALAND Wildash Audio Systems 14 Malvern Road, Mt. Albert, Auckland, New Zealand...