Table of Contents
Advertisement
Advertisement
Table of Contents

Related Manuals for ProScan PS27500


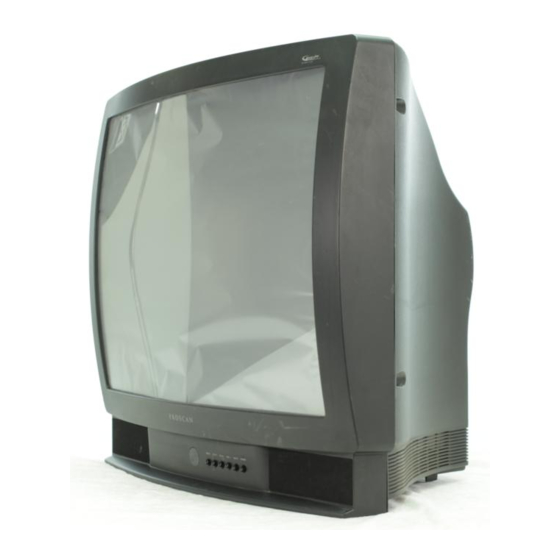
Summary of Contents for ProScan PS27500
- Page 1 USER'S MANUAL...
- Page 2 IMPORTANT INFORMATION ___To reduce tl_e risk of e_[ktric shock, do not remove r balll_o_l_erviceable parts inside. Refer D_Op_ ser_ t_ifie_ice Pers°nnel. l_k This symbol indicates This symbol indicates "dangerous voltage" inside the important instructions product that presents a risk of accompanying the product.
-
Page 3: Table Of Contents
TABLE OF CONTENTS SETUP AND CONNECTIONS ........ .-... 3 Step 1 : Unpack the TV ............. Step 2: Connecting your TV ........2..TV Only (PIP Not Available) ........The Basic connection (pip not available) ....Advanced Connections .......... - Page 4 Channel Menu ............... Time Menu ..............Parental Controls Menu ..........GUIDE Plus+ Menu ............Setup Menu ..............PIP (Picture-in-Picture) Operation ........Channel Marker ............. TROUBLESHOOTING ............CARE AND CLEANING ............. PROSCAN TV LIMITED WARRANTY ......41 ACCESSORY INFORMATION ......... INDEX ..................
- Page 5 SETUP AND CONN GETTING STARTED This manual is designed to get yo_ The first four sections of the to get yourTV Setup and Jn the Interactive Setup, Rem_ and use all_ the Features and of yourTV. book The Reference secti_in the back contains troubleshoot_ng_ps, care cleaning...
-
Page 6: Setup And Connections
SETUP AND CONNECTIONS STEP I: UNPACK THETV Before You Connect Make sure to locate the remote control and your GUIDE Plus+ Booklet. Protect against power surges: • Connect all components before STEP 2: CONNECTING YOUR "l"Y plugging any power cords into the wall outlet. -
Page 7: The Basic Connection (Pip Not Available)
SETUP AND CONNECTIONS- THE BASIC CONNECTION (PIP NOT AVAILABLE) The basic connection below (TV and VCR) is the most common connection and is therefore used to illustrate a single component connection with your TV. For better sound and picture quality and multiple component connection information refer to the next section, Advanced Connections. -
Page 8: Advanced Connections
SETUP AND CONNECTIONS ADVANCED CONNECTIONS Advanced connections give you better sound and video by separating the audio and video signals and enable you to connect multiple components. This section describes the types of inputs available on the back of your TV and suggests ways you can use them for optimum performance. - Page 9 SETUP AND CONNECTIONS Cautions: SAMPLE CONNECTIONS The following are sample connection scenarios which you may Position cables to Avoid Audio Hum or encounter when connecting components to your TV. Note: those Interference components which offer an S-Video connection, such as DVD, VCR or •...
- Page 10 SETUP AND CONNECTIONS TV,VCR AND SATELLITE RECEIVER CABLE, CABLE BOX, OR ANTENNA SATELLITE RECEIVER TO VIEW YOUR COHPONENTS To watch the Satellite Receiver in this connection, press TV to put the remote control into TV mode, then press WHO.INPUT to scroll through the video input channels until you tune to VID1 ( or S-VID 1) input.
-
Page 11: Step 3:Connecting The Ir Controller
SETUP AND CONNECTIONS STEP 3: CONNECTING CONTROLLER The IR {Infrared) Controller enables GUIDE Plus+ Gold" to control your VCR and cable box {if necessary) so that you can tune to television channels and even start recording a program from the program guide. After you have affixed the ends of the controller to the necessary devices (VCR, or Cable box), you will use the on-screen interactive setup routine for GUIDE Plus+ to test the connected devices. -
Page 12: Step 4: Plug In The -Iv
SETUP AND CONNECTIONS STEP 4: PLUG IN THETV Plug the end into the wall outlet, matching the wide blade of the plug with the wide slot in the outlet. Be sure to insert the plug completely. PLACE STEP 5: BATTERIES IN REMOTE •... - Page 13 INTERACTIVE SETU THERE'S AN ONSCREEN SETUP ROUTINE The interactive setup routine take h the steps needed to configure theTV: • Select a menu languJ INTI • Search for availabl_channels • Set upthe GUID_Plus+ • Set the time • SettheVCRI channel •...
-
Page 14: Interactive Setup
INTERACTIVE SETUP USING POINT SELECT You only need to know one rule when using the remote to access on- screen menus and control panels: point and select. The point and select method has two steps. Point to a menu item using the MOVE arrows on the remote. To point up or down, press the up or down arrows. -
Page 15: Select A Language
INTERACTIVE SETUP Point to Begin setup now and press MENU or OK. SELECT A LANGUAGE The first part of the setup routine asks you to select your preferred language for the menu system. Point to your preferred language for the menu system. Press MENU or OK to select that language. -
Page 16: Guide Plus+ System
INTERACTIVE SETUP GUIDE PLUS+ SYSTEM The next step lets you set up the GUIDE Plus+ system to display your control your cable box and VCR. local program listings, You can press MENU or OK up the GUIDE Plus+ initial either to bring menu or point... -
Page 17: Set The Vcr1 Channel (Auto Tuning)
INTERACTIVE SETUP SET THEVCRI CHANNEL (AUTO TUNING) The next step lets you set the VCR1 channel. When you set the VCR1 channel, you're telling the TV what channel to tune to when you press the VCR1 button on the remote. This is Auto Tuning. Indicate which input you used to connect the VCR. -
Page 18: Set The Dvd Channel (Auto Tuning)
INTERACTIVESETUP Press MENU or OK to bring up the VCR2 choice list. Point to the choice that matches the way you have your second VCR connected to the TV. Press MENU or OK to continue. SET THEDVD CHANNEL TUNING) (AUTO The next step lets you set the DVD channel. -
Page 19: Set The Sat/Cable Channel (Auto Tuning)
INTERACTIVE SETUP Point to the choice that matches the way you have your DVD player connected to the TV. Press MENU or OK to continue. SAT/CABLE SET THE CHANNEL (AUTO TUNING) The next step lets you set the SAT/CABLE channel. When you set the SAT/CABLE channel, you're telling the TV what channel to tune to when you press the SAT-CABLE button on the remote. -
Page 20: Label The Channels
INTERACTIVE SETUP LABEL THE CHANNELS This last step in the Interactive Setup lets you create your channel list and label your channels. (For more, see List and Labels in the Features and Menus section.) Press MENU or OK to bring up the List and Labels control panel. Use the left and right arrows to point to the three different areas of the control panel (called "fields"). -
Page 21: Using The Remote
USING THE RE TO USEYOUR UNIVERSAL REMOTE SETU ]TIONS This section defines the buttons p0hents. how to program it to control ,ed to The universal remote can b__ lableVCRs, :TIVE S[ control most brands of_mote have an satellite receivers, a_n_cable boxes. RCA, GE, or PROS_N compor probably don't need to _ogram... -
Page 22: Remote Buttons
When pressed twice within two seconds all devices that are on will be turned off (this feature only works with most RCA, ProScan and GE products). VCR1 Puts the remote in VCR mode and if autotuning is enabled, it will turn on the TV and tune to the correct channel. -
Page 23: Using The Who.input Button
USING THE REMOTE MENU Brings up the Main menu and selects highlighted items. When in VCR mode, it functions as a PROGRAM button. CLEAR Removes any menu or display from the screen and returns you to TV viewing. Will also exit the Guide system. (0-9) Number Buttons Enters channel... -
Page 24: Programming The Remote
The universal remote can be programmed to control most brands of remote controllable VCRs, satellite receivers and cable boxes. The remote is already programmed to control most RCA, GE and PROSCAN TVs, VCRs, DVD players, laserdisc players and satellite receivers. -
Page 25: Using The Remote To Controla Device
USING THE REMOTE Look up the brand and code number{s} for the component on the code list on the last pageof this section, Using the Remote. Press and hold the button on the remote you want to program. Enter the code from the code list. Release button, and then press ONoOFF to see if the component... - Page 26 Portland ........2 016.2017,2019,2110 Philips ..501 I, 50 12, 5013, 50 19, 5025, 5030, 503 I, 5032 Canon ............202 I, 2022, 2114 Proscan ............2 000, 200 I Pioneer ..............5033, 5034 Capehart ............2020, 2110 Protec ................206 I Pulsar .................
- Page 27 FEATURE S AND USING THETV This section exploresthe features and your TV and control beginning with some panels. Each menu is then outlined__a_l special 4 tures are d_t_iled in from yot INTE order to help you get the_ost can be found - Information on using, your GUIDE -._..
-
Page 28: Features And Menus
FEATURES AND MENUS MENUS AND PANELS CONTROL Using the buttons on both the remote and front panel enable you to access and make changes to the Menus and Control Panels. Menus use the point and select rule to navigate, but control panels use a variety of methods to adjust features on your TV. -
Page 29: Control Panels
FEATURES AND MENUS CONTROL PANELS VCRI ON'OFF Control Panels allow you to adjust the default settings on many features of your TV. You can choose a setting, enter a number, or adjust VCR2 SAT-CABLE &&o&& a level such as tint or brightness. There are three types of control panels: sliders, choice lists, and numeric entry. -
Page 30: Audio Menu
FEATURES AND MENUS CHOICE LISTS Choice lists are used to choose a particular setting from a list of settings. Point to a choice from the list and press MEN U or OK to select that choice. Now that you know how to access the menus and adjust the control panels the following pages provide a brief explanation of all the menu features. -
Page 31: Using The Remote To Select An Audio Processor
FEATURES AND MENUS Second Audio Program (SAP) Plays the program's audio in a second language, if one is available. The TV displays the word SAP when you tune to a Program that is broadcast with SAP information. SAP audio isbroadcast in mono. SAP is also used to broadcast a program's audio with descriptions of the video for the visually impaired. -
Page 32: Picture Quality Menu
FEATURES AND MENUS PICTURE QUALITY MENU Basic Picture Controls Displays the five slider controls for adjusting the way the picture looks. Contrast Adjusts the difference between the light and dark areas of the picture. Color Adjusts the richness of the Color. Tint Adjusts the balance between the red and green levels. -
Page 33: Screen Menu
FEATURES AND MENUS SCREEN MENU Closed-Caption Display Displays a choice list that lets you choose the way closed captioning information is shown on the screen. Off No captioning information displayed. On Captioning information shown always, when available. On When Sound is Muted Displays captioning information, when available, whenever the TV's sound is muted by pressing the MUTE button. -
Page 34: Using Closed Captioning
FEATURES AND MENUS USING CLOSED CAPTIONING Many programs are encoded with closed captioning information, which lets you display the audio portion of a program as text on the TV screen. Closed captioning is not available on all channels at all times. Only specific programs encoded with closed captioning information are applicable. -
Page 35: Channel Menu
FEATURES AND MENUS CHANNEL MENU Signal Type Displays a choice list that lets you select the current antenna type. This option does not appear when the TV GUIDE Plus+ system is set up. UHF/VHF Antenna Choose this if you are currently using an off-air antenna for TV signals. -
Page 36: Time Menu
FEATURES AND MENUS The choices for each screen are: Not Connected Choose this if you do not have a component connected to an antenna or video input on the back of the TV, or if you don't want the TV to tune to a channel when the particular component button is pressed. -
Page 37: Parental Controls Menu
FEATURES AND MENUS PARENTAL CONTROLS MENU Parent Approved Channels Displays a control panel that lets you decide what channels can be viewed or selected using the rv's front panel controls. Chan # Use the up and down arrows to scroll up and down through the channel scan list. -
Page 38: Guide Plus+ Menu
FEATURES AND MENUS GUIDE PLUS+ MENU GUIDE Plus+ Setup Displays the GUIDE Plus+ setup screen. Setup Setting up the GUIDE Plus+ system is detailed in the GUIDE Plus+ booklet. View Demo Runs the GUIDE Plus+ demonstration. GUIDE Plus+ Label Displays the GUIDE Plus+ Label menu. On Displays the station name when you change channels. -
Page 39: Pip (Picture-In-Picture)
FEATURES AND MENUS (PICTURE-IN-PICTURE) OPERATION The PIP (picture-in-picture) feature lets you display a second, smaller picture on top of the main picture. Your TV is equipped with a single tuner that tunes to cable or off-air television signals. The PIP feature on your TV requires a second video source, like a VCR or satellite receiver to supply the second picture to the screen. -
Page 40: Channel Marker
FEATURES AND MENUS PIP PROBLEMS. _ CABLE. CABLE BOX, OR ANTENNA • Make sure the remote is in the right mode. For example, once you turn on the VCR with the VCR1 button, you can't SWAP the pictures until you put the remote in TV mode. Just press the "IV .€... -
Page 41: Troubleshooting
REFERENCE TROUBLESHOOTING Troubles sometimes are caused by simple "faults" that you can correct without the help of a service technician. If you experience any difficulty with your TV, check a few basic remedies before calling your service technician. TV WILL NOT TURN ON •... -
Page 42: Care And Cleaning
REFERENCE CAN'T •SELECT CERTAIN CHANNEL • Channel may be blocked or not approved in the Parental Controls menu. • If using a VCR, check to make sure the TV/VCR switch on the VCR is in the correct position. Noisy STEREO RECEPTION •... -
Page 43: Proscan Tv Limited Warranty
HOW YOU GET SERVICE: • For screen sizes of 26" and smaller: Take your ProScan television to any Authorized ProScan Television Service Center and pick up when repairs are complete. •... -
Page 44: Accessory Information
REFERENCE ACCESSORY INFORMATION Antenna (or cable-TV) connections are made with either The following accessories are available from most dealers coaxial antenna cable or twin-lead cable. Coaxial and electronics supply stores in case you want to position cables are shielded so they are less susceptible to hum your components farther apart or need additional cables. - Page 45 REFERENCE Remote Control This is the Accessory Order Form remote control that came Description packed with your TV. Screw-on antenna cable (3-ft) Replacements or spares can be ordered as needed. Screw-on antenna cable (6-ft) VH82 $6.95 Push-on antenna cable (6-ft) VH89 $5.95 -_, ._- I...
- Page 46 REFERENCE UNITED STATES AND CANADA ORDERS Charge your order on your VISA, MasterCard, or Discover Card by To place your order by phone, have your Visa, MasterCard filling in below or Discover Card ready and call the toll-free number listed USE YOUR CREDIT CARD below between 8AM and 8PM (EST)Monday through IMPORTANT:...
-
Page 47: Index
REFERENCE Accessories 42 DVD Channel 16, 33 Remote Control Advanced Connections 4. 6 DVD player remote codes 24 Installing the batteries Audio menu 28 Programming Audio Output Volume & Speakers Remote batteries are low 38 Remote control Fixed images 40 Audio Processor 28 Fixed Output, Speakers Off 29... - Page 48 CREATING A GREENER FUTURE At Thomson Consumer Electronicswe are dedicated to the preservation of our natural heritage and to a healthy and safe way of life for current and future generations. This is a global effort which encompasses every THOMSON facility throughout the world.