
Related Manuals for Zoom R8


Summary of Contents for Zoom R8
- Page 1 AUDIO INTERFACE MANUAL © ZOOM Corporation Reproduction of this manual, in whole or in part, by any means, is prohibited.
-
Page 2: Table Of Contents
Contents Contents Audio interface and control surface Cubase LE Installation overview Audio interface . . . . . . . . . . . . . . . . . . . . . . . . . . . . . . . . . . . . . . . . 6 Control surface . - Page 3 Mixer in audio interface mode Volume, reverb send, pan . . . . . . . . . . . . . . . . . . . . . . . . . . . . . . . . . . .26 Stereo link .
-
Page 4: Audio Interface And Control Surface
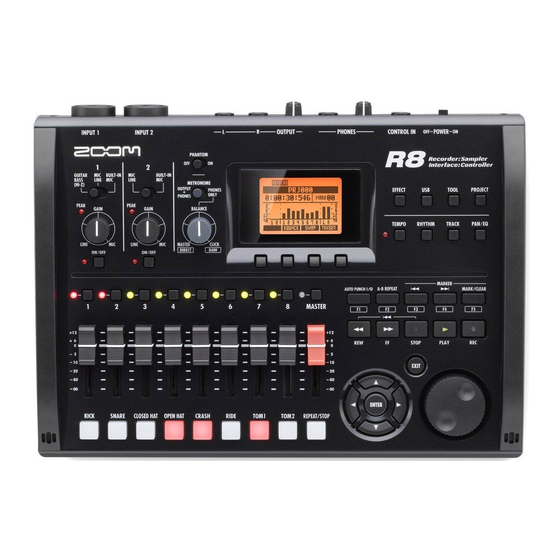
Audio interface and control surface This section explains how to connect the unit with a computer and how to set up and use the audio interface and control surface functions of the with a DAW and other software Functions of the audio interface and control surface INPUT jacks PHONES jack OUTPUT jacks... - Page 5 Supports input from a variety of Versatile effect functions sources, including guitars, mics and line level instruments Built-in insert effects can be applied to specific channel paths, and two-types The two onboard jacks include one high- of send/return effects work via the mixer impedance input.
-
Page 6: Cubase Le Installation Overview
❷ Install DAW software Reference: "Cubase LE Startup Guide" Cubase LE Install driver Reference: "Cubase LE Startup Guide" ZOOM R8 audio driver* Connect R8 to computer Audio interface setup DAW software setup Device setup Reference: "Cubase LE Startup Guide" ZOOM R8 audio driver Control surface setup P.10, 30~... -
Page 7: R8 Audio Interface System Requirements
Windows Please refer to the Cubase LE Startup Guide Windows® XP SP3 or later (32-bit) for detailed instructions on installing the ZOOM Windows® Vista SP1 or later (32-bit, 64-bit) audio driver and Cubase LE. Windows® 7 (32-bit, 64-bit) 32-bit: Intel®... -
Page 8: Connecting And Disconnecting In Audio Interface Mode
Connect the to the computer software on the computer. using a USB capable. Press USB. Install the ZOOM audio driver on the computer from the included SD card. (No driver is necessary for use with Macintosh computers.) Select AUDIO I/F. -
Page 9: Disconnecting
Disconnecting Press the below or press Select Change menu Press ENTER. NOTE Select CONTINUE to use the same settings as last time. • INSERT EFFECT settings • SEND RETURN EFFECT settings • Mixer settings • TUNER settings Select RESET to restore default settings for each item. •... -
Page 10: Using Control Surface Functions
, as well as other trans- port/function keys that are supported by Cubase LE, please consult the “Control surface functions MIDI input: ZOOM R8 quick reference guide” in this manual . MIDI output: ZOOM R8 Reference: Control surface functions quick ☞... -
Page 11: Transport Section
Transport section By setting up the control surface, the transport section keys can be assigned to indi- vidual functions in Cubase LE. F1 key F2 key F3 key F4 key F5 key REW key FF key STOP key PLAY key REC key Fast Rewind... -
Page 12: Fader Section Operation
Fader section operation Using the faders and status keys of the fader section, you can adjust the volume of corresponding Cubase LE tracks, mute and solo them, and arm them for recording About banks Operating the fader section After setting up control surface operation, the Assign the Cubase LE tracks main parameters of Cubase LE can be oper- (channels) that you want to control... -
Page 13: R8 Level Meters (Audio Interface Use)
level meters (Audio interface use) Signal just before being Signal returning from sent to computer shown the computer shown . Checking DAW recording levels Set “REC SIGNAL” (in the INSERT EFFECT menu) to set whether signals are sent to the computer “WET” (with effect) or “DRY”... -
Page 14: Setting The Function Keys
Setting the function keys The five keys above the transport keys can be used as function keys (F1~F5) and assigned as desired Function key setup Choose the type of Cubase LE Open the “Device setup…” dialog function from the Category pop-up in Cubase LE. -
Page 15: Control Surface Functions Quick Reference Guide
Control surface functions quick reference guide These functions work with Cubase LE, Cubase, Logic Pro, SONAR, Ableton Live and Digital Performer Control Explanation Status keys Turns mute, solo or record arming on/off for tracks Fader section 1–8 faders Controls the volume of the corresponding tracks MASTER fader Master volume operation Change functions of status keys, change banks and end... -
Page 16: Recording With Cubase Le
\templates Macintosh /Applications/CubaseLE5.app/Contents/ templates/ Launch Cubase LE. Template names and details ZOOM R8 Mono Recording Project with Cubase LE mono tracks 1–2 assigned INPUTS 1–2 ZOOM R8 Stereo Recording Project with a Cubase LE stereo track assigned to INPUTS 1–2 Choose “New Project”... -
Page 17: Create A New Audio Track
Set the save location and click the Create a new audio track “OK” button (“Choose” button on Mac OS X). Set-up the audio tracks that were The project file save location window is displayed. made as follows. To add a new audio track, select “Add Track” from the “Project”... -
Page 18: Connect An Instrument
Recording With Cubase LE Enable track monitoring and Connect an instrument recording. Channel corresponding to an audio track Master Channel Connect an instrument such as a guitar to an INPUT jack and choose an effect patch. The chosen effect patch will be applied to the signal and can be recorded on the computer via the USB port. -
Page 19: Adjust The Recording Level
After adjusting the recording level, Adjust the recording level click the Monitor button so that it becomes grey. While playing the instrument, adjust the input level and set the Cubase LE recording level. Monitor Level Meter button This turns off display of the input level, and mutes the signal from the computer to the When the Monitor button is off, the signal just before it is sent to the computer can be monitored... -
Page 20: Recording
Recording with Cubase LE Recording Check the recording (playback) Click the Record button on the Lower the master channel fader. Transport Panel to start recording. Stop button Record button As you play the instrument, a recorded waveform is drawn in real time in the project window. To stop recording, click the Stop button in the Transport Panel. - Page 21 Tips to improve performance When using Cubase LE, application perfor- mance could become extremely delayed or Raise the master channel fader to a error messages such as “cannot synchronize suitable playback level. with USB audio interface” might be dis- played. Should such things happen often, the following measures might improve the situation.
-
Page 22: Importing Audio Into Cubase Le
Importing audio into Cubase LE By connecting a computer and the with a USB cable and setting the function as a card reader, you can import audio data as WAV files into Cubase LE audio tracks Importing by drag & drop Connect the computer and the Launch Cubase LE. - Page 23 Select the file (or files) that you In the “Import Options” window wish to import from the “AUDIO” click the “Copy Files to Working folder and drag and drop them Directory” check box, and click into the Cubase LE project the OK button.
-
Page 24: Using The "Import" Command
Importing audio into Cubase LE Using the “Import” command Connect the computer and the Open the Cubase LE project into with a USB cable. which you want to import audio data. Press USB. READER Select Change menu From the Cubase LE “File” menu select “Import”... - Page 25 Select the desired audio file (or When importing multiple files at files) from the “AUDIO” folder of one time, select either “Different the project from which you wish Tracks” or “One Track” as the to import. Click “Open.” import method. The audio data is assigned to one or more Cubase LE tracks.
-
Page 26: Mixer In Audio Interface Mode
Mixer in audio interface mode In audio interface mode you can make a mix for monitoring using the internal mixer In addition, you can adjust the balance of the sound from the internal mixer and from the computer Volume, reverb send, pan Stereo link You can be adjust the reverb send, pan, Link INPUT 1 and 2 to handle them as stereo... -
Page 27: Tuner
Tuner tuner can be used as when in audio interface mode For details, see the Operation Manual (P.108). Chromatic tuner HINT TOOL > TUNER • The default value of the standard pitch is 440 Hz. • Tuners other than the chromatic tuner can also Press TOOL. -
Page 28: Effects In Audio Interface Mode
Effects in audio interface mode insert and send-return effects can both be used when the sampling frequency is set to 44 1 kHz Basic operation is the same but there are a few differences in the menus Insert effect Send return effect As in recording mode, you can select the insert When used as an audio interface, the send location and the insert effect algorithm, as... -
Page 29: Working With Patches
Working with patches After making many changes, you can restore a patch to its pre-edited settings by initializing it This will return it to its factory preset condition Patch initialization (factory reset) Patch operations For both insert and send return effects EFFECT >... -
Page 30: Control Surface Setup For Other Daws
Then, from the top of the list at the example, might be different in a left set “Out Port” and “Input” to different version of Logic. “ZOOM R8” using their pull-down menus. Please refer to the manual for the version of Logic that you are using... -
Page 31: Sonar
Click “Customization”. Click the “Add” button and open the “Controller/Surface Settings” window. Click “Key bindings”. Choose “ZOOM R Series” from the Click “Locate Key…” drop-down menu of the “Controller/ surface” column. Press the F1-F5 key that you Select “ZOOM R8” in the input/ want to setup to see the currently output port column. -
Page 32: Ableton Live
Control Surface The above procedures are for column. Ableton Live 8. The names of the menus, for Select “ZOOM R8” from the pull- example, might be different in a down menus of the Input and different version of Live. -
Page 33: Digital Performer
Click the “+” icon in the Control Digital Performer Surface window and select “Mackie Control” from the “Driver” pull- down menu. Control surface setup Select “Mackie Control” from the “Unit” pull-down menu that will be Launch the Audio MIDI Setup displayed at bottom. - Page 34 4-4-3 Kanda-Surugadai, Chiyoda-ku, Tokyo 101-0062 Japan Web Site: http://www.zoom.co.jp R8-Audio Interface Manual-E-1...
- Page 35 Using the R8 with Mac OS X 10.5.8 If noise should occur when using the as an audio interface with Mac OS X 10.5.8, follow the procedures below to change the audio class setting. Setting the audio class HINT Connect the and the computer by ●...
- Page 36 When a “Windows security” warning message appears, click “Install”. and install it on a computer. The ZOOM R8 Audio Driver software is required to enable audio InstallShield Wizard completes input and output with a computer when using Cubase LE. Refer to Click “Finish”...
- Page 37 If USB bus power is supplied to the via a USB cable and verify that in the as Device Port column “ZOOM R8 Driver L/R” which is more than 3 meters in length, a low voltage warning might is selected for the Inputs and “ZOOM R8 Driver 1/2” is selected for appear.