
Related Manuals for Sharp AQUOS BD-MPC41U


Summary of Contents for Sharp AQUOS BD-MPC41U
- Page 1 BD-MPC41U OPERATION MANUAL MANUAL DE OPERACIÓN MODE D'EMPLOI HOME THEATER WITH BLU-RAY DISC/DVD PLAYER SISTEMA DE TEATRO EN CASA CON REPRODUCTOR DE BLU-RAY Y DVD CINÉMA-MAISON AVEC LECTEUR DE DISQUE BLU-RAY/DVD...
- Page 3 OPERATION MANUAL ENGLISH “Note to CATV system installer: This reminder is provided to call the CATV system installer's attention to Article 820-40 of the National Electrical Code that provides guidelines for proper grounding and, in particular, specifies that the cable ground shall be connected to the grounding system of the building, as close to the point of cable entry as practical.”...
-
Page 4: Table Of Contents
Main Unit (Rear) ............15 To Dim the Display ............42 Sound Bar Speaker (Magnetically Shielded) ....16 Operating a SHARP TV Using the Remote Control ..42 Surround Speakers ............. 16 TV function control ..........42 Subwoofer ..............16 AQUOS LINK Control ..........43-44... - Page 5 Contents Playback Functions ............55-57 Fast Forward/Reverse (Search) ........55 Skipping to the Next or the Start of the Current Chapter (Track/Title) ....... 55 Pause/Frame Advance Playback ......... 55 What to do first: Slow Playback ............55 Skip Search ..............55 Refer to “Getting Started”...
-
Page 6: Dear Sharp Customer
DEAR SHARP CUSTOMER Thank you for your purchase of the SHARP Home Theater with Blu-ray Disc/DVD Player. To ensure safety and many years of trouble-free operation of your product, please read the Important Safety Instructions carefully before using this product. -
Page 7: Important Safety Instructions
IMPORTANT SAFETY INSTRUCTIONS • Outdoor Antenna Grounding — If an outside antenna Example of antenna grounding as per National Electrical Code, ANSI/NFPA 70 or cable system is connected to the product, be sure the antenna or cable system is grounded so as to provide some protection against voltage surges and built-up ANTENNA LEAD IN static charges. -
Page 8: Precautions
Hold the AC power plug by the head when removing it from the AC outlet, as pulling the cord can damage internal wires. • Do not remove the outer cover, as this may result in electric shock. Refer internal service to your local SHARP service facility. •... -
Page 9: Main Features
Main Features [1] Features a new design with a sound bar front speaker to complement flat screen TVs. • Sound bar speaker houses the left, center, and right channel speakers in a single box. [2] Uses well-established Audyssey room equalization technologies to expand the listening area and reproduce dynamic and powerful sound. -
Page 10: What Would You Like To Do With This System
What would you like to do with this system? Watching high quality movies on Enjoy movies streamed from Netflix Instantly watch movies streaming via this system. Blu-ray discs By connecting this system to the Internet, you can This system offers full high-definition Blu-ray disc instantly watch TV episodes and movies streamed playback. -
Page 11: About Media Types
About Media Types • BD/DVD video players and discs have region codes, which Blu-ray Disc dictate the regions in which a disc can be played. This system's region code is A for BD and 1 for DVD. (Discs Blu-ray Disc is the ultimate next generation optical marked ALL will play in any player.) media format, offering the following key features: •... - Page 12 About Media Types The following CD-RW/R discs cannot be played. The following files cannot be played on this • Discs on which data has not been recorded cannot be system. played back. • When both Audio CD [CD-DA] format and JPEG/MP3 file •...
-
Page 13: About Disc Contents
About Media Types About Disc Contents DTS is a digital sound system developed by DTS, Inc. for use in cinemas. BD Video Linear PCM Linear PCM is a signal recording format used for Audio CDs and on some DVD and Blu-ray discs. The sound Enjoy BD-specific functions including BONUSVIEW (BD-ROM Profile 1 Version 1.1), such as picture-in-picture, and BD-LIVE on Audio CDs is recorded at 44.1 kHz with 16 bits. -
Page 14: Important Information
Never use commercially available cleaning discs. The use of Audyssey Laboratories. of these discs can damage the lens. • Request the nearest service center approved by SHARP to clean the lens. Warnings about dew formation • Condensation may form on pick up lens or disc in the following conditions: −... -
Page 15: Getting Started
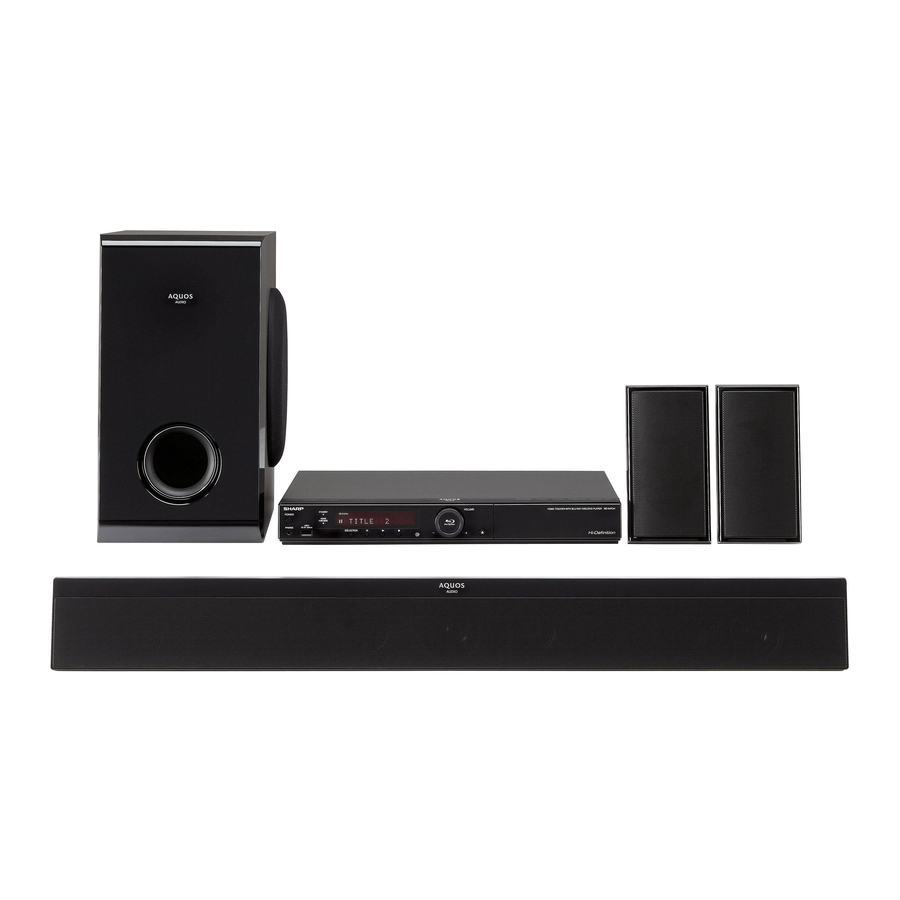
Getting Started Step 1: Unpacking Make sure the following system components and accessories are provided with the product. ■ System components Main Unit Speakers: Sound Bar speakers (L/R/Center), Surround speakers (L/R), Subwoofer ■ Accessories Remote control (x 1), “AAA” size battery (x 2) AC power cord (x 1) Page 34 Video cable (x 1) -
Page 16: Getting Started
Getting Started Step 2: Connecting to speakers and selecting equipment Make necessary connections each speakers. Refer to “Positioning the Speaker System” (Pages 18-21) and “Speaker Connections” (Pages 22-23). Connection varies with the equipment used. Refer to Connection. (Pages 24-33) Turn off the devices before connecting. For using online services such as BD-LIVE, Netflix and RSS To use the online services available on this system (BD-LIVE, Netflix or RSS), after an Internet connection is made, communication setup is required. -
Page 17: Major Components
Major Components Main Unit (Front) 14 15 Door flap SELECTOR (p.41) PAUSE (pp. 50, 55) PHONE jack (p. 42) d PLAY (p. 45) POWER (p. 36) USB2 terminal (p. 77) STOP (p. 45) When you insert or remove a USB memory device, be sure Front panel display (pp. -
Page 18: Sound Bar Speaker (Magnetically Shielded)
Major Components Sound Bar Speaker (Magnetically Shielded) Mounting slot for wall mount angle Speaker terminals (right) Speaker terminals (center) Speaker terminals (left) Surround Speakers Mounting Holes Speaker Terminals Subwoofer Bass Reflex Duct Speaker Terminals Woofer Front Panel Display Various information about the operating condition of the unit is shown here, including the input source, volume level setting, sound mode, mute, playback time etc. -
Page 19: Remote Control
Major Components Remote Control POWER (p. 36) OPEN/CLOSE (p. 41) FM (p. 62) TOP MENU (pp. 46, 48) Cursor buttons ( a /b/ c / d ), ENTER (pp. 37, 67) TUNING a /b, PRESET DOWN c /PRESET UP d (p. -
Page 20: Positioning The Speaker System
Positioning the Speaker System Placing the Speaker System To ensure optimal sound, it is recommended that you set up the speaker system as shown below. Sound Bar speaker (left/center/right) Installation image Subwoofer Default setting: 10 feet Surround Surround speaker (left) speaker (right) Default setting: 8 feet... -
Page 21: How To Apply Foot Cushions
Driving screws Mounting on a wooden wall SHARP designed the speakers so you may hang them on the wall. Mount on a sturdy part with thickness of 2" (5 cm) or more. Use proper screws (not supplied). See below for size and type. -
Page 22: To Mount The Sound Bar Speaker On The Wall
Positioning the Speaker System To mount the Sound Bar Speaker on the wall Wall mount angle fixed on the wall Installing the Sound Bar Speaker (Horizontal position) Before installing the speaker, connect the speaker connection cords to the speaker. (See pages 22-23.) Fix the pattern paper to the wall in horizontal Align the wall mount slot at the speaker to the position as below. -
Page 23: To Mount The Surround Speakers On The Wall
Positioning the Speaker System To mount the Surround Speakers on the wall Screw fixed on the wall Installing the Surround Speaker Before installing the speaker, connect the speaker Decide and make marks where to fix the screws connection cords to the speaker. (See pages 22-23.) on the wall in horizontal or vertical position as bellow. -
Page 24: Speaker Connections
Speaker Connections Speaker Connections • The speaker terminals on the main unit, the tube of the speaker lead, and speaker labels are distinguished by colors. • Connect the speaker and the unit by matching the colors. Speaker terminals Sound Bar Speaker (right/center/left) Black Black Black... -
Page 25: Connecting Speaker Wires
Speaker Connections Connecting speaker wires Make sure to leave the AC power lead disconnected when connecting the speakers. To prevent accidental short circuit between m and n terminals, connect the speaker wires to the speakers first then to the main unit. Connect the wires to the speakers. -
Page 26: Tv Connections
TV Connections Connecting to the HDMI Terminal and the DIGITAL AUDIO IN Terminal • You can enjoy high quality digital picture through the HDMI terminal. • When you use AQUOS LINK, make sure to use a certified HDMI cable. • You can enjoy the TV sound through the DIGITAL AUDIO IN terminal. -
Page 27: Selecting The Priority Video Output When Connecting Hdmi And Component Video
“Settings” – “Audio Video Settings” – “Video Out Select”. (See page 68.) NOTE • When you connect the system to a SHARP TV with an HDMI cable only and the TV is turned on, the video output switches to HDMI automatically. (The above setting is unnecessary.) •... -
Page 28: Connecting To The Component Video Out Jacks And Analog Audio In Jacks
TV Connections Connecting to the COMPONENT VIDEO OUT Jacks and ANALOG AUDIO IN Jacks • You can enjoy accurate color reproduction and high quality images through the component jacks. • You can enjoy the TV sound through the ANALOG AUDIO IN jacks. STEPS 1: Be sure to turn off this system and the equipment before making any connections. -
Page 29: Connecting To The Video Out Jack And Analog Audio In Jacks
TV Connections Connecting to the VIDEO OUT Jack and ANALOG AUDIO IN Jacks • You can enjoy the images through the video jack. • You can enjoy the TV sound through the ANALOG AUDIO IN jacks. STEPS 1: Be sure to turn off this system and the equipment before making any connections. 2: Firmly insert the cables all the way into the terminal connector (1, 2, 3 and 4). -
Page 30: Audio Connections
Audio Connections Connecting to the DIGITAL AUDIO IN Terminal • You can enjoy the audio equipment sound through the DIGITAL AUDIO IN terminal. STEPS 1: Be sure to turn off this system and the equipment before making any connections. 2: Firmly insert the cables all the way into the terminal connector (1 and 2). Main Unit To DIGITAL AUDIO IN terminal... -
Page 31: Connecting The Analog Audio In Jacks
Audio Connections Connecting the ANALOG AUDIO IN Jacks • You can enjoy the audio equipment sound through the ANALOG AUDIO IN jacks. STEPS 1: Be sure to turn off this system and the equipment before making any connections. 2: Firmly insert the cable all the way into the terminal connector (1 and 2). Main Unit To ANALOG AUDIO IN jacks... -
Page 32: Connecting To The Ipod Terminal
Audio Connections Connecting to the iPod Terminal • You can enjoy the iPod sound through the iPod terminal. STEPS 1: Be sure to turn off this system and the equipment before making any connections. 2: Firmly connect an iPod cable to the iPod terminal. Main Unit To iPod terminal iPod cable... -
Page 33: Connecting To The 2Ch Audio Output Jacks
Audio Connections Connecting to the 2CH AUDIO output Jacks • You can connect audio equipment to 2CH AUDIO output jacks. STEPS 1: Be sure to turn off this system and the equipment before making any connections. 2: Firmly insert the cable all the way into the terminal connector (1 and 2). Main Unit To 2CH AUDIO output jacks... -
Page 34: Broadband Internet Connection
By connecting this system to the Internet, you can enjoy a variety of content on your TV using BD-LIVE functions, the RSS reader function and Netflix. • This system can update the software from Sharp’s server using the Internet. • When using the Internet, a broadband Internet connection as shown below is required. -
Page 35: Antenna Connection
Antenna Connection Connecting to the FM ANT Jack You can connect an FM antenna to the system to receive FM broadcast. STEPS 1: Be sure to turn off this system and the equipment before making any connections. 2: Firmly insert the cable all the way into the terminal connector. Connecting a supplied FM antenna wire Connect the FM antenna wire to the FM ANT jack and position the FM antenna wire in the direction where the strongest signal can be received. -
Page 36: Before Starting Playback
Before Starting Playback Loading the Batteries in the Approximate operating range of Remote Control remote control Remote control sensor Press down on the tab in the direction of the arrow to remove the battery cover. 30º 30º approx. 22 feet (7 m) Remote control Load the two “AAA”... -
Page 37: Setting The Remote Control Code
RC-1, RC-2 and RC-3. If you operate this system by Point the remote control at the main unit, then remote control along with SHARP Blu-ray Disc Player or press and hold the ON SCREEN for more than DVD Player placed next to it simultaneously, switching the remote control code (both the main unit and remote 10 seconds. -
Page 38: Turning The Power On
Before Starting Playback Turning the Power On Entering standby Press POWER on the remote control or on the main unit to enter standby. • If you press POWER again immediately after entering standby, the system may not turn on. If this happens, wait for 10 seconds or more and then turn on the power again. -
Page 39: Language Setting
When loading a disc, this function sometimes cannot be displayed. language • Please note that SHARP does not take any responsibility for the contents displayed with this function. Press BD/AUX repeatedly to select DISC function. Press BD/AUX repeatedly to select DISC •... -
Page 40: Control Panel
Before Starting Playback Major functions of each button icon Control Panel • Display the pop-up menu screen for POP-UP This function allows you to operate this system using BD video and the menu screen for DVD MENU the TV remote control by displaying the control panel video. -
Page 41: Speaker Settings
Before Starting Playback Press a/b to adjust the item to the desired Speaker Settings setting, then press ENTER. • See the information on the right column for details on To ensure optimal sound, configure the speaker each adjustment item. settings according to the speaker position. Buttons under the cover 10ft/0dB 10ft/0dB... -
Page 42: Testing The Speaker Settings
Before Starting Playback Testing the speaker settings Adjust the volume to 30 before testing the audio level. (Page 41) Press a/b/c/d to select “Test Start”, then press ENTER. • A test tone is outputted from each speaker in the following order. L➝C➝R➝RS➝LS➝SW 10ft/0dB 10ft/0dB... -
Page 43: Basic Operations
Basic Operations VOLUME Changing the input selection with OPEN/CLOSE POWER control the remote control The operation buttons vary depending on the input mode. SELECTOR Loading a Disc Pressing BD/AUX changes the input mode as follows. DISC DIGITAL 1 DIGITAL 2 ANALOG To change the FM input mode, press FM. -
Page 44: Changing The Display
VOLUME Press DIMMER to dim the display. • Press DIMMER again to cancel dim. Sound mode Operating a SHARP TV Using the *1 The elapsed time is displayed during disc playback. Remote Control NOTE • If no buttons are operated for 3 seconds during the volume... -
Page 45: Aquos Link Control
What is AQUOS LINK? Using the HDMI CEC (Consumer Electronics Control), with AQUOS LINK you can interactively operate this system with your SHARP AQUOS TV. What you can do with AQUOS LINK When you connect this system to the AQUOS TV compatible with AQUOS LINK using an HDMI cable, you can perform the function listed below. -
Page 46: Watching Tv With Aquos Link
AQUOS LINK Control Watching TV with AQUOS LINK Listening to the sound through the AQUOS TV sound reproduction Use the remote control of the AQUOS TV and point it towards the AQUOS TV for operation. You can opt to listen to the TV sound only from the AQUOS TV. -
Page 47: Video/Picture/Music Playback
Video/Picture/Music Playback BD/DVD Video Playback Displaying the disc information BD VIDEO BD-RE BD-R DVD VIDEO DVD-R DVD-RW This section explains playback of commercially available BD Video and DVD Video discs (like movies), Press ON SCREEN during playback. and recorded DVD-RW/R discs. •... -
Page 48: Bd/Dvd Menus
Video/Picture/Music Playback BD/DVD Menus Using the disc menu • This section explains how to play back a BD/DVD DVD VIDEO video disc with a top menu, disc menu or pop-up Example: Select “SUBTITLE LANGUAGE”. menu. Press TOP MENU. • The titles listed in the top menu and a disc guide (for •... -
Page 49: Enjoying Bonusview Or Bd-Live
NOTE • The playback methods vary depending on the disc. For • SHARP cannot guarantee that all brands’ USB memory details, refer to the disc manual. devices will operate with this system. • Only USB memory devices formatted with FAT 32/16 are compatible. -
Page 50: Bd-Live
Video/Picture/Music Playback NOTE BD-LIVE • “Finalize” refers to a recorder processing a recorded disc so that it will play in other DVD players/recorders as well as In this system, a variety of contents with interactive this system. Only finalized DVD discs will play back in this functions are available through BD-LIVE compatible Blu- system. -
Page 51: Playback By Selecting A Chapter
Video/Picture/Music Playback About Title List Sorting the titles • The Title List can be displayed in two types, Thumbnail and Title Name. Each time you press B (Green) while the Title Name • Each time you press A (Red), the screen changes between screen is displayed, the Title Name display changes Thumbnail and Title Name. -
Page 52: Audio Cd Playback
Video/Picture/Music Playback Audio CD Playback Playback by selecting a track AUDIO CD Press a/b to select the track, then press ENTER during playback or when playback is This system can play back audio CDs. stopped. • For a description of other playback functions, refer to •... -
Page 53: Audio Data (Mp3 File) Playback
Video/Picture/Music Playback Press a/b to select “DVD/CD*” or “USB Audio Data (MP3 File) Playback Memory Device”, then press d or ENTER. * Display name varies depending on the type of media CD-R CD-RW DVD-R DVD-RW inserted. • If only a “DVD/CD” or a USB memory device is This system can play back audio data (MP3 files) inserted, the “DVD/CD”... -
Page 54: Displaying Still Images (Jpeg Files)
Video/Picture/Music Playback Press a/b to select a folder or file. Displaying Still Images (JPEG files) • When you select a folder, press ENTER to open it, and then press a/b to select a file in the folder. CD-R CD-RW DVD-R DVD-RW Folder 1 This system can display still images (JPEG files) -
Page 55: Instantly Watching Movies From Netflix
For more information on Netflix visit http://www.netflix. com/help or login to your Netflix account and click “Help” Subscribe by visiting http://www.netflix.com/ at the top of the page. sharp from your PC. • Netflix is only available in the US. •... -
Page 56: Adding Content To The Instant Queue
Video/Picture/Music Playback You will see the following window. The title you selected is displayed. To return to the step 10, press a. • The activation code is displayed. • Press a/b to select “play”, then press ENTER or • The screen of this system shown on the TV d PLAY to start playback. -
Page 57: Playback Functions
Playback Functions Pause/Frame Advance Playback BD VIDEO BD-R BD-RE DVD VIDEO DVD-R DVD-RW The Pause function is enabled when PAUSE is pressed during playback. (If you are playing back an audio CD, audio data [MP3 files] or still images [JPEG Buttons under the cover files], these will also pause.) The Frame Advance Playback function is enabled when... -
Page 58: Repeat Playback Of A Title Or Chapter (Repeat Playback)
Playback Functions Repeat Playback of a Title or Partial Repeat Playback (Repeat Chapter (Repeat Playback) Playback of a Specified Part) BD VIDEO BD-R BD-RE DVD-R DVD-RW DVD VIDEO AUDIO CD DVD VIDEO DVD-R DVD-RW AUDIO CD Press REPEAT during playback. Press a/b to select “Scene Selection”, then Play back the title or chapter you want to repeat. -
Page 59: Displaying The Audio Information
Playback Functions Switching the Angle BD VIDEO DVD VIDEO If multiple angles are recorded, you can switch NOTE between them. • Some operations in the following playback function cannot Press ANGLE during playback. be performed depending on the specifications of the disc. •... -
Page 60: Settings During Playback
Settings During Playback Function Control operation Function Control procedure BD VIDEO BD-R BD-RE Buttons under the cover DVD VIDEO DVD-R DVD-RW AUDIO CD This allows you to adjust various settings at once, like subtitles, angle settings and the title selection for Direct Playback. -
Page 61: Functions Which Can Be Set
Settings During Playback Functions which can be set Title/Track Number (Direct Title/Track Skip) • Shows the title number being played back (or track number when playing back an audio CD). You can skip to the start of the title (or track). •... -
Page 62: Listening To The Ipod
Listening to the iPod Supported iPod Connecting the iPod • This system is compatible with the following iPod models. See page 30 to connect the iPod cable to the main unit. iPod nano (software 1.2 above) How to connect the iPod cable iPod mini (software 1.2 above) Insert the connector into the terminal of the iPod. -
Page 63: Ipod Playback
Listening to the iPod Various iPod functions iPod Playback Function Main Remote Operation Main unit operation: unit control Play Press in the pause mode. Pause Press in the playback mode. (PLAY) SELECTOR Track Press in the playback (PAUSE) up/down or pause mode. If you press the button Press SELECTOR on the main unit repeatedly —... -
Page 64: Listening To The Fm Broadcast
Listening to the FM Broadcast Buttons under the cover Presetting a Station You can preset up to 20 FM stations and recall them by pressing PRESET c/d. Perform Steps 1 to 2 in “Tuning” on the left. Press ENTER to enter the channel presetting mode. -
Page 65: Audio Settings And Operations
Audio Settings and Operations Various Audio Settings Buttons under the cover Changing the audio setting You can switch between main audio and sub audio for dual mono input or when playing back a dual mono disc. Press AUDIO. • Pressing AUDIO changes the mode as follows. MAIN Audio Setting Display Pressing BD FUNCTION during playback displays the... -
Page 66: Enjoying Multi-Channel Mode
Audio Settings and Operations Enjoying Multi-Channel Mode Audyssey Technology Audyssey EQ ® Audyssey EQ is based on the same core technology as Audyssey MultEQ that is used for automatic correction of room acoustics. Audyssey EQ uses time-domain filters to correct problems that arise from speaker drivers and When playing back Dolby Digital, DTS or other multi- enclosures and is calibrated to account for the acoustical channel audio signals, the system automatically selects... -
Page 67: Enjoying A Surround Sound Effect (Sound Mode)
Audio Settings and Operations Enjoying a Surround Sound Effect Enjoying preset sound mode (Sound Mode) Select any of the 10 sound modes preset to the optimal sound quality levels. Buttons under the cover Select a desired sound mode by pressing one of the SOUND MODE buttons. -
Page 68: Dynamic Volume
Audio Settings and Operations Dynamic EQ You can adjust the Dynamic EQ offset level. Press DYNAMIC VOL twice continuously. • The current Dynamic EQ offset level is displayed. Press a/b within 3 seconds to adjust the desired offset as the below indicated. 0 dB Dynamic Volume You can adjust the Dynamic Volume level. -
Page 69: Settings
SETTINGS Common operations The “menu” enables various audio/visual settings and adjustments on the functions using the remote control. You need to call up the On Screen Display to perform settings for this system. The following is the explanation for the basic operations of the “menu”. -
Page 70: Audio Video Settings
SETTINGS Audio Video Settings Video Out Select Dual video output is possible simultaneously from the TV Aspect Ratio COMPONENT VIDEO OUT jacks and the HDMI OUT terminal with the following settings. Select the video You can set the screen aspect ratio of the connected output which you want to have priority according to TV, and adjust the video output. -
Page 71: Speaker Settings
SETTINGS Smart Settings Dynamic Range Control This lets you adjust the range between the loudest Quick Start and softest sounds (dynamic range) for playback at average volume. Use this when it is hard to hear This turns the Quick Start function on and off. dialog. -
Page 72: Playback Setting
SETTINGS Playback Setting Password Setting This sets the password for setting or changing the Parental Control Parental Control Level. This lets you set the Parental Control depending on the Item disc content. The available Parental Control Levels are Yes: Enter the 4-digit number. shown below. -
Page 73: Communication Setup
SETTINGS For setting the IP address, press c/d to select Communication Setup “Yes” or “No”, then press ENTER. This allows you to perform and/or change the Do you obtain the IP address communication setting. This setting is required to use automatically? BD-LIVE functions, the RSS reader function, Netflix and software updates that connect to the Internet. - Page 74 SETTINGS For the advanced setting (the setting of the Ethernet connection speeds), press a/b to select “Yes” or “No”, then press ENTER. • Normally select “No”, then press ENTER. • The Ethernet connection speeds can be set when you select “Yes”, then press ENTER. •...
-
Page 75: The Operation Procedure For Inputting Characters Manually
SETTINGS Press c/d to select a number/character, then The operation procedure for press ENTER. inputting characters manually Repeat the step 3 to display all of the desired characters/numbers in the input field. NOTE • Numeric characters such as IP address can be entered on Example: The screen for inputting numeric characters the input screen either by selecting each of the characters in the “Numeric”... -
Page 76: Usb Memory Management
Press a/b to select “Erase” or “Format”, then NOTE: press ENTER. • SHARP cannot guarantee that all brands’ USB memory devices will operate with this system. Erase: Deletes only BD-VIDEO data written on the USB • Only USB memory devices formatted with FAT 32/16 memory device such as BD-LIVE data. -
Page 77: Software Update Settings
SETTINGS Update process Software Update Settings When this system is turned on, the internet connection starts automatically. In this system, the software version can be updated • “Accessing...” blinks on the screen. using either one of the following methods. • Auto Update from Network •... -
Page 78: Manual Update From Network
SETTINGS During access to the network and checking the Manual Update from Network latest version of firmware, “Accessing” blinks. • The current version of this unit software and the latest This function allows you to perform the update version of the update file on the network are displayed operation by accessing an internet connection when latest version of firmware has been found. -
Page 79: Manual Update From Usb Memory Device
USB1 terminal may give priority to Local you have any questions, please call 1-800-BE- Storage and the USB1 terminal may not be able to be used SHARP (800-237-4277). for Software Update. • When software update data is released, copy the data onto a USB memory device after downloading it to a PC. - Page 80 SETTINGS During the data checking, “Checking” blinks. When the software is successfully updated, a screen is displayed indicating that the update process is completed. Now checking the data in USB memory device. • If the update has failed, check the file in the USB device and try Software Update again.
- Page 81 SETTINGS Country Code List USA / CANADA / JAPAN / GERMANY / FRANCE / UK / ITALY / SPAIN / SWISS / SWEDEN / HOLLAND / NORWAY / DENMARK / FINLAND / BELGIUM / HONG KONG / SINGAPORE / THAILAND / MALAYSIA / INDONESIA / TAIWAN / PHILIPPINE / AUSTRALIA / RUSSIA / CHINA Language List English / Français / Deutsch / Italiano / Español / Japanese / Svenska / Nederlands...
-
Page 82: Troubleshooting
Troubleshooting The following problems do not always suggest a defect or malfunction of this system. Refer to the problems and lists of possible solutions below before calling for service. Power Problem Possible causes and solutions The system power cannot be turned •... - Page 83 Troubleshooting Picture Problem Possible causes and solutions No picture. • Make sure that the cables are connected correctly. (Pages 24-27) • Make sure that the connected TV or the AV receiver is set to the correct input. (Pages 24-27) • Take out the disc and clean it.
- Page 84 Troubleshooting Network Problem Possible causes and solutions Cannot connect to the Internet. • Is the LAN cable connected properly? • Is the wrong cable such as a modular cable used? Connect a LAN cable to the ETHERNET terminal. (Page 32) •...
-
Page 85: Error Messages
Since all settings including the language setting stored in memory are also reset when a reset has been performed, they must be set again. • When the problem persists even after performing a reset, unplug the AC cord and plug it in again. If this does not solve the problem, contact the nearest service center approved by SHARP. -
Page 86: Specifications
Specifications As part of our policy of continuous improvement, SHARP reserves the right to make design and specification changes for product improvement without prior notice. The performance specification figures indicated are nominal values of production units. There may be some deviations from these values in individual units. -
Page 87: Glossary
Glossary AQUOS LINK (pages 43-44) Blu-ray Disc (BD) (page 9) AQUOS LINK is a function that lets the system control A disc format developed for recording/playing high- and be controlled by the operations of a connected definition (HD) video (for HDTV, etc.), and for storing AQUOS TV that supports AQUOS LINK. - Page 88 Glossary DTS-HD High Resolution Audio Interlace format DTS-HD High Resolution Audio is a new technology Interlace format shows every other line of an image developed for the next generation high definition as a single “field” and is the standard method for optical disc format.
-
Page 89: Glossary
Glossary Netflix (pages 53, 54) Subtitles (pages 57, 58, 59) Netflix is an online DVD and Blu-ray Disc rental service, These are the lines of text appearing at the bottom of offering rental-by mail and streaming instantly to Netflix the screen which translate or transcribe the dialog. unlimited members. -
Page 90: Network Service Disclaimer
Therefore, any use of such third party content and services must be in accordance with any authorization or terms of use provided by such content or service provider. Sharp shall not be liable to you or any third party for your failure to abide by such authorization or terms of use. -
Page 91: About Software License
The copyrights for the software components and various relevant documents included with this product that were developed or written by SHARP are owned by SHARP and are protected by the Copyright Act, international treaties, and other relevant laws. This product also makes use of freely distributed software and software components whose copyrights are held by third parties. -
Page 92: Limited Warranty
FROM STATE TO STATE. The warranties given herein shall be the sole and exclusive warranties granted by Sharp and shall be the sole and exclu- sive remedy available to the purchaser and only for the time periods set forth herein. No other representations or prom- ises made by anyone are permitted. - Page 94 Memo...
- Page 96 SHARP ELECTRONICS CORPORATION Sharp Plaza, Mahwah, New Jersey 07495-1163 SHARP CORPORATION Printed in Malaysia Imprimé en Malaisie Impreso en Malasia TINS-E595WJQZ 10P04-MA-NM...