Table of Contents
Advertisement
Save this Manual
for Future Reference
Sears !
MODEL NO,
113.207600
SAW ONLY
MODEL NO.
113.207650
SAW WITH
LEGS
Serial
Number
Model
and
serial
number may be found
at the right-hand
side
of the base
You should record both
model and serial number
in a safe place for
future use,,
CAUTION:
Read
GENERAL
and
ADDITIONAL
SAFETY
H_STRUCT_ONS
carefully
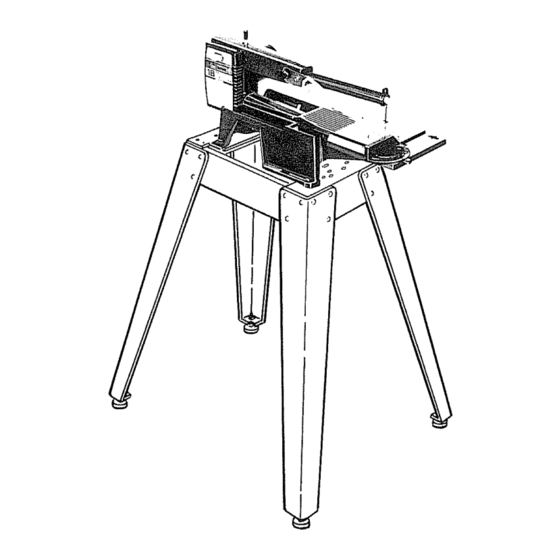
18=iNCH
MO TORIZED
SCROLL
SA W
® assembly
o operating
o repair parts
Sold by SEARS,
ROEBUCK
AND
CO.,
Chicago,
iL
601384
U.S.A.
Part No
66017
Printed
in USA,
Advertisement
Table of Contents

Related Manuals for Craftsman 113.207650


Summary of Contents for Craftsman 113.207650
- Page 1 Save this Manual for Future Reference Sears ! MODEL NO, 113.207600 SAW ONLY MODEL NO. 113.207650 SAW WITH LEGS Serial Number Model serial number may be found at the right-hand side of the base You should record both model and serial number in a safe place for future use,, 18=iNCH...
- Page 2 FULL ONE YEAR WARRANTY ON CRAFTSMAN SCROLL If within one year from the date of purchase, this Craftsman Scroll Saw fails due to a defect in material or workmanship, Sears will repair it, free of charge+ WARRANTY SERVICE IS AVAILABLE...
-
Page 3: Additional Safety Instructions
additional safety instructions for scroln saw Safety is a combination of operator common sense m When backing the blade out of the workpiece, and alertness at all times when the scroll saw is the blade may bind in the kerf (cut) this is being used usuaNy caused by sawdust... -
Page 4: Motor Specifications And Electrical Requirements
location and function of controls TENSION KNOB ON/OFF SWITCH GUARD LOCK KNOBS BLADE HOLDER RETAINING CLIPS GUARD BLOWER TUBE ]OLDERS BLADE HOLDER POCKETS BEVEL SCALES TABLE INSERT MITER GAUGE BEVEL LOCK KNOB LOCK KNOB BLADE STORAGE motor specifications and electrical requirements Plug power cord intoa 110-120Vproperlygrounded This machine is equipped with a 1725 RPM motor... -
Page 5: Unpacking And Checking
contents GETTING TO KNOW YOUR SCROLL SAW POWER TOOL WARRANTY ....Tension Control Knob ....GENERAL SAFETY INSTRUCTIONS Guard Lock Knobs ....... FOR POWER TOOLS ......Guard ........ADDITIONAL SAFETY INSTRUCTIONS Blower Tube ........FOR SCROLL SAW ......Blade Holder Retaining Clips ..... -
Page 6: Assembling Steel Legs
FOR LEG SET This Leg Set is included with Model No 113,207650 only, NOTE: For illustrative purposes, the Scroll Saw is shown mounted on the Craftsman Catalog No 9- 22239 Steel Leg Set ASSEMBLING STEEL LEGS SIDE STIFFNER... -
Page 7: Mounting Scroll Saw To Workbench
MOUNTING HOLES MOUNTING SCROLL 1 Place the Scroll Saw on the Steel Legs, position as shown by aligning the mounting holes in the base of the Scroll Saw with those in the END STIFFENERS (marked with X in 0 Oo REAR illustration) 2 Mount... - Page 8 assembly _ ..MOUNTING SCROLL FROM BOTTOM MOUNTING BOARD OF MOUNTING COUNTER SINK BOARD An alternate method of mounting is to fasten Scroll Saw to a mounting board The board should be of sufficient size to avoid tipping of saw while in use. Any good grade of plywood or chipboard with a 3/4"...
-
Page 9: Blade Installation And Tensioning
BLADE DNSTALLATUON TENSIONnNG FOR PLAnN-END OF{ PRN TYPE BLADES NOTE: Included with the scroll saw are three 5" blades. This saw can accommodate 5" to 6" plain- end blades, and 5" pin type blades. 'TO INSTALL/TENSION PLAIN-END BLADES: WARNING: YOUR SAFETY, TURN SWITCH... - Page 10 assembly 7 Locate table insert among loose parts and install in table by sliding the insert in place from back to front of blade, aligning rear tab on back of insert, and pushing downward on front of insert TABLEINSERT ADJUSTING INSERT TABLE if insert is higher...
-
Page 11: Tensioning The Blade)
TO INSTALL/TENSION PIN TYPE BLADES: UPPER ARM BLADE WARNING: YOUR SAFETY, TURN END CAP HOLDER SWITCH ='OFF", REMOVE REMOVE PLUG FROM POWER SOURCE OUTLET BEFORE BLADE HOLDER REMOVING OR INSTALLING SAWBLADE, t Locate two (2) blade holders among loose parts 2 Blade clips and set screws are not needed in blade holders... - Page 12 assembly 3. For plain-end blades, remove blade holders (with blade installed) from retainer clips by putling clips away from blade holders. Pull out upper and Iowe_ blade holders Ptace blade ho(der' assembly in blade holder pockets with set screw side upward BLADE HOLDERS...
- Page 13 ADJUSTING THE BLADE SQUARE TO TABLE COMBINATION WARNING: YOUR SAFETY, TURN SQUARE SWITCH "OFF", REMOVE KEY AND REMOVE GUARD PLUG FROM POWER SOURCE OUTLET. 1, WITH BLADE INSTALLED AND TENSIONED place combination square on side of blade, Guard prevents placing square directly against blade, so gauge squareness...
-
Page 14: Installation
assembly PEEL OFF THIS PIECE OF SCALE BACKING FIRST INSTALLATION OF BEVEL SCALES 1 With blade installed and tensioned, Iocatetwo bevel scales among loose parts 2 Locate slit in paper backing on back side of scale. (2ND SCALE POSIT!ON} Remove backing on the zero end of scale. 3 While holding scale by the end still protected the backing, lightly position... - Page 15 getting to know your scrota saw TENSION KNOB GUARD LOCK BLADE HOLDER KNOBS GUARD RETAINING CLIP BLOWER TUBE BLADE HOLDERS ON/OFF SWITCH BLADE HOLDER POCKETS BEVEL SCALES TABLE INSERT BEVEL MITER LOCK KNOB LOCK KNOB BLADE STORAGE BLADE STORAGE.,, Space provided in the saw 1.
- Page 16 2 To turn machineon, placefinger underswitch leverand pull endof switchout 3. To turn machine OFF... PUSH lever in. NEVER LEAVE THE MACHINE UNATTENDED UNTIL IT HAS COME TO A COMPLETE STOP, PUSH PULL HOLD 4 To lock switch in OFF position ..
- Page 17 basic scronH saw operation INSTALLATION-GETTING KNOW YOUR NOTE: Make certain set screws in blade holders are SCROLL SAW) Remove two (2) blade holder keys tight prior to each use of the scroll saw and store for future WARNING: NEVER OPERATE WITHOUT TABLE Plain-end...
-
Page 18: Basic Scroll Saw Operation
Do not allow pitch to accumulate on the table, tabIe insert, blade or biade holders Clean them with Craftsman Gum and Pitch Remover Apply a thin coat of automobile-type wax on the table so the wood slides easily while cutting... -
Page 19: Troubleshooting
RECOMMENDED ACCESSORIES MOTOR Frequently vacuum or blow out any sawdust from Item the motor Leg Set 9-22239 If the power cord is worn, cut, or damaged in any ........way, have it replaced immediately Blades ........ See Cata{og Casters ....... 9-22221 or 9-222)2 LUBRICATION WIRING... - Page 20 PARTS LIST CRAFTSMAN 18-INCH MOTORIZED SCROLL MODEL 113.207600 113.207650 55 56 FIGURE...
- Page 21 PARTS LIST CRAFTSMAN 18-INCH MOTORIZED SCROt.L MODEL 113.207600 113.207650 Always order by Part Number - Not by Key Number FIGURE Description Key I Part Description %_oy Part No, I 35 I STD551210 *Lockwasher, External No 10 *Screw, Pan Cross Type "T"...
-
Page 22: Miter Gauge Assembly
PARTS LIST FOR CRAFTSMAN 18-INCH MOTORIZED SCROLL SAW MODEL NO. 113.207600 AND 113,207650 FIGURE 2 - MITER GAUGE ASSEMBLY Pa rt Description 62170 Gauge Assy, Miter 62176 Knob, Miter Gauge STD551010 *Washer, 13/64 x 5/8 x 1/32 62173 Gauge, Miter... - Page 23 PARTS LIST CRAFTSMAN 18-INCH MOTORIZED SCROLL MODEL 113.207600 113.207650 FIGURE 3 - LEG MODEL 113.207650 ONLY ,,,J,l,,. Part Description ..60314 Screw, Serrated Truss Hd 1/4-20 x 5/8 63749 62554 Stiffener, Side STD551225 *Lockwasher, Ext 1/4 STD541025 *Nut, Hex 1/4-20...
- Page 24 18-iNCH MOTORIZED SCROLL SERVICE Now that you have purchased your 18-inch motorized Scrolf Saw should a need ever exist for repair parts or service, simply contact any Sears Service Center and most Sears, Roebuck and Co stores° Be sure to provide all pertinent facts when you call or visit MODEL NO 113.207600 SAW ONLY...