Advertisement
Quick Links
®
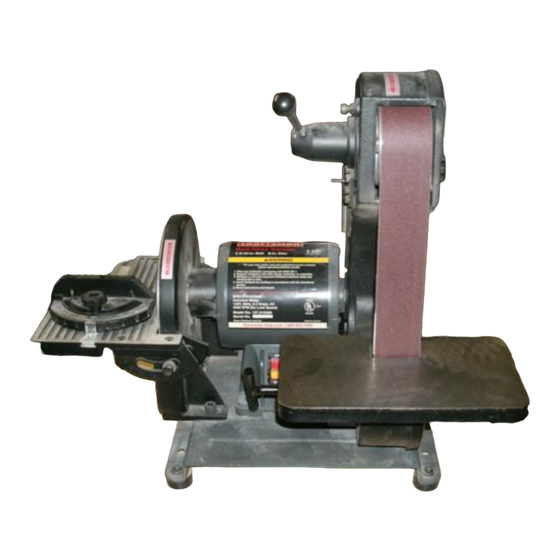
1 HP (Maximum
DeveKoped)
2"x
42" BeMt
8" Disc
Be t/Disc Sander
Mode_ No.
137.215280
CAUTION:
Before using this belt/disc
sander,
read this manual and follow
all its Safety Rules and
Operating
Instructions.
@
\
Safety Instructions
Installation
o Operation
o Maintenance
o Parts List
Sears, Roebuck
and Co., Hoffman
Estates,
_L 60179 USA
Part
No. ! 37215280001
Advertisement

Related Manuals for Craftsman 137.215280


Summary of Contents for Craftsman 137.215280
- Page 1 ® 1 HP (Maximum DeveKoped) 2"x 42" BeMt 8" Disc Be t/Disc Sander Mode_ No. 137.215280 CAUTION: Safety Instructions Installation Before using this belt/disc sander, read this manual and follow o Operation all its Safety Rules and o Maintenance Operating Instructions.
-
Page 2: General Safety
GENERAL SAFETY NSTRUCT ONS WEARYOUR ALWAYS WEAR EYE SECTION PAGE PROTECTION. Any belt/disc BEFORE USING THE BELT / D_SC SANDER sander can throw foreign Warranty ., ............... objects into the eyes which Safety is a combination of common sense, staying alert Product Specifications ........ - Page 3 24. DONOToperate t hetoolifyouareunder t heinfluence ALWAYS maintain a minimum clearance of 1/16 inch GROUNDUNG tNSTRUCTRONS This tool is intended for use on a circuit that has a ofanydrugs, a lcohol o r medication t hatcouldaffect between the table or backstop and the sanding belt or receptacle like the one illustrated in FIGURE A.
- Page 4 UNPACKING YOUR BELT!DiSC SANDER UNPACKING AND CHECKING AVAPLABLE ACCESSORIES CONTENTS Use only accessories recommended for this belt/disc To avoid injury, if any part is missing or damaged, do not sander. Follow instructions that accompany accessories. Use plug the belt/disc sander in until the missing or damaged of improper accessories may cause hazards.
- Page 5 ASSEMBLY NSTRUCTmONS Fig. A Rotation arrow Belt tracking bolt For your own safety, never connect plug to power source outlet until al! assembly and adjustment steps are completed, and you have read and understood the safety and operating instructions, Disc guard g belt Nameplate Phillips screwdriver...
- Page 6 INSTALLING i REPLACING 8" ABRASIVE DmSC (FIG. C) ASSEMBLE THE TENSION HANDLE WITH GRIP (FroG.F) FASTENING SANDER TO WORK SURFACE (FIG. H) Fig. D Remove the table assembly (1) from the sander by Thread the lock nut (t) completely onto the handle (2). To mount your sander in a permanent location such as a sturdy workbench, bolt the sander base to a Thread the handle (2) into the hole on the hub (3).
- Page 7 ADJUSTING THE BELT BACKSTOP (FIG. J) SQUARmNG THE BELT TABLE (FIG. L ) Operating with the backstop (1) in place will allow the To tilt the table (1) loosen the handle (2). Fig. M operator to sand or grind straight edges, Always turntheswitchOFFandunplug thepower cord Use a combination square to set the table at...
-
Page 8: Sanding Operations
ABRASIVE BELT Fig. R The abrasive belt can be used to sand wood, deburr metal, Contour sanding or polish plastic and glass, The belt is most efficient when used with the table. The 1" belt size is convenient for getting into corners and concave curved edges, "ON/OFF"... -
Page 9: Troubleshootmng
TROUBLESHOOTMNG GUIDE For your safety, turn switch OFF, and remove the power After sanding wood or non-metallic material, always clean cord from the electrical outlet before adjusting, cleaning, or the sawdust from sander or work area before grinding or performing maintenance on your sander. Turn switch OFF and always remove plug from power source before making any adjustments or repairs, sharpening metal workpieces. - Page 10 BELT/DISC SANDER PARTS LJST MODEL NO. I37.215280 When servicing use only CRAFTSMAN replacement parts. Use of any other parts may create a HAZARD or cause product damage. Any attempt to repair or replace electrical parts on this belt / disc sander...