Table of Contents
Advertisement
Advertisement
Table of Contents

Related Manuals for Dukane Camera 335B


Summary of Contents for Dukane Camera 335B
- Page 1 Camera 335B Visual Presenter User’s Guide UG335B122209V1 English...
-
Page 2: Table Of Contents
Contents Chapter 1 Precautions ..................3 Safety Precautions ..................4 FCC Warning....................4 Chapter 2 Package Contents................5 Chapter 3 Product Overview ................6 Positioning the Presenter and Document........... 7 Correct Usage ..................7 Chapter 4 Installation and Connections ............8 System Diagram ................. - Page 3 Turning the Lamp on/off ..............18 Automatically Adjusting the Image to Optimal Brightness and Focal Length 18 Freezing Images................18 Capturing Images ................18 7.10 Browsing Captured Images .............. 18 7.11 Deleting Captured Images..............19 7.12 Automatically Deleting Captured Images When the Device is Turned off (Auto Erase) ....................
-
Page 4: Chapter 1 Precautions
Chapter 1 Precautions Always follow these safety instructions when setting up and using the Document Camera: 1. Please do not tilt the machine while using. 2. Do not place the Document Camera on an unstable trolley, stand or table. 3. Do not use the Document Camera near water or source of heat. 4. -
Page 5: Safety Precautions
If liquid is spilled into it or the Document Camera has been exposed to rain or water. Safety Precautions Warning: To reduce the risk of fire or electric shock, do not expose this appliance to rain or moisture. This Document Camera has a 3-wire AC line Plug. This is a safety feature to ensure that the plug will fit into the power outlet. -
Page 6: Chapter 2 Package Contents
Chapter 2 Package Contents Camera 335B User Guide Warranty Card Remote Control VGA Cable USB Cable C-Video Cable Power Cord Appearance may vary in different countries English... -
Page 7: Chapter 3 Product Overview
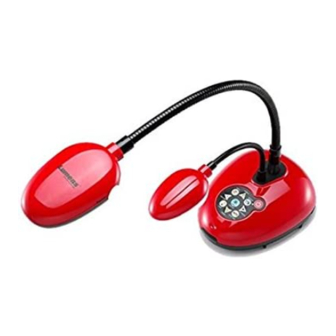
Chapter 3 Product Overview 1. Gooseneck 2. Lamp 3. Control panel 4. LED indicator 5. Remote sensor 6. Lens 7. DIP switch (Bottom) English... -
Page 8: Positioning The Presenter And Document
3.1 Positioning the Presenter and Document 3.2 Correct Usage * About 400mm distance between camera and the desktop is recommended. 400 mm English... -
Page 9: Chapter 4 Installation And Connections
Chapter 4 Installation and Connections 4.1 System Diagram Projector Monitor Television English... -
Page 10: Connecting To External Devices
4.2 Connecting to External Devices 4.2.1 Step 1: Connect the power cord from the AC In on the Camera 335B to the power outlet AC Outlet <Note>: Appearance of the power cord may vary depending on country/region. 4.2.2 Step 2: Connection projector with other hardware devices Connecting to a Projector or Monitor Connect the VGA cable from the VGA OUT port on the Camera 335B to the VGA IN port on the projector or monitor. -
Page 11: Connecting To A Computer
2. Adjust DIP Switch Setting NTSC: U.S.A., Taiwan, Panama, Philippine, Canada, Chile, Japan, Korea and Mexico. PAL: Country/region not listed above. <Note> The on-screen display (OSD) is not available in C-VIDEO. Some functions are not available on the control panel and the remote control in this mode. -
Page 12: Getting Started
2. Connect the VGA cable from the VGA IN port on the Camera 335B to the VGA OUT port on the computer. 3. Connect the RS-232 Adapter (Optional) to the RS-232 port on the Camera 335B and the RS-232 port on the computer. 4.3 Getting Started Control panel Remote Control... -
Page 13: Chapter 5 Dip Switch
Chapter 5 DIP Switch <Note>: You must restart the Camera 335B in order for DIP switch configuration to take effect. Connecting to a Projector or Monitor 5.1.1 SXGA output (factory default): WXGA output 5.1.2 5.1.3 XGA output 5.1.4 Special mode English... -
Page 14: Connecting To A Tv
Connecting to a TV 5.2.1 NTSC Settings: U.S.A., Taiwan, Panama, Philippines, Canada, Chile, Japan, Korea, and Mexico 5.2.2 PAL Settings: Countries/regions not listed above <Note> VGA OUT is not supported once C-VIDEO is enabled. English... -
Page 15: Chapter 6 Introduction To Control Panel/Remote Control Buttons And On-Screen Menu
Chapter 6 Introduction to Control Panel/ Remote Control Buttons and On-Screen Menu 6.1 Functions of Control Panel and Remote Control Buttons <Remark> The functions below are listed alphabetically Name Function Descriptions Operation Turns the visual presenter on and off. Remote control / Control panel , , , Moves up, down, left or right to select the... -
Page 16: On-Screen Menu
6.2 On-screen Menu <Note> Press [Menu] on the remote control or control panel to enter the on-screen menu, The bold underlined values in the following table are defaults. 1st Level 2nd Level 3rd Level Major Function Descriptions Sub items Adjustment Values Items Press [ENTER] to automatically Display... - Page 17 Use the left and right arrow keys to enable/disable the auto erase Auto Erase ON/OFF function, which automatically deletes all stored images upon system shutdown. Use the left and right arrow keys USB Transfer Camera/Storage Device Setting to select the USB transfer mode. Use the left and right arrow keys Lamp ON /OFF...
-
Page 18: Chapter 7 Descriptions Of Major Functions
Chapter 7 Descriptions of Major Functions 7.1 Switching Image Sources Live image is the default image source. Press [SOURCE] on the remote control or control panel to switch between image sources: 1. Live images (default). 2. PC. 7.2 Making Text Clearer and Photos More Colorful Photo (Photo mode) is selected by default in the [Photo/Text/Gray] mode [Photo] (Default): View photos or text with photos in this mode to enhance colors in photos. -
Page 19: Turning The Lamp On/Off
brighter. 2. From the Remote Control or Control Panel, press [BRT-] to darken the image. 7.6 Turning the Lamp on/off From the remote control or control panel: 1. Press [MENU] to enter the on-screen menu. 2. Press [ ] or [ ] to select [Setting]. 3. -
Page 20: Deleting Captured Images
2. Press [ ] or [ ] or [ ] or [ ] to select the thumbnail you want you browse. 3. Press [ENTER] to access the full-screen display of the image. 4. Press [ ] or [ ] to browse the through saved images. 5. -
Page 21: Panning Across A Live Image (Pan)
7.13 Panning Across a Live Image (PAN) <Note> Panning and zooming are not available in Microscope Mode. From the remote control: 1. Press [PAN] on the remote control to zoom in a part of a live image. 2. Press [ ] or [ ] or [ ] or [ ] to move around the partially zoomed-in image. -
Page 22: Comparing Live Images With Stored Images (Pbp)
7.14.3 Start/Pause/Stop Playing Images <Note> Images over 8MB cannot be played. During playback, the [ROTATE] function can be activated to rotate the images. From the remote control: 1. Press [SLIDE SHOW] to start playback. 2. Press [ENTER] to pause playback. 3. -
Page 23: Restoring Factory Default Settings (Factory Reset)
5. Press [ ] or [ ] to move the selected image left or right. 6. Press [ZOOM+/-] to zoom in/out from the live image 7. Press [PBP] to return to the stored image screen. 8. Press [MENU] to exit. From the control panel 1. -
Page 24: Inserting A Photo In The Ms-Paint Application
7.17.1 Inserting a Photo in the MS-Paint Application 1. Click [File> From Scanner or Camera] in the MS-Paint application as shown in the bottom left figure. 2. Click on [Get Picture] to finish, as shown in the top right figure. 7.17.2 Inserting a Photo in a Microsoft Word Document 1. -
Page 25: Changing The Setting Of The Camera 335B And Then Capturing A Photo In Microsoft Word
3. Click [Get Picture] to finish. 7.17.3 Changing the Setting of the Camera 335B and then Capturing a Photo in Microsoft Word 1. Click [Insert /Image /From Scanner or Camera] in Microsoft Word. 2. Select [Visual Presenter V2 TWAIN] and click [Custom Insert]. English... -
Page 26: Setting Up The Camera 335B As A Webcam For Skype
3. A window displaying a live image (see below) will appear. 4. Press [Setting]: When the Camera Settings window pops up, the live image can be adjusted. The operation is identical from both the remote control and the control panel. Refer to Chapter 6 Control Panel/Remote Control Buttons and On-screen Menu for more information. - Page 27 Call your desired contact. When both parties are connected, Skype will display the video screen. English...
-
Page 28: Setting The Camera 335B As A Pc Camera
7.17.5 Setting the Camera 335B as a PC Camera 1. Open My Computer and click on [Visual Presenter V2] to display a live image. English... -
Page 29: Chapter 8 Connecting To A Microscope
Chapter 8 Connecting to a Microscope 1 Mount the microscope adaptor (optional) in the accessories pack onto the microscope <Note> The Microscope adapter fits eyepieces of about Ø28.4mm. 2 Connect the lens of the Camera 335B to the microscope adaptor. 3 Select the Microscope mode 3.1. -
Page 30: Chapter 9 Software Instructions
Chapter 9 Software instructions Using the Camera with a computer. After installing the B-WORKS, you can use the software to: Control the Camera 335B. Capture and record images. Annotate images, highlight important details and save them for later use. Use the full-screen function. 9.1 System Requirements Windows Vista / MAC OS X 10.4 / 10.5 /... -
Page 31: Chapter 10 Troubleshooting
Chapter 10 Troubleshooting This chapter outlines possible solutions to common problems. For other issues, contact your dealer or service center. Problems Solutions Check that the power cord is securely connected to No power signal the wall socket and the unit. No image output 1. - Page 32 Information in this Guide may change due to product improvements. To obtain the latest manuals, literature, and software please visit the Dukane web site at; www.dukane.com/av and look at the specific model SUPPORT or DOWNLOADS section. DUKANE CORP AV SERVICE DEPT...