Table of Contents
Advertisement
Quick Links
Advertisement
Table of Contents

Related Manuals for Dukane DV-P505A


Summary of Contents for Dukane DV-P505A
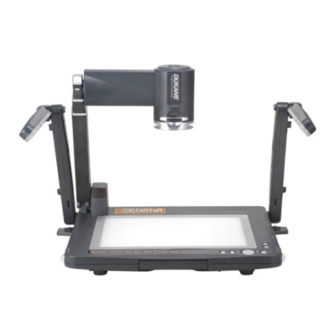
- Page 1 Model DVP505A User's Manual Digital Visual Presenter...
-
Page 3: Table Of Contents
1__INTRODUCTION 1-1 I ...2 NTRODUCTION 1-2 C ...2 ERTIFICATION 1-3 W ...2 ARNING 1-4 S AFETY NSTRUCTION 1-5 S ...4 PECIFICATION 2__PACKAGE CONTENT 3__PRODUCT OVERVIEW 3-1 F RONT 3-2 C ONTROL PANEL 3-3 R ...7 3-4 I NFRARED EMOTE 4__INSTALLATION 4-1 S ETTING P THE... -
Page 4: Introduction
1__Introduction 1-1 Introduction This equipment generates and uses radio-frequency energy and, if not installed and used in accordance with the instruction manual, may cause interference to radio and television reception. It has been tested and found to comply with the limits for a class A computing device in accordance with the specifications in Subpart J of Part 15 of FCC Rules, which are designed to provide reasonable protection against such interference when operated in a commercial environment. - Page 5 7. Do not overload wall outlets. Do not use extended extension leads or multi-way plug boards. Fire or electric shock may be possible. 8. Do not block any cabinet opening with any kind of objects. 9. Never allow liquid of any kind to spill into the Digital Presenter. 10.
-
Page 6: Specification
1-5 Specification Image_________________________________________________________________ Pick-up Device Effective Pixels Frame Rate White Balance Exposure Image Mode Freeze Analog RGB Output H.Sync. Signal V.Sync. Signal Image Signal Level S-Video, C-Video Output Portable Storage Optics_______________________________________________________________ Lens Shooting Area Zooming Focusing Power Source Consumption Lighting_______________________________________________________________ Lamp type. -
Page 7: 2__Package Content
2__Package Content Make sure that the package contains the following items ♦ Digital Presenter ♦ User’s manual CD ♦ Remote controller ♦ Power cable ♦ VGA cable ♦ USB cable ♦ RS232 cable ♦ Slide Holder ♦ Negative Holder... -
Page 8: Front/Top View
3__Product Overview 3-1 Front/Top View 3-2 Control panel (Power button): Turn on/off the Digital Presenter. Select button: 2.1 AF: Auto Focus 2.2 Adjust: Switch the function mode between Focus and Brightness, R, B. 2.3 ◄ Or ►: To adjust the value of the function mode, (SOURCE): Switch between different signal sources. -
Page 9: Rear View
3-3 Rear View VGA INPUT Connect the connector to the VGA output connector of another VGA output device. When an input device is selected, the image is shown through the VGA IN connector. VGA OUTPUT Connect The connector to the input connector of a display device. DVI OUT (DVI-I) Digital Video connector:Output digital and analog signal format USB (Support for USB 1.1) -
Page 10: Infrared Remote Control
3-4 Infrared Remote Control Button Description 1. Power Turn on and off the Digital Presenter. 2. AF Auto Focus 3. Freeze Keep the current image display on the screen. 4. Capture Capture an image. 5. Selection Select a function or Button item. -
Page 11: Setting Up The Digital Presenter
4__Installation 4-1 Setting Up the Digital Presenter Pull up the arm. Adjust the position and height (the height should be 48.5 cm for operation) of the arm by moving the 3-section joint. Turning the camera head toward the platform. Note: The angle of the camera head is limited. Do not turn it forcefully when it reaches the maximal angle. 4-2 Powering on the Digital Presenter Note: Before using the Digital Presenter, make sure that you have connected it to the computer, video source or other output devices. -
Page 12: Getting Started
5__Using the Digital Presenter This chapter shows you the basic and advanced functions of the Digital Presenter as and how to use the menu, the mouse, and the Presenter USB/RS232 interface. 5-1 Getting Started For Presenting Printed Materials: Power on the Digital Presenter. (The lamp arm should be ready before you turn on the power) Place the document or object on the platform. -
Page 13: Basic Operation
OSD Menu Layer 1 Display Layer 1 Source Layer 1 Storage Layer 1 Setting 5-3 Basic Operation Zoom, to make the image larger or smaller: Option 1: Press the make the image larger or smaller. Option 2: Press the Zoom In ( ) or Zoom Out ( ) button on your remote control to make the image larger or smaller. - Page 14 You may execute the AF (Auto Focus) function by pressing the Auto Focus button. Option 1: Press the keypad “AF” for executing the AF function. Option 2: Using the remote controller “AF” button for auto focus function. Besides, the digital presenter will execute Auto Focus when user adjusting the zoom in/out.
- Page 15 To capture an image: Option 1: If you are using the mouse, click the "Storage". Click "Capture" to capture the current image display. When the "image capturing" function is in progress, "Processing" will be shown just at the place of "Capture" location. Option 2: If you are using the remote control, press the Capture button to capture the current image display.
-
Page 16: Using The Mouse
Flip: Press (Flip) on the Remote Controller Select to rotate the image by 180º. Lamp: Press (Lamp) on the Remote Controller to turn on and off the lamps and the backlight. Source: Option 1: Use Source on the remote control to switch the image input device (Presenter/VGA In). -
Page 17: Sps Settings And Operation
Output Format: Use Output Format to choose the output mode: XGA (1024 x 768), or SVGA (800 x 600). The default setting is XGA. Pointer Color: Adjust the color of the indication cursor by using the selection buttons ( R (Red) G (Green) Remark setting: You may select "Box"... - Page 18 2.2 Select the Lamp status, as shown in the following figure: 2.3 If you select Upper (Upper Lamp), press on your remote control until highlighted. Press Enter to show Gamma options. Select one, as shown in the following figure. 2.4 If you select Photo, press on your remote control until Press Enter to show Brightness.
-
Page 19: Storage After Use
messages appears for three seconds. Then the screen to the one as shown in 2.2. You may select control to return to Layer 1; or, select 2.7.2 If you have selected Discard in Step 2.6, a "Discard your settings" message appears. Then the screen returns to the one as shown in Step 2.2. - Page 20 & 6__Q Q: The ( ) system indicator does not come on. Ans: No power is coming on. Check that the power cord is connected securely both at the power outlet and the PS. Q: No image appears on the screen. Make sure the power is installed correctly and securely.
- Page 22 Dukane Corporation Phone: (630) 762-4040 Audio Visual Products Division Orders: (800) 676-2485 2900 Dukane Drive St. Charles, IL 60174-3395 Parts & Service: (800) 676-2487 E-mail: avsales@dukcorp.com Fax: (630) 584-5156 Fax: (630) 584-0984 Audio Visual Products Part # 401-505A-00...