Table of Contents
Advertisement
Quick Links
Camera 445 Visual Presenter
User Manual
[Important]
To download the latest version of Quick Start
Guide, multilingual user manual, software, or
driver, etc., please visit
http://www.dukcorp.com/audiovisual/products
"Downloads"
Dukane Audio Visual, 2900 Dukane Drive
St. Charles, IL 60174
866.280.4298 Fax: 630.584.5156
http://www.dukcorp.com/
090107-Rev
English - 0
Advertisement
Table of Contents

Related Manuals for Dukane Camera 445


Summary of Contents for Dukane Camera 445
-
Page 1: User Manual
User Manual [Important] To download the latest version of Quick Start Guide, multilingual user manual, software, or driver, etc., please visit http://www.dukcorp.com/audiovisual/products “Downloads” Dukane Audio Visual, 2900 Dukane Drive St. Charles, IL 60174 866.280.4298 Fax: 630.584.5156 http://www.dukcorp.com/ 090107-Rev English - 0... -
Page 2: Table Of Contents
Contents Copyright Information....................3 Chapter 1 Precautions ..................4 Chapter 2 Package Content ................6 Chapter 3 Product Overview ................7 Relative position of the presenter and 445 ..........8 Recommend distance ................8 Incorrect use ....................9 Chapter 4 Installation and Connections............10 System diagram..................10 Mounting the 445 at desktop ..............10 Connecting devices .................10 Start using the 445 ..................12 Installing remote control holder ..............13... - Page 3 7.16 I would like to resume the factory default setting (Factory Reset) ..23 7.17 I would like to reduce the image noise (Noise Reduction) ....24 7.18 I would like to set / change the password (Lock Down)......24 7.19 Using a SD card..................25 7.20 Computer-related functions ..............25 7.20.1 I would like to insert a photo in MS-Paint..........25...
-
Page 4: Copyright Information
Dukane is a trademark that is currently being registered Dukane Corporation Inc. Copying, reproducing or transmitting this file is not allowed if a license is not provided by Dukane Corporation Inc. unless copying this file is for the purpose of backup after purchasing this product. -
Page 5: Chapter 1 Precautions
Chapter 1 Precautions Always follow these safety instructions when setting up and using the visual presenter: Do not place visual presenter in tilted position. Do not place the visual presenter on an unstable trolley, stand or table. Do not use the visual presenter near water or source of heat. Use attachments only as recommended. - Page 6 EQUIPMENT. Note: This equipment has been tested and found to comply with the limits for a Class A or B digital device, pursuant to Part 15 of FCC Rules. These limits are designed to provide reasonable protection against harmful interference in a residential installation. This equipment generates uses and can radiate radio frequency energy and, if not installed and used in accordance with the instruction, may cause harmful interference to radio communications.
-
Page 7: Chapter 2 Package Content
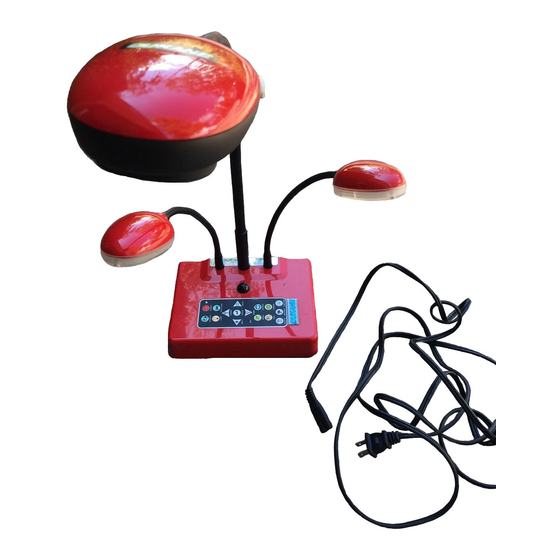
Chapter 2 Package Content Quick Start Guide User Manual Remote control Remote Control Holder Base Installation Guide Extender Adapter VGA Cable USB Cable C-Video Cable Power Cord Microscope Adapter Appearance may vary with country/region. Padded Carry Bag Audio cable (Optional) English - 6... -
Page 8: Chapter 3 Product Overview
Chapter 3 Product Overview 8. Gooseneck 7. AF button 4. LED indicator 1. Lamp 3. Control panel 2. Remote sensor 9. Built-in Microphone kkkkkkk 5. Lens 6. DIP switch (Bottom) English - 7... -
Page 9: Relative Position Of The Presenter And 445
3.1 Relative position of the presenter and 445 Presenter Document 3.2 Recommend distance * About 470 mm distance between camera and the desktop is recommended. English - 8... -
Page 10: Incorrect Use
3.3 Incorrect use English - 9... -
Page 11: Chapter 4 Installation And Connections
Chapter 4 Installation and Connections 4.1 System diagram Projector Monitor Monitor Speaker (or an amplifier before connecting to the speaker) LCD TV SD Card Televisio 4.2 Mounting the 445 on a desktop stand 1. Please set up the DIP Switch settings first. Refer to Chapter 5 “DIP Switch Settings”... - Page 12 4.3.2 Step 2: Connecting the components Connecting to a projector Connect the VGA OUT on the 445 to the VGA IN on the projector using the VGA cable. Connecting to a monitor Use VGA cable to connect VGA PASSTHROUGH connector on 445 to the VGA IN connector on a monitor. [Note] The VGA PASSTHROUGH connector only outputs VGA IN signals.
-
Page 13: Start Using The 445
Use VGA cable to connect VGA IN connector on 445 to the VGA OUT connector on the computer Using the USB Cable Connect to USB port then install the supplied queue program. Using the EXTENDER adapter and RS232 Cable to connect EXTENDER of 445 to a RS232 of computer ... -
Page 14: Installing Remote Control Holder
100MB resolution and 24-bit Disc Space color display Required: Minimum Hard Disc 100MB Space Required: 1GB QuickTime 7.4.5 above 4.6.2 Installation steps 1. Go to Dukane website: www.dukcorp.com/av and select the model you have purchased English - 13... -
Page 15: Chapter 5 Dip Switch Settings
Download the [queue X.X.X +Driver] and its user manual. <Note> Please follow the user manual of queue for installation and operation. Chapter 5 DIP Switch Settings <Note> You have to turn the unit OFF and back ON for the setting to take affect. 5.1 Connecting to a projector or monitor 5.1.1 SXGA 60Hz output (default values): 5.1.2 XGA 60 Hz output... -
Page 16: Connecting To A Tv
5.2 Connecting to a TV 5.2.1 NTSC: America, Taiwan, Panama, Philippines, Canada, Chile, Japan, Korea and Mexico 5.2.2 PAL: Countries/regions not listed above. <Remark> VGA output is not supported once C-Video output has been enabled. English - 15... -
Page 17: Chapter 6 Control Panel/Remote Control And Setting Menu
Chapter 6 Control Panel/Remote Control and Setting Menu 6.1 Functions of control panel and remote control <NOTE>: OSD is not available at C-Video mode. [Menu] / [Rotate] / [PAN] / [Source] / [Record] / [Capture] / [Delete] / [PBP] / [Slide Show] functions are not available on the machine panel and the remote control. <Remark>... -
Page 18: Setting Menu
6.2 Setting Menu <Remark> Press [Menu] on the remote control or control panel to enter the setting menu; The bold underlined values in the following table are the defaults. Level Level Level Adjustment Descriptions Major Items Minor Items values Use the left and right arrow Focus 0~Max keys to adjust focal length on... - Page 19 memory. Use the left and right arrow keys to select, and then press Format Yes/No [Enter] to format the data stored in the SD card (priority) or internal memory. Use the left and right arrow 1. Single keys to select the video capture Capture 2.
- Page 20 8. Suomi Finnish 9. Polski Polish 10. Italiano Italian 11. Português Portuguese 12. Svenska Swedish 13. Česky Czech Use the left and right arrow keys in the language option to select the preferred language. 1. XGA Based on different DIP switch 2.
-
Page 21: Chapter 7 Descriptions Of Major Functions
Chapter 7 Descriptions of major functions 7.1 I would like to switch image sources Live image is the default of image source. Press [Source] on the remote control or control panel to change: 1. Live images (default) 2. SD card (priority) or internal memory 3. -
Page 22: I Would Like To Capture Images
7.8 I would like to capture images 7.8.1 Setting the quality of captured images 1. Press [Menu] on the remote control or control panel to enter the setting menu. 2. Press [] or [] to the [Setting]. 3. Press [] to find [Image Quality]. 4. -
Page 23: I Would Like To Automatically Delete The Captured Images Whenever It Is Turned Off (Auto Erase)
7.11 I would like to automatically delete the captured images whenever it is turned off (Auto Erase) 1. Press [Menu] on the remote control or control panel to enter the setting menu. 2. Press [] or [] to access the [Advance] menu. 3. -
Page 24: I Would Like To Compare Images (Compare Live Images With Captured Images) (Pbp, Picture By Picture)
7.14.3 Activating/Stopping the slide show <Notes>Images over 8 MB, cannot be played. Whilst playing, the [Rotate] function can be activated to rotate the images. Remote control: 1. Press [Slide Show] to start playing. 2. Press [Slide Show] again to stop playing. Control panel: 1. -
Page 25: I Would Like To Reduce The Image Noise (Noise Reduction)
7.17 I would like to reduce the image noise (Noise Reduction) This function enables visual presenter to automatically clear image noise. The noise is especially obvious when Visual presenter is connected to a DLP projector. You can use this function to improve the image quality. 1. -
Page 26: Using A Sd Card
7.19 Using a SD card 7.19.1 Deactivate the write protect function (SD Lock) on the card If the write protect function of the SD card is activated, you will not be able to use the Capture function, although you can still read the files in it. -
Page 27: I Would Like To Insert A Photo In Ms-Word
7.20.2 I would like to insert a photo in MS-Word 1. Click Insert > Image > From Scanner or Camera in MS-Word. 2. Select [Visual Presenter V2] and click [Custom Insert]. 3. Click [Get Picture]. It will capture the photo of live image. 7.20.3 I would like to change the setting of Camera 445 then capture a photo in MS-Word 1. -
Page 28: I Would Like To Set The 445 As A Webcam For Skype
3. A window showing a live image (see below) will be displayed. 4. Press [Setting] to control the 445 via the Camera Settings interface. The operating procedure is the same with the remote control and control panel of the 445. Refer to 445 User Manual Chapter 6 Control Panel / Remote Control and Setting Menu. -
Page 29: I Would Like To Set The 445 As A Pc Camera
7.20.5 I would like to set the 445 as a PC Camera 1. Press [Menu] on the control panel to enter the setting menu. 2. Press [] or [] to the [Setting] menu. 3. Press [] to find [USB Transfer]. 4. -
Page 30: Chapter 8 Connecting To Microscope
<Note> Doing this will disable the Capture function. Suggest you return it to [Camera] mode after using this function. Please follow the steps below. 1. Press [Menu] on the control panel to enter the setting menu. 2. Press [] or [] to the [Setting] menu. 3. -
Page 31: Camera 445 Image
4.2. Press the AF button on the camera head of main unit to activate the auto focus. 5. Digital Zoom 5.1. Press [MENU] to enter the setting menu. 5.2. Press [] or [] to the [Setting]. 5.3. Press [] to select [Digital Zoom]. 5.4. -
Page 32: Chapter 9 Troubleshooting
Chapter 9 Troubleshooting This chapter describes problems you may encounter while using 445. If you have questions, please refer to related chapters and follow all the suggested solutions. If the problem still occurred, please contact our distributors or service center. Issues Solutions Boot without power Make sure you have plugged in the power cord.