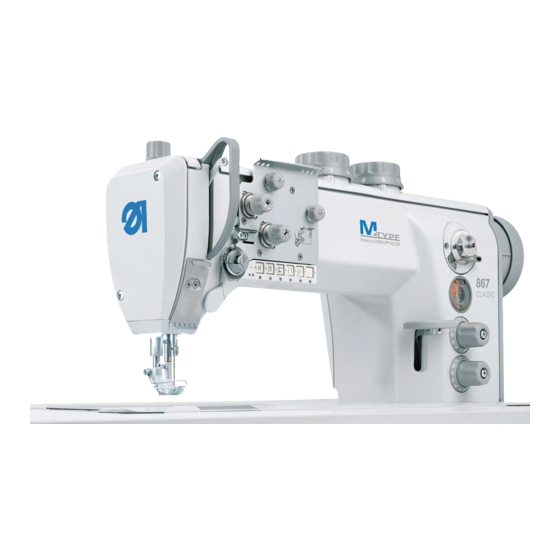
DURKOPP ADLER 867 Service Instructions Manual
Hide thumbs
Also See for 867:
- Durkopp adler (192 pages) ,
- Service instructions manual (164 pages) ,
- Parts list (153 pages)
Table of Contents
Advertisement
Postfach 17 03 51, D-33703 Bielefeld • Potsdamer Straße 190, D-33719 Bielefeld
Telefon +49 (0) 521 / 9 25-00
Ausgabe / Edition:
Änderungsindex
02/2010
Rev. index: 03.0
Spezialnähmaschine
•
Telefax +49 (0) 521 / 9 25 24 35 • www.duerkopp-adler.com
Printed in Federal Republic of Germany
Serviceanleitung
Service Instructions
Instructions de service
Istruzioni per il servizio
867
D
GB
F
I
Teile-Nr./Part.-No.:
0791 867641
Advertisement
Table of Contents

Related Manuals for DURKOPP ADLER 867


Summary of Contents for DURKOPP ADLER 867
-
Page 1: Service Instructions
Spezialnähmaschine Serviceanleitung Service Instructions Instructions de service Istruzioni per il servizio Postfach 17 03 51, D-33703 Bielefeld • Potsdamer Straße 190, D-33719 Bielefeld Telefon +49 (0) 521 / 9 25-00 • Telefax +49 (0) 521 / 9 25 24 35 • www.duerkopp-adler.com Ausgabe / Edition: Änderungsindex Teile-Nr./Part.-No.:... - Page 2 Alle Rechte vorbehalten. Eigentum der Dürkopp Adler AG und urheberrechtlich geschützt. Jede, auch auszugsweise Wiederverwendung dieser Inhalte ist ohne vorheriges schriftliches Einverständnis der Dürkopp Adler AG verboten. All rights reserved. Property of Dürkopp Adler AG and copyrighted. Reproduction or publication of the content in any manner, even in extracts, without prior written permission of Dürkopp Adler AG, is prohibited.
- Page 3 Foreword This instruction manual is intended to help the user to become familiar with the machine and take advantage of its application possibilities in accordance with the recommendations. The instruction manual contains important information on how to operate the machine securely, properly and economically. Observation of the instructions eliminates danger, reduces costs for repair and down-times, and increases the reliability and life of the machine.
-
Page 4: General Safety Instructions
General safety instructions The non-observance of the following safety instructions can cause bodily injuries or damages to the machine. 1. The machine must only be commissioned in full knowledge of the instruction book and operated by persons with appropriate training. 2. -
Page 5: Table Of Contents
Contents Page: Service instructions class 867 (Edition 02.2010) General notes Gauges........... . . Description of the locking positions . - Page 6 Index Page: 2.12 Thread-guiding parts ..........2.12.1 Thread regulator .
-
Page 7: General Notes
General notes The present service instructions describe the adjustment of the special sewing machine 867. ATTENTION ! The operations described in the service instructions must only be executed by qualified staff or correspondingly instructed persons respectively! Caution: Danger of injury ! In case of repair, alteration or maintenance work turn off the main switch and disconnect the machine from the pneumatic supply system. -
Page 8: Description Of The Locking Positions
Description of the locking positions With the locking pin 1 and the arresting grooves 2 and 3 in the arm shaft crank 4 the sewing machine can be arrested in two adjusting positions. Position I = Locking pin Ø 5 mm for large groove = Looping stroke, needle bar height Position II = Locking pin Ø... -
Page 9: Graduation On The Handwheel
Graduation on the handwheel The handwheel 2 has a graduation printed on it. Certain settings are carried out according to the position of the handwheel. – Turn the handwheel until the degree mark mentioned in this manual points to the index 3. –... -
Page 10: Sewing Machine
Sewing machine Position of the arm shaft crank on the arm shaft Caution: Danger of injury ! Turn off the main switch. Check and set the position of the arm shaft crank only when the machine is switched off. Standard checking The arm shaft crank 1 is fastened on the arm shaft 4 with three threaded pins 2. -
Page 11: Upper And Lower Toothed Belt Wheel / Toothed Belt
Upper and lower toothed belt wheel / toothed belt 2.2.1 Position of the upper toothed belt wheel Caution: Danger of injury ! Turn off the main switch. Check and set the position of the upper toothed belt wheel only when the machine is switched off. -
Page 12: Position Of The Lower Toothed Belt Wheel
2.2.2 Position of the lower toothed belt wheel Caution: Danger of injury ! Turn off the main switch. Check and set the position of the lower toothed belt wheel only when the machine is switched off. Standard checking The threaded pins in the toothed belt wheel 2 must sit on the flat spot 1 of the lower shaft 5. -
Page 13: Bottom Feed And Stitch Regulator Gear
Bottom feed and stitch regulator gear 2.3.1 Basic setting of stitch adjustment Caution: Danger of injury ! Turn off the main switch. Set the basic setting of stitch adjustment only with the sewing machine switched off. Standard checking When the setting wheel 5 is in zero position, the stitch regulator gear should have the least clearance possible. - Page 14 Adjust the eccentric The eccentric 3 has to be adjusted in such a way that the mark 4 points to the upper left and that the eccentric slot 6 stands parallel to the threaded pin 2. – Loosen the threaded pin 2 of the block 5. –...
-
Page 15: Adjust The 2Nd Stitch Length
2.3.2 Adjust the 2nd stitch length Caution: Danger of injury ! Turn off the main switch. Set the basic setting of stitch adjustment only with the sewing machine switched off. – Set the upper setting wheel 1 to “4". – Unscrew the screw 2 and remove the setting wheel 3. -
Page 16: Position Of The Feed Dog In The Throat Plate Cutout
2.3.3 Position of the feed dog in the throat plate cutout Caution: Danger of injury ! Turn off the main switch. Check and set the position of the feed dog and stitch regulator gear only when the machine is switched off. –... - Page 17 – Turn the stitch regulator handwheel to position “0". – Set the gear to “0". In order to do so, turn the positioning frame 14 so that the tongues come parallel to each other. – Tighten the screw 13 on the block 12. –...
-
Page 18: Feeding Motion Of The Feed Dog
2.3.4 Feeding motion of the feed dog Caution: Danger of injury ! Turn off the main switch. Check and set the feeding motion of the feed dog only when the machine is switched off. Standard checking When the machine is in position “190°” the feed dog must not move upon actuating the stitch regulator lever if the maximum stitch length is set. -
Page 19: Lifting Motion Of The Feed Dog
2.3.5 Lifting motion of the feed dog Caution: Danger of injury ! Turn off the main switch. Check and set the lifting motion of the feed dog only when the machine is switched off. Standard checking The feed dog is supposed to have the same distance to the throat plate at its front and backward dead center: –... -
Page 20: Feed Dog Height
2.3.6 Feed dog height Caution: Danger of injury ! Turn off the main switch. Check and set the height of the feed dog only when the machine is switched off. Standard checking Machines without feed dog lifting device The feed dog should be on the same level as the throat plate. Machines with feed dog lifting device For a safe forward movement of the material the feed dog 2 must in its highest position be:... -
Page 21: Balance Weight
2.3.7 Balance weight Caution: Danger of injury ! Turn off the main switch. Check and set the balance weight only when the machine is switched off. Standard checking The balance weight 1 has to be positioned in a way that, with the handwheel in position “210°”, a stuck in Allen key 3 stands parallel to the bed plate 2. -
Page 22: Transmission Lever
Transmission lever Caution: Danger of injury ! Turn off the main switch. Check and set the transmission lever only when the machine is switched off. Standard checking The lever 3 transmits the movement of the advance shaft to the needle bar linkage. -
Page 23: Needle Bar Linkage
Needle bar linkage 2.5.1 Align the needle bar linkage laterally Caution: Danger of injury ! Turn off the main switch. Check and set the needle bar linkage only when the machine is switched off. Standard checking The needle must penetrate the center of the feed dog’s stitch hole. –... -
Page 24: Needle Penetration In Feeding Direction
2.5.2 Needle penetration in feeding direction Caution: Danger of injury ! Turn off the main switch. Check and set the needle penetration only when the machine is switched off. Standard checking he needle is supposed to penetrate the center of the feed dog’s stitch hole with the stitch length set to “0". -
Page 25: Hook, Looping Stroke And Needle Bar Height
Hook, looping stroke and needle bar height 2.6.1 Looping stroke Caution: Danger of injury ! Turn off the main switch. Check and set the looping stroke only when the machine is switched off. Standard checking The looping stroke is the way of the needle bar from its bottom dead center to the point where the hook tip 2 is at the middle of the needle 1. -
Page 26: Needle Bar Height
2.6.2 Needle bar height Caution: Danger of injury ! Turn off the main switch. Check and set the needle bar height only when the machine is switched off. Standard checking The needle bar’ s height is to be set in a way that the hook tip stands in the lower third of the needle scarf with the stitch length set to “... -
Page 27: Distance Between Hook And Needle
2.6.3 Distance between hook and needle Caution: Danger of injury ! Turn off the main switch. Check and set the distance between hook and needle only when the machine is switched off. Standard checking In looping stroke position the distance between the hook tip and the needle scarf is to be max. -
Page 28: Needle Guard
2.6.4 Needle guard Caution: Danger of injury ! Turn off the main switch. Check and set the needle guard only when the machine is switched off. Standard checking The needle guard 2 is to prevent a contact of the needle with the hook tip. -
Page 29: Bobbin Case Opening
Bobbin case opening 2.7.1 General The thread lever has to pull the thread through between the bobbin case and its holder. For the thread to slip through without any hindrance the bobbing case must be opened in this particular moment. That way the desired seam pattern can be achieved with the lowest possible thread tension. - Page 30 Correction – Loosen screw 4. – Shift the cover on the hook housing downward. – Loosen screw 5. – Adjust the bobbing case opener 3. – Tighten screw 5 again. – Put the cover back again. – Tighten screw 4.
-
Page 31: Timing Of Opening
2.7.3 Timing of opening Caution: Danger of injury ! Turn off the main switch. Check and set the bobbin case opener only when the machine is switched off. Standard checking After having taken up the loop, when the hook tip 2 is below the bobbin case opener (handwheel position 350°) the sewing thread should be able to slip through unimpededly between the bobbin case opening finger 3 and the bobbin case 1. -
Page 32: Feeding Foot And Presser Foot
Feeding foot and presser foot 2.8.1 Feeding foot and presser foot stroke Caution: Danger of injury ! Turn off the main switch. Check and set the stroke of the sewing feet only when the machine is switched off. Standard checking The strokes of both sewing feet should be identical when the setting wheel 5 for the sewing foot stroke setting is set to “3". -
Page 33: Stroke Motion Of The Feeding Foot
2.8.2 Stroke motion of the feeding foot Caution: Danger of injury ! Turn off the main switch. Check and set the stroke motion only when the machine is switched off. Prerequisite · The strokes of the feeding foot and the presser foot must be identical (see chapter 2.8.1) ·... -
Page 34: Sewing Foot Pressure
2.8.3 Sewing foot pressure Standard checking The material that is to be sewn must not “float”. It should not be exerted more pressure than necessary. Correction – Set the sewing foot pressure by turning screw 1. Increase the pressure = Turn screw 1 clockwise. Decrease the pressure = Turn screw 1 counter-clockwise... -
Page 35: Stitch Length Limitation
Stitch length limitation Depending on the sewing equipment used, the stitch length setting has to be limited to 6, 9 or 12 mm. – Unscrew the screw 2 on the stitch length setting wheel. – Lift off the setting wheel 1. –... -
Page 36: Stitch Equality Of The Forward And Backward Stitch
2.10 Stitch equality of the forward and backward stitch Caution: Danger of injury ! Turn off the main switch. Set the stitch equality only with the sewing machine switched off. Standard checking The stitch length of the forward and backward stitch should be identical. -
Page 37: Sewing Foot Lifting
2.11 Sewing foot lifting 2.11.1 Mechanical sewing foot lift Caution: Danger of injury ! Turn off the main switch. Check and set the clearance of the lifting mechanism only when the machine is switched off. Standard checking The lifting shaft 6 is supposed to run softly but should have no end play. -
Page 38: Height Of The Sewing Feet Arrested With Hand Lever
2.11.2 Height of the sewing feet arrested with hand lever Caution: Danger of injury ! Turn off the main switch. Check and set the sewing foot lifting only when the machine is switched off. Standard checking The sewing feet 4 are arrested in lifted position with the hand lever 1, for example in order to exchange the sewing feet or to run the sewing machine without any material or to wind up the hook thread. -
Page 39: Height Of The Lifted Sewing Feet
2.11.3 Height of the lifted sewing feet Caution: Danger of injury ! Turn off the main switch. Check and set the height of the lifted sewing feet only when the machine is switched off. Standard checking The pneumatically or via knee lever lifted sewing feet 4 are supposed to have a distance of 20 mm to the throat plate, when the needle bar is in its upper dead center. -
Page 40: Thread-Guiding Parts
2.12 Thread-guiding parts 2.12.1 Thread regulator Caution: Danger of injury ! Turn off the main switch. Check and set the thread regulator only when the machine is switched off. Standard checking The position of the thread regulator 1 depends on the thickness of the material to be sewn, the thread size and the chosen stitch length. -
Page 41: Thread Take-Up Spring
2.12.2 Thread take-up spring Caution: Danger of injury ! Turn off the main switch. Check and set the thread take-up spring only when the machine is switched off. Standard checking The standard setting for the spring travel and spring tension only apply to usual thread sizes. -
Page 42: Bobbin Winder
2.13 Bobbin winder Caution: Danger of injury ! Turn off the main switch. Check and set the bobbin winder only when the machine is switched off. Standard checking The bobbin winding operation has to stop automatically, when the bobbin is filled up to approx. 0.5 mm below the edge of the bobbin. The winder wheel must not have end play but its moving should not be too sluggish either. - Page 43 – Turn the winder bobbin so that the tear-off knife 12 points to the fastening screw 1 on the right side. – Loosen the screw on the engagement block 14. – Set the winder flap so that between the thread on the bobbin and the winder flap remains a distance of 2 - 3 mm (insert a distance keeper).
-
Page 44: Thread Cutter
2.14 Thread cutter 2.14.1 General large hook oversized hook... - Page 45 Thread-pulling knife height The thread-pulling knife 1 is supposed to swing past the bobbin as close as possible. As standard the height of the thread-pulling knife is set through the washers underneath the knife carrier 3 to a measure of 10.7±0.05 between the upper edge of the knife carrier 3 and the screw-on area of the hook bearing.
-
Page 46: Thread Pulling Knife
2.14.2 Thread pulling knife Caution: Danger of injury ! Turn off the main switch. Check and set the thread-pulling knife only when the machine is switched off. Standard checking In the thread-pulling knife’s 1 resting position the distance between the control cam 4 (highest point) and the roller 7 should be at max. - Page 47 Correction – Loosen the screw (4x) on the clamping ring 5 and shift it towards the hook bearing. Fasten the screws (4x) on the clamping ring 5 again in order to avoid a change of the looping stroke’s position. – Loosen the screws (2x) on the control cam 4.
-
Page 48: Counter-Knife And Lower Thread Clamp
2.14.3 Counter-knife and lower thread clamp Caution: Danger of injury ! Turn off the main switch. Check and set the counter-knife and the lower thread clamp only when the machine is switched off. Standard checking In the thread-pulling knife’s 1 resting position the thread clamp 15 is supposed to bear without any pressure on the thread-pulling knife. - Page 49 Correction of the cutting pressure – Turn the handwheel until the thread-pulling knife 1 can be swung out. – Swing out the thread-pulling knife 1 far enough so that the marking “á” stands next to the blade of the counter-knife 2. –...
-
Page 50: Cutting Position
2.14.4 Cutting position Caution: Danger of injury ! Turn off the main switch. Check and set the cutting position only when the machine is switched off. Standard checking With the factory setting the cutting position corresponds to the position “thread lever in its upper dead center” (60°on the handwheel). –... - Page 51 Correction – Loosen the screws (2x) on the control cam 4. – Swing out the thread-pulling knife 1 until the blade of thread-pulling knife 1 comes flush with the blade of the counter-knife 2. – Bring the machine into the position “thread lever in its upper dead center"...
-
Page 52: Short Thread Cutter
2.15 Short thread cutter 2.15.1 General Thread-pulling knife height As standard the height of the thread-pulling knife is set through the washers underneath the knife carrier 3 to a measure of 10.9±0.05 between the upper edge of the knife carrier 3 and the screw-on area of the hook bearing (see the picture). -
Page 53: Locking Latch For The Thread-Pulling Knife
2.15.2 Locking latch for the thread-pulling knife ATTENTION: Danger of breakage! The sewing machine must not be used without the thread-pulling knife The back stop (anti-rollback) for the bobbin case 2 is situated on the thread pulling knife. Standard checking In the thread-pulling knife’s 1 resting position, between the locking latch 10 and the locking bolt 11 should not be a distance of more than 0.1mm. -
Page 54: Thread Pulling Knife
2.15.3 Thread pulling knife Caution: Danger of injury ! Turn off the main switch. Check and set the thread-pulling knife only when the machine is switched off. ATTENTION! The sewing machine must not be used without the thread-pulling knife. The back stop (anti-rollback) for the bobbin case 2 is situated on the thread pulling knife. - Page 55 Correction – Loosen the screws (4x) on the clamping ring 5 and shift it towards the hook bearing. Tighten the screws (4x) on the clamping ring 5 again in order to avoid changing the looping stroke’s position. – Loosen the screws (2x) on the control cam 4. –...
-
Page 56: Counter Knife
2.15.4 Counter knife Caution: Danger of injury ! Turn off the main switch. Check and set the counter-knife only when the machine is switched off. Standard checking The thread is to be trimmed safely with as little pressure as possible. A low trimming pressure keeps the knife wear low! It must be possible to safely trim two of the thickest sewing threads simultaneously. - Page 57 Correction of the cutting pressure – Swing out the thread-pulling knife 1 far enough so that the marking 19 stands next to the blade of the counter-knife 2. – Loosen screw 20. – Turn the counter-knife 2 against the thread-pulling knife 1. –...
-
Page 58: Potentiometer In The Arm
2.16 Potentiometer in the arm Sewing machines with thread cutter are equipped with a potentiometer in order to limit the driving speed of higher sewing foot strokes. Through this potentiometer the control recognizes the sewing foot stroke and limits the sewing speed. 2.16.1 Basic setting without control panel Set sewing machines without control panel according to the following... -
Page 59: Basic Setting With The Control Panel V810 Or V820
2.16.2 Basic setting with the control panel V810 or V820 Caution: Danger of injury ! The adjustment of the potentiometer is done with the main switch turned on. Work with utmost caution. – Loosen the stop screw 1 for the potentiometer 2. –... -
Page 60: Check The Potentiometer Adjustment
2.16.3 Check the potentiometer adjustment – Keep the key “P” pressed and switch on the main switch. – Enter the technician level. – Select the parameter “F-188”. – Actuate the key “E”. The current Speedomat grade and the corresponding driving speed limitation are displayed. -
Page 61: Connections Pcb
2.17 Connections PCB For the sake of completeness, the various connections of the PCB mentioned below are explained here. X11 Control Sewing Drive X12 Solenoid Thread Tension X13 Solenoid Additional Thread Tension X14 Solenoid X15 Solenoid Sewing Foot Lifting X16 Solenoid Tack Stroke Adjustment pneum. -
Page 62: Machines With Moving Binder
2.18 Machines with moving binder Sewing machines with this equipment are able to bind the edges of the material at the same time while sewing. When switched on, the binder 1 should run synchronously to the feed. Via the “+”/"-" keys it can be set to fullness feed or lesser feed. -
Page 63: Machines With Vertical Trimmer
2.19 Machines with vertical trimmer Sewing machines with this equipment can cut the material during the sewing operation. The vertical cutter is stopped at each pneumatic lifting of the sewing feet. When the knee lever is being used, it stops only after 2/3 of the lifting has taken place. - Page 64 Stroke of the knife The stroke lift of the knife 1 can be set. This becomes necessary, e.g. after grinding, when the knife is shorter. – Unscrew the cover 2. – Loosen the locknut 3. – Turn the screw 4. Turn the screw upwards = higher stroke Turn the screw downwards = lower stroke –...
- Page 65 Knife overlapping When the knife 2 is in the bottom dead center, the overlapping should amount to 0.5 mm. – Loosen screw 1. – Push the knife downwards until it overlaps the counter knife 3 for 0.5 mm. – Tighten the screw 1. Position and pressure of the knife blades The knife 2 should stand slightly inclined towards the counter knife 3.
-
Page 66: Oil Lubrication
Oil lubrication Caution: Danger of injury ! Oil can cause skin eruption. Avoid a longer contact with the skin. Wash yourself thoroughly after a contact. ATTENTION ! The handling and disposal of mineral oils is subject to legal regulations. Deliver used oil to an authorized collecting station. Protect your environment. -
Page 67: Hook Lubrication
Hook lubrication Caution: Danger of injury ! Turn off the main switch. Adjust the hook lubrication only with the sewing machine switched off. Make a functional test with utmost caution when the sewing machine is running. Standard checking The necessary oil quantity for the correct lubrication of the hook has been adjusted by the manufacturer. -
Page 68: Maintenance
Maintenance Caution: Danger of injury ! Turn the main switch off ! The maintenance of the sewing machine must only be done when the machine is switched off. The daily or weekly maintenance work (cleaning and oiling) to be carried out by the operators of the sewing machine is described in the operating instructions (part 1).