DURKOPP ADLER M-type 867 Instruction Manual
Hide thumbs
Also See for M-type 867:
- Durkopp adler (192 pages) ,
- Service instructions manual (164 pages) ,
- Parts list (153 pages)
Table of Contents
Advertisement
Postfach 17 03 51, D-33703 Bielefeld • Potsdamer Straße 190, D-33719 Bielefeld
Telefon +49 (0) 521 / 9 25-00
Ausgabe / Edition:
Änderungsindex
01/2011
Rev. index: 08.0
•
Telefax +49 (0) 521 / 9 25 24 35 • www.duerkopp-adler.com
Printed in Federal Republic of Germany
Keystone Sewing Machine Company, Inc.
Spezialnähmaschine
Betriebsanleitung
Instruction manual
Instructions d'emploi
867
D
GB
F
Teile-Nr./Part.-No.:
0791 867740
Advertisement
Table of Contents

Related Manuals for DURKOPP ADLER M-type 867


Summary of Contents for DURKOPP ADLER M-type 867
- Page 1 Spezialnähmaschine Betriebsanleitung Instruction manual Instructions d’emploi Postfach 17 03 51, D-33703 Bielefeld • Potsdamer Straße 190, D-33719 Bielefeld Telefon +49 (0) 521 / 9 25-00 • Telefax +49 (0) 521 / 9 25 24 35 • www.duerkopp-adler.com Ausgabe / Edition: Änderungsindex Teile-Nr./Part.-No.: 01/2011...
- Page 2 Alle Rechte vorbehalten. Eigentum der Dürkopp Adler AG und urheberrechtlich geschützt. Jede, auch auszugsweise Wiederverwendung dieser Inhalte ist ohne vorheriges schriftliches Einverständnis der Dürkopp Adler AG verboten. All rights reserved. Property of Dürkopp Adler AG and copyrighted. Reproduction or publication of the content in any manner, even in extracts, without prior written permission of Dürkopp Adler AG, is prohibited.
- Page 3 Foreword This instruction manual is intended to help the user to become familiar with the machine and take advantage of its application possibilities in accordance with the recommendations. The instruction manual contains important information on how to operate the machine securely, properly and economically. Observation of the instructions eliminates danger, reduces costs for repair and down-times, and increases the reliability and life of the machine.
-
Page 4: General Safety Instructions
General safety instructions The non-observance of the following safety instructions can cause bodily injuries or damages to the machine. 1. The machine must only be commissioned in full knowledge of the instruction book and operated by persons with appropriate training. 2. -
Page 5: Table Of Contents
Page: Preface and general safety instructions Part 1: Operating Instructions Class 867 – Original Instructions (Edition 01/2011) Product description .......... - Page 6 Key pad on the machine arm ........6.18 Activating the needle bar with subclass 867-490322 ......Efka DC1550/DA321G direct-current positioning drive General .
-
Page 7: Product Description
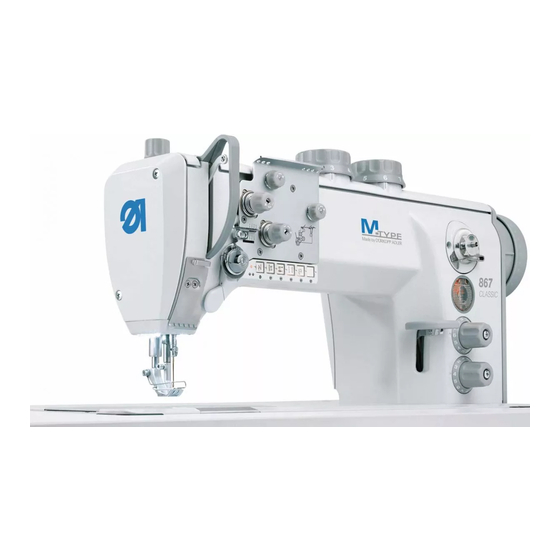
Product description The DÜRKOPP ADLER 867 is a special sewing machine for universal use. It is a flatbed double-lockstitch machine with bottom feed, needle feed and alternating upper foot feed. Depending on the subclass it comes as single or double needle machine, with or without electromagnetic thread cutter, with or without edge trimmer. -
Page 8: Subclasses
Subclasses 867-160152 Single-needle double-lockstitch machine with bottom feed, needle feed, alternating upper foot feed,electro-magnetic thread cutter, electro-pneumatic seam bartacking and sewing foot lifting. - Page 9 867-190145 Single-needle double-lockstitch machine with bottom feed, needle feed, alternating upper foot feed, electro-magnetic short thread cutter, electro-pneumatic seam bartacking and sewing foot lifting. With oversized hook (XXL). 867-190146 Single-needle double-lockstitch machine with bottom feed, needle feed, alternating upper foot...
- Page 10 867-290322 Double-needle double-lockstitch machine with bottom feed, needle feed, alternating upper foot feed, electro-pneumatic rapid stroke adjustment, electro-magnetic thread cutter, connectable thread tension, electro-pneumatic seam bartacking, electro-pneumatic second stitch length and sewing foot lifting. With large hooks and integrated sewing lamp.
- Page 11 867-490322 Double-needle double-lockstitch machine with disconnectable needle bars, with bottom feed, needle feed, alternating upper foot feed, electro-pneumatic rapid stroke adjustment, electro-magnetic thread cutter, connectable thread tension, electro-pneumatic seam bartacking, electro-pneumatic second stitch length and sewing foot lifting. With large hooks and integrated sewing lamp.
- Page 12 With oversized hooks (XXL) and integrated sewing light. 867-290342-100 1000 mm long arm flatbed double-needle double-lockstitch machine with bottom feed, needle feed, alternating upper foot feed, electro-pneumatic rapid stroke adjustment, electro-magnetic thread...
-
Page 13: Subclasses With Direct Drive
Subclasses with direct drive 867-190020-M Single-needle double-lockstitch machine with bottom feed, needle feed, alternating upper foot feed and large hook. 867-190142-M Single-needle double-lockstitch machine with bottom feed, needle feed, alternating upper foot feed, electro-magnetic thread cutter, electro-pneumatic seam bartacking and sewing foot lifting. -
Page 14: Optional Equipments
Optional equipments For the 867 the following optional equipments are available: Order No. Optional equipment Subclasses 0867 590014 Electro-pneumatic needle cooler from the top x x x x x x x x x (NK 20-1) 0867 590024 Electro-pneumatic needle cooler from the bottom... - Page 15 Subclasses x x x x x x x x x x x x x x x x x x x x x x x x x x x x x x x x x x o o x x o o o o o x o o o o x x o o o x x o o o o x x x x x x x x x x x x x x x x x x x x x x x x x x x x x x x x x x x x x x x x x x x x x x x x x x x x x x x x x x x x x x x x x x x x x x x x...
- Page 16 Order No. Optional equipment Subclasses N800 080021 Edge guide, swivelling x x x x x x x x x N800 080022 Edge guide / Rule on the slide of the throat plate x x x x x x x x seam distance) N800 005646 Edge guide pneumatic driven with two adjustable...
- Page 17 Subclasses x x x x x x x x x x x x x x x x x x x x x x x x x x x x x x x x x x x x x x x x x x x x x x x x x x x x x x x x x...
- Page 18 Stands Order No. Optional equipment Subclasses MG55 400304 Stand set MG 55-3 x x x x x x x x x x x for motor fitting beneath the table, with pedal Table top size 1060 x 500 mm MG55 400314 Stand set MG 55-3 x x x x x x...
- Page 19 Subclasses x x x x x x x x x x x x x x x x x x x x x x x x x x x x x x x x x x x x x x x x Keystone Sewing Machine Company, Inc.
-
Page 20: Optionnal Equipment For Machines With Direct Drive
Optionnal equipment for machines with direct drive For the 867 with direct drive, the following optional equipments are available: Order No. Optional equipment Subclasses 0867 590014 Electro-pneumatic needle cooler from the top (NK 20-1) 0867 590024 Electro-pneumatic needle cooler from the bottom... - Page 21 Subclasses Keystone Sewing Machine Company, Inc.
- Page 22 Order No. Optional equipment Subclasses 0867 590464 Mechanical locking N800 080021 Edge guide, swivelling N800 080022 Edge guide / Rule on the slide of the throat plate (2. seam distance) N800 005646 Edge guide pneumatic driven with two adjustable seam distances / Fixed on the slide of the throat plate N800 080001 Edge guide, swivelling...
- Page 23 Subclasses Keystone Sewing Machine Company, Inc.
- Page 24 Further optional equipments are available. Please contact our application center (APC). E-Mail: marketing@duerkopp-adler.com Further available documents concerning the class 867: 0791 867801 Parts list 0791 867641 Service Instructions 0791 100700 Fitting Instructions for Sewing Lamp LED 0791 867701 Instructions for fitting seam center guide...
-
Page 25: Technical Data
867-190142 LC = _dB (A) Stitch length: _ mm Sewing foot stroke: mm Speed: ___ min Material: 867-190142-M LC = _dB (A) Stitch length: _ mm Sewing foot stroke: mm Speed: ___ min 867-190145 LC = _dB (A) Stitch length: _ mm... - Page 26 867-290040 LC = _dB (A) Stitch length: _ mm Sewing foot stroke: mm Speed: ___ min Material: 867-290122 LC = _dB (A) Stitch length: _ mm Sewing foot stroke: mm Speed: ___ min Material: 867-290142 LC = _dB (A) Stitch length: _ mm...
- Page 27 Material: 867-290342-70 LC = _dB (A) Stitch length: _ mm Sewing foot stroke: mm Speed: ____ min Material: 867-290342-100 LC = _dB (A) Stitch length: _ mm Sewing foot stroke: mm Speed: ____ min Material: Keystone Sewing Machine Company, Inc.
-
Page 28: Technical Data Subclasses
Technical data subclasses Subclasses Type of stitch Lockstitch 301 Hook type Number of needles Needle system 134-35 Needle size (depending on E-No.) [Nm] Max. thread thickness [Nm] 80/3 - 10/3 Stitch length [mm] - Forward - Backward Number adj. stitch lengths Max. - Page 29 Lockstitch 301 134-35 80/3 - 10/3 3000 3000 3500 3200 3500 3200 3200 3000 3000 3000 3000 3000 3000 3000 3000 3000 3000 3000 3000 3000 3000 3000 3000 3000 690 / 220 / 460 690 / 320 / 690 / 220 / 460 Keystone Sewing Machine Company, Inc.
- Page 30 Subclasses Type of stitch Lockstitch 301 Type of hook Number of needles Needle system 134-35 Needle size (depending on E-No.) [Nm] Max. thread thickness [Nm] 80/3 - 10/3 Stitch length [mm] Forward Backward Number adj. stitch lengths Max. number of stitches [min ] 3000 3000 3000 3000 3000 3000 3000 3000 3000 3000 Number of stitches with...
- Page 31 Lockstitch 134-35 80/3 - 10/3 3000 3000 1390 / 220 / 460 Keystone Sewing Machine Company, Inc.
- Page 32 Technical data of subclasses with direct drive Subclasses Type of stitch Lockstitch 301 Hook type Number of needles Needle system 134-35 Needle size (depending on E-No) [Nm] Max. thread thickness [Nm] 80/3 -10/3 Stitch length [mm] -Forward -Backward Number of adj. stitches Max.
- Page 33 Notes: Keystone Sewing Machine Company, Inc.
- Page 34 Threading scheme single-needle machine Threading scheme double-needle machine Keystone Sewing Machine Company, Inc.
-
Page 35: Operation
Operation Threading the needle thread 6.1.1 Threading the needle thread on machine without short thread cutter Caution: danger of injury ! Turn off the main switch. The needle thread may only be threaded with the sewing machine switched off. Threading in the needle thread with single-needle machines –... - Page 36 Threading scheme single-needle machine Threading scheme double-needle machine Keystone Sewing Machine Company, Inc.
-
Page 37: Threading The Needle Thread On Machine With Short Thread Cutter
6.1.2 Threading the needle thread on machine with short thread cutter Caution: danger of injury ! Turn off the main switch. The needle thread may only be threaded with the sewing machine switched off. Threading in the needle thread with single-needle machines –... -
Page 38: Threading The Needle Thread On Subclass -190146
6.1.3 Threading the needle thread on subclass -190146 – Thread in the thread through the threading guide 1. – Thread in the thread around the pre-tensioner wheel 2. – Conduct the thread through the thread clamp 3. – Thread in the thread through the threading guide 4 on the thread retainer and the eyelets 8 on the tension plate. - Page 39 Notes: Keystone Sewing Machine Company, Inc.
- Page 40 Fig. A: Correct thread interlacing in the center of the material Fig. B: Needle-thread tension too weak hook-thread tension too strong Fig. C: Needle-thread tension too strong hook-thread tension too weak Keystone Sewing Machine Company, Inc.
-
Page 41: Adjusting The Needle-Thread Tension
Adjusting the needle-thread tension Pre-tensioner When the main tensioner 2 and supplementary tensioner 3 are open (e.g. when the sewing feet are raised) the needle thread must be under slight residual tension. This residual tension is produced by the pre-tensioner 1. The pre-tensioner 1 simultaneously affects the length of the end of the severed needle thread (the starting thread for the next seam). -
Page 42: Opening The Thread Tension
Opening the thread tension Subclasses 867-190020, 867-190020-M, 867-190040, 867-290020, 867-290040, 867-190020-70, 867-190040-70, 867-290020-70, 867-290040-70 When lifting the sewing feet with the knee switch, main and supplementary tension are automatically opened. Subclasses 867-160152, 867-190122, 867-190125, 867-190142, 867-190142-M, 867-190145, 867-190146, 867-190322, 867-190342, 867-190425,... -
Page 43: Switching The Supplementary Tension On And Off With Machines Without Thread Trimmer
Switching the supplementary tension on and off with machines without thread trimmer The supplementary tension is being switched on and off with lever 1. Switching on – Push the handle 2 of lever 1 to the left. Switching off – Push the handle 2 of the lever 1 to the right. -
Page 44: Adjusting The Thread Regulator
Adjusting the thread regulator Caution: danger of injury ! Turn off the main switch. The thread regulator may only be adjusted with the sewing machine switched off. The thread regulator 1 controls the quantity of needle thread required for stitch formation. The thread regulator must be precisely adjusted for an optimum result. -
Page 45: Winding On The Hook Thread
Winding on the hook thread – Put the thread reel on the thread stand and conduct the needle thread through the unwinder arm. – Conduct the thread through the thread guide 5, around the tensioner 4 and through the thread guide 3. –... -
Page 46: Changing The Hook-Thread Bobbin
Changing the hook-thread bobbin Caution: danger of injury ! Turn off the main switch. The hook-thread bobbin may only be changed with the machine switched off. Remove the empty bobbin – Raise up the flap 1 and remove the empty bobbin. Insert a full bobbin –... -
Page 47: Inserting The Hook Thread Bobbin With Machines Equipped With Residual Thread Monitor
6.7.1 Inserting the hook thread bobbin with machines equipped with residual thread monitor CAUTION ! The hook bobbin has to be inserted so that the groove 1 is turned downwards. The area around the bobbin housing and the light barrier has to be cleared of sewing dust ! Wind up the bobbin thread CAUTION ! -
Page 48: Setting The Hook Thread Tension
Setting the hook thread tension Caution: danger of injury ! Turn off the main switch. The hook-thread tension may only be adjusted with the machine switched off. Setting the tension spring 2 – Set the tension spring 2 by turning the adjustment screw 1. Increase the hook thread tension = Turn screw 1 clockwise Decrease the hook thread tension =... -
Page 49: Inserting And Changing The Needle With Single-Needle Machines
Inserting and changing the needle with single-needle machines Caution: danger of injury ! Turn off the main switch. The needle may only be changed with the sewing machine switched off. – Turn the hand wheel, until the needle bar 1 has reached its highest position. -
Page 50: Inserting And Changing The Needle With Double-Needle Machines
6.10 Inserting and changing the needle with double-needle machines Caution Danger of Injury ! Turn off the main switch. The needle may only be changed with the sewing machine switched off. – Turn the hand wheel until the needle bar 1 has reached its highest position. -
Page 51: Inserting And Changing The Needle With Double-Needle Machines With Disconnectable Needle Bars
6.11 Inserting and changing the needle with double-needle machines with disconnectable needle bars Caution Danger of Injury ! Turn off the main switch. The needle may only be changed with the sewing machine switched off. – Turn the hand wheel until the needle bar has reached its highest position. -
Page 52: Lifting The Sewing Foot
6.12 Lifting the sewing foot Subclasses 867-190020, 867-190020-M, 867-190040, 867-290020, 867-290040, 867-190020-70, 867-190040-70, 867-290020-70, 867-290040-70 The sewing feet can be lifted mechanically by actuating the knee lever 1. Subclasses 867-160152, 867-190122, 867-190125, 867-190142, 867-190142-M, 867-190145, 867-190146, 867-190322, 867-190342, 867-190425, 867-190445, 867-260152, 867-290122, 867-290142, 867-290322,... -
Page 53: Locking The Sewing Feet In Lifted Position
6.13 Locking the sewing feet in lifted position – Push the lever 1 downwards. The sewing feet are locked in lifted position. – Push the lever 1 upward. The sewing feet’s position is unlocked. – Lift the sewing feet pneumatically by pushing the knee switch. The lever 1 then moves back into its initial position. -
Page 54: Sewing-Foot Pressure
6.14 Sewing-foot pressure The required sewing-foot pressure is set with the setting wheel 2. CAUTION ! The material must not ”swim”. Do not set a higher pressure than is necessary. – To increase the sewing-foot pressure = turn the setting wheel 2 clockwise. -
Page 55: Sewing-Foot Stroke
6.15 Sewing-foot stroke The special sewing machine 867 has, depending on the subclass, as standard equipment two setting wheels for the sewing foot stroke. With the left setting wheel 2 the standard sewing foot stroke from 1 to 9 mm is selected. -
Page 56: Adjusting The Sewing Foot Stroke On Automotive Machines
6.15.1 Adjusting the sewing foot stroke on automotive machines On automotive machines, the setting wheels 4 and 6 for the sewing foot stroke are secured against altering through the user. Adjusting the sewing foot stroke – Loosen the screws 5. –... - Page 57 HINT ! In order to ensure an operation as safe as possible and a high durability, the max. speed as shown in the chart should not been exceeded. Subclasses Range of stitch lengths Sewing foot stroke max. speed [mm] pos. of setting wheel [min 0867-160152 0867-190122...
-
Page 58: Setting The Stitch Length
6.16 Setting the stitch length The special sewing machines 867 are, depending on the subclass, equipped with two setting wheels. Thus, two different stitch lengths can be sewn, that are activated by actuating a key (see chapter 6.16). The two stitch lengths are set with the setting wheels 1 and 2 on the machine arm. -
Page 59: Adjusting The Stitch Length On Automotive Machines
6.15.1 Adjusting the stitch length on automotive machines On automotive machines, the setting wheels 3 and 4 for the stitch length are secured against altering through the user. Adjusting the stitch length Caution: danger of injury ! Turn off the main switch. The stitch length may only be adjusted with the machine switched off. -
Page 60: Key Pad On The Machine Arm
The factory setting is 1 = Needle high. Manually sewing backward. The machine sews backward stitches as long as the key is being pushed. (only 867-393342, 867-394342) Switching ON/OFF the edge trimmer. The knife remains switched off after sewing foot lifting. - Page 61 (only 867-392342) After switching on the special sewing machine, the binding device is moving synchronously with the feeder. Pressing the + key = fullness facility of the binding device activated. Pressing the - key = reduced motion of the binding device.
-
Page 62: Activating The Needle Bar With Subclass 867-490322
6.18 Activating the needle bar with subclass 867-490322 The needle bar can be activated/deactivated via keys “L” and “R”. – Press key “L”. The key will shine. The left needle bar is deactivated. – Sew. – Press again the key “L”. -
Page 63: Efka Dc1550/Da321G Direct-Current Positioning Drive
Efka DC1550/DA321G direct-current positioning drive General For a detailed description of the control unit, please consult the enclosed current issue of the operating manual of the motor manufacturer (see also www.efka.net) Keystone Sewing Machine Company, Inc. -
Page 64: Direct Drive Dac Classic
Direct drive DAC Classic General For a detailed description of the control unit, please consult the operating instructions (see also www.duerkopp-adler.com) Keystone Sewing Machine Company, Inc. -
Page 65: Sewing
Sewing Operating and function sequence: Sewing process Operation / explanation Prior to sewing - Pedal in rest position Starting position The machine is at a halt. Needle up, sewing feet down. - Pull pedal half-way back. Position material correctly The sewing feet are raised. for starting the seam. - Page 66 Sewing an intermediate bartack - Push down the stitch regulator lever 6. The machine sews reverse stitches as long as the stitch regulator lever is pressed down. The rotation speed is determined through the pedal - Actuate key 5. Sewing over a cross seam. The max.
-
Page 67: Maintenance
10 Maintenance 10.1 Cleaning and testing Caution: danger of injury ! Turn off the main switch. Maintenance may only be carried out with the machine switched off! Maintenance work must be carried out no less frequently than at the intervals given in the tables (see ”operating hours” column). Maintenance intervals may need to be shorter when processing heavy-shedding materials. - Page 68 Maintenance work Explanation Operating to be carried out hours Sewing drive Remove lint and pieces of thread from Clean fan grille (e.g. with an air blow gun). air-intake openings. It must be possible to depress the V-belt by Check condition and tension of V-belt 1 about 10 mm by pressing it with a finger at its mid-point.
-
Page 69: Lubrication
10.2 Lubrication Caution: danger of injury Oil can cause skin eruptions. Avoid protracted contact with the skin. In the event of contact, thoroughly wash the affected area. CAUTION: The handling and disposal of mineral oils is subject to legal regulation. Deliver used oil to an authorised collection point. -
Page 70: Repair
10.3 Repair When the machine is damaged or parts are worn please contact: DÜRKOPP ADLER AG Potsdamer Str. 190 D-33719 Bielefeld Phone: +49 (0) 180 5 383 756 Fax: +49 (0) 521 925 2594 E-mail: service@duerkopp-adler.com Internet: www.duerkopp-adler.com Keystone Sewing Machine Company, Inc.