Rimage 480i User Manual
Hide thumbs
Also See for 480i:
- User manual (20 pages) ,
- Operator-parts list manual (6 pages) ,
- Maintenance manual (6 pages)
Table of Contents
Advertisement
Quick Links
Advertisement
Table of Contents

Related Manuals for Rimage 480i


Summary of Contents for Rimage 480i
- Page 1 Rimage® 480i Printer User Guide...
- Page 2 Rimage Corporation in this document at any time without any prior notice. 7725 Washington Avenue South Rimage Corporation reserves the right to revise this Minneapolis, MN 55439 publication and to make changes from time to time in the content hereof without obligation of Rimage Corporation...
-
Page 3: Table Of Contents
Install the Printer Driver ..........................10 Operate the Rimage 480i Printer................11 Access the Power and USB Cables....................11 Power On or Off the Rimage 480i Printer ..................11 Open the Ink Cartridge Access Door .....................12 Open the Printer Service Door....................... 12 Place a Disc onto the Printer Tray .................... - Page 4 Maintain the Rimage 480i Printer ................20 Preventative Maintenance Schedule..................... 20 Clean the Ink Cartridges........................ 21 Clean the Printer Exterior ......................21 Remove Dust from the Rimage 480i Printer.................. 22 Replace Consumables ........................23 Replace the Fan Filter..........................23 Replace the Ink Cartridges ........................23...
-
Page 5: Introduction
Introduction Introduction This manual provides the information needed to set up, install, operate, and identify the parts of the Rimage 480i printer, as well as how to configure the 480i printing preferences. Important Information This section provides support contact information, cautions and warnings, and product specifications for the Rimage 480i Printer. -
Page 6: Learn More Online
Technical Support and Product Updates Support for the Rimage 480i printer is available through your authorized reseller. Important! Make sure that you register your Rimage 480i printer so that Rimage can notify you of upgrades as they become available. Safety and Compliance Information Safety Precautions This manual and the indications on the product allow proper and safe operation. -
Page 7: Compliance Information
Important Information Compliance Information Product name: Rimage 480i Printer Model: CDPR4 Notice for USA NOTE: This equipment has been tested and found to comply with the limits for a Class A digital device, pursuant to part 15 of the FCC Rules. These limits are designed to provide reasonable protection against harmful interference when this equipment is operated in a commercial environment. -
Page 8: Rimage 480I Printer Specifications
** Leave an additional 3.5 inches (9 cm) for cabling. Interface USB 2.0 Operating System The Rimage 480i printer is compatible only with the following operating systems: Requirements Windows 2000 Professional with Service Pack 4 Windows XP Professional with Service Pack 2 or higher... -
Page 9: Printer Requirements
Printer Requirements Ink Requirements Important! Use only authentic Rimage ink cartridges in the Rimage 480i printer. Keep print cartridges sealed in the original package until they are needed. Use only ink cartridges that are not expired. Store print cartridges at room temperature (60° to 78° F or 15.6° to 26.6° C). -
Page 10: Label Design Requirements
Any label that you create and save through CD Designer is in the correct file format (.btw) and can be printed to a Rimage 480i printer. If do not use CD Designer with your Rimage 480i printer, you can print labels saved as PDF files. -
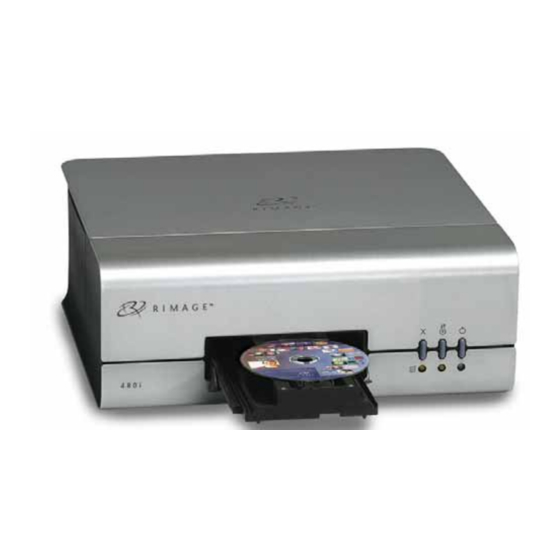
Page 11: Identify The Parts Of The Rimage 480I Printer
Identify the Parts of the Rimage 480i Printer Identify the Parts of the Rimage 480i Printer This section describes the Rimage 480i printer hardware and its features. Front View Printer Service Door Printer Control Ink Cartridge Panel Access Door Printer Tray... -
Page 12: Printer Control Panel
Rimage® 480i Printer User Guide Printer Control Panel The Rimage 480i printer control panel has three buttons and three lights to indicate certain conditions. The table below explains each of these buttons and indicator lights. Image Name Functionality Cancel/ When you press the Cancel button, it provides limited functionality to cancel printing. -
Page 13: Set Up The Rimage 480I Printer
Install the Rimage Software Power on the PC. Insert the CD Designer software disc in the PC. The Rimage CD Designer Software Suite window opens. Tip: If the software installation does not start automatically, select Start and then Run. Browse to the setup.exe file on the disc. -
Page 14: Install The Printer Driver
Rimage® 480i Printer User Guide Install the Printer Driver You must install the printer driver before you can use the Rimage 480i printer with any label editing software. Follow the onscreen instructions in the Plug-n-Play window to install the printer driver. -
Page 15: Operate The Rimage 480I Printer
Operate the Rimage 480i Printer Operate the Rimage 480i Printer This section provides the information that you need to operate your Rimage 480i printer. Access the Power and USB Cables You will need to open the cable access door to power on and off the 480i printer, as well as to perform regular maintenance on the printer. -
Page 16: Open The Ink Cartridge Access Door
Open the Printer Service Door You will need to open the printer service door to perform regular maintenance on the 480i printer. Refer to the Remove Dust from the Rimage 480i Printer section on page 22. Press the tab and lift as shown to open the printer service door. -
Page 17: Place A Disc Onto The Printer Tray
Operate the Rimage 480i Printer Place a Disc onto the Printer Tray Use this procedure to place a disc onto the printer tray without scratching or damaging the recording surface of the disc. Press . The printer tray opens. Note: The printer tray opens automatically if you select Print from your software application. -
Page 18: Set Your Printing Preferences On A Windows-Based Pc
Rimage® 480i Printer User Guide Set Your Printing Preferences on a Windows-based PC Printing preferences allow you to set up your Rimage 480i printer to produce the best possible labels on your discs. Through printing preferences, you can: Set the Print Quality... -
Page 19: Set The Print Quality
Operate the Rimage 480i Printer Set the Print Quality Use this procedure to set the print quality for your print job. Navigate to Printing Preferences. Refer to page 14. Select the Disc/Quality tab. In the Disc Options section, select the appropriate Type from the dropdown list. -
Page 20: Adjust The Ink Volume Used
Rimage® 480i Printer User Guide Adjust the Ink Volume Used This functionality allows you to adjust the amount of ink that is used. Navigate to Printing Preferences. Refer to page 14. Select the Basics tab. Select Advanced Features. The Advanced Features window opens. -
Page 21: Set The Printable Area
Operate the Rimage 480i Printer Set the Printable Area This functionality allows you to adjust the non-printable area, or mask settings, for standard CD/DVD 120 mm media. You can set the outer and inner diameters to print the disc without overlapping the disc edges. -
Page 22: Align The Ink Cartridges
Rimage® 480i Printer User Guide If you use hub-printable discs without a stacking ring: Measure the inner diameter of the printable surface. Disc without a stacking ring Tip: Most discs like the one shown above have the following printable areas: Outer Diameter 118 mm Inner Diameter 24 mm. -
Page 23: Center The Image On A Disc
Center the Image on a Disc The Rimage 480i printer provides two ways to center the image on a disc. You can use the Auto Centering method or the Manual Centering method. This procedure describes both processes. The Auto Centering method is accurate to +/- 0.5 mm. -
Page 24: Maintain The Rimage 480I Printer
Never use oils, silicone, or other lubricants on any part of your Rimage 480i printer. Use only non-abrasive cleaners to wipe down the surfaces of your Rimage 480i printer. Do not pour cleaner directly onto your Rimage 480i printer. Instead, apply the cleaner to a lint-free cloth first. -
Page 25: Clean The Ink Cartridges
Lint-free cloth Non-abrasive, all-purpose cleaner Open the cable access door and disconnect the AC power adaptor to power off the Rimage 480i printer. Wipe down all exterior surfaces of the printer. Tip: Your printer may require more frequent maintenance if it is used in an area such as a store or a warehouse. -
Page 26: Remove Dust From The Rimage 480I Printer
Remove Dust from the Rimage 480i Printer Required tools: Can of compressed air Open the cable access door and disconnect the AC power adaptor to power off the Rimage 480i printer. Disconnect the USB cable from the side of the printer. Remove the dust. -
Page 27: Replace Consumables
Maintain the Rimage 480i Printer Replace Consumables This section provides information about how to replace the consumables on the Rimage 480i printer consumables for the 480i printer include: The fan filter The ink cartridges Replace the Fan Filter You must change the fan filter every month. Use this procedure to change the fan filter. - Page 28 Close the ink cartridge access door. The ink cartridge status light flashes for a few seconds and then stops. The Rimage 480i printer is ready to print. Note: If the ink cartridge is not securely seated in the cradle, the printer will not recognize the ink cartridge.