Table of Contents
Advertisement
Quick Links
Advertisement
Table of Contents
Troubleshooting

Related Manuals for Olivetti MY_WAY


Summary of Contents for Olivetti MY_WAY
- Page 2 Other trademarks and trade names may be used in this document to refer to either the entities claiming the marks and names or their products. Olivetti disclaims any Copyright © Olivetti, 2005 proprietary interest in trademarks and trade names other All rights reserved than its own.
-
Page 3: Table Of Contents
CONTENTS GETTING STARTED ........1 OVERVIEW ..........2 SAFETY INSTRUCTIONS . - Page 4 USING YOUR PRINTER FROM A COMPUTER ... . .21 BEFORE YOU BEGIN ........22 THE TOOLBOX .
-
Page 5: Getting Started
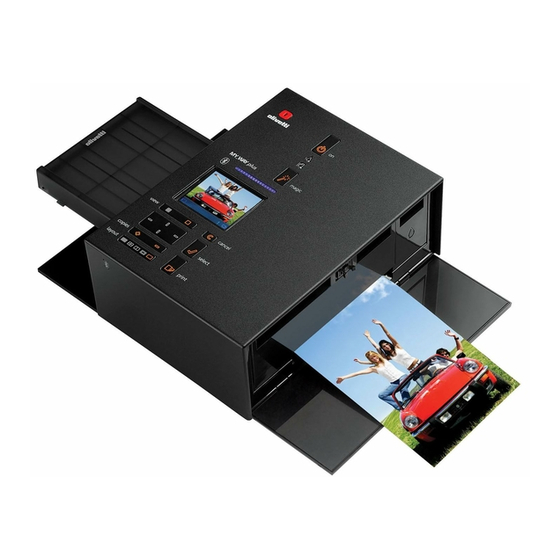
1GETTING STARTED OVERVIEW SAFETY INSTRUCTIONS INFORMATION ABOUT PRINT QUALITY AND THE WARRANTY LOCATING YOUR PRINTER’S COMPONENTS PRINTER CONTROL PANEL LOADING PAPER POWERING YOUR PRINTER TURNING YOUR PRINTER ON AND OFF CONNECTING A DIGITAL CAMERA TO YOUR PRINTER INSERTING AND REMOVING MEMORY CARDS CARRYING YOUR PRINTER GETTING STARTED... - Page 6 OVERVIEW Your compact, lightweight wireless mobile bubble ink-jet printer uses with a high-quality 3-colour print cartridge to print borderless photographs in very high photo quality on photo or plain paper. With the possibility of being operated with rechargeable batteries, and equipped with a wireless Bluetooth interface, this printer becomes an inseparable companion during your moments of leisure.
- Page 7 To guarantee the correct operation of your printer and top quality printing, it is essential to use only Olivetti original ink cartridges. Olivetti declines any responsibility for damage to your printer caused by the tampering with, or refilling of, the ink-jet cartridges. Such actions also imply forfeiture of the Warranty.
-
Page 8: Locating Your Printer's Components
LOCATING YOUR PRINTER’S COMPONENTS CHAPTER 1... - Page 9 Reference Part Description Control panel Features the colour display, Bluetooth activity indicator, error LEDs and a number of buttons and indicators that allow you to print and customize print jobs. See "Printer Control Panel" for a description of the functions available. USB interface Plug the USB cable from your digital camera to print photographs directly from your camera.
-
Page 10: Printer Control Panel
PRINTER CONTROL PANEL The printer control panel allows you to manually control the printing of photos received from a digital camera connected to the printer, stored in a memory card inserted in one of the printer’s memory card slots, or received from a Bluetooth peripheral. With its colour display, you can also scroll and view the photos. - Page 11 Reference Part Description Select button Press to select the photo displayed on the LCD. Copy selection Press the Plus sign (+) button to increase the number of copies to buttons be made, press the Minus sign (-) button to decrease the number of copies to be made.
-
Page 12: Loading Paper
LOADING PAPER The printer is equipped with a paper detection sensor that automatically detects whether the paper is fed manually or from the paper cassette. Loading Paper in the Paper Cassette Open the paper cassette lid. Load up to 20 sheets of photo paper in the paper cassette bay with the print or glossy side facing upward, adjusting the paper width guide accordingly. -
Page 13: Powering Your Printer
You can also order an Olivetti battery recharge kit by phoning a hot-line number listed in the leaflet that came with the printer, provided in the printer software or in the Olivetti web site. -
Page 14: Turning Your Printer On And Off
Rechargeable NiCd or NiMH Batteries Turn over your printer and then open and remove the battery compartment cover. Insert six 2-2.3 Ah rechargeable Nickel Cadmium (Nicd) or Nickel Metal Hydride (NiMH) batteries in the battery compartment, then replace and close the compartment cover. TURNING YOUR PRINTER ON AND OFF Turning On Your Printer Press the ON/OFF button on the printer control panel. -
Page 15: Connecting A Digital Camera To Your Printer
CONNECTING A DIGITAL CAMERA TO YOUR PRINTER Turn on your digital camera. Read your camera’s User’s Guide for more information. With your printer powered on, plug one end of the digital camera’s USB cable to the USB connector on the camera. Open the printer’s left outer door by pressing the upper centre part of the door to release it. -
Page 16: Removing A Memory Card
Proceed as follows: Open the printer’s left outer door by pressing the upper centre part of the door to release it, so you can access the memory card slots. Orient your specific memory card as indicated at the beginning of this section, carefully insert it into the selected slot and then gently push it in until it stops. -
Page 17: Carrying Your Printer
CARRYING YOUR PRINTER Extract the paper cassette from its insertion slot on the right side of the printer and close the printer’s left outer door. Slide the paper cassette along the cassette rails on the bottom of the printer until it is locked in place by the securing clip. - Page 18 CHAPTER 1...
-
Page 19: Using Your Printer Without A Computer
2USING YOUR PRINTER WITHOUT A COMPUTER VIEWING PHOTOS ON YOUR PRINTER’S DISPLAY SELECTING AND PRINTING PHOTOS FROM YOUR MEMORY CARD PRINTING PHOTOS FROM YOUR PICTBRIDGE DIGITAL CAMERA SELECTING AND PRINTING PHOTOS FROM YOUR DPOF DIGITAL CAMERA SELECTING AND PRINTING PHOTOS FROM YOUR NON-PICTBRIDGE/DPOF DIGITAL CAMERA PRINTING PHOTOS FROM A BLUETOOTH PERIPHERAL USING YOUR PRINTER WITHOUT A COMPUTER... -
Page 20: Full-Screen Views
VIEWING PHOTOS ON YOUR PRINTER’S DISPLAY Full-Screen Views Reference Part Description Browse window Displays the current photo. Select frame Indicates the selection state, highlighted when the Select button is pressed to select the photo displayed. Image Total field Indicates the number of selected photos that you want to print. Device icon Represents the device connected. -
Page 21: Thumbnail Views
Thumbnail Views Reference Part Description Photo indicator Indicates how many photos are stored on the connected device. Select frame Indicates that the photo was selected by using the Select button. Browse frame Highlights the current image as a result of the of the pressing of the Navigation button. -
Page 22: Printing Photos From Your Pictbridge Digital Camera
Upon completion of the print job, the initial screen indicating the number of photos stored will be redisplayed. PRINTING PHOTOS FROM YOUR PICTBRIDGE DIGITAL CAMERA Load the paper on which you want to print. For optimum results when printing photographs, use photo paper. -
Page 23: Selecting And Printing Photos From Your Non-Pictbridge/Dpof Digital Camera
SELECTING AND PRINTING PHOTOS FROM YOUR NON-PICTBRIDGE/DPOF DIGITAL CAMERA Load the paper on which you want to print. For optimum results when printing photographs, use photo paper. For information see Loading Paper". Make sure your digital camera is turned on and connected to the printer. For more information, see "Connecting a Digital Camera to Your Printer". - Page 24 CHAPTER 2...
-
Page 25: Using Your Printer From A Computer
3USING YOUR PRINTER FROM A COMPUTER BEFORE YOU BEGIN THE TOOLBOX THE PRINTER STATUS MONITOR PRINTING TRANSFERRING FILES FROM A MEMORY CARD TO YOUR COMPUTER USING YOUR PRINTER FROM A COMPUTER... - Page 26 CD-ROM. To access the Toolbox: Right click your mouse button on the Olivetti icon on the Windows task bar and click on MY_WAY Toolbox, or click Start > Programs or All Programs > Olivetti > MY_WAY Toolbox. The Toolbox is displayed.
- Page 27 The Toolbox main interface screen also provides links to Help, Solutions and assistance, and Settings. Clicking on this You can: Toolbox link: Help • Read more information on the currently displayed topic. Solutions and • Clean and test the ink cartridge. assistance •...
-
Page 28: Printing
PRINTING Printing From Your Application Using Print Properties With the document or photo open in the application that you are using, click File > Print to open the Print dialogue box. Click Preferences or Properties, depending on your operating system. On the Paper/Quality tab, customise your print settings: Document type: define the characteristics of the document that you want to print. -
Page 29: Printing With The Toolbox Print Photos Tool
Printing with the Toolbox Print Photos Tool Right click your mouse button on the Olivetti icon on the Windows task bar and click MY_WAY Toolbox, or click Start > Programs or All Programs > Olivetti > MY_WAY Toolbox. The Toolbox is displayed. -
Page 30: Transferring Files From A Memory Card To Your Computer
Insert into the corresponding slot on the printer, the memory card containing the files to transfer. See "Inserting and Removing Memory Cards". Right click your mouse button on the Olivetti icon on the Windows task bar and click MY_WAY Toolbox, or click Start > Programs or All Programs > Olivetti > MY_WAY Toolbox. The Toolbox is displayed. -
Page 31: The Ink Cartridge
4THE INK CARTRIDGE CHECKING INK LEVELS REPLACING THE INK CARTRIDGE ALIGNING THE INK CARTRIDGE THE INK CARTRIDGE... - Page 32 From the Toolbox, by viewing the ink level indicators on the bottom of the Toolbox’s main screen or in the New ink cartridges dialogue box: Right click your mouse button on the Olivetti icon on the Windows task bar and click MY_WAY Toolbox, or click Start > Programs or All Programs > Olivetti > ANY_WAY Toolbox. The Toolbox is displayed.
- Page 33 REPLACING THE INK CARTRIDGE Before proceeding with the procedures indicated in this section, carefully read and follow the information provided in "Safety Instructions" at the beginning of this manual. For information on how to purchase new ink cartridges from the manufacturer, consult the Toolbox’s Solutions and Assistance feature.
- Page 34 Hold the ink cartridge with its nozzles facing downward and its contacts facing the rear of the printer, then insert the cartridge into the carrier from the bottom nozzle side first and with a rotating motion. Push the ink cartridge firmly until it clicks into place. Close the printer’s inner and outer doors.
-
Page 35: Aligning The Ink Cartridge From The Toolbox
Right click your mouse button on the Olivetti icon on the Windows task bar and click on MY_WAY Toolbox, or click Start > Programs or All Programs > Olivetti > MY_WAY Toolbox. The Toolbox is displayed. - Page 36 CHAPTER 4...
-
Page 37: Maintenance And Troubleshooting
5MAINTENANCE AND TROUBLESHOOTING CLEANING YOUR PRINTER CLEANING THE INK CARTRIDGE NOZZLES TROUBLESHOOTING CLEARING PAPER JAMS MAINTENANCE AND TROUBLESHOOTING... -
Page 38: Cleaning The Printer Casing
Make sure paper is loaded in the printer. See "Loading Paper". Right click your mouse button on the Olivetti icon on the Windows task bar and click on MY_WAY Toolbox, or click Start > Programs or All Programs > Olivetti > MY_WAY Toolbox. The Toolbox is displayed. -
Page 39: Troubleshooting
TROUBLESHOOTING Problems During Printer Setup Before reading this section: Make sure the printer’s power transformer is properly connected to the printer and to a working electrical outlet, or the car cigarette lighter adapter is properly connected, or the six rechargeable 2-2.3 Ah Nickel Cadmium (NiCd) or Nickel Metal Hydride (NiMH) batteries are properly inserted and fully charged. - Page 40 Problem Possible Cause Corrective Action When connecting your printer to • The computer is running an Make sure the computer is the computer with the USB incompatible operating running Windows 98 SE, ME, cable, the New Hardware Wizard system. 2000 or XP, or MAC OS 10.3 is not displayed on the or later.
-
Page 41: Problems When Powering On The Printer
Problems When Powering On the Printer Problem Possible Cause Corrective Action The printer does not turn on • When the printer is Unplug the transformer’s when you press the Power powered from the mains power cords from the printer ON/OFF button on the control through its transformer: and from the electrical outlet panel. -
Page 42: Printing Problems
Printing Problems Problem Possible Cause Corrective Action Your printer does not print when • Your printer is not set as the Click Start > Settings > you click on the Print icon on the default printer. Printers. task bar of the application you Right-click on your printer’s are using. -
Page 43: Clearing Paper Jams
CLEARING PAPER JAMS Open the printer’s right outer door by pressing the upper centre part of the door to release it, then pull open the printer’s right inner door. Firmly grasp the jammed paper and gently pull it out from where it jammed. If the paper tears, make sure you remove all the torn pieces from the printer. - Page 44 CHAPTER 5...
-
Page 45: Technical Characteristics
6TECHNICAL CHARACTERISTICS GENERAL SPECIFICATIONS PRINTER SPECIFICATIONS PAPER SPECIFICATIONS TECHNICAL CHARACTERISTICS... - Page 46 GENERAL SPECIFICATIONS General Specifications Display 1.9" colour Liquid Crystal Display for photo preview and selection. Dimensions and weight • Height: 90 mm • Width: 220 mm • Depth: 162 mm • Weight: 1.6 Kg Power source • Power transformer plugged into a 100 - 240 Vac, 50-60 Hz electrical outlet.
-
Page 47: Printer Specifications
General Specifications Minimum system requirements for the connected Operating system: personal computer • Microsoft Windows 98 SE, ME, Pentium II 500 MHz, 128 MB RAM, 150 MB HDU • Microsoft Windows 2000, Pentium III 650 MHz, 128 MB RAM, 200MB HDU •... - Page 48 Supported Paper Formats and Sizes Format Size 4x6" cards 102 x 152 mm A6 cards 105 x 148.5 mm Dual A6 (Folded A4) 105 x 297 mm 10 x 15 cards 105 x 150 mm note: All of the above paper sizes are automatically detected by the printer. CHAPTER 6...
-
Page 49: Index
INDEX Aligning the ink cartridge Formats supported 43, 44 Memory card 5, 22 from the toolbox 31 card interfaces 42 Full-Screen Views 16 Views Browse window 16 Maintenance 33 Views Device icon 16 Meaning of the LED Views Icon bar 16 indicators 38 Views Image Total field 16 Battery 5... - Page 50 Printing Photos Toolbox 22 From a Bluetooth peripheral Help 23 Memory card file transfer 22 from your DPOF digital camera Print photos 22 Settings 23 from your non-Pictbridge/ Solutions and assistance 23 DPOF digital camera 19 Transferring files from a from your pictbridge digital memory card to your camera 18...
- Page 51 Code: 516307...