Ricoh Aficio SP 1210N User Manual
User's guide
Hide thumbs
Also See for Aficio SP 1210N:
- Quick setup manual (28 pages) ,
- Operation panel manual (17 pages) ,
- Specifications (2 pages)

Related Manuals for Ricoh Aficio SP 1210N


Summary of Contents for Ricoh Aficio SP 1210N
- Page 1 SP 1210N User’s Guide Read this manual carefully before you use this machine and keep it handy for future reference. For safe and correct use, be sure to read the Important Information in this manual before using the machine.
-
Page 2: Using This Guide
Using this guide Symbols used in this guide We use the following icons throughout this User’s Guide: Warnings tell you what to do to prevent possible personal injury. Electrical Hazard icons alert you to a possible electrical shock. Hot Surface icons warn you not to touch machine parts that are hot. Cautions specify procedures you must follow or avoid to prevent possible damage to the printer or other objects. -
Page 3: Safety Precautions
Safety precautions To use the printer safely Please keep these instructions for later reference and read them before attempting any maintenance. WARNING There are high voltage electrodes inside the printer. Before you clean the inside of the printer, make sure that you have turned off the power switch and unplugged the printer from the AC power outlet. - Page 4 After you have just used the printer, some internal parts of the printer will be extremely hot. To prevent injury, when you open the front or back cover (back output tray) of the printer, DO NOT touch the shaded parts shown in the illustration. Inside the printer Inside the printer (Back View)
-
Page 5: Symbols For The Main Power Switch
CAUTION Be sure to disconnect the plug from the wall outlet and clean the prongs and the area around the prongs at least once a year. Allowing dust to build up on the plug constitutes a fire hazard. Symbols for the main power switch In accordance with IEC 60417, this machine uses the following symbols for the main power switch: means POWER ON. -
Page 6: Compilation And Publication Notice
The contents of this manual and the specifications of this product are subject to change without notice. Ricoh reserves the right to make changes without notice in the specifications and materials contained herein and shall not be responsible for any damages (including consequential) caused by reliance on the materials presented, including but not limited to typographical and other errors relating to the publication. -
Page 7: Table Of Contents
Table of Contents About this Printer What is in the box? ............................1 Interface cable .............................1 Front view ............................2 Back view ............................3 Positioning the printer ..........................4 Power supply ............................4 Environment ............................4 Printing Methods About paper ...............................5 Type and size of paper ........................5 Recommended paper ..........................6 Unprintable area ..........................8 Printing methods............................9... - Page 8 Cleaning the outside of the printer.....................65 Cleaning the inside of the printer.......................66 Cleaning the corona wire........................69 Troubleshooting Identifying your problem ..........................71 Error messages in the Status Monitor .....................72 Error message printout ..........................74 Paper handling ............................75 Paper jams and how to clear them ......................77 Improving the print quality........................83 Solving print problems ..........................89 Network problems............................90...
- Page 9 Important Information for Some Countries.....................114 Important Safety Instructions......................114 Laser notices ............................116 Laser safety (110 to 120 volt model only)..................116 FDA regulations (110 to 120 volt model only) .................116 Internal laser radiation ........................116 IMPORTANT - for your safety ......................117 Index viii...
-
Page 10: About This Printer
About this Printer What is in the box? When you unpack the printer, make sure that you have all of the following parts. Quick Setup Guide (For North America, Asia) Quick Install Guide Printer (For EU, North America) CD-ROM Drum Unit Assembly USB cable (including Quick Setup Guide, User's (including Toner Cartridge) -
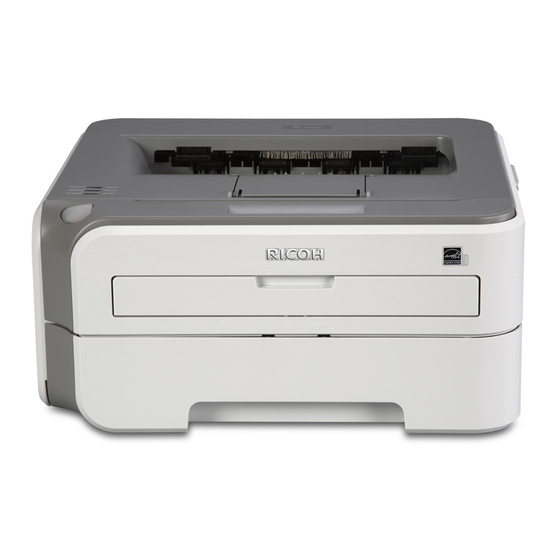
Page 11: Front View
About this Printer Front view 1 Face-down output tray support flap 2 (support flap 2) 2 Face-down output tray support flap 1 (support flap 1) 3 Control panel 4 Manual feed paper guide 5 Manual feed slot 6 Manual feed slot cover 7 Paper tray 8 Front cover 9 Power switch... -
Page 12: Back View
About this Printer Back view 1 Back cover (back output tray) 2 AC power connector 3 Network status LEDs (Light Emitting Diodes) 4 10/100BASE-TX port 5 USB interface connector... -
Page 13: Positioning The Printer
About this Printer Positioning the printer Read the following before you use the printer. Power supply Use the printer within the recommended power range. Power source: USA and Canada: AC 110 to 120 V, 50/60 Hz Europe and Australia: AC 220 to 240 V, 50/60 Hz The power cord, including extensions, should be no longer than 5 meters (16.5 feet). -
Page 14: Printing Methods
Printing Methods About paper Type and size of paper The printer loads paper from the installed paper tray or the manual feed slot. The names for the paper trays in the printer driver and this guide are as follows: Paper tray Tray 1 Manual feed slot Manual... -
Page 15: Recommended Paper
Printing Methods Tray 1 Manual Paper size Width: 76.2 to 220mm (3 to 8.7 in.) A4, Letter, Legal , B5 (ISO), Executive, A5, A6, B6 (ISO), Folio, Post Card Length: 116 to 406.4 mm (4.57 to 16 in.) 250 sheets Single sheet Number of sheets (80 g/m 20 lb) - Page 16 Printing Methods Types of envelopes Most envelopes will be suitable for your printer. However, some envelopes may have feed and print quality problems due to the way they have been made. A suitable envelope should have edges with straight, well- creased folds and the leading edge should not be thicker than two pieces of paper.
-
Page 17: Unprintable Area
Printing Methods Unprintable area The area of the paper that cannot be printed on is shown in the table below: Portrait Letter Legal B5 (ISO) Executive 4.23 mm 4.23 mm 4.23 mm 4.23 mm 4.23 mm 4.23 mm 4.23 mm 4.23 mm (0.16 in.) (0.16 in.) -
Page 18: Printing Methods
Printing Methods Printing methods Printing on plain paper and transparencies Printing on plain paper and transparencies from the paper tray (For the recommended paper to use, see About paper on page 5.) Pull the paper tray completely out of the printer. While pressing the blue paper-guide release lever, slide the paper guides to fit the paper size. - Page 19 Printing Methods Note For Legal size paper, press the release button in the bottom of the paper tray and then pull out the back of the paper tray. (Legal size paper is not available in some regions.) Put paper in the tray, and make sure that the paper is below the maximum paper mark (1). The side to be printed on must be face down.
- Page 20 Printing Methods Lift up the support flap 1 (1) to prevent paper from sliding off the face-down output tray. Choose the following from the printer driver: Paper Size ......(1) Media Type ......(2) Paper Source ....... (3) and any other settings.
- Page 21 Printing Methods Send the print data to the printer. Note • The Error LED on the control panel will light up to indicate No paper if the power switch is turned on before you put paper or transparencies in the tray. You can clear this error indication by pressing Go. •...
- Page 22 Printing Methods Printing on plain paper, bond paper or transparencies from the Manual feed slot (For the recommended paper to use, see About paper on page 5.) Note The printer automatically turns on the Manual Feed mode when you put paper in the manual feed slot. Lift up the support flap 1 (1) to prevent paper from sliding off the face-down output tray, or remove each page as soon as it comes out of the printer.
- Page 23 Printing Methods Using both hands, put one piece of paper or one transparency in the manual feed slot until the front edge of the paper or transparency touches the paper feed roller. When you feel the machine pull in the paper, let go.
- Page 24 Printing Methods Choose the following from the printer driver: Paper Size ......(1) Media Type ......(2) Paper Source ....... (3) and any other settings.
- Page 25 Printing Methods Send the print data to the printer. After the printed page comes out of the printer, put in the next sheet of paper or transparency as in Step d above. Repeat for each page that you want to print. Note •...
-
Page 26: Printing On Thick Paper, Labels And Envelopes
Printing Methods Printing on thick paper, labels and envelopes When the back output tray is pulled down, the printer has a straight paper path from the manual feed slot through to the back of the printer. Use this paper feed and output method when you want to print on thick paper, labels or envelopes. - Page 27 Printing Methods Using both hands, put one piece of paper or one envelope in the manual feed slot until the front edge of the paper or envelope touches the paper feed roller. When you feel the machine pull in the paper, let go. Note •...
- Page 28 Printing Methods Note • When you use Envelope #10, choose Com-10 for the Paper Size. • For other envelopes which are not listed in the printer driver, such as Envelope #9 or Envelope C6, choose User Defined... (For more information on envelope sizes, see Paper size on page 97.) Send the print data to the printer.
- Page 29 Printing Methods Note ° • If an envelope is creased after it is printed, turn the next one around 180 when you put it in the manual feed slot, and then in the printer driver choose the Advanced tab, select Page Setting, and check the Reverse Print box.
-
Page 30: Duplex Printing
Printing Methods Duplex printing ® ® The supplied printer drivers for Windows 2000/XP/XP Professional x64 Edition, Windows Vista ® ® ® Windows 7, Windows Server 2003/Windows Server 2003 x64 Edition all enable duplex printing. For more information about how to choose the settings, see the Help text in the printer driver. Guidelines for printing on both sides of the paper If the paper is thin, it may wrinkle. - Page 31 Printing Methods Remove the printed even-numbered pages from the output tray and put them back in the paper tray with the side to be printed on (blank side) face down. Follow the instructions on the computer screen. The printer will now automatically print all the odd-numbered pages on the other side of the paper. Note When you put paper in the paper tray, first empty the tray.
- Page 32 Printing Methods Using both hands, slide the manual feed slot paper guides to the width of the paper that you are going to use. Using both hands put the paper in the manual feed slot with the side that is going to be printed on first facing up.
-
Page 33: Paper Orientation For Manual Duplex Printing
Printing Methods Paper orientation for manual duplex printing The printer prints the second page first. If you print 10 pages on 5 sheets of paper, it will print page 2 and then page 1 on the first sheet of paper. It will print page 4 and then page 3 on the second sheet of paper. -
Page 34: Driver And Software
Driver and Software Printer driver A printer driver is software that translates data from the format used by a computer to the format that a particular printer needs. Typically, this format is page description language (PDL). ® The printer drivers for the supported versions of Windows are on the CD-ROM we have supplied or on our Web site. - Page 35 Driver and Software You can change the following printer settings when you print from your computer. Paper Size Multiple Page Orientation Copies Media Type Paper Source Resolution Toner Save Mode Print Setting Manual Duplex printing Watermark Scaling Job Spooling Quick Print Setup Sleep Time Macro Header-Footer Print...
-
Page 36: Features In The Printer Driver
Driver and Software Features in the printer driver (For more information, see the Help text in the printer driver.) Note ® • The screens in this section are from Windows XP. The screens on your computer will vary depending on your operating system. -
Page 37: Border Line
Driver and Software Paper Size From the drop-down box choose the Paper Size you are using. Multiple Page The Multiple Page selection can reduce the image size of a page allowing multiple pages to be printed on one sheet of paper or can enlarge the image size for printing one page on multiple sheets of paper. Page Order When N in 1 option is selected, the page order can be selected from the drop-down list. - Page 38 Driver and Software Media Type You can use the following types of media in your printer. For the best print quality, select the type of media that you wish to use. Plain Paper Thin Paper Thick Paper Thicker Paper Bond Paper Transparencies Envelopes Env.
-
Page 39: Advanced Tab
Driver and Software Advanced tab Change the tab settings by clicking one of the following icons: Print Quality (1) Duplex (2) Watermark (3) Page Setting (4) Device Options (5) Print Quality Resolution You can change the resolution as follows: • HQ 1200 •... - Page 40 Driver and Software Print Setting You can manually change the print setting. • General This is a printing mode for general printing of documents. • Graphics This is the best mode for printing documents that contain graphics. • Office Document This is the best mode for printing office documents.
- Page 41 Driver and Software Device Options You can set the following in Printer Function: Job Spooling Quick Print Setup Sleep Time Macro Header-Footer Print Density adjustment Error Message Printout Improve Print Output...
- Page 42 Driver and Software Job Spooling The printer keeps the last print job sent to it in memory. To reprint the last document, press the Go button and hold it down for about 4 seconds until all the LEDs light up in order (Toner, Drum, Error, Ready), and then release the Go button. Within 2 seconds press the Go button the number of times you want to reprint.
- Page 43 Driver and Software Header-Footer Print When this feature is enabled, it will print the date and time on your document from your computer’s system clock and the PC login user name or the text you entered. By clicking Setting, you can customize the information.
- Page 44 Driver and Software Tray Settings tab You can define the paper size for each paper tray and auto detect the serial number in the Tray Settings tab as follows. Paper Source Setting (1) This feature identifies the paper size defined for each paper tray. •...
-
Page 45: Support Tab
Driver and Software Support tab Print Settings (1) This will print the pages that show how the internal settings of the printer have been configured. Print Fonts (2) This will print the pages that show all the internal fonts of the printer. Check Setting... -
Page 46: Uninstalling The Printer Driver
Driver and Software Uninstalling the printer driver You can uninstall the printer driver that you have installed with the following steps. Note • This is not available if you installed the printer driver from the Windows Add a printer function. •... -
Page 47: Software
Software for network models BRAdmin Light BRAdmin Light is a utility for initial setup of Ricoh network connected devices. This utility can search for products on your network, view the status and configure basic network settings, such as IP address. The ®... -
Page 48: Control Panel
Control Panel LEDs (Light Emitting Diodes) This section refers to three LEDs Toner, Drum and Error, and a dual function Ready LED & Go button on the control panel. 1 Toner LED The Toner LED indicates when the Toner is low or at the end of its life. - Page 49 Control Panel Printer status The power switch is off. Sleep mode The printer is in sleep mode. Pressing the Go button wakes up the printer from sleep mode to ready mode. Ready to print The printer is ready to print.
- Page 50 Control Panel Printer status Warming up The printer is warming up. Cooling down The printer is cooling down. Wait for a few seconds until the inside of the printer has cooled down. Receiving data The printer is either receiving data from the computer, processing data in memory or printing the data.
- Page 51 Control Panel Printer status Drum life end soon The drum unit is near the end of its life. We recommend that you get a new drum unit to replace the current one. See Replacing the drum unit on page 61. The Drum LED will turn on for 2 seconds and off for 3 seconds.
- Page 52 Control Panel Printer status Drum error The corona wire needs to be cleaned. See Cleaning the corona wire on page 69. If your LED's still shows the same error indication after you have cleaned the corona wire, replace the drum unit with a new one. See Replacing the drum unit on page 61.
-
Page 53: Service Call Indications
If the error remains after switching the printer back on, press the Go button and make a note of the LED's that remain lit and report the error status (as shown in the table below) to your dealer or Ricoh Customer Service. - Page 54 For example, the LED indication below shows a fuser unit failure. Make a note of the indication, referring to the table on page 44, and report the error status to your dealer or Ricoh Customer Service. Note Make sure that the front cover is completely closed before you report a service call.
-
Page 55: Go Button
Control Panel Go button The Go button has the following functions: Cancel printing Cancel only the printing job: While printing press the Go button for about 4 seconds until all the LEDs light up. The Ready and Error LEDs will flash as the job is being canceled. Cancel all the received jobs: To delete all jobs, press the Go button for about 4 seconds until all the LEDs light up and then release it. -
Page 56: Print A Test Page
Control Panel Print a test page You can use the Go button or the printer driver to print a test page. Using the Go button Turn off the printer. Make sure that the front cover is closed and the power cord is plugged in. Hold down the Go button as you turn on the power switch. -
Page 57: Print A Printer Settings Page
Control Panel Print a Printer Settings page You can print the current settings using the control panel button or printer driver. Using the Go button Make sure that the front cover is closed and the power cord is plugged in. Turn on the printer and wait until the printer is in the Ready state. -
Page 58: Print Fonts
Control Panel Print Fonts You can print a list of the internal fonts using the control panel button or printer driver. Using the Go button Turn off the printer. Make sure that the front cover is closed and the power cord is plugged in. Hold down the Go button as you turn on the power switch. -
Page 59: Network Default Settings
Control Panel Network default settings If you want to reset the print server back to its default settings (resetting all information such as the password and IP address information), follow these steps: Using the Go button Turn off the printer. Make sure that the front cover is closed and the power cord is plugged in. -
Page 60: Routine Maintenance
Routine Maintenance You will need to replace certain parts and clean the printer regularly. WARNING When you replace certain parts or clean the inside of the printer, remember the following: • If your clothes are smeared with toner, wipe off the toner with a dry cloth and immediately wash the clothes in cold water to avoid stains. -
Page 61: Replacing The Consumable Items
Routine Maintenance Replacing the consumable items You will need to replace the consumable items when the machine indicates that the life of the consumable is over. Consumables Toner cartridge Drum unit See Toner cartridge on page 53. See Drum unit on page 60. Print Cartridge SP 1200E (for Europe) Drum Unit SP 1200 Print Cartridge SP 1200A (USA and Canada) -
Page 62: Toner Cartridge
Routine Maintenance Toner cartridge The life of the original toner cartridge that came with the printer will be a starter toner cartridge. The starter toner cartridge will print approximately 1,000 A4 or Letter-size single-sided pages. Approx. cartridge yield is declared in accordance with ISO/IEC 19752. - Page 63 • To ensure high quality printing, we recommend that you use only genuine toner cartridges. When you want to buy toner cartridges, call your dealer or Ricoh Customer Service. • We recommend that you clean the printer when you replace the toner cartridge. See Cleaning on page 65.
- Page 64 Routine Maintenance CAUTION We recommend that you put the drum unit and toner cartridge assembly on a piece of disposable paper or cloth in case you accidentally spill or scatter toner. To prevent damage to the printer from static electricity, DO NOT touch the electrodes shown in the illustration.
- Page 65 Routine Maintenance CAUTION Handle the toner cartridge carefully. If toner scatters on your hands or clothes, wipe or wash it off with cold water at once. To avoid print quality problems, DO NOT touch the shaded parts shown in the illustrations. Note •...
- Page 66 CAUTION For USA and Canada Ricoh strongly recommends that you do not refill the toner cartridge provided with your printer. We also strongly recommend that you continue to use only genuine Ricoh brand replacement toner cartridges. Use or attempted use of potentially incompatible toner and/or cartridges in the Ricoh machine may cause damage to the machine and/or may result in unsatisfactory print quality.
- Page 67 This machines are designed to work with toner of a particular specification and will work to a level of optimum performance when used with genuine Ricoh branded toner cartridges. We cannot guarantee this optimum performance if toner or toner cartridges of other specifications are used. We does not therefore recommend the use of cartridges other than genuine Ricoh branded cartridges with this machine.
- Page 68 Routine Maintenance Clean the primary corona wire inside the drum unit by gently sliding the blue tab from right to left and left to right several times. CAUTION Be sure to return the tab to the home position ( ) (1). If you do not, printed pages may have a vertical stripe. Put the drum unit and toner cartridge assembly back in the printer.
-
Page 69: Drum Unit
Routine Maintenance Drum unit A new drum unit can print approximately 12,000 A4 or Letter size single-sided pages at 1 per/ job. Note • There are many factors that determine the actual drum life, such as the temperature, humidity, type of paper, type of toner used, number of pages per print job and so on. - Page 70 Routine Maintenance Replacing the drum unit CAUTION While removing the drum unit, handle it carefully because it may contain toner. Every time you replace the drum unit, clean the inside of the printer. See Cleaning on page 65. When you replace the drum unit with a new one, you need to reset the drum counter by completing the following steps: Make sure that the printer is turned on and the Drum LED is blinking.
- Page 71 Routine Maintenance Take out the drum unit and toner cartridge assembly. CAUTION We recommend that you put the drum unit and toner cartridge assembly on a piece of disposable paper or cloth in case you accidentally spill or scatter toner. To prevent damage to the printer from static electricity, DO NOT touch the electrodes shown in the illustration.
- Page 72 Routine Maintenance CAUTION Handle the toner cartridge carefully. If toner scatters on your hands or clothes, wipe or wash it off with cold water at once. To avoid print quality problems, DO NOT touch the shaded parts shown in the illustrations. Note •...
- Page 73 Routine Maintenance CAUTION Make sure that you put in the toner cartridge properly, or it may separate from the drum unit. Put the drum unit and toner cartridge assembly back in the printer. Close the front cover. Make sure that the Drum LED is now off.
-
Page 74: Cleaning
Routine Maintenance Cleaning Clean the outside and inside of the printer regularly with a dry, lint-free cloth. When you replace the toner cartridge or the drum unit, make sure that you clean the inside of the printer. If printed pages are stained with toner, clean the inside of the printer with a dry, lint-free cloth. -
Page 75: Cleaning The Inside Of The Printer
Routine Maintenance Wipe the outside of the printer with a dry, lint-free cloth to remove dust. Remove anything that is stuck inside the paper tray. Wipe the inside of the paper tray with a dry, lint-free cloth to remove dust. Put the paper tray back in the printer. - Page 76 Routine Maintenance Take out the drum unit and toner cartridge assembly. HOT SURFACE After you have just used the printer, some internal parts of the printer will be extremely hot. Wait for the printer to cool down before you touch the internal parts of the printer. CAUTION We recommend that you put the drum unit and toner cartridge assembly on a piece of disposable paper or cloth in case you accidentally spill or scatter toner.
- Page 77 Routine Maintenance Wipe the scanner window with a dry, lint-free cloth. Put the drum unit and toner cartridge assembly back in the printer. Close the front cover. Plug the printer back in, and then turn on the power switch.
-
Page 78: Cleaning The Corona Wire
Routine Maintenance Cleaning the corona wire If you have print quality problems, clean the corona wire as follows: Open the front cover. Take out the drum unit and toner cartridge assembly. CAUTION We recommend that you put the drum unit and toner cartridge assembly on a piece of disposable paper or cloth in case you accidentally spill or scatter toner. - Page 79 Routine Maintenance Clean the primary corona wire inside the drum unit by gently sliding the blue tab from right to left and left to right several times. CAUTION Be sure to return the tab to the home position (a) (1). If you do not, printed pages may have a vertical stripe. Put the drum unit and toner cartridge assembly back in the printer.
-
Page 80: Troubleshooting
Troubleshooting You can correct most problems by yourself. Identifying your problem First, check the following: The AC power cord is connected properly and the printer is turned on. All of the protective parts have been removed. The toner cartridges and drum unit are installed properly. The front cover and fuser cover are fully closed. -
Page 81: Error Messages In The Status Monitor
Cut the amount of paper in the paper tray, and then try again. Make sure you use paper that meets Ricoh’s recommended paper specifications. See About paper on page 5. - Page 82 Troubleshooting Error message Action Paper Jam Tray 1 Clear the jammed paper from the indicated area. See Paper jams and how to clear them on page 77. Paper Jam Inside Paper Jam Rear Toner Life End See Replacing the toner cartridge on page 54. Toner Low Buy a new toner cartridge and have it ready for when the Toner Life End status is indicated.
-
Page 83: Error Message Printout
Troubleshooting Error message printout The printer can also report problems by printing an error message. Use the table below to identify and clear the error message. Error message Action Memory Full Press the Go button to print the remaining data in the printer memory. Cancel the print job if you want to delete the remaining data in the printer memory. -
Page 84: Paper Handling
Troubleshooting Paper handling First, make sure that you are using paper that meets Ricoh’s recommended paper specifications. (See About paper on page 5.) Problem Recommendation The printer does not feed If there is paper in the paper tray, make sure it is straight. If the paper is curled, paper. - Page 85 Troubleshooting Problem Recommendation The paper slides off the back Follow these steps: output tray. Remove the output tray support flap 1 (1) from the top of the printer by first lifting the flap up. Then push the flap to the left or right to release one of the posts (2) on the flap and pull up.
-
Page 86: Paper Jams And How To Clear Them
Troubleshooting Paper jams and how to clear them If a paper jam occurs, the printer will flash the Error LED as shown below. HOT SURFACE After you have just used the printer, some internal parts of the printer will be extremely hot. To prevent injury, when you open the front cover or back cover (back output tray) of the printer, DO NOT touch the shaded parts shown in the illustration. - Page 87 Troubleshooting Note • Always remove all paper from the paper tray and straighten the stack when you add new paper. This helps prevent multiple sheets of paper from feeding through the printer at one time and prevents paper jams. • Please confirm that you have installed both a toner cartridge and a drum unit in the machine. If you have not installed a drum unit or have installed the drum unit improperly, then this may cause a paper jam in your machine.
- Page 88 Troubleshooting Close the front cover. Note Do not put the drum unit and toner cartridge assembly back in at this point. Pull the paper tray completely out of the printer. Pull the jammed paper down and out of the printer. Open the back cover (back output tray).
- Page 89 Troubleshooting Pull the tab toward you to open the fuser cover (1). Pull the jammed paper out of the fuser unit. HOT SURFACE After you have just used the printer, some internal parts of the printer will be extremely hot. Wait for the printer to cool down before you touch the internal parts of the printer.
- Page 90 Troubleshooting Push down the green lock lever and take the toner cartridge out of the drum unit. Clear the jammed paper if there is any inside the drum unit. CAUTION Handle the toner cartridge carefully. If toner scatters on your hands or clothes, wipe or wash it off with cold water at once.
- Page 91 Troubleshooting Put the toner cartridge back into the drum unit until you hear it lock into place. If you put the cartridge in properly, the green lock lever will lift automatically. Open the front cover. Put the drum unit and toner cartridge assembly back in the printer. Put the paper tray firmly back in the printer.
-
Page 92: Improving The Print Quality
See About paper on page 5. Put in a new drum unit. See Replacing the drum unit on page 61. The fuser unit may be contaminated. Call Ricoh Customer Service. Ghost Make sure that you use paper that meets our specifications. Rough-surfaced paper may cause the problem. - Page 93 The drum unit may be damaged. Put in a new drum unit. See Replacing the drum unit on page 61. The fuser unit may be contaminated. Call Ricoh Customer Service. All black Make sure that you use paper that meets our specifications. A rough surfaced paper or thick print media can cause problems.
- Page 94 Troubleshooting Examples of poor print Recommendation quality If the problem is not solved after printing a few pages, the drum unit may have glue from a label stuck on the OPC drum surface. 75 mm Clean the drum unit as follows: (2.95 in.) 75 mm Put the print sample in front of the drum unit, and find the exact position of...
- Page 95 0 1 2 3 4 Replacing the toner cartridge on page 54. Black lines down the page The fuser unit may be smudged. Call your dealer or Ricoh Customer Service. Printed pages have toner stains down the page. Make sure that the paper or other print media is loaded properly in the paper tray and that the guides are not too tight or too loose against the paper stack.
- Page 96 Troubleshooting Examples of poor print Recommendation quality Make sure that the paper is loaded properly. See Printing on plain paper and transparencies from the paper tray on page 9. B DEFGH Check the paper type and quality. See About paper on page 5. abc efghijk Turn over the stack of paper in the tray or try rotating the paper 180°...
- Page 97 Troubleshooting Examples of poor print Recommendation quality Turn the paper over in the paper tray, and print again. (Excluding Letterhead paper) If the problem remains, lift up the support flaps as follows: Lift up the output tray support flap 1 (1). Curled Lift up the output tray support flap 2 (2).
-
Page 98: Solving Print Problems
Troubleshooting Solving print problems Problem Recommendation The printer prints unexpectedly Make sure that the printer cable is not too long. We recommend that you use a or it prints garbage data. USB cable that is no longer than 2 meters (6.5 feet). Make sure that the printer cable is not damaged or broken. -
Page 99: Network Problems
Troubleshooting Network problems For problems concerning using your printer on a Network, see the Network User’s Guide on the CD-ROM we have supplied. Click Documentation on the menu screen. The Network User’s Guide in PDF format will be installed automatically when you install the driver. Click the Start button, All Programs , your printer, and then User’s Guide. -
Page 100: A Appendix
Appendix Printer specifications Engine Model SP 1210N Technology Electrophotographic Print speed (A4 size/ Letter size) Up to 22 ppm (A4 size) ,Up to 23 ppm (Letter size) Resolution HQ1200 ® Windows 2000/XP/ XP Professional x64 600 dpi Edition, 300 dpi ®... -
Page 101: Software
Appendix Software Model SP 1210N Printer driver ® ® Windows PCL printer driver for Windows 2000/XP/XP Professional x64 Edition, Windows ® ® ® Vista , Windows Server 2003/Windows Server 2003 x64 Edition Utilities Interactive Help Instructional animations for problem solving. Control panel Model SP 1210N... -
Page 102: Supplies
Appendix Supplies Model SP 1210N Order No. Toner Cartridge Starter cartridge Approx. 1,000 pages A4/Letter pages Standard cartridge Approx. 2,600 pages A4/Letter Print Cartridge SP 1200E (for Europe) pages Print Cartridge SP 1200A (USA and Canada) Print Cartridge SP 1200S (For Asia) Drum Unit Approx. -
Page 103: Computer Requirements
Appendix Computer requirements Computer Platform & Operating Processor Minimum Speed Minimum Recommended Hard Disk System Version Space to install 64 MB ® ® ® ® Windows Windows 2000 Intel Pentium II or equivalent Operating Professional System ® Windows XP Home 256 MB Edition 128 MB... -
Page 104: Important Information For Choosing Your Paper
Appendix Important information for choosing your paper This section gives information to help you choose paper to use with this printer. Note If you use paper that is not recommended, a paper jam or misfeed may occur in the printer. (See Recommended paper on page 6.) Before you buy a large quantity of paper Make sure that the paper is suitable for the printer. - Page 105 Appendix Print surface The characteristics of the face side and reverse side of a sheet of paper may vary a little. Usually, the opening side of the paper ream package is the print side. Follow the indications on the paper package.
- Page 106 Appendix Paper size Paper size 8.5 × 11 in. Letter Legal 8.5 × 14 in. Executive 7.25 × 10.5 in. 210 × 297 mm 148 × 210 mm 210 × 148 mm A5 Long Edge 105 × 148 mm Envelope Monarch 3.875 ×...
-
Page 107: Symbol And Character Sets
Appendix Symbol and character sets For the HP LaserJet emulation modes, you can choose the symbol and character sets using Web Based Management (Web browser) when connected to a network or the control panel buttons. How to use Web Based Management (web browser) To use Web Based Management (Web browser), follow the steps below. - Page 108 Appendix OCR A (0O) OCR B (1O) HP LaserJet mode ABICOMP Brazil / Portugal (13P) ABICOMP International (14P) Desktop (7J) Greek8 (8G) HP German (0G) HP Spanish (1S) ISO Latin1 (0N) ISO Latin2 (2N) ISO Latin5 (5N) ISO Latin6 (6N) ISO2 IRV (2U) ISO4 UK (1E) ISO5 ASCII (0U)
-
Page 109: Quick Reference For Bar Code Control Commands
Appendix Quick reference for bar code control commands The printer can print bar codes in the HP LaserJet emulation modes. Print bar codes or expanded characters Code ESC i 27 105 1B 69 Format: ESC i n ... n \ Creates bar codes or expanded characters according to the segment of parameters ‘n ... - Page 110 Appendix This parameter selects the bar code mode as shown above. When n is ‘t5’ or ‘T5’ the bar code mode (EAN 8, EAN 13, or UPC A) varies according to the number of characters in the data. Bar code, expanded character, line block drawing and box drawing n = ‘s0’...
- Page 111 Appendix Bar code human readable line ON or OFF n = ‘r0’ or ‘R0 Human readable line OFF n = ‘r1’ or ‘R1 Human readable line ON Preset: Human readable line ON (1) ‘T5’ or ‘t5’ (2) ‘T6’ or ‘t6’ (3) ‘T130’...
-
Page 112: Expanded Character Rotation
Appendix Bar code & expanded character offset in Y-axis n = ‘ynnn’ or ‘Ynnn’ This parameter shows the downward offset from the current print position in the ‘u’- or ‘U’-specified unit. Bar code, expanded character, line block drawing and box drawing height n = ‘hnnn’, ‘Hnnn’, ‘dnnn’, or ‘Dnnn’... - Page 113 Appendix When Interleaved 2 of 5 is selected with the parameter ‘t1’ or ‘T1’: Ten numerical characters ‘0’ to ‘9’ can be accepted as bar code data. Other characters cause a data error. The number of characters for bar codes is not limited. This mode of bar codes needs even characters. If the bar code data has odd characters, ‘0’...
-
Page 114: Box Drawing
Appendix When ISBN (UPC-E) is selected with the parameter ‘t131’ or ‘T131’: The same rules apply as for ‘t6’ or ‘T6’. When EAN 128 set A, set B or set C is selected with the parameter ‘t132’ or ‘T132’, ‘t133’ or ‘T133’ or ‘t134’ or ‘T134’... - Page 115 Appendix 'Codabar LPRINT CHR$(27);"it9r1s0o0x00y100bA123456A\"; 'Code 128 set A LPRINT CHR$(27);"it12r1o0x00y120bCODE128A12345?\"; 'Code 128 set B LPRINT CHR$(27);"it13r1o0x00y140bCODE128B12345?\"; 'Code 128 set C LPRINT CHR$(27);"it14r1o0x00y160b";CHR$(1);CHR$(2);"?\"; 'ISBN(EAN) LPRINTCHR$(27);"it130r1o0x00y180b123456789012?+12345\"; 'EAN 128 set A LPRINT CHR$(27);"it132r1o0x00y210b1234567890?\"; LPRINT CHR$(12)
-
Page 116: B Appendix (For Europe And Other Countries)
Appendix (for Europe and Other Countries) Important information: regulations Radio interference (220 to 240 volt model only) This printer follows EN55022 (CISPR Publication 22)/Class B. IEC 60825-1:2007 specification (220 to 240 volt model only) This printer is a Class 1 laser product as defined in IEC 60825-1:2007 specifications. The label shown below is attached in countries where it is needed. -
Page 117: Internal Laser Radiation
Appendix (for Europe and Other Countries) For Finland and Sweden LUOKAN 1 LASERLAITE KLASS 1 LASER APPARAT Varoitus! Laitteen käyttäminen muulla kuin tässä käyttöohjeessa mainitulla tavalla saattaa altistaa käyttäjän turvallisuusluokan 1 ylittävälle näkymättömälle lasersäteilylle. Varning Om apparaten används på annat sätt än i denna Bruksanvisning specificerats, kan användaren utsättas för osynlig laserstrålning, som överskrider gränsen för laserklass 1. -
Page 118: Important - For Your Safety
Appendix (for Europe and Other Countries) IMPORTANT - for your safety To ensure safe operation, the supplied three-pin plug must be inserted only into a standard three-pin power outlet that is properly grounded through the standard electrical wiring. Extension cords used with this printer must be three-pin plug type and correctly wired to provide grounding. Incorrectly wired extension cords may cause personal injury and equipment damage. -
Page 119: C Appendix (For Usa And Canada)
Appendix (for USA and Canada) Important information: regulations Federal Communications Commission (FCC) Declaration of Conformity (USA only) Responsible Party: Ricoh Americas Corporation Address: 5 Dedrick Place, West Caldwell, NJ 07006 USA Telephone number: 973-882-2000 declares, that the products Product Name:... -
Page 120: International Energy Star ® Qualification Statement
The purpose of the International ENERGY STAR Program is to promote the development and ® popularization of energy-efficient office equipment. As an ENERGY STAR Partner, Ricoh Company., Ltd. ® has determined that this product meets the ENERGY STAR guidelines for energy efficiency. -
Page 121: Important Information For Australia
Appendix (for USA and Canada) Important Information for Australia IMPORTANT-For Your Safety To ensure safe operation the three-pin plug supplied must be inserted only into a standard three-pin power point which is effectively grounded through the normal household wiring. Extension cords used with the equipment must be three-conductor and be correctly wired to provide connection to ground. - Page 122 Appendix (for USA and Canada) 14 Wait until pages have exited the machine before picking them up. 15 Unplug this product from the wall outlet and refer servicing to Authorised Service Personnel under the following conditions: When the power cord is damaged or frayed. If liquid has been spilled into the product.
-
Page 123: Important Information For Some Countries
Appendix (for USA and Canada) Important Information for Some Countries Important Safety Instructions 1 Read all of these instructions. 2 Save them for later reference. 3 Follow all warnings and instructions marked on the product. 4 Unplug this product from the wall outlet before cleaning the outside of the machine and the scanner glass. DO NOT use liquid or aerosol cleaners. - Page 124 For protection against the risk of electrical shock, always disconnect all cables from the wall outlet before servicing, modifying or installing the equipment. Ricoh cannot accept any financial or other responsibilities that may be the result of your use of this information, including direct, special or consequential damages. There are no warranties extended or...
-
Page 125: Laser Notices
United States. MANUFACTURED: RICOH COMPANY LTD, 3-6, Naka-magome 1-Chome Ohta-ku, Tokyo 143-8555, Japan Complies with FDA performance standards for laser products except for deviations pursuant to Laser Notice No. 50, dated June 24, 2007. -
Page 126: Important - For Your Safety
Appendix (for USA and Canada) IMPORTANT - for your safety To ensure safe operation, the supplied three-pin plug must be inserted only into a standard three-pin power outlet that is properly grounded through the standard electrical wiring. Extension cords used with this printer must be three-pin plug type and correctly wired to provide proper grounding. - Page 127 Index Automatic Interface Selection ........38 Job cancel ..............46 Bar code control ............100 LEDs ................. 39 BRAdmin Light ............38 Manual feed slot ............13 Carton contents ............1 manual feed slot ............22 Cartridge position error ..........41 Media specifications ..........
- Page 128 Index Software ..............38 Specifications ............91 Status Monitor ............72 Symbol ..............98 Toner cartridge ............53 Toner life end ............41 Toner low ..............41 Trademarks ..............v Tray Setting tab ............35 Troubleshooting ............71 Unprintable area ............8 Utilities ..............
- Page 129 This machine is approved for use in the country of purchase only. M087-6100 GB...