Alesis SR-16 Reference Manual
Alesis reference manual lcd sr-16
Hide thumbs
Also See for SR-16:
- Quick start manual ,
- Quick start owner's manual (52 pages) ,
- Getting started (13 pages)
Table of Contents
Advertisement
Advertisement
Table of Contents

Related Manuals for Alesis SR-16


Summary of Contents for Alesis SR-16
- Page 1 ALESIS SR-16 Reference Manual...
-
Page 2: Table Of Contents
CHAPTER 1: INTRODUCTION ...1 1.1 WELCOME TO THE SR-16 DRUM MACHINE!...1 1.1A If You Just Can't Wait…...1 1.1B SR-16 Quick Description...1 1.1C About this Manual...1 1.1D Return Your Warranty Card Now!...2 1.2 GROUND RULES...2 1.2A The Pattern/Song Recording Method...2 1.2B The Four Different Types of Patterns...3 1.2C How "Looping"... - Page 3 3.3C Copy a Single Drum Pad's Part to a Drum Pad in a Different Pattern...26 3.3D Copy a Pattern to Another SR-16 Via MIDI...26 3.3E Copy a Single Drum Pad's Part to a Drum Pad in Another SR-16 Via MIDI...27 3.3F Copy a Drum Set to Another SR-16 Via MIDI...27 CHAPTER 4: CREATING DRUM SETS...28...
- Page 4 8.2D Odd Time Signatures...58 8.3 SOUND STACKING...59 8.3A Basics...59 8.3B Sound Stacking via MIDI...59 8.3C Sound Stacking when Using the SR-16 as a Drum Machine...59 8.3D Editing Stacked Combinations...59 8.4 UNDERSTANDING RHYTHMIC NOTATION...60 CHAPTER 9: MIDI SUPPLEMENT...61 9.1 MIDI BASICS...61 9.1A MIDI Hardware...61...
-
Page 5: Chapter 1: Introduction
When you're ready to learn more, return to the beginning to learn SR-16 basics. The goal of the SR-16's design team has been to create a musical instrument, not a computer that happens to make sounds. They thank you for your confidence in this product, and hope that you find the SR-16 a rewarding tool for self-expression that stimulates your creativity (and tickles your fancy). -
Page 6: D Return Your Warranty Card Now
Backup section so that you don't accidentally erase the tune or otherwise lose it. If you only want to use the SR-16 as a MIDI expander module, then the MIDI Setup section might be a priority. -
Page 7: B The Four Different Types Of Patterns
After perfecting these Patterns, Song mode offers two ways to create a song: • Program a list of Patterns, in the order in which they are to be played. • Select Patterns in real time, and the SR-16 will remember your performance. The SR-16 stores up to 100 User-programmable Songs. -
Page 8: C How "Looping" Simplifies Recording
8 beats, then immediately jump back to the beginning and continue recording through all 8 beats again. The SR-16 will remain in record mode, and continue to loop, until you press STOP or switch over to Perform mode. You will hear any previously-played parts as you record new parts. -
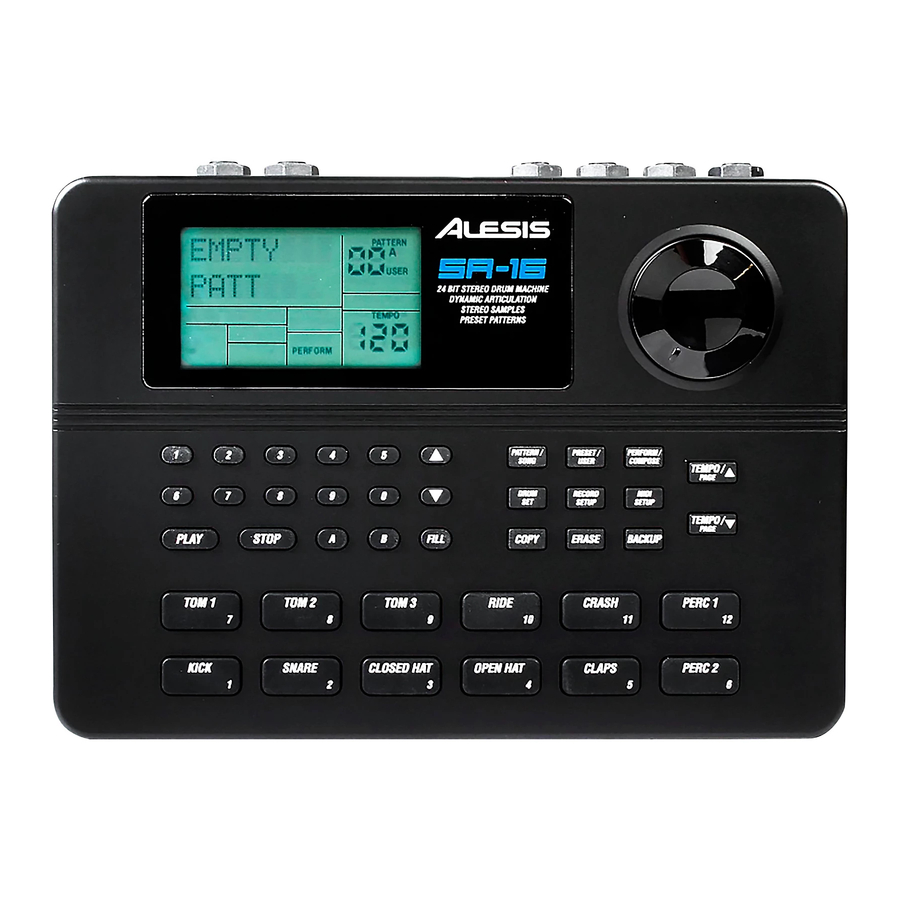
Page 9: F Physical Layout
1.2F Physical Layout The SR-16 includes seven main types of controls, along with a group of connectors (located on the back panel). The control groups (see diagram) are: • Pads (play buttons). Tapping each button triggers an SR-16 voice. • Function buttons. These six buttons select various functions, some of which include multiple "pages"... -
Page 10: G Display Layout
• Swing. In Compose mode, shows the current swing rhythm, expressed as a percentage (or OFF if swing is off). • Play/Record. If the SR-16 is playing and in Compose mode, this will say RECORDING. If the SR-16 is playing and in Perform mode, this will say PLAYING. -
Page 11: A Entering Numbers
You need to type in (enter) these numbers in a specific way (as described below). 1.3B The Cursor When the SR-16 wants you to enter a number in the "Dialog" box, the display will show the previously-entered number (or the default number), and the first digit will have a small underline called the cursor. -
Page 12: F Buttons That Toggle
(counter-clockwise). 2. Leave the MIDI jacks (rear panel) disconnected for now. 3. Plug the SR-16's AC adapter into the wall. The smaller plug inserts in the 9V AC Power jack on the back. - Page 13 STOP. If you want to play along with the demo, feel free to bash away on the pads. 8. Press PLAY, and you'll hear a Preset Pattern. (In case the SR-16 has already been played with, make sure that the display shows PERFORM and does not show USER before continuing.
-
Page 14: Chapter 2: Record Setup
CHAPTER 2: RECORD SETUP Several parameters are often adjusted prior to recording a Pattern, such as metronome, Pattern length, etc. General instructions are: 1. Press the RECORD SETUP button. 2. Use the PAGE (up and down) buttons to select different "pages" of functions; the display's lower right window shows the page number. -
Page 15: Select The Swing Value (Swing Select)
Quantization shifts your playing to the specified beat while you play, so choose the desired value before tapping out your rhythms. Remember that you can also change quantization while recording if, for example, you want to record snare with eighth note quantization but high-hats with 16th note quantization. -
Page 16: Enable Click (Metronome) And Set Rhythm (Click Select)
2.3 PAGE 3: ENABLE CLICK (METRONOME) AND SET RHYTHM (CLICK SELECT) The display shows CLICK SELECT; the Click window shows the click's rhythmic value. Enter the click value with the INC/DEC or number buttons (1 = quarter note, 2 = quarter note triplet, 3 = 8th note, 4 = 8th note triplet, 5 = 16th note, 6 = 16th note triplet, 7-0 = Click Off). -
Page 17: Adjust Velocity Response (Velocity)
2.5 PAGE 5: ADJUST VELOCITY RESPONSE (VELOCITY) There are 11 ways in which a pad's output level can respond to the force with which you tap it: soft, medium, loud, and eight fixed responses. The display says VELOCITY. To select the desired dynamic response, use the INC/DEC or number buttons (1 = Fixed 1, 2 = Fixed 2, 3 = Fixed 3, 4 = Fixed 4, 5 = Fixed 5, 6 = Fixed 6, 7 = Fixed 7, 8 = Fixed 8, 9 = Soft, and 0 = Loud). -
Page 18: Add/Remove Beats From Pattern End (Length)
(quarter notes). Enter the desired length with the INC/DEC or number buttons (this must be a three digit number; enter leading zeroes if necessary). To prevent accidental length alteration, you must press PLAY before the SR-16 will store the new Pattern length. The display shows CHANGED LENGTH for as long as PLAY is pressed. -
Page 19: Offset A Pattern Or Drum Part
DEC first. Example: To offset a part 1/16th note later, enter -24 as the offset value since 24 sub-beats equals a 1/16th note. Press PLAY to enter this number into the SR-16. To apply the same amount of offset to additional pads, press the next pad then press PLAY. - Page 20 than one drum event occurs on the same sub-beat, the PAGE UP/DOWN buttons step forward or backward respectively through each drum one at a time. If no drum event exists on this beat/sub-beat, the display will show no pad number, and EMPTY in place of volume data.
- Page 21 The following page summarizes the step edit options.
-
Page 22: A Add A New Drum To A Step
2.9A Add a New Drum to a Step Use the PAGE buttons to select the step where the drum is to be added. Press the pad that corresponds to the sound you want to add. That drum, along with its volume (how hard the pad was hit), will be recorded into the displayed step. -
Page 23: Chapter 3: Playing Back/Recording Patterns
3.1K. 3.1B Perform/Compose Modes The SR-16 doesn't have a record button. Instead, press PLAY to start the Pattern, then select either Perform or Compose mode (as selected by the PERFORM/COMPOSE button). To record, choose Compose mode (as shown in the display). This also activates the click. -
Page 24: C Set Pattern Tempo
Patterns. If you switch over to Song mode (Chapter 5) and the programmed Song tempo is different, the SR-16 will assume the Song's tempo—even if you switch back into Pattern mode— until the tempo is changed again (either manually, or by selecting a different Song). -
Page 25: F Using The Start/Stop Footswitch
• If you change your mind or select the wrong Pattern, you can select a new Pattern number at any time before the next Pattern begins. • If you press STOP before the next Pattern begins playing, the SR-16 will stop and remain on the currently selected Pattern. -
Page 26: H Select Fill Patterns In Perform (Playback) Mode
Example: Suppose an 8-beat A Main Pattern is playing and you press the FILL button on beat 4 but hold it down past beat 8. The A Fill Pattern will play the last 4 beats, then the SR-16 will return to the A Main Pattern. -
Page 27: I Record A Pattern
You will hear any drum sounds already recorded in the currently selected Pattern. To record drum parts into the Pattern, tap the drum pads, or send MIDI data to the SR-16 (sections 6.1 and 6.2) that triggers corresponding drum notes. The Pattern will "loop" during the record process so that you can overdub different drums on different passes. -
Page 28: K Using Fill To Create Repetitive Drum Hits
16th note hi-hat parts, quarter note kick drum parts, snare rolls, etc. 1. The SR-16 should be in Compose mode and recording. 2. Press a pad on the first beat of what will be a series of hits and hold it down. -
Page 29: Erase Functions
3.2 ERASE FUNCTIONS 3.2A Erase Mistakes While Recording While the SR-16 is recording, you can erase any individual drum event or series of events in real time to fix up errors. Erasure occurs only on those beats that coincide with the current quantization and swing values;... -
Page 30: Copy Functions
Pattern to another Main Pattern. 3.3A Copy, Append, and Double Patterns 1. The SR-16 should be in Pattern mode and stopped. 2. Select the Pattern to be copied. 3. Press and hold the COPY button, and keep holding it down until step (6). The display says COPY TO PATT. -
Page 31: C Copy A Single Drum Pad's Part To A Drum Pad In A Different Pattern
The SR-16 can send User Pattern system exclusive information (for the Main and Fill Patterns) to another SR-16 via MIDI. If you have only one SR-16, you can skip this section. 1. The source SR-16 should be in User Pattern mode and stopped. Connect the source SR- 16 MIDI out to the destination SR-16 MIDI in. -
Page 32: E Copy A Single Drum Pad's Part To A Drum Pad In Another Sr-16 Via Midi
D 2 if you hit pad 2). 5. Tap the destination pad on the destination SR-16 to which the source part will be merged. Often when copying to a different Pattern, this will be the same drum pad number as selected in step (4). -
Page 33: Chapter 4: Creating Drum Sets
Sets. Drum Set assignments have their own dedicated memory and can be thought of as equivalent to the "programs" or "patches" found in synthesizers. Note that if you edit a Drum Set, any Pattern using that Drum Set will be affected. Most SR-16 aficionados keep a one-to-one correspondance between Drum Sets and Patterns by assigning Set 00 to Pattern 00, Set 01 to Pattern 01, Set 02 to Pattern 02, etc. -
Page 34: Page 2: Assign Sounds To Pads
The display shows the currently selected pad number and the sound assigned to that pad. You can assign any of the SR-16's sounds to any of the pads, or to more than one pad. Each individual Drum Set can have its own drum sound assignment. -
Page 35: Set Pad Stereo Position (Panning)
Background The SR-16 has two pairs of stereo outputs. Drum sounds can be assigned to either pair of outputs (Page 7), and be placed anywhere within the stereo field of the assigned outputs via the pan function. -
Page 36: Set Pad Tuning (Tuning)
4.5 PAGE 5: SET PAD TUNING (TUNING) The display shows TUNING, the currently selected pad number, and the tuning assigned to that pad. To change the tuning associated with a given pad: 1. Press the pad (the display will show the pad number). 2. -
Page 37: Choose Output Jacks (Output)
The SR-16 can play up to 16 voices at a time, so it's possible to run out of voices if you play a flurry of notes and have lots of pads in the Multi assign mode. -
Page 38: Save Drum Set (Save Set)
Stereo with Fixed Placement: Plug the left Main output into the left channel of your amp (or mixer), and the right Main output into the right channel. The default voice mix for the preset Drum Sets pans the drums between the Main output jacks in a way that works well for most applications. -
Page 39: Manual Drum Set Override (Set Mode)
Note: If changing Patterns doesn't call up different Drum Sets, this parameter is probably set to MANUAL instead of PATT. Background Each Pattern has an associated, assigned Drum Set. However, you can tell the SR-16 to ignore these stored assignments, and retain the currently selected Drum Set regardless of whether or not you change Patterns. -
Page 40: Chapter 5: Song Mode
Song steps, delete Song steps, etc. The SR-16 holds up to 100 Songs, and each Song can contain up to 254 steps. Each step holds either a Pattern number or Fill. Each Song remembers the tempo at which it was last played. -
Page 41: C Continue, Re-Start, Or Jump To Next Song Step
Song step. 1. Make sure the SR-16 is in Compose mode, even if you don't plan to record anything. 2. Use the INC/DEC buttons to select the Song step at which you want the SR-16 to start playing. -
Page 42: G Change Song Tempo As The Sr-16 Plays
Song step in the Song. If you let the original Pattern keep playing, it will add a new Song step with its Pattern number every time it repeats. 7. In addition to selecting different Patterns, you can press FILL at any time. The SR-16 will remember where you pressed FILL. -
Page 43: Manual Song Creation
DEC button to return to a previous step and change its Pattern. 5.3B Add a Fill 1. With the SR-16 in Song and Compose modes, select the step where the Fill is to be added. 2. Press and hold the FILL button. -
Page 44: E Delete A Step
5.3E Delete a Step 1. The SR-16 should be in Song and Compose modes. 2. Use the INC/DEC buttons to select the step number to be deleted. 3. Press and hold ERASE. The display says ERASE STEP? 4. While continuing to hold ERASE, press PLAY. The step is deleted, and all subsequent steps are automatically re-numbered to reflect the deletion of the inserted step (e.g., what... -
Page 45: J Copy A Song To Another Sr-16 Via Midi
The SR-16 can send Song system exclusive information to another SR-16 via MIDI. If you have only one SR-16, you can skip this section. 1. The source SR-16 should be in Song mode and stopped. Connect the source SR-16 MIDI out to the destination SR-16 MIDI in. -
Page 46: Chapter 6: Midi Setup
When several instruments are being driven by MIDI (e.g., when a sequencer sends out data over several channels to different instruments), use Poly mode so that the SR-16 tunes in to only the channel containing drum data. -
Page 47: Receive Midi Drum Notes (Drum In)
Background Select ON V1 or ON V2 if you're using the SR-16 as an expander module, or want to play real time drum controllers into the SR-16 as it plays a Pattern or Song. Select O F F if you're using the SR-16 as a drum machine slaved to a sequencer;... -
Page 48: Assign Midi Note Numbers To Drum Pads (Note)
6.4 PAGE 4: ASSIGN MIDI NOTE NUMBERS TO DRUM PADS (NOTE) This page determines which MIDI in NOTE will trigger a pad, or MIDI out note will be produced if you play a pad. The display shows the note number/name in the upper left, and the drum pad number in the upper right window. -
Page 49: Accept External Clock Data (Clock In)
When using the SR-16 as an expander module, set CLOCK IN to OFF so that timing signals don't start playing a Pattern. Background The SR-16 can have its tempo set by another device (this overrides the internal clock tempo) if: • The external device (sequencer, drum machine, etc.) generates MIDI timing signals. -
Page 50: Merge Midi In With Midi Out (Midithru)
Technically speaking, MIDI timing data (as provided by a master unit such as a sequencer) received at the SR-16's MIDI in is not sent to the MIDI out. However, this will appear to be the case since the SR-16 will generate its own... -
Page 51: Select Drum Sets Via Midi Program Changes (Prg Chng)
The current Pattern will remember whatever Drum Set is selected via Program Changes, just as if you had selected it manually, unless the SR-16 is in Manual mode (described in Page 9 of the Drum Set menu). If Program Change is enabled, and the SR-16 is in MULTI-DRUMSET mode (see section 6.9 below), and a program change is received in the 00-49 range, the SR-16 will automatically select the drumset group corresponding to the program change number. - Page 52 Drum MIDI Note Drum note map in MULTI-DRUMSET mode NOTE: In this chart, Pad and MIDI note number values for drumset 00 also apply to drumsets 10, 20, 30, and 40; values for drumset 01 also apply to drumsets 11, 21, 31 and 41, etc. Drum MIDI Note...
-
Page 53: Chapter 7: Backup
MIDI code and stored in a MIDI data storage device such as the Alesis DataDisk, or transferred to another SR-16. As you build up a library of Patterns and Songs, data can be reloaded from tape or MIDI into the SR-16. There are two main reasons to save your work: •... -
Page 54: Tape Interface Hookup
Background The SR-16's memory contents can be sent out over MIDI like any other MIDI data. This data is meaningful only to an SR-16 (different drum machines will ignore the data) but the data can be saved to a MIDI... -
Page 55: Receive Data Directly From Another Midi Device
3 . Press the DD RECEIVE button. The display says RECV ONE SYSEX: WAITING FOR DATA. 4 . Press the SR-16 BACKUP button (if you are not already in the backup function) and select Page 1. 5 . Press the SR-16 PLAY button. The SR-16 display says SENDING MIDI… and the DD display says RECEIVING Alesis SR-16 to indicate that data has been received. -
Page 56: Save All Memory Contents To Tape (Store To Tape?)
TO TAPE? Put the cassette recorder into record mode. After the tape has gone past the leader (if present), press PLAY on the SR-16. The SR-16 display will increment through the A/B Patterns and Songs; the operation is finished when the display says DONE. It's a good idea to save data several times in case part of the tape becomes damaged. -
Page 57: Load Data From Tape (Load In Tape?)
DONE. Background This function reloads a Bank of Patterns and Songs stored on tape back into the SR-16. Data loaded from tape will take its original position in memory (e.g., SONG 15 will reload back into SONG 15). Loading all Patterns and Songs overwrites all existing data in memory, so if necessary, save your current work before loading. -
Page 58: Load One Pattern From Tape (Load In Patt)
7.8 PAGE 5: LOAD ONE PATTERN FROM TAPE (LOAD IN PATT) This loads a single Pattern from a tape dump. The display says LOAD IN PATT00. Enter the desired Pattern number with the number or INC/DEC buttons, press the A or B button to specify the desired variation, then press PLAY;... -
Page 59: Check Available Memory (Free Mem)
Some operations may not be possible even if a small amount of memory is left. This is because the SR-16 duplicates a Pattern before it is modified (length change, offset change, etc.). If you try to alter a Pattern that takes up more memory than is available, the display will tell you that there is no more memory left. -
Page 60: Clear Memory/Re-Initialize Parameters
This will let you know whether you have the enhanced software or not. • Should you experience problems with the SR-16 and call Alesis for technical support, it is important to know which software your machine is using. -
Page 61: Chapter 8: Applications
Alesis HR-16 and MMT-8). 3. Press PLAY on the SR-16. The slave units should start at the same time, and progress at the same tempo. If the slaves respond to Song Position Pointer, you can start an SR-16 Song... -
Page 62: C Synching To Synthesizer Sequencers
Korg M1 and T1, Peavey DPM-3, etc.). You can use the SR-16 as a drum expander module and record the required notes in one of the sequencer tracks. Or, record a Song in the SR-16, and sync it to the keyboard sequencer's timing data so you don't need to use up a sequencer track. -
Page 63: Strategies For Assembling Patterns And Songs
8.2 STRATEGIES FOR ASSEMBLING PATTERNS AND SONGS Ideally, you should be able to translate your inspirations into tangible form with a minimum amount of effort. The following tips and techniques help speed up the process of creating Patterns and Songs. 8.2A Create Fills Quickly with the Copy Function Many times a Fill will simply be a variation on another Pattern, but with a few minor differences to add variety or serve different musical purposes. -
Page 64: Sound Stacking
SR-16's mix, pan, and tune functions, you can customize the drum sound to the specific needs of the song you are working on. This kind of flexibility makes the SR-16 a powerful production tool in the critical decision making process that gives personality to recorded music. -
Page 65: Understanding Rhythmic Notation
8.4 UNDERSTANDING RHYTHMIC NOTATION Measures A piece of music is divided into smaller units called measures (also called bars), and each measure is divided into beats. In the SR-16, each beat is further sub-divided into 96 sub-beats. Rhythmic Values for Notes With a measure written in a 4/4 time signature, there are 4 beats per measure, and each beat represents a quarter (1/4) note. -
Page 66: Chapter 9: Midi Supplement
CHAPTER 9: MIDI SUPPLEMENT (This chapter is adapted with permission from Power Sequencing with Master Tracks Pro/Pro 4 and The Complete Guide to the Alesis HR-16 and MMT-8, copyright 1990 and 1989 respectively by AMSCO Publications.) 9.1 MIDI BASICS Most current electronic instruments, including the SR-16, contain an internal computer. -
Page 67: B About Sequencing
16's MIDI out jack can be switched to a thru function that merges MIDI in data with SR-16 MIDI data. 9.1B About Sequencing Sequencing, the computerized equivalent of tape recording, is a very common and popular MIDI application. The SR-16 is a special-purpose sequencer optimized for drum machine applications. -
Page 68: B Mode Messages
Timing Clock The SR-16 emits 24 timing messages per quarter note. Each device synchronized to the SR-16 advances by 1/24th of a quarter note when it receives the clock message, thus keeping units in sync after they've both started at the same time. However, note that to provide an internal resolution of 96 timing messages per quarter note, the SR-16 internally subdivides the MIDI clock by a factor of four. -
Page 69: Videos On Midi
Understanding MIDI and Understanding MIDI 2 by various authors; Amordian Press. A collection of MIDI-oriented articles from Musician magazine. Descubriendo MIDI by José Valenzuela; Alesis Publishing. A thorough overview of MIDI in Spanish, suitable for beginners and/or advanced users. 9.5 VIDEOS ON MIDI The Basics Of MIDI featuring Craig Anderton with Steve Smythe;... -
Page 70: Troubleshooting Chart
Pads set to wrong outputs. Miv volume too low. Mix volume(s) set too loud. SR-16 output level is too high and is overdriving receiver input. Drum set panning parameters are set incorrectly. Bad audio cable(s). Effects processors or mixing consoles being used in conjunction with the SR-16 are corrupting the stereo mix. - Page 71 This usually happens when trying to receive one Song or Pattern into a low numbered memory location when the SR-16 is very full. This is due to the internal storage format of the SR-16. Set slave’s clock in accordingly.