Table of Contents

Related Manuals for VINCENT SP-994


Summary of Contents for VINCENT SP-994
- Page 1 Vincent Bedienungsanleitung deutsch Instructions for use english Manuel d‘utilisation français SP-994 Class A/AB Stereo-Endverstärker Class A/AB Stereo Power Amplifier Amplificateur stéréo Classe A/AB...
- Page 2 à la garantie ou pour les réparations après la période de garantie. Dans tous les cas, vos expériences avec les produits Vincent l'intéressent, n'hésitez pas à lui en faire part. Nous vous souhaitons beaucoup de plaisir avec notre / votre produit.
-
Page 3: Table Of Contents
Description of the appliance Installation Operating the appliance Tips Search for errors Technical Specifications Glossary english Consignes de sécurité Autres consignes Contenu de la livraison Description de l'appareil Installation Utilisation de l'appareil Conseils Résolution de problèmes Caractéristiques techniques Glossaire français Vincent... -
Page 4: Sicherheitshinweise
Händen an. Verwenden Sie das weit unterhalb der maximal möglichen Einstellung am im Lieferumfang enthaltene oder andere Netzkabel Verstärker erreicht. Gehen Sie deshalb vorsichtig mit von Vincent. der Lautstärkeeinstellung um, damit Hörschäden vermie- den werden. Damit Sie sich nicht unbeabsichtigt hoher Ausschalten Lautstärke aussetzen, stellen Sie vor dem Wechsel des... -
Page 5: Weitere Hinweise
Produkte. Deshalb bleiben Ände- das Klangpotential Ihres Systems optimal auszunut- rungen an Design und technischer Konstruktion des Ge- zen, empfehlen wir, die Geräte auf Vincent Racks zu rätes, sofern sie dem Fortschritt dienen, vorbehalten. platzieren und nicht aufeinander zu stellen. -
Page 6: Lieferumfang
(SA-94, SA-93plus) oder eine Mehrkanal- muss stets den Weg zum Lautsprecher finden. Dekodervorstufe (SAV-C-Reihe) stellen. Zusammen Der SP-994 ist ein vielseitig einsetzbarer Stereo- mit CD-Playern, DVD-Playern, Tunern sowie den Endverstärker aus Vincents solidLine. Er steht in HiFi-Möbeln, Lautsprechern und Lautsprecherka- der Tradition von Verstärkern wie Vincent SP-993... - Page 7 Cinch-Anschlüssen oder die an den Dies ist auch im laufenden Betrieb erlaubt. XLR-Anschlüssen bereitgestellten Signale als Eingangssignal verwendet werden sollen. 2. POWER: Netzschalter Schaltet das Gerät ein und aus. Beachten Sie die Hinweise im Abschnitt „Kabelverbindungen für die Einschaltsteuerung (POWER CONTROL)“. Vincent...
- Page 8 Ausgangsbuchsen mit Schraubklemmen zum mit „PRE OUT R“ und „PRE OUT L“ beschriftet, Anschluss von einem oder zwei Lautsprecherpaa- wenn der SP-994 für die Lautsprecher eines ren. Es können Lautsprecherkabel mit 4mm Ba- Stereo-Systems verwendet wird. Es kann immer nanensteckern verwendet werden. Beachten Sie nur eine der beiden Anschlussvarianten des die Hinweise im Kapitel „Installation“...
-
Page 9: Installation
Signalverbindung richtig. Dies ist immer der O UT PUT Cinch-Anschlüsse Fall, wenn beide von Vincent hergestellt wurden. Achten Sie darauf, die analogen Anschlüsse für Werden zwei Geräte unterschiedlicher Norm ver- rechts und links nicht zu vertauschen. Häufig sind sie bunden, wird dadurch das Signal invertiert. - Page 10 Mit dem Umschalter „RCA/XLR“ (4) wird bestimmt, welcher Anschluss momentan als Eingang verwen- det wird. Falls der SP-994 für die beiden Kanäle eines Stereo-Systems zuständig sein soll, verbinden Sie den gewählten Eingang des SP-994 mit den meist mit „PRE OUT R“ und „PRE OUT L“ bezeichneten Vorver- stärkerausgangsanschlüssen der Vorstufe.
- Page 11 Klinkenstecker (mono) versehene Leitungen Verwendung. Für die Verbindung zwischen jeweils zwei Geräten wird eins dieser Kabel benötigt. Der SP-994 besitzt einen Eingangsanschluss und einen Ausgangsanschluss für die Einschaltsteuerung. Damit kann er auf das Schaltsignal eines Verstärkers/Vorverstärkers reagieren und dieses bei Bedarf weitergeben (durchschleifen).
- Page 12 Geräterückwand. Verbinden Sie das andere Ende des Netzkabels mit einer Netzsteckdose. ANSCHLUSS DER LAUTSPRECHER An den Endverstärker SP-994 können zwei Lautsprecher normal (durch je ein zweiadriges Lautsprecherkabel) angeschlossen werden. Es besteht aber auch die Möglichkeit, vier Lautsprecher oder zwei Lautsprecher im Bi-Wiring anzuschließen.
- Page 13 Sollen Kabelschuhe verwendet werden, muss an jeder Klemme der Schraubkopf im Gegenuhrzeigersinn gelöst, der Kabelschuh darunter geschoben und die Schraubkappe im Uhrzeigersinn festgedreht werden. Stellen Sie zur Vermeidung von Schäden sicher, dass der Anschluss fest sitzt und kein blankes Metall von den Kabelschuhen die Rückwand oder einen anderen Anschluss berührt. Vincent...
- Page 14 Paar Lautsprecher angeschlossen werden) und mindestens 4 Ω (wenn ein Paar Lautsprecher angeschlos- sen wird). Achten Sie auf die richtige Polung der Lautsprecherkabelanschlüsse. Der positive Kontakt ist meist rot und oft mit „+“ markiert. Die markierte Leitung des Lautsprecherkabels muss mit dem positiven Anschluss ver- bunden werden. Vincent...
-
Page 15: Bedienung Des Gerätes
Verfügung gestellt wird. Ist der Druckschalter in seiner Einschaltposi- Eingangsanschluss XLR/RCA (4) tion, so kann der SP-994 ein an den Cinch-Anschlüssen anliegendes Signal wählen nicht verarbeiten, sondern erwartet das Signal über die XLR-Anschlüsse. Die Umschaltung darf auch im laufenden Betrieb und während der Musikwiedergabe erfolgen. -
Page 16: Weitere Tipps
Dies kann helfen, das Netzbrummen zu beseitigen. elektrostatischen Lautsprechern, Subwoofern, Platten- Die Schutzleiterwirkung bleibt erhalten. spielern oder Kopfhörerverstärkern hervorgerufen, Ist das Brummgeräusch durch eigene Versuche nicht zu sofern eine Audioverbindung zum Verstärker besteht. beseitigen, wird Ihnen Ihr Fachhändler weiterhelfen. Vincent... -
Page 17: Fehlertabelle
Funktion). „MUTE“ des Vorverstärkers). Ausgang des Vorverstärkers nicht bzw. falsch mit Korrigieren Sie den Anschluss des dem Eingangsanschluss des SP-994 verbunden. Vorverstärkers. Der Umschalter „XLR/RCA“ (4) an der Geräte- Verringern Sie zur Vorsicht die Lautstärke und vorderseite ist nicht auf die verwendete Anschluss- schalten Sie auf den richtigen Eingangs- variante eingestellt. -
Page 18: Technische Daten
1x XLR Main Input stereo, 1x Power Control (3,5 mm Klinke) Ausgänge: 4x2 Lautsprecherklemmen, 1x Power Control (3,5 mm Klinke) Maße (B x H x T): 430 x 195 x 530 mm Gewicht: 34,5 kg Farbe: silber / schwarz Vincent... -
Page 19: Lexikon/Wissenswertes
Störungen beseitigt werden können. Des Wei- RCA/Cinch teren wird mit einem höheren Pegel übertragen. RCA ist die amerikanische Bezeichnung für die Dadurch ist diese Art der Audiosignal-Übertragung koaxialen Cinch-Steckverbindungen als Abkür- störsicherer. zung für „Radio Corporation of America“, den Vincent... -
Page 20: Safety Guidelines
Be careful with the volume set- hands. Use the power cable supplied or another ting, therefore, in order to prevent damage to hea- one from Vincent. ring. So that you do not expose yourself to high volumes unintentionally, always set to a low level before changing the input channel. -
Page 21: Other Instructions
OTHER INSTRUCTIONS Setting up the appliance How the system is set up has an effect on the Vincent is a registered trademark of Sintron Vertriebs sound quality. Therefore only place it on a suitab- GmbH, 76473 Iffezheim. le, stable surface. To make the most of your system’s sound quality, we recommend placing the... -
Page 22: Included In Delivery
DVD players, tuners, hifi furniture, loud- always have to find its way to the loudspeaker. speakers and loudspeaker cables from the Vincent Our SP-994 is a versatile stereo main amplifier range, the most various, perfectly harmonised from Vincent’s solidLine. Its roots lie among systems can be built with the use of this stereo Vincent amplifiers like SP-993 and SP-991. -
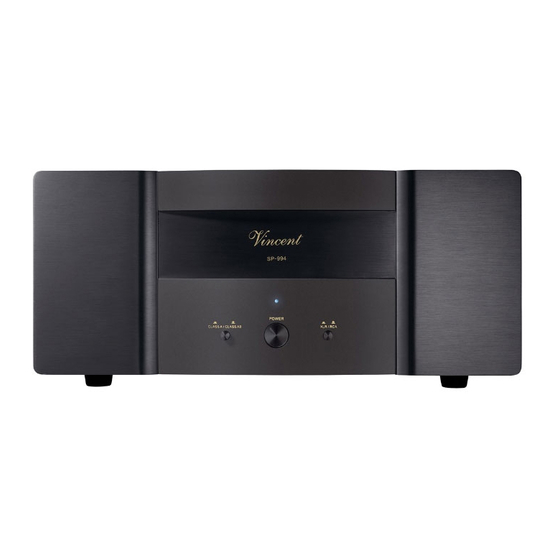
Page 23: Front View
Allowed to be switched while music is being played back. 2. POWER: mains switch This button turns the unit on and into standby mode. Please respect the information given in sec- tion “Connections for the standby control (POWER CONTROL)”. Vincent... -
Page 24: Rear View
REAR VIEW 5. SPEAKER: Loudspeaker terminals OUT L”, if the SP-994 is to be used for the loud- At these output sockets with threaded terminals speakers of a stereo system. Only one of the two one or two pairs of loudspeakers can be connec- input connector types can be used at any time. -
Page 25: Installation
This is always the case if both units were inputs for right and left. The RCA plugs for these made by Vincent. If two units from different stan- are mostly colour coded as follows: red for the dards are connected, this inverts the signal. In this right channel, black or white for the left channel. -
Page 26: Connecting The Preamplifier
If the SP-994 is used in a multi-channel system, then the connection sockets of the desired channels in the con- nection field of the decoder preamplifier usually named “AUDIO OUTPUT” are to be connected to the input of this main amplifier. -
Page 27: Power Control
3.5 mm jack plugs (mono) are used. For each connection between two devices one of those cables is needed. The SP-994 is equipped with two connectors for the power control – one input (INPUT) and one output (EXT) con- nector. -
Page 28: Connection Of The Loudspeakers
CONNECTION OF THE LOUDSPEAKERS Either a single pair of loudspeakers or two speaker pairs can be connected to the main amplifier SP-994. For each loudspeaker you will find two connector screws (positive + und negative –) at the amplifier's back- side. - Page 29 To avoid damages to the amplifier, make sure the connection is tight and no bare metal from the cable lug connector makes contact with the rear panel or with another terminal. Vincent...
- Page 30 8Ω. If only one pair of loudspeakers is used, every speaker type with a minimal nominal impedan- ce of 4Ω can be utilised. Respect correct polarity, the positive contact is mostly marked red or with “+”. The side of the speaker cable that has to be connected with the positive socket has a marking. Vincent...
-
Page 31: Operating The Appliance
Select an input XLR/RCA (4) key is in its switched-on position, the SP-994 cannot process a signal con- nected to the RCA connector, but expects the signal via the XLR connector. It is allowed to use this switch even while music is being played back. -
Page 32: Tips
(as TV-sets or Tuners), personal computers, electrostatic loud- If the problem occurs and cannot be solved by speakers, subwoofers, record players or headpho- yourself your audio specialist dealer will help you. Vincent... -
Page 33: Search For Errors
Output of the preamplifier not connected or incorrect- Correct the connection to the preamplifier. ly connected to the input connectors of the SP-994. The setting of the toggle switch “XLR/RCA” (4) on Reduce the volume setting of the preamplifier the front panel is not correct. -
Page 34: Technical Specifications
1x XLR Main Input stereo, 1x Power Control (3.5 mm Jack) Outputs: 4x2 Loudspeaker Clamps, 1x Power Control (3.5 mm Jack) Dimensions (W x H x D): 430 x 195 x 530 mm Weight: 34.5 kg Colour: silver / black Vincent... -
Page 35: Glossary
If the receiving device can process this, all inducted noise received in the cable screen can be eliminated. The signal volta- ge level used for this type of transfer is higher, so it is a more robust less sensitive signal path. Vincent... -
Page 36: Consignes De Sécurité
Ne saisissez pas l'appareil avec les mains mouillés changer de canal d'entrée pour ne pas être exposé ou humides. Utilisez le câble fourni ou un autre sans le vouloir à une plus forte puissance sonore. câble de Vincent. Arrêt Arrêtez chaque fois l'appareil avant de Nettoyage raccorder ou de retirer d'autres composants ou les Débranchez le connecteur avant de... -
Page 37: Autres Consignes
Pour cette rai- nous vous recommandons de placer les appareils son, des modifications de design et de construction sur des racks Vincent et de ne pas les poser l'un technique liées au progrès sont possibles. sur l'autre. -
Page 38: Contenu De La Livraison
Class-A caracté- composants de qualité supérieure et à longue risé par une qualité audio exceptionnelle et une durée de vie, les développeurs de Vincent se sen- performance limitée et le technique Class-AB tent plus particulièrement engagés dans la stéréo adapté... - Page 39 2. POWER : Interrupteur secteur Met l’appareil en MARCHE ou à l’ARRET. Suivez les instructions de la section « Connexion des câbles pour la commande de mise sous tension (POWER CONTROL) ». Vincent...
- Page 40 « PRE OUT R » et « PRE OUT L » des haut-parleurs lorsque le SP-994 est utilisé pour les haut-parleurs Douilles de sortie avec serrage à vis pour le rac- d’un système stéréo. L’une des deux variantes de cordement de deux ou de quatre haut-parleurs.
-
Page 41: Installation
Cela est toujours le cas, si OUT PUT Prises RCA les deux appareils sont de fabrication Vincent. Si Veillez à ne pas intervertir les connexions analogiques deux appareils de norme différente sont raccordés, droite et gauche. Souvent, des connexions RCA pré- le signal est alors inversé. - Page 42 « XLR/RCA » (4) permet de déterminer le raccord qui doit être utilisé à l’immédiat comme entrée. Dans le cas ou le SP-994 doit être adapté pour les deux canaux d'un système stéréo, reliez le rac- cord d'entrée choisi sur le SP-994 avec les raccords de sortie du préamplificateur portant généralement les marques «...
- Page 43 état de veille. On utilise pour cela des câbles à deux conducteurs, équipés de fiches banane 3,5 mm (mono). Pour chaque liaison entre deux appareils, il faut utiliser un de ces câbles. Le SP-994 possède une prise d’en- trée et une prise de sortie pour la commande de commutation.
- Page 44 Vous avez la possibilité de brancher normalement (avec un câble de haut-parleur à deux voies) un paire de haut-parleurs ou deux paires de haut-parleurs à un amplificateur SP-994. Vous avez également la possibili- té de raccorder deux haut-parleurs en « Bi-Wiring ». Pour chaque haut-parleur vous trouverez sur l’appareil deux bornes de serrage (positive + et négative –), auxquelles vous pouvez raccorder une extrémité...
- Page 45 SP-994 est livré (dévissez complètement le couvercle à vis, retirez les bouchons, remettez le cou- vercle à vis en place). Les couvercles à vis devront être serrées en les tournant dans le sens horaire.
- Page 46 Veuillez à la bonne polarité des raccordements des câbles de haut-parleurs. Le contact positif est géné- ralement de couleur rouge et marqué du signe « + ». Le conducteur marqué du câble de haut-parleur doit être relié à la borne positive. Vincent...
-
Page 47: Utilisation De L'appareil
être transmis à l'amplificateur par les raccords XLR ou RCA à la partie arrière XLR/RCA (4) Choisir un raccord de l’appareil. Si le commutateur est en position marche, le SP-994 ne peut d'entrée pas traiter le signal adjacent des raccords RCA, mais attend plutôt le signal à... -
Page 48: Conseils
Si vous ne parvenez pas à éliminer vous-même ce ronflement, votre revendeur vous y aidera. Vincent... -
Page 49: Résolution De Problèmes
« MUTE » du préamplificateur). La sortie du préamplificateur n’est pas ou est mal Corrigez la connexion du préamplificateur. raccordée à la prise d’entrée du SP-994 (7). Le réglage du commutateur « XLR/RCA » (4) Par prudence, réduisez le volume et sélection- à... -
Page 50: Caracteristiques Techniques
1x Power Control (3,5 mm prise Jack) Sorties : 4x2 bornes de haut-parleurs, 1x Power Control (3,5 mm prise Jack) Dimensions (L x H x P) : 430 x 195 x 530 mm Poids : 34,5 kg Variante de couleur : noir / argent Vincent... -
Page 51: Glossaire
XLR, ce type de connexion est aussi appelé « liai- puissent être éliminées. Le niveau de transmission son de signal asymétrique » (« unbalanced »). est en outre plus élevé, les signaux audio transmis sont ainsi moins sensibles aux parasites. Vincent... - Page 52 Vincent Bewahren Sie die Kaufquittung zusammen mit der Bedienungsanleitung auf. Die Kaufquittung dient Ihnen als Nachweis für den Beginn der Garantiezeit. Die Seriennummer befindet sich an der Rückseite des Gerätes. Please keep the receipt, store it together with this manual. The receipt is your proof for the beginning of the warranty period.