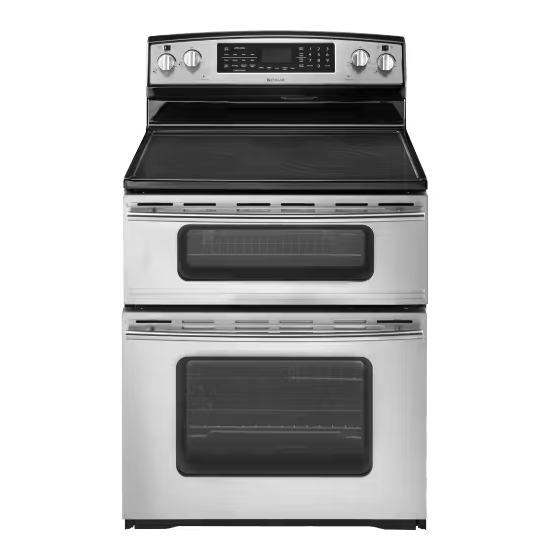
Jenn-Air JER8895BAS - 30" Electric Double Oven Range Use And Care Manual
Electric double oven range
Hide thumbs
Also See for JER8895BAS - 30" Electric Double Oven Range:
- Use & care manual (24 pages) ,
- Installation instructions manual (12 pages)
Table of Contents
Advertisement
Quick Links
Advertisement
Table of Contents

Related Manuals for Jenn-Air JER8895BAS - 30" Electric Double Oven Range


Summary of Contents for Jenn-Air JER8895BAS - 30" Electric Double Oven Range
- Page 1 JENN-AII_ ELECTRIC DOUBLE OVEN RANGE '_iii Use&CareGuide For questions about features, operation/performance, parts, accessories, or service, call: 1-800-688-1100 or visit our website at www.jennair.com. Table of Contents ..........JENN-AIRo W10160641A...
-
Page 2: Table Of Contents
TABLE OF CONTENTS RANGE SAFETY ................The Anti-Tip Bracket ..............COOKTOP USE ................Cooktop Controls ................. Dual and Triple Elements ............. Warm Zone ................... Ceramic Glass ................Home Canning ................Coo kware ..................ELECTRONIC OVEN CONTROLS ..........Display ..................Cancel ..................Clock .................... -
Page 3: Range Safety
RANGE SAFETY Your safety and the safety of others are very important. We have provided many important safety messages in this manual and on your appliance. Always read and obey all safety messages. This is the safety alert symbol. This symbol alerts you to potential hazards that can kill or hurt you and others. All safety messages will follow the safety alert symbol and either the word "DANGER"... - Page 4 iMPORTANT SAFETY iNSTRUCTiONS WARN(NG: [] Protective Liners - Do not use aluminum foil to line surface To reduce the risk of fire, electrical shock, injury to persons, or damage when using the range, follow unit drip bowls or oven bottoms, except as suggested in basic precautions, including the following: the manual.
-
Page 5: Cooktop Use
COOKTOP USE _PP_< o wn ?/,t, 1 2 3 '_ii!i _JENNAIR A. Single/dual element rocker switch E. Dualltriple element rocker switch H. Cooktop on indicator light B. Left rear control knob I. Surface burner Iocator F. Right front control knob C. -
Page 6: Warm Zone
To Use the Dual Element: • Use only cookware and dishes recommended for oven and cooktop use. • Cover all foods with a lid or aluminum foil. When warming baked goods, allow a small opening in the cover for moisture to escape. -
Page 7: Home Canning
Use cookware about the same size as the surface cooking area. Cookware should not extend more than 1/2" (1.3 cm) outside the area. IMPORTANT: Do not leave empty cookware on a hot surface cooking area, element or surface burner. _..... Ideal cookware should have a flat bottom, straight sides and a well-fitting lid, and the material should be of medium-to-heavy... -
Page 8: Electronicoven Controls
ELECTRONICOVEN CONTROLS UPPER OVEN Keep cance_ Warm Clean Toast Broil Bake Lower Warm Light' 7 Zooe Clean Drying Broil Bake / Off Lower Keep Proofing Convect Convect Warm Roast Bake Favorite Autoset }'Cancel Timer Timer Clock Delay Cool< & Hold LOWER OVEN G. -
Page 9: Fahrenheit And Celsius
Adjusting Sound Level Lock Control Panel and Both Oven Doors: Press and release CANCEL. The oven is factory set for medium (MEd) but can be changed to low (LO) or high (HI). Press and hold upper oven CANCEL and COOK & HOLD for 3 seconds. -
Page 10: Oven Use
OVEN USE Odors and smoke are normal when the oven is used the first few The insert can also be removed to provide room for large items times, or when it is heavily soiled. such as a turkey and casseroles. IMPORTANT: The health of some birds is extremely sensitive to the fumes given off. -
Page 11: Bakeware
Convection Cooking (on some models) FUNCTION NUMBER OF RACK On models without a temperature probe, use a meat RACKS USED POSITION(S) thermometer to determine whether meat, poultry and fish, are Convection baking or 1,2 or 3 cooked to the desired degree of doneness. The internal roasting temperature, not appearance,... -
Page 12: Broiling
Press BAKE again or wait 4 seconds. To recall the set temperature during preheat, press BAKE. "BAKE" will stop flashing and light in the display. PREHEAT To change the oven temperature during preheat, press the will light in the display. Bake pad twice, then press the Autoset pad or appropriate number pads until the desired temperature is displayed. -
Page 13: Toasting - Upper Oven Only
(os s;o_s e, _"_' odes For toasting bread and products that are toasted in a toaster or The Proofing feature can be used to raise yeast-based bread toaster oven. products prior to baking. There are 2 proofing methods available - Rapid and Standard. •... -
Page 14: Keep Warm
To Set Convect Roast: When roasting poultry and meat, use a broiler pan and grid. It is not necessary to wait for the oven to preheat, unless 1. Press CONVECT ROAST. recommended in the recipe. "LOWER," "ROAST," and the Fan icon will flash. "000" will flash in the display. -
Page 15: Cook & Hold
To Use: When the cooking time has elapsed: 1. Press appropriate KEEP WARM pad. Four beeps will sound, "WARM" and "HOLD" will light and "170 °'' ("75 °" Celsius) will appear in the display. "WARM," "000" and either UPPER or LOWER flashes in the display. -
Page 16: Automatic Shut-Off/Sabbath Mode
The oven control is set to automatically shut off the oven 12 hours after the oven is turned on. This feature can be turned off to enable Sabbath Mode. • Sabbath Mode can be turned on at any time with or without Food Poisoning Hazard the oven on. -
Page 17: Range Care
RANGE CARE How the Cycle Works IMPORTANT: The heating and cooling of porcelain on steel in the oven may result in discoloring, loss of gloss, hairline cracks and popping sounds. The Self-Cleaning cycle uses very high temperatures, burning soil to a powdery ash. The oven is preset for a 3 hour clean cycle, however the time can be changed. -
Page 18: General Cleaning
Press CLEAN. To change the delay self-clean time: 1. Press DELAY. "SET" flashes in the display. "DELAY" flashes and "00:00" will appear in the display. Press AUTOSET. "MEd" (medium soil level) is displayed. 2. Press the number pads to enter the amount of time you want to delay the cycle. -
Page 19: Oven Lights
Metal marks from aluminum and copper OVEN CAVITY • Cooktop Cleaner: Clean as soon as cooktop has cooled down. Rub creme into Do not use oven cleaners. surface with a damp paper towel or soft cloth. Continue rubbing until white film disappears. The marks will not totally Food spills should be cleaned when oven cools. -
Page 20: Oven Door
For normal range use, it is not suggested to remove the oven 3. Lift up evenly until door clears hinge arms. door. However, if removal is necessary, make sure the oven is off and cool. Then, follow these instructions. The oven door is heavy. To Remove: 1. -
Page 21: Assistanceor Service
Was the oven preheated? See "Bake," and "Broil," sections. Self-Cleaning Cycle will notoperate Is the proper bakeware being used? See "Bakeware" section. • Is the oven door open? Close the oven door all the way. Are the racks positioned properly? See "Positioning Racks •... -
Page 23: War Ranty
JENN-AIR COOKING APPLIANCE WARRANTY LIMITED WARRANTY For one year from the date of purchase, when this major appliance is operated and maintained according to instructions attached to or furnished with the product, Jenn-Air brand of Whirlpool Corporation or Whirlpool Canada LP (hereafter "Jenn-Air") will pay for factory specified parts and repair labor to correct defects in materials or workmanship. - Page 24 Keep this book and your sales slip together for future Dealer name reference. You must provide proof of purchase or installation date for in-warranty service. Address Write down the following information about your major appliance Phone number to better help you obtain assistance or service if you ever need it. You will need to know your complete model number and serial Model number number.