
Related Manuals for Jensen VR209TPB


Summary of Contents for Jensen VR209TPB
- Page 1 VR209TP TOUCH PANEL MOBILE AUDIO AND OBSERVATION SYSTEM Installation and Operation Manual...
-
Page 2: Safety Information
VR209TP SAFETY INFORMATION When Driving Keep the volume level Iow enough to be aware of the road and traffic conditions. Protect from Water Do not expose the product to water, as this can cause electrical shorts, fire or other damage. Protect from High Temperatures Exposure to direct sunlight for an extended period of time can produce very high temperatures inside your vehicle. -
Page 3: Disc Notes
VR209TP DISC NOTES Depending on the recording status, conditions of the disc, and the equipment used for recording, some CD-Rs/CD-RWs may not play on this unit. For more reliable playback, please adhere to the NOTE: A disc may become scratched (although not enough to make it unusable) depending on how you handle it and other conditions in the usage environment. -
Page 4: Installation
VR209TP INSTALLATION Before You Begin Check the dashboard opening size by sliding the mounting sleeve into it. If the opening is not large enough, carefully cut or file as necessary until the sleeve easily slides into the opening. Disconnect Battery Do not force the sleeve into the opening or cause it to bend or bow. - Page 5 VR209TP WIRING...
- Page 6 VR209TP Recommended Camera Installation Configurations...
-
Page 7: Basic Operation
VR209TP BASIC OPERATION Camera (CAM) • Press the CAM button (5) to access camera mode. • Press and Hold to enter the “Camera Setup” menu. See “Camera Operation” on page 21. Audio • Press the AUDIO button (4) to access Audio Mode and select a source for playback. •... -
Page 8: Auxiliary Input
VR209TP Auxiliary Input To access an auxiliary device: Connect the portable audio player to the AUX IN connector on the front panel (12) or to the AUX IN cables on the back of the radio. Touch the AUDIO button on the left side of the screen to select AUX IN mode. Touch the “F.AUX”... -
Page 9: User Settings Menu
VR209TP USER SETTINGS MENU Press the MENU button (3) to access the User Settings Menu. Table 2: Audio Setup Menu Options Setting Adjustable Range NOTES: The Bass and Treble levels are only adjustable when EQ is set to "Off" mode. The Loud function compensates for deficiencies in sound ranges at low levels. -
Page 10: Source Select Menu
VR209TP System Setup Menu Table 3: Camera Setup Menu Options The following “System Setup” options can be adjusted: Setting Options Function Table 5: System Setup Menu Options Trigger Delay 1 SEC Set delay time for displaying camera image after trigger signal is removed. -
Page 11: Preset Stations
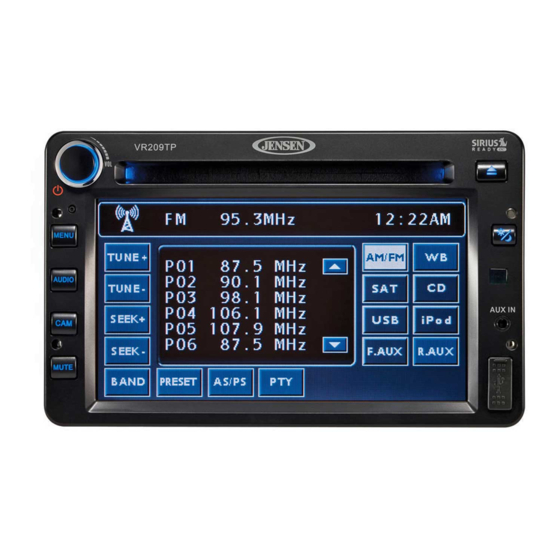
VR209TP AM/FM/RBDS CONTROLS Select a Band Touch the BAND button on the left side of the touch screen to change between FM and AM bands. Tuning • Touch the TUNE + or TUNE - buttons on the touch screen to tune up or down in one step increments. -
Page 12: Rbds Operation
VR209TP Automatic Store / Preset Scan (AS/PS) Touch the WB button on the touch screen to access the weather band (NOAA seven frequency broadcast). Automatic Store Touch the TUNE + or TUNE - button to choose one of the seven channels. The seven channels Select a band (if needed). -
Page 13: Cd/Mp3/Wma Operation
VR209TP CD/MP3/WMA OPERATION Ejecting a Disc Press the eject button (9) on the front panel to stop disc play and eject the disc. The unit must be turned on to eject the disc. After the disc is ejected, the unit automatically returns to AM/FM mode. - Page 14 VR209TP Display Modes (MP3 Discs) NOTE: Only six tracks are displayed at one time. Touch the up/down arrows to the right of Touch the INFO button to toggle between MP3 files/directories view and large screen format, where the list to access additional tracks. the artist, song title and album is displayed.
-
Page 15: Usb Operation
VR209TP USB OPERATION NOTE: The USB button is operative only when a USB device is connected. Removing a USB Device Change to another mode and then remove the USB device from the USB connector. Accessing USB Mode from Another Playback Mode Touch the USB button on the right side of the touch screen to access USB mode. - Page 16 VR209TP NOTE: Only six files are displayed at one time. Touch the up/down arrows to the right of the list to access additional files. Direct File Access Touch the button to make the keypad appear on the screen. Enter the file number using the keypad in the center of the screen to directly select a file. NOTE: Touch the button on the keypad to backspace and cancel wrong number input.
-
Page 17: Sirius Radio Operation
VR209TP SIRIUS RADIO OPERATION Tuning a Channel Touch the TUNE + or TUNE - buttons to tune up or down in one step increments. Display Information • Touch the INFO button to toggle list display in the following order: Channel Name -> Song Title ->... -
Page 18: Direct Channel Access
VR209TP Direct Channel Access Use the on-screen number pad to re-enter the new 4-digit code, and then press the ok button. If the new code is correctly entered twice, “Code Saved” appears on the screen and the radio Touch the button to make the keypad appear on the screen. -
Page 19: Accessing Ipod Mode
VR209TP iPod OPERATION This unit is equipped with an iPod ready function that will allow you to control your iPod (if • Touch and hold the button to fast forward or fast reverse. Release to resume normal compatible) using the control panel buttons. The following iPod versions are supported: playback. - Page 20 VR209TP Play/Pause Playback • Touch the button to suspend playback. • Press the button again to resume playback. Repeat Play • Touch the RPT button during playback to repeat play the current file. • Touch RPT again to stop repeat play. Shuffle Play •...
-
Page 21: Camera Operation
VR209TP CAMERA OPERATION Enter Camera Mode It is important to set this correctly so that the proper camera/microphone combination will be used to interrupt playback when the vehicle is backing up. Connect the cameras to the unit using camera connection cable at the back of the unit. Press the CAM key on the front control panel to access camera mode. - Page 22 VR209TP REMVRCC CARD REMOTE CONTROL (SOLD SEPARATELY) • POWER: Powers on/off. • MODE: Cycles through all available play modes (Radio, CDP, SAT, iPod, Aux). • VOL /\ / \/: Adjusts volume level. • AUDIO MENU: Accesses Audio and System Menu. •...
-
Page 23: Care And Maintenance
VR209TP CARE AND MAINTENANCE • Keep the product dry. If it does get wet, wipe it dry immediately. Liquids might contain minerals that can corrode the electronic circuits. • Keep the product away from dust and dirt, which can cause premature wear of parts. •... -
Page 24: Troubleshooting
VR209TP TROUBLESHOOTING Symptom Cause Solution No power The vehicle’s ignition is not on If the power supply is properly connected to the vehicle accessory terminal, switch the ignition key to “ACC”. The fuse is blown Replace the fuse. Disc cannot be loaded or Presence of CD disc inside the player Remove the disc in the player and insert the new one. -
Page 25: Specifications
SPECIFICATIONS Signal to Noise Ratio....................> 60dB Channel Separation ..................More than 50 dB Frequency Response ..................40Hz - 18 kHz CD Format Compatibility ..............CD-DA, CD-R, CD-RW FM Radio Frequency Range (USA)................87.5 to 107.9 MHz Frequency Range (Europe)................87.5 to 108 MHz Sensitivity (S/N=30dB) ...................... - Page 26 VR209TP ASA Electronics Corporation www.asaelectronics.com www.jensenrvdirect.com © 2009 ASA Electronics Corporation v.061009...