Jensen VX7014 Operation Manual
7" single din multimedia receiver
Hide thumbs
Also See for VX7014:
- Installation & quick start manual (4 pages) ,
- Operating instructions manual (100 pages)

Related Manuals for Jensen VX7014


Summary of Contents for Jensen VX7014
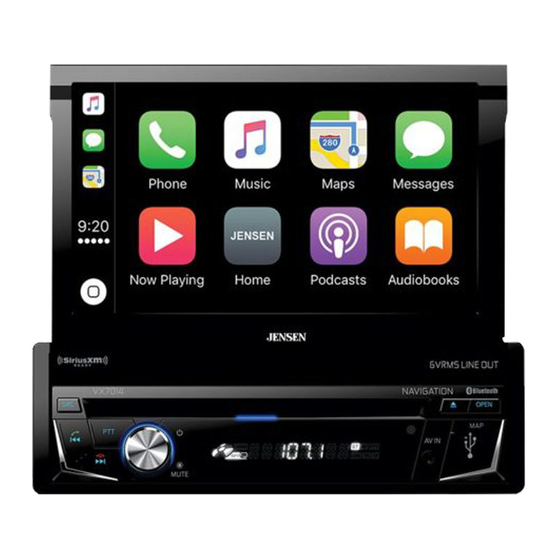
- Page 1 VX7014 7" Single DIN Multimedia Receiver AM-FM / DVD / NAV / SiriusXM Ready™ / Pandora / Bluetooth / iPhone® - iPod®/ Screen Mirroring / USB / AV In / Rear Camera In / CarPlay Operation Manual 6VRMS RCA Output...
- Page 2 VX7014 Android is a trademark of Google Inc. Sirius, XM and all related marks and logos are registered trademarks of Sirius XM Radio Inc. All rights reserved. microSD is a trademark or registered trademark of SD-3C, LLC in the United States, other countries or both.
-
Page 3: Table Of Contents
VX7014 CONTENTS Features ...��������������������������������������������������������������������������������������������������������������� 5 Controls and Indicators ..������������������������������������������������������������������������������� 8 Remote Control ..�����������������������������������������������������������������������������������������������10 External Devices ..�.�������������������������������������������������������������������������������������������13 Quick Start ....�.������������������������������������������������������������������������������������������14 Audio Equalizer .....�.�����������������������������������������������������������������������������17 System Settings ..�.����������������������������������������������������������������������������������������������19 Disc Operation �.��������..���������������������������������������������������������������������������������������28 AM-FM Radio ......�.��������������������������������������������������������.������������������������40 USB / microSD card....�.��������������������������������������..���������������������������������45 iPod®/ iPhone® Connectivity�.����������������������������������������.��������������������������������������50 AV In1 / AV In2 .....�.�������������������������������������������������������������������������������54 HDMI / MHL Connectivity ..�.������������������������������������������������������������������������������55... - Page 4 VX7014 FCC Statement 1. This device complies with Part 15 of the FCC Rules. Operation is subject to the following two conditions: (1) This device may not cause harmful interference, and (2) This device must accept any interference received, including interference that may cause undesired operation.
-
Page 5: Features
If you take a few minutes to look through it, you’ll learn how to use all the features of your new Jensen VX7014 Multimedia Receiver for maximum enjoyment. Please save this manual for future reference. - Page 6 *Some apps may not be supported. • USB Charging Current - 2.1 Amp Support Rear Camera • The VX7014 is “camera ready.” Before accessing any camera features, you must. purchase and install a rear video camera. Built-In Navigation • iGo Primo Next Gen Navigation Engine •...
- Page 7 VX7014 CarPlay Smart interface that uses SIri to enable hands-free control of music, navigation, phone and messaging apps. • Make phone calls and check voicemail • Send, read and reply to text messages • Access music by artist, song, playlist and more •...
-
Page 8: Controls And Indicators
VX7014 CONTROLS AND INDICATORS 1. Disc Slot: Accepts DVD/CD/MP3 discs. If the unit is turned on, playback begins when a disc is inserted. Remote Sensor: Used to receive command signals from the remote control. Reset Button: Press this button to reset the system settings (except password and parental lock settings) and to correct a system halt or other illegal operation. - Page 9 VX7014 USB Slot: Used to connect an iPhone/iPod®, MP3 player or USB flash drive for playback of music/video files. microSD Card Slot: Used to insert microSD cards containing navigation software. Do not delete or modify SD card contents. 3�5mm AV IN Jack: This connector accepts a 3.5 mm jack through which signals from various...
-
Page 10: Remote Control
VX7014 NOTES ON REMOTE CONTROL USAGE • Aim the remote control at the TFT/screen. • Remove the battery from the remote control or insert a battery insulator if the remote control will not be used for a month or longer. - Page 11 VX7014 Remote Control Function Description 1. SOURCE (SRC) Button: Press this button to switch between and select available sources. 2. EJECT Button ( ): Press this button to eject a DVD/CD/MP3 disc. Disc play is stopped, the disc is ejected and the unit will change to radio operation. If the disc is not removed from the unit and the button is pressed again, the disc will be re-loaded.
- Page 12 VX7014 12. NEXT (l) Button: Press this button to skip to the next chapter, track or song during playback of a disc. Press this button while in Radio mode to search available radio station by increasing tuning frequency. 13. PLAY / PAUSE ( ) Button: Press this button to pause the playback of a disc.
-
Page 13: External Devices
AV In2 is used for playback of audio/video from an external device connected to the RCA connectors located on the back of the unit (see the VX7014 Installation Guide). The unit can increase or decrease the volume of the connected device. All other controls are done on the connected device. -
Page 14: Quick Start
1. Press the the front panel volume knob momentarily or touch the SRC icon to view the Main Source Menu. VX7014 Front Panel 2. Touch the desired source icon on one of the two main menu screens. Screen 1 of 2: Radio, CarPlay, USB, Navigation, Bluetooth, Screen Mirroring or SXM. - Page 15 VX7014 USING THE TFT MONITOR Opening / Closing the TFT Monitor Open the TFT Monitor Press the OPEN button on the front panel to activate the mechanism that moves the TFT screen into the viewing position. Close the TFT Monitor Press the OPEN button on the front panel to load the TFT screen back into the compartment.
- Page 16 VX7014 System Settings Adjustment To access and adjust system settings: Touch the Settings ( ) icon on the Main Menu screen to enter the SETTINGS MENU. Sub-menus where adjustments can be made will be highlighted. Volume Adjustment / Turn On Volume To increase or decrease the volume level, rotate the rotary encoder knob.
- Page 17 VX7014 Playing a Disc To begin playback of an Audio/Video Disc: Press the front panel Power On/Off ( ) button / Rotary Volume ( ) knob to turn the unit ON. 2. Insert a disc with the label side facing up. Playback will begin automatically.
- Page 18 VX7014 EQUALIZER CONTROL MENU Adjusting Equalizer Controls The equalizer adjustment screen allows the user to easily adjust the audio system to meet the acoustical characteristics of the vehicle. The acoustical characteristics vary depending on the type of vehicle and measurements.
- Page 19 VX7014 Reset Touch the Reset icon to reset the 10 equalizer band frequencies to the mid point. Loudness Touch the Loud icon to turn the loud option ON or OFF. The loud option automatically alters the frequency response curve of audio to make it sound more natural when played at a lower volume level.
-
Page 20: System Settings
System Settings Sub-Menus (General, Audio, Time, Language, Bluetooth, DVD or Volume) that are used to adjust the performance of each option of the VX7014. The Version Sub-Menu is for information only. Touch a desired Sub-Menu and the Sub-Menu will appear highlighted. The features available for adjustment will appear on the screen. - Page 21 VX7014 Beep - Touch ON or OFF to turn the selection confirmation beep ON or OFF. Wallpaper - Touch wallpaper selection to select wallpaper. Touch again to confirm and set the wallpaper. Calibration- The Touch Screen Calibration adjustment is used to set the parameters of the touch screen to ensure that when the screen is touched, it corresponds to the feature desired.
- Page 22 VX7014 Illumination - Customize the front panel illumination. Touch to change the illumination color. Select a color or touch Custom > Adjust to select the color palette. Front Panel Illumination Adjustment User Interface UI Color - Touch green, red, amber, blue or purple to select the user interface color.
- Page 23 VX7014 Audio Sub-Menu Features The Audio Sub-Menu is used to turn the Subwoofer output ON or OFF and to select a Subwoofer crossover frequency. Audio Sub-Menu Screen Subwoofer - Touch ON or OFF to turn the subwoofer output ON or OFF.
- Page 24 VX7014 Time - Touch the Time icon and use the or icons to set the hour, minute, and either AM or PM. After setting the time, touch Save. The time will appear to the right of the Date option.
- Page 25 VX7014 Bluetooth Sub-Menu Features The Bluetooth audio capabilities can be used for hands free applications. Before attempting to use the Bluetooth functions on this unit, please make sure the mobile phone to be connected supports Bluetooth functions. Bluetooth Pairing Code Screen 2 Bluetooth - Touch ON or OFF to turn the Bluetooth function ON or OFF.
- Page 26 VX7014 DVD Sub-Menu Features The DVD system has a built-in parental lock feature to prevent unauthorized persons from viewing restricted disc content. By default, the rating system is unlocked. Once set up, the parental lock is released only by entering the correct password.
- Page 27 VX7014 Load Factory - This feature allows the user to “Reset” the factory default settings. To reset the password, access the “RATING” menu and enter the current password. Once the correct password is entered, you can access the “Password” field and enter a new one.
- Page 28 VX7014 AV In 1 - Touch the AV In 1 icon to enter the setting of the connected device then use the or icons to increase or decrease the relative volume level between -6 to +6. AV In 2 - Touch the AV In 2 icon to enter the setting of the connected device then use the ...
-
Page 29: Disc Operation
VX7014 DISC OPERATION Compatible Audio Discs Types This system will play the following types of discs: • DVD - DVDs that contain audio and/or video. • Audio discs - Audio CDs that contain audio files. • MP3 discs - A disc that contains audio, video and image files (for example, a CD-R with downloaded MP3 files). - Page 30 VX7014 Title/Chapter Information - The title/chapter information displayed is the current number of the track playing, the total number of tracks on the disc, the current chapter playing and the total number of chapters on the disc. Time Display - This indicator displays the time as entered by the user in the Settings Menu.
- Page 31 VX7014 ) Repeat - Touch this icon during playback to repeat the current chapter. The icon on the screen will light and small letter C will appear below the icon and the chapter will repeat. Touch this icon a second time to repeat the current title.
- Page 32 VX7014 Direct Entry When the Direct Entry icon is touched the Direct Entry Screen appears. The user can manually select a title or a chapter. By touching icon, the user can select a chapter or title. The title or chapter can be selected by touching the corresponding number for a title or chapter.
- Page 33 VX7014 Multi-Language Discs (DVD Only) Changing Audio Language - If you are watching a disc recorded in multiple languages, touch the TFT LCD screen, then touch AUDIO to choose a language. Each time the icon is touched the language will change.
- Page 34 VX7014 General Disc Information Disc Properties Symbol 12cm Disc Properties Max Play Time Single side single layer (DVD-5) (MPEG 2 Method) Single side double layer (DVD-9) 133 minutes Double side single layer (DVD-10) 242 minutes Double side double layer (DVD-18)
- Page 35 VX7014 CD Operation From the Main Menu Screen touch the DISC icon or insert a CD into the disc slot, label side up. Playback begins in CD mode when a disc is inserted correctly. CD Main Menu The on-screen icons and touch key areas are outlined below.
- Page 36 VX7014 List - Touch this icon to access the list of tracks contained on the disc. Touch a desired track icon twice and the track will begin playing. ) Shuffle - Touch this icon to play tracks in the directory in a random order.
- Page 37 VX7014 CD List Touching the List icon will display the CD List Screen. The CD List Screen illustrates the contents of a CD disc. The contents are divided into folders and various file types. Touching the icon will display the files present on the disc.
- Page 38 VX7014 Track Direct Entry When the Direct Entry icon is touched the Direct Entry Screen appears. The user can manually select a track by touching the corresponding number. After entering the track numbers touch the OK icon. If a wrong digit is entered touching the arrow will remove the number.
- Page 39 VX7014 MP3/WMA Operation MP3 is a format for storing digital audio. An audio CD-quality song can be compressed into the MP3 format with very little loss of quality, while taking up much less space. Insert a MP3 Disc into the disc slot, label side up. Playback begins in MP3 mode when a disc is inserted correctly.
- Page 40 VX7014 Controlling Playback Inserting a Disc- Upon inserting a MP3/WMA disc, disc play begins. You cannot insert a disc if there is already a disc in the unit or if the power is off. Ejecting a Disc - Press the Eject ( ) button on the front of the unit to eject the disc.
- Page 41 VX7014 RADIO TUNER OPERATION From the main menu screen touch the radio icon. The radio tuner display screen appears. Radio Tuner TFT Display The on-screen icons and touch key areas are outlined below. Radio Tuner TFT Display Screen SRC Icon - Touch to view the SOURCE MENU and select a new playback source.
- Page 42 VX7014 More ( / ) - Touch the / icons to display the next or previous page of the Radio menu. ) Seek Down / Manual Seek - Touch this icon to seek the previous available radio station. Touch and hold this icon (Until "Manual Seek -" is displayed) to manually tune the radio in increments.
- Page 43 VX7014 RDS ON/OFF - Radio Data System (RDS) is a communications protocol standard for embedding small amounts of digital information in conventional FM radio broadcasts. CT ON/OFF - (Clock Time) Some stations broadcast the time and date within the encoded RDS signal. The clock time is automatically adjusted when ‘CT’ is set to ‘ON’.
- Page 44 VX7014 Direct Entry Tuning When the Direct Entry icon is touched the Direct Entry Screen appears. The user can enter the desired radio station frequency using the on-screen number pad. After entering the radio station frequency touch the OK icon. If a wrong digit is entered touching the green arrow will remove the number.
- Page 45 VX7014 3. Touch the preset number in which you would like to store the current station. The station frequency is displayed at the top of the menu. The preset number will appear highlighted. The station frequency will be stored in the highlighted preset.
- Page 46 VX7014 USB OPERATION The unit will read the audio/video files on USB devices automatically. NOTE: The USB port will recognize most USB flash memory devices and portable hard drives. Hard drives must be formatted to FAT32. NTFS is not supported.
- Page 47 VX7014 USB Operation From the main menu screen touch the USB icon. USB Main Menu The on-screen icons and touch key areas are outlined below. USB Main Menu SRC Icon - Touch this icon to return to the Main Menu Screen.
- Page 48 VX7014 List - Touch this icon to access the list of audio and video files contained on the USB device. Touch a folder icon and the contents of the folder will be displayed. Touch a desired track icon twice and the track will begin playing.
- Page 49 VX7014 USB List Touching the "List" icon will display the USB List Screen. The USB List Screen displays the audio and video files present on the USB device. The contents are divided into folders and various file types. The file types consist of audio and video files.
- Page 50 VX7014 Direct Entry When the Direct Entry icon is touched the Direct Entry Screen appears. The user can manually select a track by touching the corresponding number. After entering the track numbers touch the OK icon. If a wrong digit is entered use the arrow/backspace key to remove the number.
- Page 51 VX7014 iPod® / iPhone® Controls Accessing iPod® Mode The user can control an iPod®/iPhone® using the touch screen to access, albums, songs, etc. The unit will automatically switch to iPod® mode when an iPod®nano, iPod® touch or iPhone® is plugged into the front panel USB connector. Also the iPod®...
- Page 52 VX7014 ) Previous - Touch this icon to play the previous track. ) Play/Pause - Touch this icon to begin playback. Touch this icon again to pause playback. ) Next - Touch this icon to play the next track. List - Touch this icon to access the list of audio and video files contained on the iPod®.
- Page 53 VX7014 ) Audio Files - Touch the audio file icon to display the audio file. Touch the audio file icon to select a track. Touch the audio file icon again to confirm and playback will begin. ) Image Files (JPEG etc) - Image files are selected and controlled by the iPod®.
-
Page 54: Av In1 / Av In2
VX7014 Connecting External Devices AV In 1 / AV In 2 AV In 1 AV In 1 is used for playback of audio/video from an external device connected to the unit through a 3.5mm jack located on the front panel. The unit can increase or decrease the volume of the connected device. - Page 55 Android smartphones will require an app that must be downloaded from Google Play Store. Search for "Jensen Screen Mirroring" in the search bar. Note: In order to connect your smartphone to your VX7014, you will need an HDMI/MHL adapter for your particular brand of smartphone. In some...
-
Page 56: Hdmi / Mhl Connectivity
Plus® / iPhone 6® / iPhone 6 Plus® / iPhone 5® / iPhone 5S® / iPhone 5C® Note: In order to connect your smartphone to your VX7014, you will need the "Apple Lightning Digital AV Adapter" (HDMI adapter). No app or software is needed for Apple devices. - Page 57 HDMI/MHL adapters. Connect your smartphone to the HDMI/MHL adapter. Connect one end of the HDMI cable to the HDMI/MHL adapter. Connect the remaining end of the HDMI cable to the Jensen multimedia head unit HDMI input (Rear chassis panel). Consult your smartphone documentation for instructions on how to access HDMI/MHL on your device.
- Page 58 Mirror Mode (One -Way Control - Apple / Android) Mirror Mode does not need any app support. Simply connecting the DMH25J to the VX7014 and establishing a WiFi connection is all that is needed. Mirror Mode w/ Touch Screen Control (Two-Way Control - Android Only) Mirror Mode w/ Touch Screen Control will require an app to be downloaded from Google Play Store.
- Page 59 • Before using Bluetooth functions, you must pair your mobile phone to the VX7014 unit (see “Pairing the Your Mobile Phone with the Unit”. To ensure the best reception for pairing and re-connection, please make sure the mobile phone battery is fully charged before you begin.
- Page 60 Bluetooth - Displays the current source. LG VX9200 - Indicates the device that is paired with the unit. VX7014 Device Name - Provides the name that will appear on the Bluetooth device. Scan - Touch the icon to search for Bluetooth devices.
- Page 61 VX7014 The user can make or receive phone calls with Bluetooth enabled phones through the unit. The user can also listen to music from a Bluetooth enabled device. Pairing Bluetooth Devices To connect your Bluetooth phone to the unit, the user needs to pair the phone to the unit.
- Page 62 The mobile phone should display a message similar to “Device Connected” and the mobile phone and the unit are now connected. VX7014 will appear on the mobile phone list of devices. Managing Incoming Calls When connected to a Bluetooth mobile phone, the unit will mute audio output, pause CD play, and change to the Bluetooth screen below when a call is received.
- Page 63 VX7014 Making an Outgoing Call Outgoing calls can be performed in two manners. The outgoing call can be direct dialed using the front panel keypad or the by touching either the Phonebook or Call History icons, selecting a name and touching the phone number.
- Page 64 VX7014 Audio Mute To mute the phone call audio from the unit when a call is received, press the front panel rotary knob. Press the front panel rotary knob again and phone call audio will be restored to the unit.
- Page 65 VX7014 Call Transfer While talking, to transfer audio from the unit back to the mobile phone, touch the Transfer to Phone icon. You can only transfer a call after it has been answered. Touching the Transfer to Radio icon will return the audio from the mobile phone to the unit.
- Page 66 Main Source Menu. PTT (Push to Talk) Function The VX7014 has a PTT button to allow you to access Siri or Google Voice through the head unit when connected via Bluetooth. You mobile phone must support Siri or Google Voice in order for this feature to be supported on the head unit.
-
Page 67: Rear Camera
VX7014 REAR CAMERA OPERATION This unit is “camera ready. ” Before accessing any camera features, you must install a rear video camera. When the camera is not installed and the function is accessed by the gear selector being placed in reverse or by the unit’s menu, the message “No Signal!” will be displayed and the following screen will appear. -
Page 68: Steering Wheel Controls (Swc)
SWC Ready The built-in SWC Interface is compatible with PAC steering wheel control modules. The PAC SWI-RC is recommended. A third-party adapter must be used in order for the VX7014 to be compatible with any steering wheel controls. Note: Not all OE steering wheel functions may be supported by the VX7014. PTT - Will activate Siri / Google Voice if mobile phone supports the feature. -
Page 69: Pandora® Radio
Apple device for audio connectivity. To play Pandora Music using an Android device, it is necessary to pair your mobile phone via Bluetooth to the VX7014. A cable connection for Pandora via Android is not supported. - Page 70 VX7014 ) Pause / Play Icon - Touch the icon to pause playback. Touch the icon to begin playback. ) Next Icon - Press this icon skip a song, subject to the skip limit. ) Thumbs Up - Press thumbs up to tell Pandora® you like the track currently playing, and Pandora will play more tracks like it.
- Page 71 VX7014 Station List Screen The Station List Screen allows you to search for music by stations you created. Pandora® Music Station List Screen Touch a station on the list to choose that station. Touch the Scroll Down () icon to view the next page in the list or the Scroll Up () icon to view the previous page.
- Page 72 VX7014 3. If both an Android and iPhone®/ iPod® device are connected to the radio, the select Android or Apple device screen appears. Select Android or Apple device screen 4. To stop Pandora,® exit the Pandora app on the iPhone®, iPod® or Android device.
-
Page 73: Siriusxm® Radio
VX7014 SiriusXM® RADIO OPERATION Only SiriusXM® brings you more of what you love to listen to, all in one place. Get over 140 channels, including commercial-free music plus the best sports, news, talk, comedy and entertainment. Welcome to the world of satellite radio. A SiriusXM Vehicle Tuner and Subscription are required. - Page 74 VX7014 SiriusXM® User Interface The on-screen indicators and touch key areas for SiriusXM® functions are outlined below. Menu Page 1 SiriusXM® Menu Page 1 SRC Icon - Touch to return to the unit’s Main Menu Screen. Band indicator (SXM1 icon) - Displays SiriusXM® radio band currently selected.
- Page 75 VX7014 Previous ( ) Icon - Touch to tune to the previous channel. Channel/Category Icon - Touch to toggle the icon displayed between Category and Channel. When Channel is displayed, touching tunes channels up or down. When Category is displayed, touching tunes channels within a category up or down.
- Page 76 VX7014 Menu Page 2 SiriusXM® Menu Page 2 More Icon - Touch to go to SiriusXM® Menu Page 1. Band Icon - Touch to select a band of preset channels. Three bands are available: SXM1, SXM2, and SXM3. Each band can store up to ten preset channels. (Preset channels are accessed from the List icon.)
- Page 77 VX7014 Switching to SiriusXM® Radio • Touch the top left corner of the screen (the SRC box) to view the Main Menu screen. From the Main menu screen, touch the SiriusXM icon. • Press the MENU button on the front panel to switch to the SXM source.
- Page 78 VX7014 Using Preset Channels A preset is a channel name that is stored for instant access to that channel. Ten numbered preset buttons store and recall channels for each band. Storing a Channel Select a band (if needed), then select a channel.
- Page 79 VX7014 Searching for a Channel Search by Channel To search by channel: On the SirusXM® menu page 1, touch the Category/Channel icon (if needed) to select Channel. 2. Touch List to display the Channel Search Screen: Channel Search Screen 3. Touch a channel to tune to that channel. Touch the or icon to scroll up or down the list.
- Page 80 VX7014 Locking SXM Mature Channels SiriusXM® attaches a label to channels with mature content. The radio recognizes these channels as “Mature”. The Mature Channel Lock option allows you to lock out channels with “Mature” labels. These channels will still appear in the channel...
- Page 81 VX7014 Temporarily Unlock a Mature Channel When the global “Mature Lock” is enabled, a mature channel can be temporarily unlocked. All mature channels are temporarily unlocked (but still hidden when channel browsing) until the SXM source is changed, Accy (Key) is cycled or the “Power Button”...
- Page 82 VX7014 Unlock All Mature Channels To unlock all mature channels: On the SirusXM® menu page 2, touch the Lock icon. The following screen appears: Enter Lock Password Screen 3. Enter your 4-digit password and then press the Ok icon. The following screen appears: 4.
- Page 83 VX7014 Locking Individual SXM Channels An user can lock individual channels. When locked, a channel has the lock ( icon next to it on the channel list. Locking a Channel To lock an individual channel: On the SirusXM® menu page 2, touch the Lock icon. The following screen...
- Page 84 VX7014 Unlocking a Channel To unlock an individual channel: On the SirusXM® menu page 2, touch the Lock icon. The Enter Password Screen appears appears. 2. Enter your 4-digit password. The following screen appears: Unlock Screen 3. Touch a lock ( ) icon to unlock a channel.
- Page 85 VX7014 SiriusXM® Radio Advisory Messages SiriusXM® user advisory messages are listed below: Advisory Displayed Cause Check SXM Tuner Check the SiriusXM® tuner connection on the back of the unit to ensure that it’s correctly connected. Check SXM Antenna Ensure the SiriusXM® antenna cable is connected to the SiriusXM®...
-
Page 86: Apple Carplay Operation
VX7014 APPLE CARPLAY™ OPERATION Apple CarPlay™ is a smart interface for iPhone, allowing you to voice-control (via Siri) music, navigation, phone and messaging apps - significantly reducing driver distraction. Phone - Use Siri to make calls, return missed calls, listen to voicemail messages, and view the caller ID on the receiver’s screen. - Page 87 VX7014 Using Apple CarPlay™ When the CarPlay menu is displayed, the home button in the lower left corner work just like the home button on your iPhone. Press and hold it to summon Siri and begin your voice commands. At any time during CarPlay operation, you can press this button momentarily to return to the main CarPlay menu screen.
- Page 88 VX7014 Controlling Apple CarPlay™ The following basic controls will operate many standard CarPlay features. Touch Briefly press the desired option. Swipe Briefly swipe in the desired direction. Drag Press, hold and drag to the desired location. Additional Notes 1. There is no need to pair your iPhone when using CarPlay. This will occur automatically when connecting an iPhone to the unit's USB port.
- Page 89 VX7014 NOTES:...
-
Page 90: Troubleshooting
VX7014 TROUBLESHOOTING Troubleshooting Problem Cause Corrective Action GENERAL Unit will not power Radio Fuse open Install new fuse with correct rating Car battery fuse open Install new fuse with correct rating Illegal operation Press the RESET button located in the middle... - Page 91 VX7014 Problem Cause Corrective Action TFT Monitor No image Incorrect connection to parking Check wiring and brake wire correct Parking brake is not engage Stop vehicle in safe place and apply parking brake Flashing image DVD is not compatible with...
- Page 92 VX7014 Problem Cause Corrective Action Disc does not play Disc is warped or scratched Use disc in good back condition Clean disc with soft Disc is dirty or wet cloth Laser pickup is dirty Clean laser pickup with cleaning disc...
- Page 93 VX7014 Disc Error Messages Message Displayed Cause Corrective Action Loading Disc is being read No Disc Disc is dirty Clean disc with soft cloth Disc is upside down Insert disc with label side Disc not present in Insert disc loading compartment...
-
Page 94: Care And Maintenance
VX7014 CARE AND MAINTENANCE Use only a clean silicone cloth and neutral detergent to clean the front panel or monitor. A rough cloth and non-neutral detergent (such as alcohol) may result in scratching or discoloration. 2. Do not get water or cleaning fluids on the unit. -
Page 95: Specifications
VX7014 SPECIFICATIONS DVD/CD Player Compatible Disc Media: DVD + R / RW (Single and Dual Layer and CD-R / RW Compatible Media Formats: CD-DA, MP3, WMA, VCD, SVCD, Xvid, AVI, MPEG 1/2 and AAC Signal to Noise Ratio: >95dBA Dynamic Range: >95dB Frequency Response: 20Hz to 20 kHz, -3dB Channel Separation: >... - Page 96 VX7014 General Auxiliary (Audio) Input Impedance: 10kOhm Power Supply: 14.4VDC Nominally, Negative Ground Only (11VDC to 16VDC Allowable) Power Antenna / Amp Remote (Blue): 500mA max (Current Limited Protection) Operating Temperature: 0C ~ 65C / 32F ~ 149F Fuse: 15-Amp, ATO type Chassis Dimensions: 7”...
-
Page 97: Notes
VX7014 NOTES:... -
Page 98: Common Replacement Parts
VX7014 Dual Electronics Corporation Heathrow, FL 32746 Technical Assistance: 888-921-4088 www�jensenmobile�com © 2017 Printed in China VX7014 Common Replacement Parts 30313950 Wire Harness (Pwr/Spk/Line Out/Mic/GPS Antenna) Trim Ring 30413950 Remote Control 30714230 Hardware Bag 30514000 Operation manuals and other material online at: www.jensenmobile.com...