Table of Contents
Advertisement
422-04-651-0064 - 06-20-05.qxd
6/20/05
1:42 PM
Page 1
UNISAW
®
10" Right Tilting Arbor Saw
(Models 34-801, 34-806, 34-814, 36-812)
PART NO. 422-04-651-0064 - 06-20-05
Copyright © 2005 Delta Machinery
To learn more about DELTA MACHINERY
visit our website at: www.deltamachinery.com.
For Parts, Service, Warranty or other Assistance,
1-800-223-7278 (
1-800-463-3582).
please call
In Canada call
Advertisement
Table of Contents

Related Manuals for Delta UNISAW 34-806


Summary of Contents for Delta UNISAW 34-806
- Page 1 10" Right Tilting Arbor Saw (Models 34-801, 34-806, 34-814, 36-812) PART NO. 422-04-651-0064 - 06-20-05 Copyright © 2005 Delta Machinery To learn more about DELTA MACHINERY visit our website at: www.deltamachinery.com. For Parts, Service, Warranty or other Assistance, 1-800-223-7278 ( 1-800-463-3582).
-
Page 2: Table Of Contents
NOT be modified and/or used for any application other than for which it was designed. If you have any questions relative to its application DO NOT use the product until you have written Delta Machinery and we have advised you. -
Page 3: Safety Guidelines
422-04-651-0064 - 06-20-05.qxd 6/20/05 SAFETY GUIDELINES - DEFINITIONS It is important for you to read and understand this manual. The information it contains relates to protecting YOUR SAFETY and PREVENTING PROBLEMS. The symbols below are used to help you recognize this information. -
Page 4: General Safety Rules
Damage to the machine and/or injury may result. 13. USE RECOMMENDED ACCESSORIES. The use of accessories and attachments not recommended by Delta may cause damage to the machine or injury to the user. 1:42 PM... -
Page 5: Additional Specific Safety Rules
15. NEVER have any part of your body in line with the path of the saw blade. 16. NEVER REACH AROUND or over the saw blade. 17. NEVER attempt to free a stalled saw blade without first turning the machine “OFF”. 18. PROPERLY SUPPORT LONG OR WIDE workpieces. -
Page 6: Functional Description
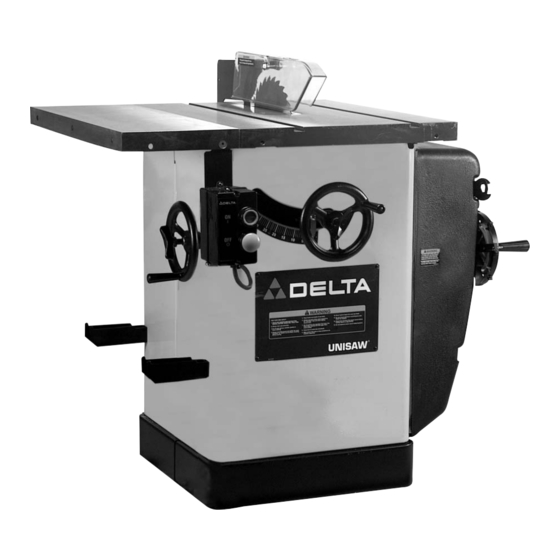
FOREWORD The Delta Unisaw is a 10" right tilting arbor saw. The Delta Unisaw features set the standards in the table saw industry. NOTICE: The photo on the manual cover illustrates the current production model. All other illustrations contained in the manual are representative only and may not depict the actual labeling or accessories included. -
Page 7: Unpacking And Cleaning
422-04-651-0064 - 06-20-05.qxd 6/20/05 DUST CHUTE ADAPTER HANDWHEEL BLADE GUARD AND SPLITTER BRACKET MITER GAUGE EXTENSION WING HANGERS FOR RIP FENCE (2) CLOSED-END ARBOR WRENCH 10. OPEN-END ARBOR WRENCH 11. UPPER BRACKET FOR SPLITTER 11A. LOWER BRACKET FOR SUPPORT ROD 12. -
Page 8: Assembly
“ATTACHING THE LVC ON/OFF SWITCH.” Attach the extension wing (A) Fig. 5 to the left side of the saw table using three 7/16"-20x 1 and 7/16" flat washers. NOTE: Make sure that the front edge of the wing is flush with the front edge of the table. - Page 9 1. Place a 1/4" lockwasher, then a 1/4" flat washer on a 1/4-20x1/2" hex head bolt. Insert the bolt through one of the holes (B) Fig. 7 on the inside of the saw cabinet and into the matching tapped hole (C) Fig. 7 in the starter.Tighten just enough to hold the starter.
- Page 10 DISCONNECT THE MACHINE FROM THE POWER SOURCE! 1. Remove the table insert Fig. 12. Raise the saw arbor by turning the height adjusting handle on the front of the saw counter-clockwise as far as it will go. Then turn the angle-adjusting handle on the front of the saw clockwise as far as it will go.
- Page 11 (C), that were removed in STEP 3. 5. Insert the threaded end of the support rod (G) Fig. 16, through the slot in the rear of the saw and into the hole in the rear trunnion (H). Fasten the support rod (G) to the trunnion with a star washer and hex nut (J) Fig.
- Page 12 11. Install the saw blade, making certain the teeth are pointing down at the front of the saw table (Fig. 24). Install the outside blade flange and arbor nut (X). With open-end wrench (Y) on the flats of the arbor to keep it from turning, tighten arbor nut by turning box-end wrench (Z) counter-clockwise.
- Page 13 Then turn the angle adjusting handle on the front of the saw clockwise as far as it will go. 2. Fasten motor cord (A) Fig. 29 to the saw frame cross member (B), using the cable tie (C) supplied with the saw.
- Page 14 4" diameter dust collector hose to the machine. Align the four holes in the adapter (A) Fig. 34 with the four holes in the back of the saw cabinet (B). Attach the dust chute adapter with four #10 x 1/2" sheet metal screws.
-
Page 15: Operation
The blade tilting mechanism allows the blade to be tilted up to 45° to the right. To tilt the saw blade to the desired angle, loosen the lock knob (D) Fig. 37, and turn the handwheel (C). A pointer indicates the angle of tilt on scale (E), which is marked in one-degree increments. - Page 16 (Fig. 40). Lock the square in this position. 2. Rotate the saw blade so that the same tooth you used in STEP 2 is in the rear position (Fig. 45). Both the front and rear measurements should be identical.
-
Page 17: Adjusting The Table Insert
422-04-651-0064 - 06-20-05.qxd 6/20/05 ADJUSTING THE TABLE INSERT Place a straight edge (B) across the table at both ends of the table insert (Fig. 42). The table insert (A) should always be level with the table. To adjust, turn the adjusting screws (C), with a supplied hex wrench. - Page 18 The following information describes the safe and proper method for performing the most common sawing operations. The use of attachments and accessories not recommended by Delta may result in the risk of injury to the user or others.
- Page 19 The saw blade guard must be used. On Delta saws, the guard has anti-kickback fingers to prevent kickback and a splitter to prevent the wood kerf from closing and binding the blade. Be sure to replace or sharpen the anti-kickback devices when the points become dull.
-
Page 20: Ripping On Left Side Of Saw Blade
RIPPING ON LEFT SIDE OF SAW BLADE In some cases it may be desirable to use the fence on the left side of the saw blade. This is easily accomplished by repositioning the fence (A) Figs. 55 and 56, fence clamp bar (B), and lock knobs (C) so that the fence (A) will be attached to the right side of the fence body, as shown in Fig. - Page 21 Loosen screws (G) and (H) Fig. 58. Lift up and swing blade guard and splitter assembly (W) Fig. 59 to the rear of the saw and retighten (H). pushsticks, fixtures, or featherboards to help guide and control the workpiece when the guard cannot be used.
- Page 22 The blade guard and splitter assembly cannot be used when dadoing or moulding. It must be removed or swung to the rear of the saw as described in “USING ACCESSORY MOULDING CUTTERHEAD” SECTION. Auxiliary jigs, fixtures, push sticks and feather boards should be used.
-
Page 23: Constructing A Featherboard
422-04-651-0064 - 06-20-05.qxd 6/20/05 1:45 PM Page 23 USING AUXILIARY WOOD FACING ON RIP FENCE When performing special cutting operations – and that operation may cause the cutting implement to contact the fence – it is necessary to add a wood facing (A) Fig. 145, to one side of the rip fence as shown. -
Page 24: Constructing A Push Stick
422-04-651-0064 - 06-20-05.qxd 6/20/05 1:45 PM Page 24 CONSTRUCTING A PUSH STICK When ripping work less than 4 inches wide, a push stick should be used to complete the feed and could easily be made from scrap material by following the pattern shown. -
Page 25: Troubleshooting
NOTE: You may have to raise the saw arbor to insert the wooden block. Lower the saw arbor until the motor contacts the wood. 3. Loosen the bolt (D) Fig. 70 and continue to lower the saw arbor until all tension is removed from the belts (E). Tighten the bolt (D). -
Page 26: Service
Also, check for blown fuses or open circuit breakers in the line. PARTS, SERVICE OR WARRANTY ASSISTANCE All Delta Machines and accessories are manufactured to high quality standards and are serviced by a network • of Porter-Cable Delta Factory Service Centers and Delta Authorized Service Stations. To obtain additional information regarding your Delta quality product or to obtain parts, service, warranty assistance, or the location of the nearest service outlet, please call 1-800-223-7278 (In Canada call 1-800-463-3582). -
Page 27: Warranty
Two Year Limited New Product Warranty Delta will repair or replace, at its expense and at its option, any new Delta machine, machine part, or machine accessory which in normal use has proven to be defective in workmanship or material, provided that the customer returns the product prepaid to a Delta factory service center or authorized service station with proof of purchase of the product within two years and provides Delta with reasonable opportunity to verify the alleged defect by inspection. - Page 28 Phone: (604) 420-0102 Fax: (604) 420-3522 The following are trademarks of PORTER-CABLE • DELTA (Las siguientes son marcas registradas de PORTER-CABLE • DELTA S.A.) (Les marques suivantes sont des marques de fabriquant de la PORTER-CABLE • DELTA): Auto-Set Contractor’s Saw II™, Delta ®...