HP 330834-B21 - StorageWorks Ultrium 460 Tape Library Drive Module User Manual
Full-height scsi tape drives
Hide thumbs
Also See for 330834-B21 - StorageWorks Ultrium 460 Tape Library Drive Module:
- Getting started manual (56 pages) ,
- Technical reference manual (44 pages)

Related Manuals for HP 330834-B21 - StorageWorks Ultrium 460 Tape Library Drive Module


Summary of Contents for HP 330834-B21 - StorageWorks Ultrium 460 Tape Library Drive Module
- Page 1 HP StorageWorks Ultrium full-height SCSI Tape Drives user guide Part number: EH853–90905 Second edition: February 2007...
- Page 2 Legal and notice information © Copyright 2006-2007 Hewlett-Packard Development Company, L.P. The information contained herein is subject to change without notice. The only warranties for HP products and services are set forth in the express warranty statements accompanying such products and services. Nothing herein should be construed as constituting an additional warranty.
-
Page 3: Table Of Contents
Contents About this guide ......Intended audience ........Related documentation . - Page 4 Check the drive’s SCSI ID ........Connect the SCSI cable ........Does the tape drive need a terminator? .
- Page 5 12 Troubleshooting ......General Procedure ........Problems with cartridges .
- Page 6 Figures 1 ..Front view of full-height Ultrium external tape drive ....2 ..Usage model ....... . . 3 ..Checking the SCSI ID .
- Page 7 Tables 1 ..Document conventions ....... 2 ..Supported SCSI bus types ......3 ..Recommended usage models .
-
Page 9: About This Guide
About this guide This guide provides information about: • Installing the HP StorageWorks Ultrium SCSI tape drive • Using the HP StorageWorks Ultrium SCSI tape drive • Troubleshooting the HP StorageWorks Ultrium SCSI tape drive Intended audience This guide is intended for users who install, operate and maintain the HP StorageWorks Ultrium tape drive. Related documentation In addition to this guide, the following document provides related information: •... -
Page 10: Hp Technical Support
CAUTION: Indicates that failure to follow directions could result in damage to equipment or data. IMPORTANT: Provides clarifying information or specific instructions. NOTE: Provides additional information. HP technical support For worldwide technical support information, see the HP support website: http://www.hp.com/support Before contacting HP, collect the following information: •... -
Page 11: Hp Websites
HP websites For additional information, see the following HP websites: • http://www.hp.com • http://www.hp.com/go/storage • http://www.hp.com/service_locator • http://www.hp.com/support/manuals • http://www.hp.com/support/downloads Documentation feedback HP welcomes your feedback. To make comments and suggestions about product documentation, please send a message to storagedocs.feedback@hp.com. All submissions become the property of HP. Ultrium full-height SCSI Tape Drives... - Page 12 About this guide...
-
Page 13: Before You Start
1 Before you start Supported models This guide describes how to install and operate the following HP StorageWorks Ultrium tape drive models: • HP StorageWorks Ultrium 1840 internal, external and removable tape drives. These are Ultra 320 SCSI devices with a maximum burst transfer speed of 320 MB/second. They can write uncompressed data at up to 120 MB/second (432 GB/hour) or compressed data at up to 240 MB/second (864 GB/hour), assuming 2:1 compression. -
Page 14: Internal Drives
• You will need a properly installed and configured SCSI host bus adapter (HBA) or a built-in SCSI controller on your server and a suitably-rated SCSI cable. See also Why is the SCSI bus type important?. • For optimum performance the drive should be the only device on the SCSI bus. •... -
Page 15: How Can I Check The Scsi Bus Type And Scsi Id
Table 2 Supported SCSI bus types SCSI Bus Type Supported Ultra320 LVD Yes. This is a recommended configuration for all Ultrium full-height tape drives. Do not daisy chain Ultrium 1840 or Ultrium 960 tape drives because performance will be degraded. Up to two Ultrium 460 tape drives may be daisy-chained. Ultra160 LVD Yes. -
Page 16: Usage Models
Usage models HP StorageWorks Ultrium tape drives can be used in a standalone or network environment. However, they should always be directly attached to suitably-rated SCSI connector on the storage server. Server Tape drive Figure 2 Usage model The following table shows the recommended usage models and Optimizing performance provides further information about factors that can affect performance. -
Page 17: Other Usage Models
Table 3 Recommended usage models Direct Attach, Across the Network, single storage server single storage server, multiple clients Ultrium 1840 Recommended Not recommended Ultrium 960 Recommended Requires careful design to utilize the drive’s performance capabilities, even Gigabit Ethernet will limit performance Ultrium 460 Recommended Recommended, anything less than Gigabit Ethernet may... - Page 18 Before you start...
-
Page 19: Drivers And Backup Software
2 Drivers and backup software Install drivers NOTE: The HP Tape driver is suitable for use in most applications, but refer also to the documentation of your software application to ensure you are using the recommended driver. Installing on Windows The driver available from Microsoft update is acceptable, but the HP driver provides better support for all the features of your new tape drive. -
Page 20: Enabling Encryption
Select your combination of operating system and tape drive model in the table. A list of supported backup applications is displayed. This will also tell you whether your configuration is compatible with HP One-Button Disaster Recovery, HP OBDR. (All HP StorageWorks Ultrium tape drives support HP OBDR. -
Page 21: Installing An Internal Tape Drive
3 Installing an internal tape drive If you are installing an external Ultrium tape drive, please refer to Installing an external Ultrium tape drive. If you are installing a removable Ultrium tape drive, please refer to Installing a removable Ultrium tape drive. -
Page 22: Prepare Mounting Bay
For most operating systems you can run HP Library & Tape Tools from the HP StorageWorks Tape CD-ROM to check your server’s current SCSI configuration (see Diagnostic tools ). This will provide information about the SCSI bus and the SCSI IDs in use. To do this, select the ‘troubleshoot with L&TT’... -
Page 23: Attach Mounting Hardware
Figure 4 Removing cover from ProLiant ML370 server 1. Release catch 2. Push cover back and lift off Remove the filler panel from a spare 5¼-inch bay of your server, as described in your server’s documentation. With some servers, such as the HP AlphaServer ES40, you must also remove the half-height device divider. -
Page 24: Mounting Rails
Please check your HP ProLiant server documentation to ascertain the correct method of mounting, and to check whether mounting hardware is provided with the server. Mounting rails Some HP ProLiant servers, such as ML570, require mounting rails. These may be metal or plastic rails attached to the server’s drive bay filler panel. -
Page 25: Other Servers
1. Release catch 2. Push cover back and lift off Figure 6 Attaching locating screws in a typical HP ProLiant 350 or 370 Other servers Attach the appropriate mounting hardware. Refer to the manufacturer’s documentation for instructions. • If you are installing on a server that requires a tray, place the tape drive in the tray. •... -
Page 26: Attach Power And Scsi Cables
Attach power and SCSI cables To support the high performance of the tape drive it is important that you connect to a recommended SCSI bus and use a suitably-rated SCSI cable, see Why is the SCSI bus type important?. Electrical specifications are as follows. Table 4 Electrical specifications, internal drives Ultrium 1840 Ultrium 960... -
Page 27: Where Should The Scsi Terminator Be
1 and 7 terminated SCSI cable 2 and 4 power cable tape drive server’s power supply SCSI controller Figure 8 Connecting power and SCSI cables Where should the SCSI terminator be? Termination must be present at two and ONLY two positions on the SCSI bus—at the beginning of the SCSI bus and at the end of the SCSI bus. -
Page 28: Secure The Drive
Secure the drive NOTE: The server latches and side views of your server model may not be exactly the same as shown in the illustrations. Please refer also to you server documentation. Mounting hardware used (HP ProLiant) Ensure that you use the correct mounting rails or locating screws, as described in Attach mounting hardware. -
Page 29: Securing Drive, No Mounting Hardware Used
M3 screws, supplied with tape drive Figure 10 Securing drive, no mounting hardware used Ensure blanking plates are in place over empty bays and replace the cover on the server. Ultrium full-height SCSI Tape Drives... - Page 30 Installing an internal tape drive...
-
Page 31: Installing An External Ultrium Tape Drive
4 Installing an external Ultrium tape drive If you are installing an internal Ultrium tape drive, please refer to Installing an internal Ultrium tape drive. If you are installing a removable Ultrium tape drive, please refer to Installing a removable Ultrium tape drive. -
Page 32: Connect The Scsi Cable
Use a small screwdriver or a ball-point pen to press the indented SCSI ID selector buttons on the rear panel (see Figure 12) until the required value is displayed. Do not use a pencil because small bits of graphite could contaminate the drive. NOTE: The server and the tape drive SCSI IDs are only checked at power-on. -
Page 33: Does The Tape Drive Need A Terminator
Act TERM LED Fan/Power LED Figure 12 Connecting the SCSI cable Attach the VHD connection on the SCSI cable to the server’s external SCSI connector and secure it by tightening the screws. Attach the HD connection on the SCSI cable to the SCSI-IN connector on the rear panel of the tape drive and secure it by tightening the screws. -
Page 34: Connecting The Power Cable
Table 5 Electrical specifications, external drives Ultrium 1840 Ultrium 960 Ultrium 460 Power consumption 13 Watts idle, 12 Watts idle, 11 Watts idle, 26 Watts typical, 30 Watts typical, 25 Watts typical, 40 Watts maximum 35 Watts maximum 38 Watts maximum Power requirements 100–240 VAC 100–240 VAC... -
Page 35: Installing A Removable Ultrium Tape Drive
5 Installing a removable Ultrium tape drive If you are installing an internal Ultrium tape drive, please refer to Installing an internal Ultrium tape drive. If you are installing an external Ultrium tape drive, please refer to Installing an external Ultrium tape drive. -
Page 36: Install The Drive
• If you daisy-chain devices, make sure that devices are of the same SCSI type and that each device on the same SCSI bus has a unique SCSI ID and is terminated appropriately. Do not daisy-chain more than two devices on the same SCSI bus. •... -
Page 37: Set The Drive's Scsi Id
Figure 15 Inserting the tape drive If there are empty bays, insert a blanking plate. This is essential to ensure adequate airflow is maintained. Failure to do so may affect tape drive performance. See the documentation with the tape array for details on installing blanking plates. Set the drive’s SCSI ID To set the tape drive’s SCSI ID you need to set the appropriate switch on the rear of the tape array. -
Page 38: Why Does The Tape Drive Need A Terminator
The HP Tape Array 5300 has four SCSI ID switches to enable the installation of up to four half-height drives. When installing two HP Ultrium full-height tape drives, use SCSI ID switches 1 and 2 only. S C S I S C S I B a y 4 B a y 3... -
Page 39: Extractor Lever In Out Position
Figure 17 Extractor lever in out position Using the extraction lever, pull the drive gently and firmly out of the tape array. Figure 18 Removing the tape drive To insert another drive, follow the instructions in Install the drive. Ultrium full-height SCSI Tape Drives... - Page 40 Installing a removable Ultrium tape drive...
-
Page 41: Verify Installation
6 Verify installation Once you have installed the drive hardware, check that drivers have been installed correctly and you have the correct version of backup software, and verify that the tape drive is functioning properly before you store your valuable data. Switch on the drive and the server. - Page 42 Verify installation...
-
Page 43: Understanding The Leds
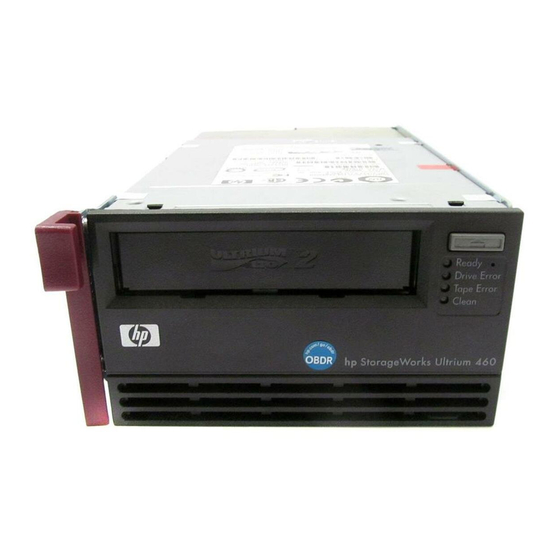
7 Understanding the LEDs Your HP StorageWorks tape drive See also "Understanding LED sequences" on page 43. 5. Drive LED 1. On/Off switch (external drives only) 6. Tape LED 2. Eject button 3. Emergency reset button 7. Clean LED 4. Ready LED Figure 19 Front view of full-height Ultrium external tape drive Understanding LED sequences The meaning of different patterns of LEDs is as follows:... - Page 44 LED Sequence Cause Action required The drive has failed to execute Power cycle or reset the drive (see "Problems power-on self test (POST). with cartridges" on page 62). If the error condition reappears, call for service. Ready and Clean OFF. Drive and Tape FLASH.
- Page 45 LED Sequence Cause Action required None. Firmware is being reprogrammed. Do not reset or power cycle the drive. Ready is OFF, others are The drive requires cleaning. Load the Ultrium cleaning cartridge. See "Cleaning cartridges" on page 49 for supported cartridges and instructions. If the Clean LED is still flashing when you load a new or known good data cartridge after cleaning, call for service.
-
Page 46: Rear Panel Led Sequences
LED Sequence Cause Action required The drive mechanism has Load a new cartridge. If the error persists, detected an error. power cycle or reset the drive. If the Drive LED remains on, call for service. Drive FLASHES. Insert a cartridge to clear the LED sequence. There is a firmware download problem. -
Page 47: Operating Your Tape Drive
8 Operating your tape drive Loading a cartridge 1. Arrow indicates leading direction 2. Label area Figure 20 Inserting a cartridge Insert the cartridge into the slot in the front of the drive with the white arrow uppermost and facing the drive door. -
Page 48: Removing Power From The Drive
1. Eject button Figure 21 Ejecting a cartridge The drive will complete its current task, rewind the tape to the beginning, and eject the cartridge. The rewind process may take up to 10 minutes. The Ready light will flash to indicate that the unload is still in progress. -
Page 49: Use The Correct Media
9 Use the correct media For best performance we recommend HP branded media. Order online at: http://www.hp.com/go/storagemedia. Cartridges Cleaning cartridges The recommended cleaning cartridges is the HP Ultrium universal cleaning cartridge, C7978A (Orange). This cleaning cartridge is designed to work with any Ultrium drive. It may be used for up to 50 cleans. NOTE: Do not use the earlier HP Ultrium cartridge, C7979A (Blue), or Ultrium cartridges from other manufacturers. -
Page 50: Hp Ultrium Worm Data Cartridges
HP Ultrium WORM data cartridges The HP StorageWorks Ultrium 1840 and 960 tape drive includes support for both re-writable and Write-Once, Read-Many, WORM, data cartridges. WORM cartridges provide for an enhanced level of data security against accidental or malicious alteration of data on the tape cartridge. The WORM data cartridge can be appended to maximize the full capacity of the tape cartridge, but the user will be unable to erase or overwrite data on the cartridge. -
Page 51: Cleaning The Tape Drive
1. Write-protect tab Figure 22 Write protecting a cartridge Write-protection will not protect your cartridges against magnets. Write-protection will not prevent a cartridge being erased by bulk-erasure or degaussing. Do not bulk erase Ultrium format cartridges. This will destroy pre-recorded servo information and make the cartridge unusable. Cleaning the tape drive You must use the Ultrium Universal cleaning cartridge with HP StorageWorks Ultrium tape drives, as other cleaning cartridges will not load and run. -
Page 52: Operating And Storage Environment
• Do not leave cartridges in excessively dry or humid conditions. • Do not leave cartridges in direct sunlight or in places where magnetic fields are present (for example, under telephones, next to monitors or near transformers). • Do not drop cartridges or handle them roughly. •... -
Page 53: 10 Using Hp Obdr
10 Using HP OBDR Compatibility HP One-Button Disaster Recovery is a standard feature on all HP StorageWorks Ultrium tape drives. However, it can only be used with specific configurations and will only recover the server to which the tape drive is directly connected. To check whether your system (hardware, operating system and backup software) is OBDR-compatible, please refer to our World Wide Web site http://www.hp.com/go/connect. -
Page 54: Running Hp Obdr
want to overwrite your system, you can safely cancel the disaster recovery process at step 3 in the following procedure. Refer to our connectivity web site (http://www.hp.com/go/connect) for more information about suitable backup applications. Running HP OBDR HP OBDR can only be used with backup applications that support one-button disaster recovery and methods of operating OBDR will vary between different software companies. -
Page 55: If Restore Fails
Follow the on-screen instructions to set up the operating system. Normally, you can accept the default response to all the prompts, for example just press <Enter>. The LEDs will flash in OBDR mode (as described in step 2) while the tape drive restores your operating system to a state where it can run a normal data restore. - Page 56 Using HP OBDR...
-
Page 57: Diagnostic Tools And Performance
11 Diagnostic Tools and Performance Diagnostic tools HP Library & Tape Tools HP StorageWorks Library & Tape Tools is the recommended diagnostic and support tool for your HP tape storage product. It is available from a link on the CD shipped with your product or as a free download from the HP web site. -
Page 58: Optimizing Performance
You can use our free, standalone performance assessment tools to check tape performance and test whether your disk subsystem can supply data at the maximum transfer rate. The tools are located online at http://www.hp.com/support/pat. They are also integrated into HP Library &... - Page 59 will always limit the speed at which the drive can write/read data. You will achieve no more than native rates with uncompressible data. Examples of files that compress well are plain text files, spreadsheets; those that compress poorly are those that are either compressed as part of their format (such as, JPEG photographic files) or stored as compressed (such as, .ZIP files or .gz/.Z files on Unix platforms).
- Page 60 Diagnostic Tools and Performance...
-
Page 61: 12 Troubleshooting
12 Troubleshooting Many users can use HP Library & Tape Tools to help them diagnose problems, see "Diagnostic tools " on page 57. We also recommend the detailed troubleshooting guide at http://www.hp.com/go/support for comprehensive troubleshooting information. General Procedure If a problem occurs, the first step is to try to establish whether the problem lies with the cartridge, the drive, the host computer and connections, or the way the system is being operated. -
Page 62: Problems With Cartridges
Has the drive been moved recently? Have any cables been disconnected and reconnected? Has the environment changed—unusually hot, cold, damp or dry? Has there been dust or dirt near the drive. Have reasonable precautions against static been taken? The problem could lie with the drive: Check the cables and connectors. -
Page 63: The Drive Will Not Accept The Cartridge (Or Ejects It Immediately)
NOTE: This form of reset will clear the internal buffers and, therefore, lose any data in them. If the drive was writing at the time, data may be lost and the cartridge will not have an EOD, which means that subsequent restores are likely to fail. - Page 64 Troubleshooting...
-
Page 65: 13 Replacing A Tape Drive
13 Replacing a tape drive If your tape drive proves to be faulty and cannot be repaired and it is still covered by the original warranty, it will be replaced. HP will provide a replacement tape drive free of charge. Based on availability and where geography permits, the replacement tape drive will be shipped for next business day delivery. - Page 66 Replacing a tape drive...
-
Page 67: A Scsi Configuration Guide
A SCSI configuration guide SCSI in HP StorageWorks Ultrium devices HP StorageWorks Ultrium 1840 and 960 tape drives are high performance Ultra320 SCSI compatible devices; HP StorageWorks Ultrium 460 tape drives are high performance Ultra160 SCSI compatible devices. They are designed to operate on a low voltage differential (LVD) SCSI interface and are not compatible with high voltage differential (HVD) SCSI devices. -
Page 68: Setting Up The Scsi Bus
• The voltage level of the interface, which may be single-ended (SE) or low voltage differential (LVD). Setting up the SCSI bus Each device on a SCSI bus, including the SCSI host bus adapter (HBA), must be configured with a unique ID (identifier). -
Page 69: Setting The Scsi Id On Hp Storageworks Ultrium Drives
Setting the SCSI ID on HP StorageWorks Ultrium drives Note that host adapters check SCSI IDs only at power-on, so any changes will not take effect until the host system is power-cycled. • On internal HP StorageWorks drives, set the SCSI ID by attaching or removing jumpers at the rear of the drive, see Check the drive SCSI •... -
Page 70: External Drives
Figure 25 SCSI termination in internal drives As long as this terminator is attached, you do not need to take any further action. However, if you have other devices attached to the cable, make sure that they have termination removed or disabled. NOTE: If you have an internal and external device attached to the same SCSI bus, the HBA will be in the middle of the cable and thus its termination must be disabled. -
Page 71: Scsi Termination On A Single Ultrium Tape Drive
Figure 26 SCSI termination on a single Ultrium tape drive If you have more than one device on the SCSI bus, daisy-chain them by connecting an LVD-rated cable from the SCSI-OUT connector on the first device to the SCSI-IN connector on the second device. Assuming you have two Ultrium tape drives connected, the enclosure on the second drive provides termination. -
Page 72: Scsi Cables
Figure 27 SCSI termination in daisy-chained external drives SCSI cables Cables matter in SCSI systems. There are two factors to consider: cable length and cable quality. Cable length • For LVD SCSI the maximum length for a single device is 25 meters. For multiple devices, the maximum combined internal/external length is 12 meters. -
Page 73: With External Devices
With external devices The cable provided with all HP StorageWorks Ultrium external tape drives will attach to a computer with a wide, very high density (VHD), LVDS SCSI connector. If your server or host bus adapter is equipped with a high density (HD) wide SCSI connector, you will need to order a 68-pin VHD-to-HD converter or 68-pin VHD-to-HD cable.