
Related Manuals for Oregon Scientific EW92


Summary of Contents for Oregon Scientific EW92
- Page 1 C8312A(DCF MSF) Size: 148 x 105(mm) Indoor / Outdoor Thermometer with Radio-Controlled Alarm Clock and Ice Alert Model: EW92 USER MANUAL...
-
Page 2: Table Of Contents
Indoor / Outdoor Thermometer with Precautions ..........10 Radio-Controlled Alarm Clock and Ice Alert Specifications ..........11 Model: EW92 About Oregon Scientific ......11 Eu-Declaration of Conformity ....12 USER MANUAL FCC statement ..........12 Declaration of Conformity ....12 CONTENTS Brief Introduction ..........2 Overview ............2 Receiver ............2... -
Page 3: Brief Introduction
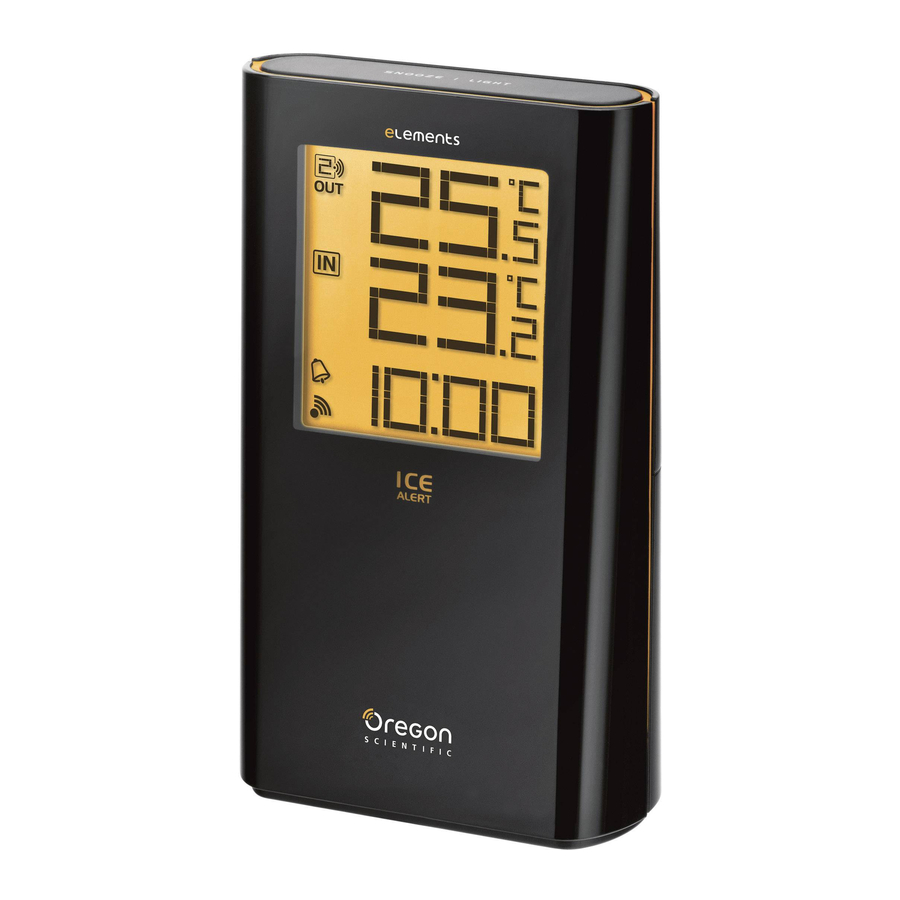
BRIEF INTRODUCTION Thank you for your purchase of this Indoor / Outdoor Thermometer. Please read these instructions carefully and keep the manual well for future reference. The receiver unit has a clear and easy-to-read display that shows the indoor temperature, time, the maximum &... - Page 4 Press and hold it for 2 seconds to view the 9.ALARM ON/OFF key: channels automatically. Press it again to exit Press it once to turn on the backlight and the automatic display mode. display the alarm time for 5 seconds. In time setting mode, press it to increase the Press it again to turn on/off the alarm.
-
Page 5: Lcd Display
15.BATTERY DOOR 1.LED indicator: Flashes when the remote unit transmits a LCD DISPLAY reading. 1. Sensor signal 2.Wall-mounting holder: 2. Channel Supports the sensor on the wall. 3. Low battery indicator 4. Min. & Max. temperature 3.RESET key: 5. Time Press it to restart the sensor and return all 6. -
Page 6: Operating The Sensor
Slide “°C/°F” switch to select between Celsius Press “RESET” key to restart the clock. and Fahrenheit. Replace the battery door. Replace the battery door. Press “+/CHANNEL” key to select the desired Note channel. The transmission range may vary depending on Main unit is searching for the sensor(s) many factors. -
Page 7: Reception Of Radio Controlled Time Signal
sources such as TV set, computer, etc. RECEPTION OF RADIO CONTROLLED Avoid placing the unit on or next to metal TIME SIGNAL plates. Closed area such as airport, basement, tower The time and calendar are radio-controlled. The block or factory is not recommended. current time and calendar are automatically Do not start reception in moving articles such synchronized with time signal transmitted from... -
Page 8: Alarm Time Setting
Press “SET ALARM” key to save and exit the setting mode. “ ” indicates alarm is ON. 12/24 Hr setting Time setting Time difference setting Normal time mode Alarm time setting mode Note Month-Date setting MD/DM setting Year setting The alarm will be automatically turned on when Note you set the alarm time. -
Page 9: To Silence The Alarm
TO SILENCE THE ALARM VIEWING THE MIN. & MAX. TEMPERATURE RECORDS Press “SNOOZE/LIGHT” to silence the alarm In normal mode, press “-/MIN./MAX.” key once for 8 minutes. The “ ” will be flashing. to show the minimum indoor & outdoor Press “ALARM ON/OFF”... -
Page 10: Battery Replacement
BATTERY REPLACEMENT PLACEMENT OF MAIN UNIT AND SENSOR If the low battery indicator “ ” displays beside the outdoor temperature, it means that the battery For the sensor, place the screw on the desired wall power of sensor is not enough, and you should and hang the sensor by the recessed hole in the replace with 2 AAA size batteries at once. -
Page 11: Precautions
Note objects that may safely be placed on the wood surface. Oregon Scientiûc shall not be The technical speciûcations for this product and the responsible for any damage to wood surfaces contents of the user manual are subject to change from contact with this product. -
Page 12: Specifications
ABOUT OREGON SCIENTIFIC Visit our website (www.oregonscientific.com) to learn TYPE DESCRIPTION more about Oregon Scientific products such as digi- MAIN UNIT tal cameras; MP3 players; children’s electronic learing 81 x 38 x 137 mm products and games; projection clocks; health and L x W x H (3.19 x 1.5 x 5.39 in) -
Page 13: Eu-Declaration Of Conformity
NOTE This equipment has been tested and found to comply with the limits for a Class B digital device, Hereby, Oregon Scientific, declares that the Indoor / pursuant to Part 15 of the FCC Rules. These limits Outdoor Thermometer (Model EW92) is in compli-... - Page 14 Please call our customer service number (listed on our website at www.oregonscientific.com or on the warranty card for this product) for all inquiries instead. Name: Oregon Scientific, Inc. Address: 19861 SW 95th AVe., Tualatin, Oregon 97062 USA Telephone No.:...
- Page 15 Posizionamento Dell’unita Principale E Del INDICE Sensore ............9 Precauzioni ..........10 Introduzione ........2 Dati Tecnici ..........11 Panoramica ..........2 Informazioni Su Oregon Scientific ...11 Ricevitore ...........2 Dichiarazione Di Conformita’ue ..11 Display LCD ..........4 Sensore ..........4 Ricezione Del Segnale Del Sensore .....4 Funzionamento Termometro ..............4...
-
Page 16: Introduzione
INTRODUZIONE Grazie per aver acquistato questo Termometro interno ed esterno senza fili. Leggere attentamente queste istruzioni e conservare il manuale per riferimento futuro. L’unità ricevente permette la chiara visualizzazione della temperatura interna, rilevazione delle massime e delle minime delle ultime 24 ore e della temperatura 2.Display LCD esterna rilevata e trasmessa dai sensori remoti. - Page 17 9. Tasto ALARM ON/OFF: 5.Tasto SET CLOCK: Premerlo volta attivare In modalità normale, premerlo una volta per retroilluminazione e visualizzare l’ora della accedere alla modalità di impostazione normale sveglia per 5 secondi. dell’ora. Premere nuovamente per attivare / disattivare In modalità impostazione normale dell’ora, la sveglia.
-
Page 18: Display Lcd
Spostarla per scegliere il proprio fuso orario tra EU (Germania) e UK (Inghilterra). 14. VANO BATTERIE Predisposto per 2 batterie di tipo AAA. 15. COPERTURA VANO BATTERIE DISPLAY LCD 2.Supporto per montaggio a muro: 1. Segnale del sensore 2. Canale Sostiene il sensore se appeso al muro. -
Page 19: Ricezione Del Segnale Del Sensore
FUNZIONAMENTO DEL SENSORE RICEZIONE DEL SEGNALE DEL SENSORE Rimuovere la copertura del vano batterie e F U N Z I O N A M E N T O D E L spostare la levetta “CHANNEL” per scegliere T E R M O M E T R O il canale di rilevazione della temperatura sincronizzato con il ricevitore. -
Page 20: R Icezione Del Segnale Orario Radiocontrollato
Collocare sempre l’unità lontano da fonti di R I C E Z I O N E D E L S E G N A L E interferenze come televisori, computer etc. O R A R I O RADIOCONTROLLATO Evitare di collocare l’unità sopra o vicino a piastre metalliche. -
Page 21: Impostazione Dell'ora Della Sveglia
impostazione dell’ora. Premere “+/CHANNEL” o “-/MIN.MAX.” per impostare ora/minuti. Premere “SET ALARM” per salvare e uscire dalla modalità di impostazione. Il simbolo “ ” Impostazione del Impostazione dell’ora Impostazione indica che la sveglia è attiva. formato 12/24 ore differenza oraria Impostazione mese-data Impostazione Impostazione dell’anno... -
Page 22: Silenziamento Della Sveglia
Premere nuovamente per attivare / disattivare VISUALIZZAZIONE DELLE RILEVAZIONI la sveglia. MINIME E MASSIME DELLA TEMPERATURA SILENZIAMENTO DELLA SVEGLIA In modalità normale premere una volta il pulsante “MIN/MAX per visualizzare i dati della temperatura Premere “SNOOZE/LIGHT” per silenziare la interna ed esterna delle ultime 24 ore. sveglia per 8 minuti. -
Page 23: Sostituzione Delle Batterie
POSIZIONAMENTO DELL’UNITÀ SOSTITUZIONE DELLE BATTERIE PRINCIPALE E DEL SENSORE Se l’indicatore di batteria in esaurimento visualizza l’icona “ ” accanto alla temperatura esterna, Per il sensore, inserire la vite sulla parete e significa che l’alimentazione del sensore non è appendere il sensore utilizzando il foro sul retro, sufficiente e che è... -
Page 24: Precauzioni
Non manomettere i componenti interni. In senza preavviso. questo modo si invalida la garanzia. Oregon Scientific declina ogni responsabilità per eventuali danni alle finiture causati dal posizionamento del prodotto su determinati tipi di legno. Consultare le istruzioni fornite dal fabbricante del mobile per ulteriori informazioni. -
Page 25: Dati Tecnici
3°C to -2°C Con la presente Oregon Scientific dichiara che Allarme Ghiaccio °F to 28°F questa prodotto (Modello EW92) è conforme ai requisiti essenziali ed alle altre disposizioni pertinenti Alimentazione 2 x AA 1.5V stabilite dalla direttiva 1999/5/ CE. Una copia firmata UNITÀ... - Page 26 Thermomètre sans fil intérieur et extérieur AAfficher Les Releves De Temperature Mini. Et avec réveil et alerte du niveau de gel Maxi............8 Modèle : EW92 Avertisseur De Gel ........9 Remplacement Des Piles .......9 MANUEL DE L’UTILISATEUR Positionner L’appareil Principal Et La Sonde ..............9...
-
Page 27: Avec Réveil Et Alerte Du Niveau De Gel
INTRODUCTION Nous vous remercions pour avoir fait l’acquisition de ce thermomètre sans fil intérieur et extérieur avec réveil et alerte du niveau de gel. Veuillez lireattentivement ces instructions et conserver ce manuel pour toute référence ultérieure. Le récepteur est équipé d’un écran clair affichant les relevés de température intérieure et les minima et maxima des dernières 24 heures comme la température Appuyez sur cette touche pour couper le son... - Page 28 Appuyez et maintenez-la pendant 2 secondes Pendant la période de réception, appuyez et pour afficher automatiquement les canaux. maintenez cette touche pendant 3 secondes Appuyez une nouvelle fois sur cette touche pour arrêter la réception. pour sortir du mode d’affichage automatique. En mode de réglage de l’heure, appuyez sur 8.
-
Page 29: Ecran Lcd
SONDE 12.Touche RCC : En mode d’heure standard, appuyez une fois pour recevoir le signal RC afférent au test de réception. Pendant la période de réception, maintenez appuyé le bouton 8 secondes pour arrêter le réception. 13.Encoche UK / EU : Faites glisser l’encoche pour sélectionner le pays entre EU (Allemagne) et UK (Angleterre). -
Page 30: Réception Du Signal De La Sonde
6. Couvercle Du Compartiment Des Piles REMARQUE Une fois le signal de la sonde reçu, l’icône “ ” RÉCEPTION DU SIGNAL DE LA SONDE s’affichera à l’écran. FONCTIONNEMENT DE L'UNITÉ FONCTIONNEMENT DE LA SONDE PRINCIPALE Retirez le couvercle du compartiment des piles Retirez le couvercle du compartiment des piles et faites glisser l’encoche «... -
Page 31: Reception Du Signal De L'heure Radio-Pilotee
Les ondes radios peuvent être altérées par divers de réception. La qualité du signal peut se classifier facteurs, comme les températures extrêmement en trois catégories : froides. Un froid extrême peut temporairement réduire la portée effective entre le capteur et la Aucun signal Signal faible Signal excellent... -
Page 32: Reglage De L'heure De L'alarme
Une fois le signal de la sonde reçu, l’horloge se REMARQUE synchronisera automatiquement avec l’heure et le calendrier exacts. Pendant le réglage, appuyez et maintenez « +/ En mode d’heure standard, appuyez une fois CHANNEL » ou « -/MIN.MAX. » pour accélérer sur “SET CLOCK”... -
Page 33: Utilisation De La Fonction Alarme
UTILISATION DE LA FONCTION RÉTRO REMARQUE ÉCLAIRAGE L’alarme s’activera automatiquement lorsque vous réglez l’heure de l’alarme. En mode normal, appuyez une fois sur Pendant le réglage de l’heure de l’alarme, appuyez « CHANNEL » ou « MIN./MAX. » pour activer le et maintenez «... -
Page 34: Avertisseur De Gel
REMARQUE REMARQUE Attention ! Veuillez jeter les piles ou l’appareil usagés Appuyez et maintenez-la pendant 3 secondes pour supprimer en respectant l’environnement. les relevés des températures maximum et minimum. AVERTISSEUR DE GEL POSITIONNER L’APPAREIL PRINCIPAL ET LA SONDE Si la sonde du canal 1 passe entre 3°C et -2 °C (37°F à... -
Page 35: Precautions
être placé sans dommage sur la surface du bois. REMARQUE Oregon Scientiûc ne sera pas tenu pour responsable pour tout dommage aux surfaces Les caractéristiques techniques de cet appareil et en bois résultant du contact avec cet appareil. -
Page 36: Caracteristiques
Distance de thermomètre sans fil intérieur et extérieur avec 30 m (98 ft) unobstructed transmission réveil et alerte du niveau de gel (Modèle EW92) est Plage de mesure de la conforme aux exigences essentielles et aux autres -20°C to 60°C (-4 °F to 140°F... - Page 37 Une copie signée et datée de la déclaration de conformité est disponible sur demande auprès de notre Service Client. PAYS CONCERNÉS RTT&E Tous les pays Européens, la Suisse CH la Norvège N...
- Page 38 Batteriewechsel ..........9 BEDIENUNGSANLEITUNG P latzierung Von Basiseinheit Und Sendeeinheit ..............10 INHALT Vorsichtsmassnahmen .........10 Technische Daten ..........11 Kurze Einführung ..........2 Über Oregon Scientific ........12 Übersicht ............2 Eg-Konformitatserklarung ......12 Empfänger ..........2 LCD-Display ..........4 Sendeeinheit ..........4 Empfang Des Sensorsignals .......5 Inbetriebnahme Der Temperaturstation ..5 Inbetriebnahme Der Sendeeinheit ....5...
-
Page 39: Kurze Einführung
KURZE EINFÜHRUNG Wir danken Ihnen für den Erwerb dieses kabellosen Innen- und Außenthermometers. Lesen Sie bitte diese Anleitung sorgfältig durch und bewahren Sie sie zur späteren Einsichtnahme auf. Die Empfangseinheit verfügt über ein deutliches Display, das die Innentemperatur, die maximalen und minimalen Datensätze der Temperatur in den letzten 24 Stunden, sowie die von den Funksendeeinheiten 1.SNOOZE / LIGHT-Taste:... - Page 40 Drücken Sie die Taste im Uhreinstellungsmodus, 4.+/CHANNEL-Taste: um die Einstellungswerte zu verringern. Drücken Sie die Taste einmal, um zwischen Kanal 1, 2 und 3 umzuschalten. 7. SENSOR-Taste: Halten Sie die Taste 2 Sekunden lang gedrückt, Drücken Sie die Taste einmal, um nach einer um die Kanäle automatisch anzuzeigen.
-
Page 41: Lcd-Display
11. RESET-Taste: 3. Batterieladestatus Drücken Sie diese Taste, um alle Werte auf 4. Min. und Max. Temperatur die Standardeinstellungen zurückzusetzen. 5. Uhrzeit Bei einer Fehlfunktion müssen Sie das Gerät 6. Indikator für Signalempfang möglicherweise zurücksetzen. 7. °C und °F 8. Außentemperatur 12.RCC-Taste: 9. -
Page 42: Empfang Des Sensorsignals
neu zu starten und alle Werte auf die Die Basiseinheit sucht nach Standardeinstellungen zurückzusetzen. Sendeeinheit(en) (das Symbol blinkt) Sendeeinheit(en) kann/können 4. CHANNEL-Schiebeschalter: nicht gefunden werden Reservieren Sie Kanal 1, 2 oder 3 für die Sendeeinheit. Sendeeinheit 1 wurde gefunden (das Symbol wird angezeigt, blinkt aber nicht) 5. -
Page 43: Empfang Des Funkgesteuerten Zeitsignals
Tipp: Die Übertragungsreichweite kann von gesteuert. Die aktuelle Uhrzeit und der Kalender werden verschiedenen Faktoren abhängen. Sie müssen automatisch mit einem Zeitsignal synchronisiert, das eventuell mehrere Standorte testen, um optimale von Deutschland/England übertragen wird. Ergebnisse zu erzielen. Wenn Sie das Gerät zum ersten Mal benutzen (nach dem einsetzen der Batterien oder betätigen der „Re- Handelsübliche Alkaline-Batterien enthalten beträchtliche set“... -
Page 44: Manuelle Einstellung Von Uhrzeit Und Kalender
Versuchen Sie nicht, den Empfang in beweglichen Objekten, wie Kraftfahrzeugen oder Zügen, zu starten. MANUELLE EINSTELLUNG VON UHRZEIT UND KALENDER Einstellung von Einstellung der Uhrzeit Einstellung der 12/24-Stunden Zeitverschiebung Wenn Sie sich außerhalb des Empfangsbereichs der Funksendeeinheit befinden oder kein Empfang verfügbar ist, können Sie Uhrzeit und Kalender manuell einstellen. -
Page 45: Alarmfunktion Verwenden
auf die Taste “SET ALARM”, um den Drücken Sie einmal im normalen Uhrzeitmodus Alarmeinstellungsmodus aufzurufen. auf die Taste “ALARM ON/OFF”, um die Drücken Sie die Taste “+/CHANNEL” oder “-/ aktuelle Alarmzeit anzuzeigen. MIN.MAX.”, um Stunde/Minute einzustellen. Drücken Sie die Taste erneut, um den Alarm Drücken Sie die Taste “SET ALARM”, um zu ein-/auszuschalten (ON/OFF). -
Page 46: Datensätze Der Min. & Max. Temperatur Anzeigen
Verschieben Sie den Schalter “ºC/ºF”, um zwischen FROSTWARNUNG Celsius und Fahrenheit zu wechseln. Wenn die Sendeeinheit des Kanals 1 auf einen Wert DATENSÄTZE DER MIN. & MAX. zwischen 3 °C und -2 °C (37 °F bis 28 °F) abfällt, TEMPERATUR ANZEIGEN blinkt der LED-Indikator;... -
Page 47: P Latzierung Von Basiseinheit Und Sendeeinheit
Wenn dieses Produkt auf Holzûächen mit bestimmten Oberûächenausführung wie Klarlack gestellt wird, kann die Oberûäche beschädigt werden. Entsprechende Hinweise zu Gegenständen, die sicher auf Holzûächen gestellt werden können, entnehmen Sie bitte der Pûegeanleitung Ihres Möbelherstellers. Oregon Scientiûc ist nicht haftbar für... -
Page 48: Technische Daten
Beschädigungen von Holzûächen, die durch Entsorgen Sie das Gerät nicht im allgemeinen die Berührung mit diesem Produkt verursacht Hausmüll, sondern ausschließlich in den dafür werden. vorgesehenen kommunalen Sammelstellen, Tauchen Sie das Gerät niemals in Wasser. die Sie bei Ihrer Gemeinde erfragen können. Falls Sie eine Flüssigkeit über das Gerät verschütten, trocknen Sie es sofort mit einem HINWEIS... -
Page 49: Über Oregon Scientific
Anfrage über unseren Oregon Scientific Kundendienst. ÜBER OREGON SCIENTIFIC Besuchen Sie unsere Website (www.oregonscientific.de) KONFORM IN FOLGENDEN LÄNDERN und erfahren Sie mehr über unsere Oregon Scientific- Alle EG Staaten, die Schweiz CH Produkte wie zum Beispiel Wetterstationen, Projektions-Funkuhren, Produkte für Gesundheit und... - Page 50 Colacación De La Unidad Principal y El Sensor ..............9 CONTENIDOS Precaución ..........10 Ficha Tecnica ..........11 Breve Presentación ........2 Sobre Oregon Scientific ........11 Resumen ..........2 U - Declaración De Conformidad ....11 Receptor ...........2 Pantalla LCD ..........4 Sensor ..........4 Recepcion De La Senal Del Sensor ....5 Funcionamiento De La Estacion De Temperatura ..............5...
-
Page 51: Breve Presentación
BREVE PRESENTACIÓN Gracias por adquirir este termómetro inalámbrico interior y exterior. Por favor, lea detenidamente estas instrucciones y guarde el manual para consultarlo en el futuro. La unidad de recepción tiene una pantalla clara que muestra la temperatura interior, los registros de temperatura máxima y mínima en las últimas 24 horas, y la temperatura exterior registrada y Púlselo para silenciar la alarma actual mientras... - Page 52 segundos para canales Durante el periodo de recepción, púlselo y automáticamente. Púlselo de nuevo para salir manténgalo pulsado durante 3 segundos para del modo de pantalla automática. detener la recepción. En el modo de configuración de la hora, púlselo para incrementar los valores del ajuste. 8.
-
Page 53: Pantalla Lcd
recibir la señal RCC y hacer una prueba de SENSOR recepción. Durante el período de recepción, presiónelo y manténgalo presionado durante 8 segundos para parar la recepción. 13. Interruptor RU / UE: Deslícelo para elegir qué versión quiere, UE (Alemania) o UK (Inglaterra). 14.COMPARTIMIENTO PARA LAS PILAS: Funciona con dos pilas tamaño AAA. -
Page 54: Recepcion De La Senal Del Sensor
NOTA Si se recibe señal del sensor, la pantalla LCD 6. TAPA DEL COMPARTIMIENTO PARA PILAS mostrará el icono “ ”. RECEPCIÓN DE LA SEÑAL DEL SENSOR FUNCIONAMIENTO DEL SENSOR FUNCIONAMIENTO DE LA ESTACIÓN DE TEMPERATURA Retire la tapa del compartimiento para pilas y deslice el interruptor “CHANNEL”... -
Page 55: Recepcion De Senal De Tiempo Controlada Por Radio
impacto de una serie de factores, como las temperaturas extremadamente bajas. El frío extremo Señal excelente Señal débil No se recibe señal podría reducir temporalmente la cobertura efectiva entre la estación base y el sensor. Si el rendimiento NOTA de la unidad se interrumpe debido a las bajas La unidad buscará... -
Page 56: Configuracion De La Alarma
En el modo de hora normal, pulse “SET CLOCK” modificar la configuración más rápidamente. una vez para acceder al modo de configuración Mediante el ajuste “+/-23 horas de diferencia de la hora. horaria” se mostrará la hora exacta de otra Pulse “+/CHANNEL”... -
Page 57: Uso De La Funcion De Alarma
Durante el ajuste de la hora de la alarma, En modo normal, pulse el botón “CHANNEL” o el pulse “+/CHANNEL” o “-/MIN.MAX.” y botón “MIN./MAX.” una vez para activar la manténgalo pulsado para modificar la retroiluminación durante 5 segundos. configuración más rápidamente. ALTERNAR ENTRE FORMATOS DE USO DE LA FUNCIÓN DE ALARMA TEMPERATURA °C / °F... -
Page 58: Aviso De Hielo
NOTA NOTA Púlselo y manténgalo pulsado durante 3 segundos para ¡Atención! Por favor, elimine la unidad y las pilas borrar los registros de temperatura máxima y mínima. gastadas de un modo ecológico. AVISO DE HIELO COLOCACIÓN DE LA UNIDAD PRINCIPAL Y EL SENSOR Si el canal 1 del sensor baja a una temperatura entre 3°C y 2°C (37°F a 28°F), el indicador LED parpadeará,... -
Page 59: Precaución
Oregon NOTA Scientiûc no asume ninguna responsabilidad en caso de daños en superûcies de madera La ûcha técnica de este producto y los contenidos... -
Page 60: Ficha Tecnica
1-800-853-8883. Cobertura de 30 m (98 ft) unobstructed transmisión U - DECLARACIÓN DE CONFORMIDAD Alcance de la -20°C to 60°C (-4 °F to 140°F temperatura interior Por medio de la presente Oregon Scientiûc declara Corriente 2 x AAA 1.5V... - Page 61 Termómetro inalámbrico interior y exterior (Modelo EW92) cumple con los requisitos esenciales y cualesquiera otras disposiciones aplicables o exigibles de la Directiva 1999/5/CE. Tiene a su disposición una copia ûrmada y sellada de la Declaración de Conformidad, solicítela al Departamento de Atención al Cliente de Oregon...
- Page 62 Modelo:EW92 Posicionamento Da Unidade Principal E Do Sensor ............9 MANUAL DO USUÁRIO Precauções ..........10 Especificações ..........11 ÍNDICE Sobre A Oregon Scientific ....11 Declaração De Conformidade .....11 Breve introdução ........2 Visão geral ..........2 Receptor ..........2 Display de LCD .........4 Sensor ..........4 Recepção Do Sinal Do Sensor ....4...
-
Page 63: Breve Introdução
BREVE INTRODUÇÃO Obrigado por adquirir este Termômetro sem fio de interior e exterior. Leia estas instruções com cuidado e guarde o manual em um lugar seguro para referência futura. A unidade do receptor possui um display que exibe os registros de temperatura do ambiente interior, das temperaturas mínima e máxima nas últimas 24 2.Display de LCD horas, bem como a temperatura do ambiente externo... - Page 64 5. Botão SET CLOCK: Pressione o botão uma vez para acender a luz No modo de hora normal, pressione uma vez de fundo e exibir a hora do alarme por 5 segundos. para entrar no modo de ajuste de hora normal. Pressione o botão novamente para ativar/ No modo de ajuste de hora normal, pressione desativar o alarme.
-
Page 65: Display De Lcd
14.COMPARTIMENTO DE PILHAS: Acomoda duas pilhas tamanho AAA. 15.PORTA DO COMPARTIMENTO DE PILHAS DISPLAY DE LCD 1.Sinal do sensor 2.Canal 2.Suporte de montagem em parede: 3.Indicador de pilhas fracas Suporta o sensor na parede. 4.Temperaturas mínima e máxima 5.Hora 3.Botão RESET: 6.Indicador de recepção do sinal Pressione para reiniciar o sensor e reverter 7.°C e °F... -
Page 66: Operando O Sensor
Remova a porta do compartimento de pilhas OPERANDO O SENSOR e insira 2 pilhas novas tamanho AAA fazendo a correspondência das polaridades assinaladas Remova a tampa do compartimento de pilhas no compartimento de pilhas. e deslize o interruptor “CHANNEL” para Pressione o botão “RESET”... -
Page 67: Recepção Do Sinal De Hora Controlado Por Rádio
temporariamente reduzir a faixa efetiva entre o NOTA sensor e a estação base. Se o desempenho da A unidade buscará automaticamente o sinal unidade cair devido à baixa temperatura, a unidade de hora às 2:00 (3:00 ou 4:00 também retomará o funcionamento apropriado, assim que disponíveis se o sinal não for recebido às a temperatura aumentar para dentro da faixa normal 2:00), 8:00, 14:00 e 20:00 de cada dia. -
Page 68: Ajuste De Hora Do Alarme
Pressione o botão “+/CHANNEL” ou o botão Pelo ajuste de “+/-23 horas de diferença”, será “-/MIN.MAX.” para alterar os ajustes. exibida a hora exata de outra área. Pressione o botão “SET CLOCK” para AJUSTE DE HORA DO ALARME confirmar. A ordem de ajuste é: formato 12/ 24-hr, hora, +/-23 horas de diferença, ano, formato dia/mês, data. -
Page 69: Usando A Função De Alarme
LTERNANDO ENTRE OS FORMATOS USANDO A FUNÇÃO DE ALARME D E TEMPERATURA ºC E ºF Ajuste a hora do alarme, conforme as Deslize o interruptor “ºC/ºF” para selecionar entre instruções da seção anterior. Celsius e Fahrenheit. No modo de hora normal, pressione o botão “ALARM ON/OFF”... -
Page 70: Aviso De Gelo
AVISO DE GELO DO SENSOR Se a temperatura do sensor do canal 1 cair e û car Para o sensor, posicione o parafuso na parede e entre 3°C e -2 °C (37°F e 28°F), o indicador LED pendure o sensor pelo orifício pela parte posterior piscará... -
Page 71: Precauções
A As especiûcações técnicas deste produto e o Oregon Scientiûc não será responsável por conteúdo do manual do usuário estão sujeitos a nenhum dano causado em superfícies de alterações sem aviso prévio. -
Page 72: Especificações
2 x AA 1.5V Oregon Scientiûc declara que este(a) Termômetro UNIDADE REMOTA (EW-99) sem fio de interior e exterior (Model EW92) está 58 x 23 x 100 mm C x L x A conforme com os requisitos essenciais e outras (2.28 x 0.9 x 3.94 in) - Page 73 Batterijen Vervangen ........9 Model: EW92 Plaatsing Van Het Basisstation En De Sensor ..............9 HANDLEIDING Waarschuwingen ..........10 Specificaties ..........11 INHOUD Over Oregon Scientific ......11 Eu Conformiteits Verklaring ......11 Korte Introductie ........2 Overzicht ..........2 Ontvanger ..........2 LCD-Scherm ..........4 Sensor ..........4 Ontvangst Van Sensorsignaal ......4 Bediening Van Het Temperatuurstation ....4...
-
Page 74: Korte Introductie
KORTE INTRODUCTIE Dank u voor de aanschaf van deze Draadloze binnen- en buitenthermometer. Lees deze instructies zorgvuldig door, en bewaar de handleiding om later te kunnen raadplegen. De ontvanger heeft een helder scherm, waarop de binnentemperatuur, de maximum en minimum temperatuurgegevens van de afgelopen 24 uur, en de buitentemperatuur worden weergegeven, zoals Druk op deze knop om het huidige alarm stil te... - Page 75 8. °C/°F schakelaar: In de tijdinstellingsmodus drukt u hierop om een instellingswaarde te verhogen. Schakel hiermee tussen Celsius en Fahrenheit. 5.SET CLOCK knop: 9.ALARM ON/OFF knop: In normale tijdmodus drukt u eenmaal op deze Druk eenmaal op deze knop om de knop om de normale tijdinstellingsmodus te schermverlichting aan te zetten, en de alarmtijd openen.
-
Page 76: Lcd-Scherm
13.UK/EU schakelaar: Schuif naar het gewenste land, EU (Duitsland) en UK (Engeland). 14. BATTERIJVAK: Plaats hier 2 AAA batterijen. 15. BATTERIJKLEP LCD-SCHERM 3. RESET Knop: Druk hierop om de sensor opnieuw te starten, 1. Sensorsignaal en alle instellingen terug te zetten op de 2. -
Page 77: De Sensor Bedienen
AAA formaat batterijen volgens de in het “CHANNEL” knop om het kanaal overeen te batterijvak aangegeven polariteit. stemmen met de ontvanger. Druk op “RESET” om het basisstation opnieuw Plaats 2 nieuwe AAA formaat batterijen volgens op te starten. de in het batterijvak aangegeven polariteit. Schuif de “°C/°F”... -
Page 78: Ontvangst Van Het Radiogestuurde Tijdsignaal
Plaats het apparaat niet op of naast metalen ONTVANGST VAN HET voorwerpen. RADIOGESTUURDE TIJDSIGNAAL Het is niet raadzaam het apparaat te gebruiken in gesloten omgevingen als vliegveld, kelder, De tijd en datum zijn radiogestuurd. De huidige tijd flatgebouw, of fabriek. en datum worden automatisch gesynchroniseerd met Begin signaalontvangst niet in bewegende het tijdsignaal dat verzonden wordt vanuit Duitsland/... -
Page 79: Alarmtijd Instellen
Druk op “+/CHANNEL” of “-/MIN.MAX.” om de uren/minuten in te stellen. Druk op “SET ALARM” om op te slaan en de instellingsmodus te verlaten. “ ” geeft aan dat het alarm AAN is. 12/24 uur instelling Tijdinstelling Instelling tijdverschil Normale tijdmodus Alarminstellingsmodus Instelling maand-datum MD/DM instelling Jaar instelling... -
Page 80: Om Het Alarm Uit Te Zetten
DE MIN. & MAX. Druk nogmaals op de knop om het alarm AAN/ TEMPERATUURGEGEVENS BEKIJKEN UIT te zetten. OM HET ALARM UIT TE ZETTEN In normale modus drukt u tweemaal op de “MIN./MAX.” knop om de minimum binnen- en Druk op “SNOOZE/LIGHT” om het alarm 8 buitentemperatuurgegevens van de afgelopen 24 uur te bekijken. -
Page 81: Batterijen Vervangen
knipperen, en hij zal weer stoppen wanneer de PLAATSING VAN HET BASISSTATION temperatuur weer buiten deze zone gaat. EN DE SENSOR BATTERIJEN VERVANGEN Hang de sensor met de daarvoor bedoelde inkeping aan een schroef aan de muur, of plaats hem Als naast de buitentemperatuur het batterij- simpelweg op uw bureau. -
Page 82: Waarschuwingen
KCA depot. voor aanwijzingen over welk soort voorwerpen veilig op het houten oppervlak geplaatst kunnen worden. Oregon Scientiûc is niet verantwoordelijk voor enigerlei schade aan De technische speciûcaties van dit product en de... -
Page 83: Specificaties
Temperatuurbereik 3°C to -2°C Draadloze Binnen- en Buitenthermometer (Model ijsalarm °F to 28°F EW92) voldoet aan de essentiële eisen en aan de Stroom 2 x AA 1.5V overige relevante bepalingen van Richtlijn 1999/5/ SENSOR (EW-99) EC. Een kopie van de getekende en gedateerde... - Page 84 Trådlös inomhus- och utomhustermometer Placering Av Huvudenhet Och Sensor ....9 med alarmklocka och isvarning Försiktighetsåtgärder ........9 Modell: EW92 Specifikationer ..........10 Om Oregon Scientific ........11 ANVÄNDARMANUAL Eu-Försäkran Om Överensstämmelse ....11 INNEHÅLL Snabb Introduktion ........2 Översikt ..........2 Mottagare ..........2 LCD-display .........4 Sensor ..........4 Mottagning Av Sensorsignal ......4...
-
Page 85: Snabb Introduktion
SNABB INTRODUKTION Tack för att du köpt denna trådlösa inomhus- och utomhustermometer. Läs dessa instruktioner noga och spara manualen för framtida behov. Mottagningsenheten har en klar display som visar inomhustemperaturen, max- & min-temperatur för 24 timmar liksom utomhustemperatur överförd från fjärrsensorerna. - Page 86 5.SET CLOCK-knapp: Tryck igen för att aktivera/inaktivera alarmet. I normalt tidläge trycker du en gång för att öppna normalt tidinställningsläge. 10.SET ALARM-knapp: I normalt tidinställningsläge trycker du på Tryck gång för tända Enter för att bläddra mellan inställningarna. bakgrundsbelysningen i 5 sekunder, och Tryck håll nere...
-
Page 87: Lcd-Display
LCD-DISPLAY 3. RESET-knapp: Tryck för att starta om sensorn och återställa 1. Sensorsignal alla värden till standardvärden. 2. Kanal 3. Indikator för lågt batteri 4. CHANNEL-knapp: 4. Min- och Maxtemperatur Ger sensorn kanal 1, 2 eller 3. 5. Tid 6. Signalmottagningsindikator 5. -
Page 88: Använda Sensorn
Standard Alkaline-batterier innehåller vatten. På Huvudenheten söker efter sensor(er) (ikonen blinkar) grund av detta kan de frysa vid låga temperaturer, omkring -12°C (10°F). Engångs Lithium-batterier är Sensor(erna) kan inte hittas mycket mindre känsliga för temperaturer med en fryspunkt under -30°C (-22°F). Sensor 1 har hittats (ikonen visas men blinkar inte) Det trådlösa avståndet kan påverkas av många... -
Page 89: Signalmottagningsindikator
från sensorn tas emot igen kommer klockan SIGNALMOTTAGNINGSINDIKATOR automatiskt att synkronisera med den exakta tiden och kalendern. När vågsegmentet blinkar innebär det att tidsignaler I normaltidläge trycker du på “SET CLOCK” tas emot. Signalkvaliteten kan klassificeras i 3 typer: en gång för att öppna tidinställningsläget. Tryck “+/CHANNEL”... -
Page 90: Alarmtidsinställning
Under alarmtidsinställningen kan du trycka och NOTERING hålla ner “+/CHANNEL” eller “-/MIN.MAX.” för Under inställning trycker du och håller ner “+/ att öka hastigheten på ändringarna. CHANNEL” eller “-/MIN.MAX.” för att öka hastigheten på ändringarna. ANVÄNDA ALARMFUNKTIONEN Under “+/-23 timmars tidsskillnadsinställningen kan den exakta tiden för ett annat geografiskt område visas. -
Page 91: Skifta Mellan ºc & ºf
SKIFTA MELLAN ºC & ºF HALKVARNING Om sensorn på kanal 1 mäter mellan 3°C och -2 °C Dra knappen “ºC/ºF” för att välja mellan Celsius (37°F till 28°F), kommer LED-indikatorn att blinka och Fahrenheit. och slutar blinka när temperaturen är utanför detta VISA MIN &... -
Page 92: Placering Av Huvudenhet Och Sensor
Oregon Scientific kan inte hållas ansvariga för skador på träyto r som uppkommit på grund av kontakt med denna produkt. Lägg aldrig ner produkten i vatten. Om du spiller vätska på... -
Page 93: Specifikationer
Rengör inte produkten med rengöringsmedel SPECIFIKATIONER som innehåller repande eller korroderande material. BESKRIVNING Mixtra inte med interna komponenter. Detta HUVUDENHET kommer att förverka garantin på apparaten 81 x 38 x 137 mm och kan orsaka onödig skada. Produkten L x B x H (3.19 x 1.5 x 5.39 in) innehåller inga reparerbara delar. -
Page 94: Om Oregon Scientific
Vi hoppas du hittar all information du behöver på vår hemsida och om du vill komma i kontakt med Oregon Scientifics kundkontakt besöker du vår lokala hemsida www.oregonscientific.se eller www.oregonscientific.se för att finna telefonnummer... - Page 95 2009 Oregon Scientific.All rights reserved. 092001...