Table of Contents
Advertisement
Quick Links
Advertisement
Table of Contents

Related Manuals for NEC SILENTWRITER SUPERSCRIPT 660


Summary of Contents for NEC SILENTWRITER SUPERSCRIPT 660
- Page 1 Silentwriter SuperScript 660 User's Guide...
- Page 2 NEC is prohibited. Silentwriter is a U.S. registered trademark of NEC Corporation. SuperScript is a trademark of NEC Corporation. All other product, brand, or trade names used in this publication are the trademarks or registered trademarks of their respective owners.
-
Page 3: Table Of Contents
Contents Contents Using this Guide 1 Introduction How the Printing Process Works Standard Features Options Ordering Supplies and Accessories 2 Setting Up Unpacking Unpacking Locating the Printer Items Operating Requirements Printer Dimensions Printer Dimensions with 200-sheet Hopper System Requirements External Printer Parts Internal Printer Parts 2-12 Installing the Hopper... - Page 4 Printing from a Windows Application 3-29 Printing from DOS 3-29 Printing PCL Files from DOS Command Line 3-30 4 NEC SuperScript Print Manager 5 Print Status Window 6 Selecting Paper and Media Paper Properties Print Areas Paper and Media Use...
- Page 5 Contents Media Purchasing Specifications 6-10 Sheet Paper 6-11 Envelopes 6-13 Adhesive Labels 6-14 Transparency Film 6-15 Storage Guidelines 6-16 7 Using Fonts Fonts in GDI mode Fonts in PCL Mode Installing SuperScript TrueType Fonts 8 Choosing Print Options How to Print Using Various Media The Standard Hopper Multi-sheet Feed and Single-sheet Feed Installing Paper...
- Page 6 Contents Transporting the Printer 9-22 Removing the Toner Cartridge 9-22 Removing the Paper Hopper 9-24 Removing the Interface Cable 9-24 Removing the Power Cord 9-25 Check List Before Transporting the Printer 9-26 10 Troubleshooting 10-1 Print Quality Maintenance 10-3 Paper Jam 10-3 Locations of Potential Paper Jams 10-4...
- Page 7 10-37 11 Getting Service and Support (For U.S. Only) 11-1 Assistance 11-2 Getting Help from Your Company 11-2 Getting Help from NEC 11-3 Silentwriter SuperScript 660 Printer Limited Warranty 11-4 Warranty 11-5 Warranty Length 11-5 Warranty Coverage 11-5 Warranty Support...
- Page 8 Contents...
-
Page 9: Using This Guide
Using this Guide This guide provides an introduction to the NEC SuperScript 660 printer and includes information about set up, features, operation, and maintenance. If you are a new user, you may want to read this entire user’s guide to familiarize yourself with the printer. - Page 10 viii...
-
Page 11: Introduction
Introduction 1–1 Introduction... - Page 12 SuperScript 660 printer. All printer features are explained and illustrated in detail. Silentwriter SuperScript 660 is a new laser printer developed specifically for users of Windows Version 3.1. This printer is provided with the SuperScript software kit and requires no special add- in cards or cartridges.
-
Page 13: How The Printing Process Works
Host-based Processing SuperScript uses your PC power to process print jobs. Two Printing Modes The Silentwriter SuperScript 660 software allows you to select from two different modes of printing: • GDI mode provides fast, WYSIWYP (What You See Is What You Print) output. - Page 14 Print resolution : 600 600 dots per inch. : 300 300 dots per inch. Sharp Edge Technology Silentwriter SuperScript 660 features the pat- ented Sharp Edge Technology (SET). This feature detects and smooths the jagged edges of raster images by dividing one full dot into several subdots set in the same area.
- Page 15 Introduction 1–5 Paper input: from a 50-sheet hopper supporting: Paper: 1 Letter 2 A4 3 Executive 4 B5 (GDI Only) 5 Legal Envelope: 1 Monarch 2 Commercial 10 3 DL 4 C5 Paper output: face-up tray with a maximum capacity of 50 sheets (at 17 lb), or face-down door.
- Page 16 1–6 Introduction Toner Saving Mode This feature allows you to save toner by control- ling print density. You can turn this mode on or off in Print Status Window (See Chapter 5, Print Status Window). Print Darkness This feature allows you to control the print darkness of a whole page as required.
-
Page 17: Options
Introduction 1–7 Trailer Page When selected you can print a customized page of either text, graphics, or a combination at the end of a print job. Print Overlay (B/W) When selected you can print a customized overlay of either text, graphics, or combination on either the first page or all pages of a print job. -
Page 18: Ordering Supplies And Accessories
PostScript printing, in addi- tion to the standard GDI and PCL modes. To order any of the following printer supplies or Ordering Sup- accessories, contact your NEC printer dealer or call plies and Ac- 1–800–NEC–INFO to locate a supplies dealer cessories... - Page 19 Introduction 1–9 Table 1-1 Supplies and Accessories PRODUCT ORDER NUMBER Toner Cartridge 20-061 Optional 200-sheet Paper Hopper 6107 SuperScript PS Upgrade Kit 660PS Blue Toner Cartridge 20-062 Red Toner Cartridge 20-063 Yellow Toner Cartridge 20-064 For a detailed description of the PCL printer lan- guage, the LaserJet 4P Printer Technical Reference Manual is available through the Hewlett Packard Company.
- Page 20 1–10 Introduction...
-
Page 21: Setting Up
Setting Up 2–1 Setting Up... -
Page 22: Unpacking
2–2 Setting Up Perform the following procedures to set up your UNPACKING SuperScript printer. 1. Open the box. Unpacking 2. Take out the documents (including software diskettes), the hopper, and the power cord from the box. 3. Lift the printer together with the packing materi- als. -
Page 23: Locating The Printer Items
Setting Up 2–3 Locate the following items: Locating the Printer Items • NEC Silentwriter SuperScript 660 Printer • SuperScript software kit • User’s guide • Hopper • Power cord • Starter Toner Cartridge (in the printer) • Packing material (not shown) NOTE: Save this user’s guide and all packing... -
Page 24: Operating Requirements
2–4 Setting Up The following operating environment requirements OPERATING should be satisfied: REQUIRE- MENTS Place the printer on a sturdy, flat surface. Keep the room well ventilated with a relative humidity between 20% and 80% and temperature between 50˚ F and 90.5˚ F (10˚ C to 32.5˚ C ) Leave adequate space around the printer for easy access (See the following figure.) WARNING: Do not place objects near the printer... -
Page 25: Printer Dimensions
Setting Up 2–5 The following illustration shows the standard dimen- Printer sions of a Silentwriter SuperScript 660 printer. Dimensions... - Page 26 2–6 Setting Up...
-
Page 27: Printer Dimensions With 200-Sheet Hopper
Setting Up 2–7 The following illustration shows the dimensions of a Printer Dimen- Silentwriter SuperScript 660 printer when the 50- sions with 200- sheet hopper is replaced by the optional 200-sheet sheet Hopper hopper. -
Page 28: System Requirements
2–8 Setting Up SYSTEM RE- Silentwriter SuperScript 660 works with Windows 3.1, in Enhanced Mode, and requires MS-DOS 3.3 or QUIREMENTS later. To run SuperScript, you will need an IBM- compatible PC with at least a 386SX 16-MHz CPU. This includes all 486-based and most 386-based PCs. -
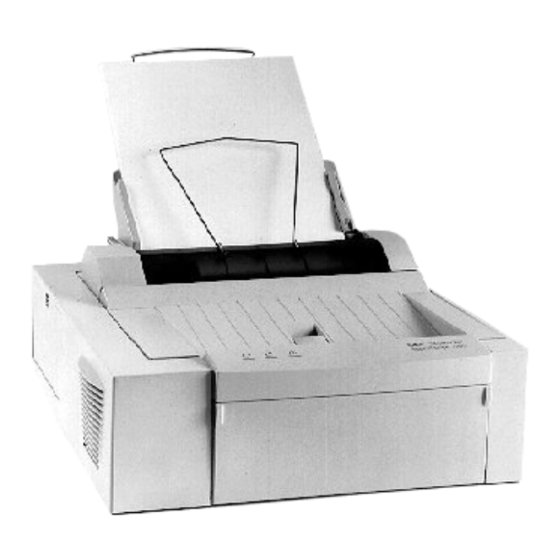
Page 29: External Printer Parts
Setting Up 2–9 NOTE: Because of NEC SuperScript’s high speed interface, it is important to use a properly manufac- tured parallel cable. Use of a poor quality parallel cable may affect your output. See Interface Cable specification, Appendix D. EXTERNAL The following two illustrations show external printer parts. - Page 30 2–10 Setting Up Upper Cover (also functions as a face-up tray) Provides access to the inside of the printer and stacks printed sheets with printed side facing up. Maximum capacity: 50 sheets. Lock Release Lever Unlocks and opens the upper cover. Status Panel There are three indicator lights to show the operating status of the printer.
- Page 31 Setting Up 2–11 Standard Hopper Holds up to 50 sheets of paper (at 17 lbs). Face-down Door Ejects the printed sheets with printed side facing down. Power Switch Turns the printer off or on. Model Number Indicates the model number of your printer. Serial Number Indicates the serial number of your printer.
-
Page 32: Internal Printer Parts
2–12 Setting Up Memory Cover Provides access to the inside of the printer for the optional memory expansion module. The printer memory can be expanded by adding a Single In-line Memory Module (SIMM). This is available from your local dealer. The specification of the memory expansion module is as follows: SIMM, 30 pin, 70 nsec, DRAM module with... - Page 33 Setting Up 2–13 Paper Guide Ribs Guides the sheets to the fuser unit. Transfer Roller A high voltage roller that attracts the toner to the sheets. Laser Diode Unit Exposes and generates the print image on the EP drum surface. Fuser Unit Fixes the toner to the paper.
-
Page 34: Installing The Hopper
2–14 Setting Up Install the hopper as follows. INSTALLING THE HOPPER Installing the 1. Hold the standard hopper with both hands as illustrated and place on the printer. Standard Hopper NOTE: Be sure to remove the ATTENTION sheet packed in your printer prior to installing the hopper. -
Page 35: Installing The 200-Sheet Hopper
Setting Up 2–15 2. Push the hopper downward. A clicking sound is heard when the hopper is firmly in place. 3. Check that the hopper is securely set by pushing gently against it. If you have purchased the optional 200-sheet hopper, Installing the install the hopper following the instructions in 200-sheet... -
Page 36: Toner Cartridge
2–16 Setting Up The toner cartridge contains toner (a dry ink sub- TONER stance) and an EP drum that transfers the toner to CARTRIDGE paper. The starter toner cartridge shipped in your printer has a sealing tape in place that must be removed prior to printing. - Page 37 Setting Up 2–17 2. Hold the cartridge horizontally and gently rock it five to six times to distribute the toner evenly. NOTE: Rock the cartridge in the direction indicated in the illustration. While rocking, take care not to touch the drum protection shutter (red transparent plastic) of the toner cartridge.
- Page 38 2–18 Setting Up 3. Grasp the transparent toner sealing tape and pull the tape out. The toner sealing tape is approxi- mately 20 inches (500 mm) long when com- pletely removed. NOTE: Be sure to pull the tape straight and slowly out of the cartridge to prevent it from being broken in the middle.
- Page 39 Setting Up 2–19 4. Carefully remove the yellow drum protection pins of the toner cartridge (2 pieces). NOTE: Do not touch the drum protection shutter.
-
Page 40: Installing The Toner Cartridge
2–20 Setting Up 1. Check that the power switch is off. Installing the Toner Car- 2. Pull the lock release lever of the upper cover and tridge carefully open it. - Page 41 Setting Up 2–21 3. Hold the toner cartridge by its two green handles and gently release it bottom first into the printer. NOTE: Check that the toner cartridge is securely seated inside the printer.
- Page 42 2–22 Setting Up 4. Carefully push down the upper cover to close it. NOTE: Check that the lock release lever has se- curely returned to its locked position.
-
Page 43: Installing Paper
Setting Up 2–23 1. Slide the right paper guide over to the right edge INSTALLING to allow for paper installation. PAPER 2. Pull the paper setting lever in the direction indicated by the arrow. - Page 44 2–24 Setting Up 3. Insert paper as far as it will go with its edges evenly touching the left paper guide. The hopper can accommodate up to approxi- mately 50 sheets. However, load one sheet at a time in single-sheet feed mode if you are using heavier paper, envelopes, labels and transparen- cies (refer to Chapter 8).
- Page 45 Setting Up 2–25 4. Slide the right paper guide over until it gently touches the edge o f paper. 5. Return the paper setting lever to its original position. NOTE: Check that the edges of paper are even. Otherwise, sheets may not be fed properly, which may cause print errors.
-
Page 46: Interface Cable
2–26 Setting Up Use a good quality parallel cable to connect this INTERFACE printer to a computer. See Appendix D for the CABLE parallel cable specifications. Connect the interface cable as described below. 1. Switch off power to the printer and the computer. NOTE: To protect your printer and computer from possible damage, make sure they are powered down prior to connection. - Page 47 Setting Up 2–27 2. Plug the interface cable connector into the printer and then secure the lock springs. 3. Connect the other end of the cable to the compu- ter. Refer to the computer manual for details about selection of a proper interface connector.
-
Page 48: Power Cord
2–28 Setting Up Use the power cord provided and connect it to an POWER CORD outlet. NOTE: Do not connect the power cord to the auxiliary outlet of your computer. Connect the power cord as described below. 1. Switch off power to the printer. NOTE: Check that the power switch is off. - Page 49 Setting Up 2–29 2. Plug the power cord into the power connector on the rear panel of the printer. 3. Plug the other end of the power cord into an outlet.
-
Page 50: Installing Superscript Printing Software
SuperScript software and fonts, and makes any SOFTWARE necessary changes to Windows startup files. Once you have started the NEC SuperScript 660 setup program, you can cancel the installation at any time. Just click on the Cancel button that appears in the setup program window. - Page 51 Setting Up 2–31 4. At the prompt, type: A:\ NECSETUP where [A:] is the letter of the drive containing the SuperScript software diskette. The first setup screen appears as shown in the following figure. Click the mouse or press any key to continue.
- Page 52 2–32 Setting Up 5. If you have a previously installed version of the SuperScript Software installed on your system you will be prompted to delete this software before installing the new software. Select Delete to delete the older version of software and continue installing the new software.
- Page 53 Print Status Window (see Chapter 5). 8. Tell the setup program which drive and directory you want to install the NEC SuperScript soft- ware. You can accept the default supplied by the setup program, or give it the name of another drive on your PC on which to install the soft- ware.
- Page 54 2–34 Setting Up Click on the OK button. The installation program then copies the NEC SuperScript software to the specified directory. 9. During the installation, NEC SuperScript shows you progress and status messages, as shown in the next figure.
- Page 55 Setting Up 2–35 10. The installation program will prompt you to insert the NEC SuperScript Software diskette #2 and #3. The installation program will then continue to copy the NEC SuperScript software to the specified directory. 11. There are 31 TrueType fonts bundled with your SuperScript 660 printer to make it compatible with HP LaserJet 4P printer.
- Page 56 2–36 Setting Up If you select Cancel you will skip this step and continue with the SuperScript installation. You can install the fonts individually later from the standard Windows Control Panel Font Utility. See chapter 7 Installing SuperScript TrueType Fonts or your Windows documentation for more information.
- Page 57 Windows initialization files so that NEC SuperScript Software runs properly when you start Windows. 13. The setup program also creates the NEC SuperScript Tools group. This group contains icons for NEC SuperScript programs, including the Print Manager, Test Utility, Printer Status Window and the PCL Control Panel.
- Page 58 NOTE: You will have to restart Windows before the SuperScript 660 will run. 15. When Windows is restarted, NEC SuperScript Test Utility will check to make sure all the print modes work correctly. The test utility will print...
- Page 59 Setting Up 2–39 16. The following notice will appear: NOTE: This program performs some time-consum- ing test operations. Before continuing, make sure the printer is ready. The power switch should be turned on, and the hopper should have paper in it. Press OK to continue with the print tests, Cancel to exit to the program's main menu.
- Page 60 2–40 Setting Up 18. The Test Utility will now prompt you to print the configuration page that shows information about your PC and printer. Save a copy of the most recent configuration page. You may find it useful if you ever need to call Customer Support.
- Page 61 Click on Yes to continue, No to bypass the current test. 20. After you have made all your selections the NEC SuperScript Test Program will inform you that all test pages have been sent to the SuperScript Print Manager for printing.
- Page 62 2–42 Setting Up 21. After printing all test pages, the Test Utility will ask if you want to exit. Click OK to quit the program. Clicking Cancel instead of OK will return you to the Test Utility's main screen. The File pull-down menu gives you the choice of repeating the test sequence or exiting the program.
- Page 63 Setting Up 2–43 Once SuperScript software is installed, NEC SuperScript 660 device names appear in the Printers window of your Control Panel (see the next figure).
- Page 64 2–44 Setting Up...
-
Page 65: Printing With Your Superscript
Printing with Your SuperScript 660 3–1 Printing with Your SuperScript 660... -
Page 66: Superscript 660 Print Modes
MS-DOS command line within Windows. You can select print mode from many Windows applications, or through the Control Panel’s Printers window. To print in GDI mode, select “NEC SuperScript 660 GDI on NEC.GDI” as the current printer. To print in PCL emulation mode, select “NEC SuperScript 660 PCL on NEC.PCL”. -
Page 67: Gdi Setup Screen
Printing with Your SuperScript 660 3–3 Your Windows based application might duplicate GDI Setup some SuperScript GDI Setup settings such as Screen number of copies. In general, for faster and more accurate printing you should use the SuperScript Setup screen instead of your application to choose print settings. - Page 68 Main. If this window has been minimized, restore it. 2. Double-click on the Control Panel icon in the Main window. 3. Double-click on the Printers icon in the Control Panel window. 4. Select NEC SuperScript 660 GDI on NEC.GDI 5. Click on the Setup button.
- Page 69 Printing with Your SuperScript 660 3–5 NOTE: You can also set options for GDI mode from the File menu of many Windows-based applications. Typically there are one or two commands to take you to the Print Setup dialog box, please refer to the application documentation for specific details, and be aware of the above conditions.
- Page 70 4-1/8 9-1/2 in Envelope DL 220 mm Envelope C5 229 mm Number of copies: 1 to 99 Use NEC SuperScript Print Manager Page 1 on TOP (With Print Manager enabled, reverse order printing) Resolution: 600 600 300 300 The OPTIONS button takes you to the Advanced Options screen, described in this chapter “GDI Op-...
-
Page 71: 2Up/4Up Screen
Printing with Your SuperScript 660 3–7 This feature is to print 2-page or 4-page data on one 2Up/4Up sheet. Screen Allows you to draw a Frame or Border around Draw Frame multiple image on the same page when 2Up or 4Up Border feature is selected. -
Page 72: Gdi Options Screen
3–8 Printing with Your SuperScript 660 Putting an X in the box marked Use NEC GDI Options SuperScript Print Manager turns the SuperScript Screen Print Manager on when you use GDI mode. (The SuperScript Print Manager is always on for PCL compatible mode.) The SuperScript Print Manager... -
Page 73: Manual Duplex Printing
3–9 If you put an X in the box marked Manual Manual Duplex Duplexing, NEC SuperScript, with a little help from Printing you, will print your file on both sides of the paper. You can also choose one of two formatting options: •... - Page 74 3–10 Printing with Your SuperScript 660 3. Set the printed sheets into the hopper as described in Chapter 2 “Installing Paper”. Click the RESUME button. Even-numbered pages can then be printed on the back sides of the previously printed odd pages. After printing, the printer detects a Paper Out condition and then pauses.
- Page 75 Printing with Your SuperScript 660 3–11 Using the Optional 200-sheet Hopper 1. Specify "Manual Feed." 2. Open the manual feed cover and insert print sheets into the printer one by one (refer to Chapter 8 "Manual Feed"). ** SuperScript prints every odd-numbered page of your document, starting with the last odd-num- bered page.
-
Page 76: Scaling
3–12 Printing with Your SuperScript 660 NOTE: If an error occurs during duplex printing, please recover as follows: • If an error (e.g. paper jam) occurs while printing the front side of the page (odd-numbered pages), clear the error as instructed in Print Status Window and click the Resume button to continue the current duplex job. -
Page 77: Density Button
Printing with Your SuperScript 660 3–13 Opens the Print Density Window. Density Button Brightness Control Use this control to lighten or darken an image. Contrast Control This control is used to adjust the difference in the light and dark areas of an image, improve a flat image. -
Page 78: Forms Window
3–14 Printing with Your SuperScript 660 NOTE: The effect of a particular density setting (brightness or contrast) is dependent on how your Windows application handles various graphical formats. Be sure to test the density setting by print- ing some test copies to see the effect. This window allows you to set up a Cover or Forms Window Trailer Page or Print Overlay... - Page 79 This feature is useful for users who wish to print a spot color, such as printing the company logo in color. NEC does not recommend the use of this feature to print overhead transparencies, or to use this feature multiple times on the same document to produce additional colors.
- Page 80 3–16 Printing with Your SuperScript 660 Create a Cover / Trailer Page 1. Open the Windows Control Panel and then choose the Printers icon. Check to be sure the printer selected is the SuperScript 660 GDI. 2. Click on the Setup Button to open the SuperScript GDI Setup screen.
- Page 81 Printing with Your SuperScript 660 3–17 Create an Overlay File 1. Open the Windows Control Panel and then choose the Printers icon. Check to be sure the printer selected is the SuperScript 660 GDI. 2. Click on the Setup Button to open the SuperScript GDI Setup screen.
- Page 82 3–18 Printing with Your SuperScript 660 9. Select OK for each screen to close the Control Panel. You are now ready to print using your overlay. Print with an Overlay, Cover, or Trailer File 1. Open the Windows Control Panel and then choose the Printers icon.
- Page 83 Printing with Your SuperScript 660 3–19 9. Select OK for each screen to close the Control Panel. 10. Print your file from any windows application as you normally would. The Overlay, Cover, or Trailer file will be printed automatically. NOTE: All files printed will continue to have the Overlay, Cover, or Trailer printed until the feature is disabled from the Print Forms screen.
- Page 84 3–20 Printing with Your SuperScript 660 8. Select if you would like the Overlay printed on every page or only on the first page. 9. Click on the Color checkbox to print the overlay in a second color. 10. Select Instruction Page to print an instruction page after the first color indicating how to re- insert the paper.
- Page 85 Printing with Your SuperScript 660 3–21 Take note of the following points when creating documents with several colors. NEC recommends the use of sheets that are 20 lb (75 g/m ) or thicker. NEC does not recommend printing on OHT films.
- Page 86 3–22 Printing with Your SuperScript 660 NOTE: When the toner cartridge is removed from the printer be sure to store it in the packing box. When removing and installing the toner cartridge, toner may fall on the laser beam window, causing solid white vertical lines to appear during printing.
-
Page 87: Pcl Print Mode
Printing with Your SuperScript 660 3–23 PCL PRINT PCL mode printing is provided to meet specific printing needs which cannot be satisfied in GDI MODE mode such as: 1. Compatibility with non-Windows applications. 2. Compatibility with previously saved PCL-format files. 3. -
Page 88: Pcl Control Panel
3–24 Printing with Your SuperScript 660 The NEC SuperScript PCL Control Panel allows you PCL Control to set up default values for the printer that would be Panel normally made from the printer control panel. Any page setup information that is downloaded by your application will override these default settings. - Page 89 Printing with Your SuperScript 660 3–25 Paper Source: Hopper Feed Manual Feed (200-sheet Hopper only) Orientation: Portrait Landscape Paper Size: Letter 8-1/2 11 in 297 mm Executive 7-1/4 10-1/2 in Legal 8-1/2 14 in...
-
Page 90: Saving Downloaded Fonts And Macros ( Pcl Mode)
3–26 Printing with Your SuperScript 660 Envelope Monarch 3-7/8 7-1/2 in Envelope #10 4-1/8 9-1/2 in Envelope DL 220 mm Envelope C5 229 mm Number of copies: 1 up to 999 Default Font: The default font can only be selected from resident fonts. - Page 91 SuperScript Print Manager to keep the PCL inter- preter active. 1. From the Windows Program Manager, double- click on the NEC SuperScript Printer Manager icon in the NEC SuperScript Tools group. 2. Minimize the SuperScript Print Manager to an icon, if desired.
-
Page 92: Page Ejects - Form Feeds ( Pcl Mode)
3–28 Printing with Your SuperScript 660 Some PCL files do not include a form feed (a com- Page Ejects - mand to eject a page) at the end of the file, so if you Form Feeds are printing to a conventional PCL printer, you have ( PCL Mode) to press a form feed key to see your output. -
Page 93: Printing From A Windows Application
DOWS APPLI- CATION PRINTING NOTE: Silentwriter SuperScript 660 is a Windows FROM DOS printer, designed for use with Windows. In particu- lar, SuperScript’s GDI mode is based on Windows and does not work with MS-DOS. However, SuperScript will work in PCL mode if you create an MS-DOS session from within Windows. -
Page 94: Printing Pcl Files From Dos Command Line
3–30 Printing with Your SuperScript 660 PRINTING PCL If you have a file in PCL or ASCII (text) format, you can print it from the MS-DOS command line within FILES FROM Windows. At the command line prompt, type DOS COM- COPY/B <filename.ext>... -
Page 95: Nec Superscript Print Manager
NEC SuperScript Print Manager 4–1 NEC SuperScript Print Manager... - Page 96 4–2 NEC SuperScript Print Manager When you use the NEC SuperScript Print Manager, the program helps you manage the output flow and operation of your SuperScript printer. You can see all files waiting to be printed, and change their order.
- Page 97 NEC SuperScript Print Manager 4–3 File 1. Exit Selecting Exit from the file menu exits you from the SuperScript Print Manager. Exiting Windows will also close the SuperScript Print Manager. Options 1. Priority Windows lets you run several applications at the same time.
- Page 98 4–4 NEC SuperScript Print Manager SuperScript’s priority settings let you control the priority of the printing activity relative to other applications running at the same time. The Options menu lets you select high, medium, or low priority processing when you print.
- Page 99 SuperScript features. 3. How to Use Help This is the standard Windows Help guide to show users how to access the help menu. 4. About The About option provides you with informa- tion about the current version of NEC SuperScript software.
- Page 100 4–6 NEC SuperScript Print Manager Queue Information This part of the SuperScript Print Manager screen shows jobs waiting to be printed. JOB NAME The software application and file that created the print job FORMAT Either GDI or PCL format SIZE...
- Page 101 A paused or selected job will also appear high- lighted, but somewhat darker gray than the current job. NEC SuperScript Print Manager will take the first print job in the queue and send it to be processed and printed. However, if you have a mouse, you can change the order of print jobs that remain in the queue by following a “drag-...
- Page 102 4–8 NEC SuperScript Print Manager Status Bar The status bar shows whether SuperScript is printing, paused, or ready to print. During printing, the status bar shows the page number currently being processed. Progress Bar The progress bar shows the percentage of the current print job processed by the SuperScript software on the PC.
- Page 103 If you select “Yes”, the print jobs will be saved as you exit. When you start up NEC SuperScript Print Manager next time, you can resume printing the unfinished documents.
- Page 104 4–10 NEC SuperScript Print Manager...
-
Page 105: Print Status Window
Print Status Window 5–1 Print Status Window... - Page 106 5–2 Print Status Window The Print Status Window has several functions. It lets you know when something is printing, notifies you of a printer alert, and allows you to set up several features of the printer. The Print Status Window will also alert you in case of a problem by displaying a warning or error mes- sage.
- Page 107 Print Status Window 5–3 Please refer to the Print Status Window above. File 1. Exit Lets you exit the Printer Status Display. Options 1. Show Print Status Display when Printing When checked, it will display the Printer Status Icon while printing a job. The default is off.
- Page 108 5–4 Print Status Window 2. Animate Icon Lets you decide whether or not to animate the printer icon. If Animate Icon is checked, then the printer will show paper printing and panel lights blinking. 3. Show Toolbar Title When checked, it will display a title for the Icons in the Printer Display Window.
- Page 109 Print Status Window 5–5 Setup 1. Change Printer Settings Selecting this choice allows you to make the following changes to the printer settings. Sharp Edge Technology: This feature smooths the edges of character and line draw images and eliminates the jaggies.
- Page 110 5–6 Print Status Window user and after correction, the page will be reprinted. Holding the page in memory and waiting for it to print will slow down the printer. When disabled Page Save Mode will discard the current page from memory once it has been sent to the printer.
- Page 111 This is the standard Windows Help guide to show users how to access the help menu. 4. About The About option provides you with infor- mation about the current version of NEC SuperScript software. Power Icon Select to access Power Saving Mode selections.
- Page 112 5–8 Print Status Window Page Save Icon Select to access Page Save Mode selections. 1. Page Save Mode When enabled the current page is saved in memory until printing is complete. Enable for sensitive documents where loss of data cannot be tolerated. Disable the feature to increase throughput.
- Page 113 Print Status Window 5–9 Job Name & Page Number This box shows the name of the application, file, and page number for the job currently being printed. Mode This box displays the type of file that is printing, either GDI or PCL. Printer Status Box This box shows a picture of your SuperScript 660 printer and a closeup view of the indicator...
- Page 114 5–10 Print Status Window Show Me Select to run an animation showing a step by step procedure to correct the problem. 1. Pause This button pauses the animation. 2. Back This button allows you to go back one frame of the animation after a pause. 3.
- Page 115 Print Status Window 5–11 Manual Duplex Printing.) Engine Error There is a problem with your printer’s engine. Follow the instructions on the screen to correct the problem. If the problem persists, call Cus- tomer Support. Engine is Warming Up Wait until the engine has finished warming up. Manual Cover Closed Manual Feed has been selected for the current print job;...
- Page 116 5–12 Print Status Window Power Off or Cable Problem NEC SuperScript software cannot find your printer because: 1. the printer is off. 2. the printer's parallel cable is not installed properly. 3. a problem exists within the connection or the parallel cable is defective.
-
Page 117: Selecting Paper And Media
Selecting Paper and Media 6–1 Selecting Paper and Media... - Page 118 Silentwriter SuperScript compatibility before you make a large purchase. Because we cannot control the quality or manufac- turing of your selected media, we cannot warrant the use or results of any specific media with the NEC Silentwriter SuperScript printer.
-
Page 119: Paper Properties
NEC tested Xerox® 4024™ (20 lb.) paper and obtained satisfactory results. Generally, paper manufactured for photocopying has good print... -
Page 120: Print Areas
6–4 Selecting Paper and Media NOTE: Paper properties can be changed by the manufacturers. NEC has no control over such changes. Thus NEC neither warrants nor recom- mends the use of any particular paper and the user assumes all responsibility as to the quality and performance of paper selected. -
Page 121: Paper And Media Use
Selecting Paper and Media 6–5 International DL 110 mm 220 mm (4.33 in. 8.66 in.): print area of 94 mm 204 mm (3.70 in. 8.03 in.) International C5 162 mm 229 mm (6.38 in. 9.02 in.): print area of 146 mm 213 mm (5.75 in. -
Page 122: Preprinted Forms
6–6 Selecting Paper and Media During the print operation, heat applied to preprinted Preprinted forms can remove ink from the form and leave Forms residue (called offset) inside the printer. In addition to offset residue problems, ink residues may generate harmful gases and emissions. Note the following considerations. -
Page 123: Heavy Print Stock
8.66 in.) C5 162 mm 229 mm (6.38 in. 9.02 in.) NEC tested Eaton 25% Cotton (20 lb, diagonal seamed and obtained satisfactory results. NOTE: NEC neither warrants nor recommends the use of any particular envelope and the user assumes all responsibility as to the quality and performance of the envelopes selected. - Page 124 6–8 Selecting Paper and Media The leading edge of an envelope that feeds into the printer must be straight. The fold must be firmly creased and be no thicker than two paper thick- nesses. As a rule, the larger the envelope is, the more difficult it is to feed properly.
-
Page 125: Adhesive Labels
The liner must be coated for easy release of the top sheet and adhesive layer sheets, particularly after being subjected to print head heat. NEC tested Avery® 5162 labels and obtained satisfactory results. NOTE: Label properties can be changed by the manufacturers. -
Page 126: Transparency Film
Once again, always test a representative sample before making a large purchase of any print media. Because we cannot control the quality or manufac- turing of your selected media, we cannot warrant the use or results of any specific media with the NEC Silentwriter SuperScript printer. -
Page 127: Sheet Paper
Selecting Paper and Media 6–11 All sheet paper properties must match the paper Sheet Paper specifications listed in Table 6-1. Table 6-1 Paper Specifications ITEM SPECIFICATION Acid content 5.5 pH to 8.0 pH. Ash content Cannot exceed 10% or contain large amounts of clay or talc. - Page 128 6–12 Selecting Paper and Media Table 6-1 Paper Specifications (Cont’d) ITEM SPECIFICATION Grain Long grain. Moisture content 4% to 6% by weight. Opacity Minimum of 85%. Packaging Polylaminated moisture-proof ream wrap. Smoothness 100 to 300, Sheffield scale. Stiffness 1.6 minimum machine direction 0.6 minimum cross direction (Taber).
-
Page 129: Envelopes
Selecting Paper and Media 6–13 All envelope paper properties must match the paper Envelopes specifications listed in Table 6-2. Table 6-2 Envelope Specifications ITEM SPECIFICATION Base weight 75 g/m (20 pound), single thickness. Calliper 5.5 mils (0.14 mm), single thickness. Furnish 100% chemical wood pulp with up to 30% cotton fiber. -
Page 130: Adhesive Labels
6–14 Selecting Paper and Media All adhesive label paper properties must match the Adhesive specifications listed in Table 6-3. Labels Table 6-3 Label Specifications ITEM SPECIFICATION Calliper No more than 0.0075 inch (0.19 mm) Construction The label stock must provide good toner adhesion. No adhesive can be on the external label surfaces. -
Page 131: Transparency Film
Selecting Paper and Media 6–15 All transparency film paper properties must match Transparency the specifications listed in Table 6-4. Film Table 6-4 Transparency Specifications ITEM SPECIFICATION Cutting dimension tolerance ±0.7 mm (±0.031 in.) Cutting angle tolerance 90˚ ±0.2˚ . Thickness 3.9 to 4.3 mils (0.100 to 0.110 mm). -
Page 132: Storage Guidelines
6–16 Selecting Paper and Media Note the following guidelines when storing paper. STORAGE GUIDELINES Don’t stack cartons of paper more than 6 cartons high. To optimize print quality, store and use paper at temperatures no lower than 20˚ C (68˚ F ), with humidity of 50%, ±5%. -
Page 133: Using Fonts
Using Fonts 7–1 Using Fonts... -
Page 134: Fonts In Gdi Mode
7–2 Using Fonts One benefit of SuperScript GDI’s WYSIWYP (What FONTS IN GDI You See Is What You Print) approach becomes clear MODE as you use fonts. In Windows 3.1, any font you can see on the screen will print on your printer. This includes TrueType, Type 1 (through Adobe’s ATM software), and Intellifont (through Intellifont for Windows). -
Page 135: Fonts In Pcl Mode
6. Click Close to exit the Fonts dialog box. 7. Select Close from the System menu to exit the Control Panel dialog box. NEC SuperScript PCL mode supports all resident FONTS IN PCL fonts, corresponding to the internal fonts in the HP MODE LaserJet 4P. -
Page 136: Installing Superscript Truetype Fonts
(usually A:\). Insert NEC SuperScript Software Disk #3. 4. Select the /TTFONTS directory from the directo- ries list. The fonts on the NEC SuperScript Software Disk in the /TTFONTS directory appear in the List of Fonts box. - Page 137 Using Fonts 7–5 31 Additional TrueType Fonts...
- Page 138 7–6 Using Fonts...
-
Page 139: Choosing Print Options
Choosing Print Options 8–1 Choosing Print Options... -
Page 140: How To Print Using Various Media
8–2 Choosing Print Options This chapter explains various print options available when using the SuperScript printer. Loading the hopper, and selecting the paper path are discussed. Before you use or order any print media, please read Chapter 6 “Selecting Paper and Media”. HOW TO PRINT Table 8-1 lists the type and capacity of print media you can load, and the paper output method. - Page 141 Choosing Print Options 8–3 Table 8-1-b Recommended Printing Methods [Optional 200-sheet Hopper] MEDIA TYPE INPUT EXIT TO (SIZE) (CAPACITY) Sheet Paper Max. 200 sheets (17lb.) Face-up Tray (16 - 22 lb) Letter Face-down Door Executive Legal* 1 sheet Face-down Door Heavy Paper** (23 - 28 lb) Legal Size Paper...
-
Page 142: The Standard Hopper
8–4 Choosing Print Options THE STAND- The standard hopper can normally feed a maximum of 50 sheets (17lb) continuously. In single-sheet ARD HOPPER feed mode, heavy paper, envelopes, labels, and transparency film can also be fed. (Refer to Table 8- 1-a.) Multiple sheets of paper from 16 to 22 lbs. -
Page 143: The 200-Sheet Paper Hopper (Optional)
Choosing Print Options 8–5 THE 200- The optional 200-sheet hopper can continuously feed up to a maximum of 200 sheets of plain paper (at 17 SHEET PAPER lb). HOPPER (OPTIONAL) In manual feed mode, heavy bond paper, envelopes, labels and transparency films may also be fed. See table 8-1-b. -
Page 144: Removing The Standard Hopper
8–6 Choosing Print Options If the standard hopper has been installed on your Removing the SuperScript printer, remove the standard hopper as Standard described below. Hopper 1. Hold the standard hopper with both hands. 2. Lift it up while holding it steadily. -
Page 145: Installing The 200-Sheet Paper Hopper
Choosing Print Options 8–7 Attach the optional 200-sheet hopper as described Installing the below: 200-sheet 1. Hold the 200-sheet hopper with both hands as Paper Hopper illustrated and push the lock release levers. 2. Carefully set the hopper on the printer and release the lock release lever. -
Page 146: Installing And Removing The Legal Guide
8–8 Choosing Print Options The legal guide is an accessory to the optional 200- Installing and sheet hopper. Removing the Legal Guide The legal guide can be installed on the 200-sheet hopper to continuously feed up to a maximum of 200 sheets (17 lb) of legal size paper. -
Page 147: Hopper Feed
Choosing Print Options 8–9 Up to a maximum of 200 sheets (17 lb) can be Hopper Feed loaded in the hopper at once . 1. Open the manual feed cover of the 200-sheet hopper by rotating the manual feed cover until a second clicking sound is heard. - Page 148 8–10 Choosing Print Options 2. Pull up the paper guide lever and move the paper guide in the direction indicated by the arrow. Flip up the hopper guide. 3. Insert paper with the left edge evenly touching the left side of the hopper.
- Page 149 Choosing Print Options 8–11 4. Adjust the paper guide until it touches the paper and then press down on the paper guide lever to lock it in place. 5. Carefully return the manual feed cover to its original position. NOTE: It is not possible to print with the manual feed cover open.
-
Page 150: Manual Feed
8–12 Choosing Print Options The method of feeding a single sheet manually with Manual Feed the 200 sheet hopper differs from that of the standard hopper feed method. To manually feed paper, do the following: 1. Pull up the manual feed cover. The manual feed cover stops to two positions when pulled up. - Page 151 Choosing Print Options 8–13 2. Specify manual feed in the printer setup screen inside your application program or in Windows. 3. Insert one sheet of paper alongside the edge of the manual feed guide of the manual feed cover. Insert the sheet as far as it will go to avoid paper jam caused by misfeeding.
-
Page 152: Removing The 200-Sheet Hopper
8–14 Choosing Print Options 5. After printing, return the manual feed cover to its original position. Detach the hopper as described below. Removing the 200-sheet 1. Hold the 200-sheet hopper with both hands and Hopper push up the lock release levers. -
Page 153: Output Paths
Choosing Print Options 8–15 2. Lift up the 200-sheet hopper with the lock release levers unlocked. Printed sheets may either be ejected onto the face-up OUTPUT tray or the face-down door, either of which can be PATHS selected. -
Page 154: Face-Up Tray
8–16 Choosing Print Options Leave the face-down door closed. Paper (16 to 22 Face-up Tray lb) will be ejected onto the face-up tray. The paper path is shown below. Open the face-down door. All types of paper can be Face-down ejected from the face-down door. -
Page 155: Maintaining Your Printer
Maintaining Your Printer 9–1 Maintaining Your Printer... - Page 156 This chapter explains the basic maintenance and cleaning procedures you must follow to maintain high print quality and efficient operation of your SuperScript printer. Information on spare parts ordering and NEC service agreements is found in Chapter 11 “Getting Service and Support.”...
-
Page 157: Redistributing The Toner
Maintaining Your Printer 9–3 The toner in one disposable Toner Cartridge lasts for REDISTRIBUT- approximately 4000 pages at 5% black to white ratio. ING THE However, the Starter Toner Cartridge will only last TONER 2,000 pages. The shading of the print output be- comes lighter when the cartridge needs to be re- placed or the toner needs to be redistributed. - Page 158 9–4 Maintaining Your Printer 3. Lift up the Toner Cartridge gently by holding the two green handles. WARNING: Do not touch the fuser unit. It is extremely hot.
- Page 159 Maintaining Your Printer 9–5 4. Rock the Toner Cartridge gently five or six times to redistribute the toner. NOTE: Rock the cartridge in the direction indicated in the illustration. While rocking, take care not to touch the drum protection shutter (red transparent plastic) of the Toner Cartridge.
- Page 160 9–6 Maintaining Your Printer 5. Insert the Toner Cartridge into the printer. NOTE: Hold the Toner Cartridge by its two green handles and insert it inside the printer as far as it will go. Check that the cartridge is securely set inside the printer.
- Page 161 Maintaining Your Printer 9–7 6. Close the printer by gently pressing the upper cover down, until it locks in place. NOTE: Make sure the lock release lever has re- turned to its original position. After redistributing the toner, continue using the cartridge if the output quality has improved.
-
Page 162: Cleaning The Printer
9–8 Maintaining Your Printer Over time, toner residue and paper dust accumulate CLEANING inside the printer. The following sections explain THE PRINTER how you can remove this buildup to keep your printer running smoothly. You should perform this cleaning procedure each time you replace the Toner Cartridge. -
Page 163: Replacing The Toner Cartridge
Maintaining Your Printer 9–9 When it is time to replace the toner cartridge, it is REPLACING also time to perform cleaning on your printer mecha- THE TONER nism. CARTRIDGE Before you begin, unpack the toner cartridge box. The cartridge box consists of a carton box, inserts, and a toner cartridge. - Page 164 9–10 Maintaining Your Printer Cleaning Please follow the recommended approach when cleaning the printer: Conditions Switch off the printer and then pull off the power cord from the printer. The fuser unit is extremely hot. After switching off the power, let the fuser unit cool down before cleaning it.
- Page 165 Maintaining Your Printer 9–11 Parts to Be Parts to be cleaned are: Cleaned The frequency and methods of cleaning each part differ. On the next page, the frequency and the methods of cleaning the main parts are shown.
- Page 166 9–12 Maintaining Your Printer Table 9-2 Parts to be cleaned, frequency, and methods PART TO BE CLEANED FREQUENCY CLEANING METHOD Paper Guide When replacing the Wipe with a soft cloth Toner Cartridge and and clean the sur- when printouts are rounding parts of paper stained.
- Page 167 Maintaining Your Printer 9–13 Cleaning Follow these steps to clean the printer mechanism. Procedure 1. Power off the printer. 2. Pull off the power cord from the rear panel of the printer. 3. Pull the lock release lever, and raise the upper cover gently.
- Page 168 9–14 Maintaining Your Printer 4. Remove the Toner Cartridge gently by holding the two green handles.
- Page 169 Maintaining Your Printer 9–15 5. Wipe off dirt and stains from the paper guide ribs Cleaning the with a piece of soft cloth. paper guide ribs 6. Wipe off dirt and stains from the glass of the laser Cleaning the beam window with a piece of soft cloth.
- Page 170 9–16 Maintaining Your Printer 7. Wipe off dirt and stains around the fuser unit with Cleaning the a soft, lint-free cloth. fuser unit WARNING: The fuser unit is extremely hot.
-
Page 171: Installing The Toner Cartridge
Cartridge toner cartridge supplies provided by different manu- facturers. Refer to Table 1-1 in Chapter 1 for the NEC order number. NOTE: Do not stand the cartridge on end. 1. Hold the Toner Cartridge by both ends. 2. Hold the Toner Cartridge horizontally and gently rock it five or six times to distribute the toner. - Page 172 9–18 Maintaining Your Printer 3. Place the new Toner Cartridge on a flat surface, grasp the yellow toner sealing tape tab and pull the tape out. The sealing tape is approximately 20 inches long when completely removed. NOTE: Be sure to pull the tape straight out of the cartridge to prevent it from being broken in the middle.
- Page 173 Maintaining Your Printer 9–19 4. Slowly remove the shutter lock pins (2) on the Toner Cartridge. NOTE: After removing the shutter lock pins, do not touch the drum protection shutter.
- Page 174 9–20 Maintaining Your Printer 5. Set the Toner Cartridge inside the printer. NOTE: Hold the Toner Cartridge by its two green handles and insert it in the printer as far as it will go. Check that it is securely set.
- Page 175 Maintaining Your Printer 9–21 6. Gently press down the upper cover and securely close it. NOTE: Check that the lock release lever has re- turned to its original position. 7. Plug the power cord into the rear panel of the printer.
-
Page 176: Transporting The Printer
9–22 Maintaining Your Printer Before transporting the printer, its accessories should TRANSPORT- be removed. The following procedures explain how ING THE to remove the accessories before transporting the PRINTER printer. Before transporting the printer, the toner cartridge Removing the must be removed to avoid stain of the printer with Toner Car- toner. - Page 177 Maintaining Your Printer 9–23 3. Hold the Toner Cartridge by its two green handles and lift it out of the printer. 4. Gently press down the upper cover and securely close it. NOTE: Check that the lock release lever has re- turned to its original position.
-
Page 178: Removing The Paper Hopper
9–24 Maintaining Your Printer You must remove the hopper before transporting the Removing the printer, to avoid any mechanical damage inside the Paper Hopper printer. See Chapter 8 “Removing the Standard Hopper” or “Removing the 200-sheet Hopper”. 1. Disconnect the interface cable by pulling it out of Removing the the computer. -
Page 179: Removing The Power Cord
Maintaining Your Printer 9–25 1. Holding the power plug, disconnect the power Removing the cord from the outlet. Power Cord 2. Hold the plug and then pull power cord from the printer. -
Page 180: Check List Before Transporting The Printer
9–26 Maintaining Your Printer Before transporting this printer and accessories, pack Check List it in the original boxes. Before Transporting Be sure to detach the hopper. the Printer Be sure to remove the Toner Cartridge. Repack the printer and its accessories in the boxes provided at the time of purchase. -
Page 181: Troubleshooting
Troubleshooting 10–1 Troubleshooting... - Page 182 10–2 Troubleshooting This chapter details how to resolve paper jams and printer output quality problems. Status displays are also explained. Table 10-1 lists simple resolutions to occasional printer problems. Table 10-1 Simple Troubleshooting CONDITION SOLUTION Power light is off. Check that the power cord is plugged into a live power outlet and the printer power switch is turned on.
-
Page 183: Print Quality Maintenance
Troubleshooting 10–3 Here are some suggestions for maintaining the Print Quality highest print quality from your printer. Maintenance When the print output becomes light, redistribute the toner. However, if light print output persists, replace the toner cartridge (refer to Chapter 9). Use high-quality paper or transparencies to obtain sharp, crisp characters and maximum contrast. -
Page 184: Locations Of Potential Paper Jams
10–4 Troubleshooting The following figure shows the path the paper Locations of follows inside the printer. A paper jam may occur in Potential Paper any of the following areas: Jams • hopper • fuser unit Paper Jamming Areas The methods of removing jammed paper depends on Removing the the location of the jam. -
Page 185: Paper Jams In The Hopper
Troubleshooting 10–5 1. Pull the lock release lever on the upper cover and Paper Jams in gently open the upper cover. the Hopper 2. Slowly pull the paper straight out. CAUTION: When paper jams before a page com- pletely passes through the fuser unit, make sure that the unfused toner does not get into the printer. -
Page 186: Paper Jams In The Fuser Unit
10–6 Troubleshooting 1. Pull the lock release lever of the upper cover and Paper Jams in gently open the upper cover. the Fuser Unit 2. If the paper can be seen inside the printer, pull it out slowly in the direction of the arrow (paper feed side). - Page 187 Troubleshooting 10–7 3. If the paper cannot be seen inside the printer, pull it straight out slowly from the face-up tray or the face-down door. CAUTION: Be sure to check if the paper can be seen inside the printer. The steps for removing the jammed paper are different and it is important to follow the proper procedure (item 2 or 3).
-
Page 188: Points To Check To Avoid Paper Jams
10–8 Troubleshooting 4. Gently press down the upper cover and close it securely. The printer will warm up and then resume print- ing. After clearing the jammed sheets, verify the follow- Points to ing in order to reduce future paper jams. Check to Avoid Are there any scraps of torn paper remaining in Paper Jams... -
Page 189: Testing The Printer
Windows. (Chapter 2 “Installing SuperScript Printing Software”) 1. From the Program Manager, find the NEC SuperScript Tools group. If NEC SuperScript Tools has been minimized, restore it by double- clicking on its icon. - Page 190 10–10 Troubleshooting...
-
Page 191: Status Messages
Troubleshooting 10–11 Status Messages SuperScript requires a PC that can run Windows Installation in 386 Enhanced mode. (See Chapter 2 System Problems Requirements.) If the installation program detects that your PC is not powerful enough, it will quit without installing the SuperScript software. - Page 192 SuperScript software. The amount of virtual memory required to run NEC SuperScript depends on how much RAM is in your PC. The total required - PC RAM plus virtual memory - must be around 12.5 megabytes minimum to run SuperScript.
- Page 193 Troubleshooting 10–13 The setup program does not detect a PC parallel port. The cable that connects the PC to the printer must be inserted in a parallel port to work properly. You may need to install a parallel port card. SuperScript requires at least version 3.1 of Windows to run properly.
-
Page 194: Status Messages
10–14 Troubleshooting STATUS MESSAGES Operating Problems This message means that the SuperScript soft- ware cannot detect the printer. Make sure the printer is turned on, and that it is firmly con- nected to your PC by a standard parallel cable. Check that the green status light is lit, or is slowly blinking indicating that the printer is in Power Saving Mode. - Page 195 Troubleshooting 10–15 This message may appear if you have just turned the printer on, or if you try to print and the printer is in Power Saving Mode and the fuser is cool. Wait for the engine to finish warming up.
- Page 196 10–16 Troubleshooting This message means that either the printer's cover is open, or there is no toner cartridge in the printer. If the printer needs a toner cartridge, insert one according to the instructions in Chap- ter 9. If the printer's cover is open, shut it gently but firmly.
- Page 197 Troubleshooting 10–17 This means the manual feed cover is open, preventing the printer from operating correctly while set to feed from the hopper. Close the manual feed cover gently but firmly.
- Page 198 10–18 Troubleshooting The printer needs the manual feed cover to be slightly open, and a sheet of paper ready, when feeding paper from this slot. Open the manual feed cover at a 60 degree angle, feed a sheet of paper to the printer, and then print your docu- ment.
- Page 199 Troubleshooting 10–19 Manual duplex mode only handles the following paper sizes: Letter, Legal, and A4 (an international standard for business documents). You will need to use one of these if you wish to print double-sided documents.
- Page 200 10–20 Troubleshooting SuperScript uses some of your PC's free disk space to store document files while they are waiting to be printed. If you do not have suffi- cient free disk space on your hard disk drive, you may have trouble printing successfully, espe- cially if you want to print a batch of documents.
- Page 201 Troubleshooting 10–21 Your printer has run out of paper. Add more paper to the printer and then click RESUME.
- Page 202 10–22 Troubleshooting This message means that paper has jammed inside your printer. Open the cover, and gently but firmly remove the paper from inside. For more details refer to “Paper Jam” earlier in this chapter.
- Page 203 Troubleshooting 10–23 Engine Error 01 - 05 are shown when the printer’s engine has a trouble. Try turning the printer off and then on to see if the problem persists. If Engine Error persists, call Customer Support.
- Page 204 10–24 Troubleshooting The message indicates that the applications now running are not leaving sufficient free memory for SuperScript to operate. Close the applica- tions you do not need. (Note: if you see this message frequently, you may want to consider adding memory to your PC.)
-
Page 205: Output Quality
Troubleshooting 10–25 OUTPUT Refer to the following information to resolve print output quality problems. QUALITY Check to see if the toner is running low. Light Page Redistribute the toner. (Refer to Chapter 9 "Redistributing the Toner".) -
Page 206: Blank Page
10–26 Troubleshooting Check to ensure that the toner sealing tape has Blank Page been removed from the toner cartridge. (Refer to Chapter 2.) If necessary, replace the Toner Cartridge; the light-sensitive transfer drum may be damaged. (Refer to Chapter 9.) Make sure you are using a standard Centronics parallel cable, and that your PC has a standard parallel port. -
Page 207: Black Page
Troubleshooting 10–27 If necessary, replace the toner cartridge; the Black Page light-sensitive transfer drum may be damaged. (Refer to Chapter 9.) -
Page 208: Streaked Page
10–28 Troubleshooting Check for any torn pieces of paper remaining in Streaked Page the paper path from a previous paper jam. (See Chapter 10 "Paper Jam".) Clean the laser beam window (Refer to Chapter 9 "Cleaning the printer Mechanism".) Rock the Toner Cartridge. (Refer to Chapter 9 "Redistributing the Toner".) Reinsert the car- tridge and print several pages. -
Page 209: Spots On Back Of Paper
Troubleshooting 10–29 Clean the transfer roller and fuser unit with a Spots on Back piece of cloth. of Paper CAUTION: Fuser unit is hot; wait for it to cool down first. -
Page 210: Blank Spots
10–30 Troubleshooting Use a fresh ream of paper. Paper should be Blank Spots stored in its original packing to prevent moisture absorption. Check paper specifications. Rock the Toner Cartridge. (Refer to Chapter 9 "Redistributing the Toner.) Reinsert the car- tridge and print several pages. Install a new toner cartridge. -
Page 211: Solid White Vertical Lines
Troubleshooting 10–31 Clean the laser beam window (Refer to Chapter 9 Solid White "Cleaning the Printer Mechanism".) Vertical Lines Check for any torn pieces of paper remaining in the paper path from a previous paper jam. (See Chapter 10 "Paper Jam".) Rock the Toner Cartridge. -
Page 212: Graphics Appear Coarse In Gdi Mode
10–32 Troubleshooting GDI graphics quality differs by application, because Graphics Ap- different applications may use Windows graphics pear Coarse in commands differently. If you are not satisfied with GDI Mode the quality of your output in GDI mode for a particu- lar application program and file, switch to PCL mode. -
Page 213: Unexpected Font In Either Gdi Or Pcl Mode
Troubleshooting 10–33 4. Click on the TrueType button. You should see the following dialog box: 5. Put an X in the boxes marked Enable TrueType Fonts and Show Only TrueType Fonts in Applications. 6. Exit and return to your application. Your screen and output will now show only TrueType fonts. -
Page 214: Unexpected Font In Pcl Mode
10–34 Troubleshooting If you are using a screen-only font, one that does not Unexpected download fonts to the printer the way TrueType does Font in PCL or Type 1/ATM does, you may see an unexpected Mode font substitution. One solution is to select another font. Another is to install a font that has a similar appearance but works with PCL, as TrueType and Type 1/ATM fonts do. -
Page 215: Allocating Virtual Memory
Troubleshooting 10–35 ALLOCATING As mentioned in Chapter 2 System Requirements , SuperScript requires a total of 12.5 megabytes of VIRTUAL space, divided between your PC memory (a mini- MEMORY mum of 4 megabytes) and your Windows virtual memory. For example, if your system has 4 mega- bytes of RAM, then you must allocate at least 8.5 megabytes of virtual memory. - Page 216 10–36 Troubleshooting If Windows does not let you allocate the required amount of space, check to make sure you have enough room on your hard disk drive. If you have enough free disk space and Windows won’t let you create large enough permanent virtual memory, you may need to run a disk defragmentation utility, such as Norton Utilities sd, to clean up your hard disk drive, before changing your virtual memory to...
-
Page 217: Commonly Asked Questions
Troubleshooting 10–37 COMMONLY Review the following questions and answers to gain an understanding of how the SuperScript 660 oper- ASKED QUES- ates. Refer to this chapter again if you experience TIONS any printing difficulties. Q. What is the procedure for printing envelopes with the Silentwriter SuperScript ? Envelopes can be printed through the hopper with the guides adjusted to accommodate their size. - Page 218 Q. Can other brands of toner cartridges be used on the SuperScript printer? No. Only SuperScript Toner Cartridges manufac- tured by NEC can be installed in the printer. Q. Can the toner cartridge be refilled? Do not attempt to refill a used cartridge as dam- age to the printer may result.
- Page 219 (Refer to Chapter 9 “Transporting the Printer” for more details). If you did not save your shipping carton, you may purchase one by calling the NEC National Re- sponse Center - Spare Parts at 1-800-388-8888. Q. Can a 115-volt SuperScript printer be converted to 220 volts in the field? No.
- Page 220 10–40 Troubleshooting...
-
Page 221: Getting Service And Support (For U.s. Only)
Getting Service and Support 11–1 Getting Service and Support (For U.S. only) -
Page 222: Assistance
Chapter 10, Troubleshooting. If you still have a problem, continue with the suggestions that follow. If your company is large and has purchased a Getting Help number of NEC printers, the best source of help may from Your be within your own company. Your company may Company... -
Page 223: Getting Help From Nec
NOTE: This product requires specific PC hardware and software configurations to operate as specified by NEC. It is the owner's responsibility to supply these supporting items, and where necessary, to reconfigure and/or furnish additional hardware and/ or software as required or specified by NEC to assure normal product operation. -
Page 224: Silentwriter Superscript 660 Printer Limited Warranty
11–4 Getting Service and Support Silentwriter The Silentwriter SuperScript 660 is warranted for two years from date of purchase under the NEC SuperScript Silentwriter SuperScript Limited Warranty. The 660 Printer warranty works as follows: Limited War- ranty • The Customer calls NEC Customer Service and Support at 800-388-8888. -
Page 225: Warranty
Getting Service and Support 11–5 • If you do not wish to provide a credit card number to NEC, the service representative will provide you with an MRA (Material Return Authorization) number for return of the defective printer at your own expense. You... - Page 226 11–6 Getting Service and Support 3. Damage, deterioration or malfunction result- ing from: a. Accident, misuse, abuse, neglect, fire, water, lightning or other acts of nature, improper storage, unauthorized Product modification, or failure to follow instructions supplied with the Product. b.
-
Page 227: Warranty Support
Getting Service and Support 11–7 NECTECH will pay labor and material expenses for Warranty covered items, but we will not pay for the following: Support 1. Removal or installation charges. 2. Costs of initial technical adjustments (set-up), including adjustment of user controls. 3. -
Page 228: Limitation Of Damages And Implied Warranties
11–8 Getting Service and Support NECTECH’S SOLE LIABILITY FOR ANY DE- Limitation of FECTIVE PRODUCT IS LIMITED TO THE Damages and REPAIR OR REPLACEMENT OF THE PRODUCT Implied War- AT OUR OPTION. NECTECH SHALL NOT BE LIABLE FOR: ranties 1. DAMAGE TO OTHER PROPERTY CAUSED BY ANY DEFECTS IN THIS PRODUCT, DAMAGES BASED UPON INCONVENIENCE, LOSS OF USE OF THE... - Page 229 Product performance is affected by system configuration, software, the application, customer data, and operator control of the system, among other factors. While NEC TECHNOLO- GIES, INC. Products are considered to be compat- ible with many systems, the specific functional implementation by the customers of the Product may vary.
- Page 230 11–10 Getting Service and Support...
-
Page 231: A Character Sets And Code/Sequence/Commands For Hp Laserjet 4P
Character Sets and Code/Sequence/Commands for HP LaserJet 4P A–1 Character Sets and Code/Sequence/ Commands in HP LaserJet 4P Mode... -
Page 232: Character Sets
A–2 Character Sets and Code/Sequence/Commands for HP LaserJet 4P CHARACTER This section provides charts for the character sets used with fonts in LaserJet 4P PCL 5 emulation. SETS The first character set chart is Roman 8 and contains PCL Character the subsets of US ASCII and Roman Extension. - Page 233 Character Sets and Code/Sequence/Commands for HP LaserJet 4P A–3...
- Page 234 A–4 Character Sets and Code/Sequence/Commands for HP LaserJet 4P...
- Page 235 Character Sets and Code/Sequence/Commands for HP LaserJet 4P A–5...
- Page 236 A–6 Character Sets and Code/Sequence/Commands for HP LaserJet 4P...
- Page 237 Character Sets and Code/Sequence/Commands for HP LaserJet 4P A–7...
- Page 238 A–8 Character Sets and Code/Sequence/Commands for HP LaserJet 4P...
- Page 239 Character Sets and Code/Sequence/Commands for HP LaserJet 4P A–9...
- Page 240 A–10 Character Sets and Code/Sequence/Commands for HP LaserJet 4P...
- Page 241 Character Sets and Code/Sequence/Commands for HP LaserJet 4P A–11...
- Page 242 A–12 Character Sets and Code/Sequence/Commands for HP LaserJet 4P...
- Page 243 Character Sets and Code/Sequence/Commands for HP LaserJet 4P A–13...
- Page 244 A–14 Character Sets and Code/Sequence/Commands for HP LaserJet 4P...
- Page 245 Character Sets and Code/Sequence/Commands for HP LaserJet 4P A–15...
-
Page 246: Iso Substitution Table
A–16 Character Sets and Code/Sequence/Commands for HP LaserJet 4P This table provides a quick reference for the values of special characters contained in ISO (International Substitution Standard Organization) symbol sets. ISO symbol sets contain the same characters and the ASCII Table symbol set, except for the character positions listed in this table. - Page 247 Character Sets and Code/Sequence/Commands for HP LaserJet 4P A–17 Roman-8 Character Conversion...
- Page 248 A–18 Character Sets and Code/Sequence/Commands for HP LaserJet 4P Roman-8 Character Conversion (cont'd)
- Page 249 Character Sets and Code/Sequence/Commands for HP LaserJet 4P A–19 Roman-8 Character Conversion (cont'd)
- Page 250 A–20 Character Sets and Code/Sequence/Commands for HP LaserJet 4P Roman-8 Character Conversion (cont'd)
- Page 251 Character Sets and Code/Sequence/Commands for HP LaserJet 4P A–21 Roman-8 Character Conversion (cont'd)
- Page 252 A–22 Character Sets and Code/Sequence/Commands for HP LaserJet 4P Roman-8 Character Conversion (cont'd)
-
Page 253: Code/Sequence/Commands
Character Sets and Code/Sequence/Commands for HP LaserJet 4P A–23 CODE/ SEQUENCE/ COMMANDS Table lists the HP LaserJet 4P printer control codes Control Codes and escape sequences. and Escape Sequences NOTE: The following PJL commands are not supported in the SuperScript 660i: OPMSG, RDMSG, STMSG, SET, and DEFAULT. - Page 254 A–24 Character Sets and Code/Sequence/Commands for HP LaserJet 4P Table HP LaserJet 4P Printer Control Codes and Escape Sequences - PCL 5 Context (cont’d)
- Page 255 Character Sets and Code/Sequence/Commands for HP LaserJet 4P A–25 Table HP LaserJet 4P Printer Control Codes and Escape Sequences - PCL 5 Context (cont’d)
- Page 256 A–26 Character Sets and Code/Sequence/Commands for HP LaserJet 4P Table HP LaserJet 4P Printer Control Codes and Escape Sequences - PCL 5 Context (cont’d)
- Page 257 Character Sets and Code/Sequence/Commands for HP LaserJet 4P A–27 Table HP LaserJet 4P Printer Control Codes and Escape Sequences - PCL 5 Context (cont’d)
- Page 258 A–28 Character Sets and Code/Sequence/Commands for HP LaserJet 4P Table HP LaserJet 4P Printer Control Codes and Escape Sequences - PCL 5 Context (cont’d)
- Page 259 Character Sets and Code/Sequence/Commands for HP LaserJet 4P A–29 Table HP LaserJet 4P Printer Control Codes and Escape Sequences - PCL 5 Context (cont’d)
- Page 260 A–30 Character Sets and Code/Sequence/Commands for HP LaserJet 4P Table HP LaserJet 4P Printer Control Codes and Escape Sequences - PCL 5 Context (cont’d)
- Page 261 Character Sets and Code/Sequence/Commands for HP LaserJet 4P A–31 Table HP LaserJet 4P Printer Control Codes and Escape Sequences - PCL 5 Context (cont’d)
- Page 262 A–32 Character Sets and Code/Sequence/Commands for HP LaserJet 4P Table HP LaserJet 4P Printer Control Codes and Escape Sequences - PCL 5 Context (cont’d)
- Page 263 Character Sets and Code/Sequence/Commands for HP LaserJet 4P A–33 Table HP LaserJet 4P Printer Control Codes and Escape Sequences - PCL 5 Context (cont’d)
- Page 264 A–34 Character Sets and Code/Sequence/Commands for HP LaserJet 4P Table HP LaserJet 4P Printer Control Codes and Escape Sequences - PCL 5 Context (cont’d)
- Page 265 Character Sets and Code/Sequence/Commands for HP LaserJet 4P A–35 Table HP LaserJet 4P Printer Control Codes and Escape Sequences - PCL 5 Context (cont’d)
- Page 266 A–36 Character Sets and Code/Sequence/Commands for HP LaserJet 4P Table HP LaserJet 4P Printer Control Codes and Escape Sequences - PCL 5 Context (cont’d)
- Page 267 Character Sets and Code/Sequence/Commands for HP LaserJet 4P A–37 Table HP LaserJet 4P Printer Control Codes and Escape Sequences - PCL 5 Context (cont’d)
- Page 268 A–38 Character Sets and Code/Sequence/Commands for HP LaserJet 4P Table HP LaserJet 4P Printer Control Codes and Escape Sequences - PCL 5 Context (cont’d)
- Page 269 Character Sets and Code/Sequence/Commands for HP LaserJet 4P A–39 Table HP LaserJet 4P Printer Control Codes and Escape Sequences - PCL 5 Context (cont’d)
- Page 270 A–40 Character Sets and Code/Sequence/Commands for HP LaserJet 4P...
-
Page 271: B Optimizing Printer Performance
Optimizing Printer Performance B–1 Optimizing Printer Per- formance... -
Page 272: What To Do
Try GDI with your documents to see if it meets your requirements. 4. Change the print priority. The NEC SuperScript Print Manager lets you select Low, Medium, or High Priority printing. If you want faster printing, set the priority to High. - Page 273 Optimizing Printer Performance B–3 5. Don’t use the NEC SuperScript Print Manager when printing in GDI mode. For fastest possible printing, you can shut off the NEC SuperScript Print Manager altogether for GDI mode. Go to the GDI Setup Options Screen,...
- Page 274 B–4 Optimizing Printer Performance 8. Install the memory expansion module on your printer The SuperScript printer provides maximum 6PPM printing. However a less powerful CPU or insufficient printer memory may restrain the throughput. If your computer has a powerful CPU, installing the memory expansion module may improve the throughput.
-
Page 275: C Specifications
Specifications C–1 Specifications... - Page 276 C–2 Specifications Print Speed Letter — 6 pages per minute maximum Warm-up — 85 seconds maximum (at 68˚ F , Power Saving Mode Off) Paper Feed — 25 seconds for first printout (Power Saving Mode Off) 110 seconds maximum (Power Saving Mode On) Print Method Electrophotography Resolution...
- Page 277 Specifications C–3 Paper Weight 16 to 28 lb (60 to 105 g/m ) (manual feed) 16 to 22 lb (60 to 82 g/m ) (hopper feed) Paper Loading Standard Hopper —50 sheet capacity (at 17 lbs) Methods Optional Hopper —200 sheet capacity (at 17 lbs) Manual Feed —...
- Page 278 C–4 Specifications Administrative UL-1950 D3 Compliance CSA-22.2, No. 950 D3 FCC Class B CDRH Class I...
-
Page 279: D Interface Cable Specifications
Interface Cable Specifications D–1 Interface Cable Specifications... - Page 280 D–2 Interface Cable Specifications Be sure to use the cable specified below in this System. 1. Pin Assignments: The following diagram shows the standard pin assignments of PC centronics cable. Use the cable of standard pin assignments with each signal line having its own ground return. ** Some poor cables that do not have individual ground returns may cause problems.
- Page 281 EC-6. CURTIS Manufacturing Company, Inc is located at 30 Fitzgerald Drive, Jaffrey, NH 03452. NOTE: NEC does not warrant the use of any particu- lar cable and the user assumes all responsibility as to the quality and performance of the cable.
-
Page 282: Cable Configurations
D–4 Interface Cable Specifications Cable configurations [Standard Pin Assignments of PC Centronics Cable] Printer Side PC Side <Centronics 36-pin connector> <Eia 25-pin connector> STROBE DATA 1 DATA 2 DATA 3 DATA 4 DATA 5 DATA 6 DATA 7 DATA 8 BUSY PAPER EMPTY SELECT... -
Page 283: Pin Assignment Of The Printer Side Connector
Interface Cable Specifications D–5 Pin Assignment of the printer side connector SIGNAL NAME SIGNAL NAME STROBE DATA 1 DATA 2 DATA 3 DATA 4 DATA 5 DATA 6 DATA 7 DATA 8 BUSY PAPER EMPTY SELECT INIT AUTOFEED FAULT AUXOUT1* 0VDC* CHASSIS GND* AUXOUT2*... - Page 284 D–6 Interface Cable Specifications...
-
Page 285: E Removing Superscript Files From Your System
Removing SuperScript Files from Your System E–1 Removing SuperScript Files from Your System... - Page 286 E–2 Removing SuperScript Files from Your System The SuperScript software kit comes with a utility program to de-install all the SuperScript files on your hard disk and return your system condition to what it was before you installed the SuperScript software.
- Page 287 Installing the Memory Expansion Module F–1 Installing the Memory Expansion Module...
-
Page 288: Installing The Memory Expansion Module
F–2 Installing the Memory Expansion Module The SuperScript 660’s memory can be expanded by adding a Single In-line Memory Module (SIMM). Adding the memory expansion module will solve Memory Overflow which causes incomplete page printing. Also, it may improve throughput of print- ing in some cases. - Page 289 Installing the Memory Expansion Module F–3 Follow these steps to install the memory expansion module. 1. Turn off the power of the printer. NOTE: To protect your printer from possible damage, make sure it is powered down prior to installation of the module. 2.
- Page 290 F–4 Installing the Memory Expansion Module 3. Using a coin, turn the screw located on the left panel of the printer in the direction of the arrow, and remove the memory cover. You can see the memory socket on the controller board. CAUTION: Do not touch any parts on the controller board with your fingers.
- Page 291 Installing the Memory Expansion Module F–5 5. Hold the module at an angle and firmly push it into the socket. 6. Then press the module down until you hear a “click” as the module snaps into place. Check that the module is securely held into place by the metal holders on each side.
- Page 292 F–6 Installing the Memory Expansion Module 7. Put the memory cover back in place. (First insert the memory cover downward into the printer, then move it to original position. Next, using a coin, tighten the screw by turning in the direction of the arrow.) CAUTION: Check that the memory cover is firmly secured.
-
Page 293: Glossary
Glossary–1 Glossary acid content The pH, or the acidity/alkalinity of paper. The acid content is determined by the Technical Association of the Pulp and Paper Industry (TAPPI) cold extrac- tion method. applications A software program that performs a specific task such as creating a spreadsheet or graphics. - Page 294 Glossary–2 bitmap A checkerboard dot-by-dot representation of a text character or graphic image. brightness The whiteness of a piece of paper. Brighter paper is usually associated with higher quality papers. buffer An electronic memory where text is stored for processing by the printer. calliper The thickness of a sheet of paper.
- Page 295 Glossary–3 density The relative darkness of print or the amount of white that shows through the printed characters. desktop publishing A system that provides you with the ability to pro- duce publication-quality documents. dialog box A box that contains a message requesting informa- tion from you.
- Page 296 Furnish can also include how fiber pulp is manufactured. fuser rollers The rollers inside the Silentwriter SuperScript 660 that fuse toner to paper. The rollers should be cleaned whenever the Toner cartridge is clamped. fusing...
- Page 297 Glossary–5 handshake A protocol that allows devices to exchange informa- tion about the connection between them, such as when to start exchanging data. icon An image that graphically represents an object, concept, or message. initialization A state where all settings return to their default values.
- Page 298 Glossary–6 The acidity/alkalinity of paper. point A unit of measurement for sizing type. One point equals 1/72 inch. porosity The openness of a sheet as determined by the spac- ing between fibers. Sheet porosity is usually evalu- ated by measuring its air permeability and is ex- pressed in Gurley units.
- Page 299 Glossary–7 proportional A printing method in which the distance between spacing characters varies according to the width of the characters. Random-access memory. Memory in which infor- mation can be accessed in an arbitrary manner. This memory can be written to and read from. Read only memory.
- Page 300 Glossary–8 Tools group Group that includes the NEC SuperScript Print Manager, and NEC SuperScript TEST Program. typeface The design of the characters in a font. Virtual Memory A technology that allows memory to be expanded more than the actual main memory of the computer.
- Page 301 Glossary–9 WYSIWYP What You See Is What You Print In the Windows environment, the fonts handled by the computer are displayed on the screen and printed on the printer with exactly the same attributes. It means that what is displayed on the screen will be output exactly produced by the printer.
- Page 302 Glossary–10...
- Page 303 index–1 Index Cleaning the Printer Mecha- Symbols nism 9-9 200-sheet Paper Hopper 1-7, Coated paper 6-5 1-9, 8-7, 9-24 Code/Sequence/Commands Installing 8-7 A-14 Manual Feed 8-12 Compliance C-4 Removing 8-14, 9-24 Connect Port 5-6 2Up/4Up 3-7 Control Codes A-23 Cover Open 5-10 Cover Page 1-6 Create a Cover / Trailer Accessories 1-8...
- Page 304 index–2 Fonts in GDI mode 7-2 Length D-2 Fonts in PCL Mode 7-3 Pin Assignments D-2 Forms Window 3-14 Removing 9-25 Fuser Unit 2-13 Specifications D-1 ISO Substitution Table A-16 GDI mode 1-3, 3-2 GDI Option 3-8 Job Name 5-9 Advanced Options 3-8 Cover Page 3-14 Density 3-13...
- Page 305 index–3 Paper and Media Use 6-5 Paper Guide Ribs 2-13 Operating Requirements 2-4 Paper Jam 5-11, 10-3 Options 1-7 Fuser Unit 10-6 Orientation 3-6 Hopper 10-5 Output Paths 8-15 Points to Check 10-8 Face Down Door 8-16 Removing 10-4 Face Up Tray 8-16 Paper Out 5-11 Output Quality 10-25 Paper Properties 6-3...
- Page 306 index–4 GDI Mode 3-2 Toner Saving Mode 5-6 PCL Print Mode 3-23 Show Me 5-10 Print Options 8-1 Status Messages 5-10 Print Overlay (B/W) 1-7 Cable Problem 5-12 Print Overlay (Color) 1-7 Cover Open 5-10 Print Quality Maintenance 10-3 Duplex Printing 5-10 Print Speed C-2 Engine Error 5-11 Print Status Window 5-1...
- Page 307 index–5 Stop 5-10 Conversion A-17 Streaked Page 10-28 SuperScript Print Manager 4-1 Add 4-8 Saving Downloaded Fonts and Delete 4-8 Macros 3-26 Help 4-5 Scaling 3-12 Options 4-3 Selecting Paper 6-1 Priority 4-3 Serial Number 2-11 Show Toolbar Titles 4-4 Setting Up 2-1 Time Format 4-4 Sharp Edge Technology...
- Page 308 index–6 Toner Saving Mode 1-6, 5-6, Trailer Page 1-7 Transfer Roller 2-13 Transparency Film 6-10 Transporting the Printer 9-23, 9-26 Checklist 9-26 Troubleshooting 10-1 TrueType 7-2 TrueType Fonts 7-4 Installing 7-4 Type 1 7-2 Unpacking 2-2 Upper Cover 2-10 Using Fonts 7-1 Virtual memory 10-12, 10-35 Allocating 10-35 Weight C-3...
- Page 309 (For United States Use Only) FEDERAL COMMUNICATIONS COMMISSION RADIO FREQUENCY INTERFERENCE STATEMENT WARNING: Changes or modifications to this unit not expressly approved by the party responsible for compliance could void the user’s authority to operate the equipment. NOTE: This equipment has been tested and found to comply with the limits for a Class B digital device, pursuant to Part 15 of the FCC Rules.
- Page 310 Employer Responsibilities Because ozone can be an irritant, various regulatory agencies have estab- lished limits to the amount of ozone to which employees may be exposed. The workplace specifications are: A person may not be exposed to an average concentration of greater than 0.1 part per million (PPM) of ozone for a period of eight hours.
- Page 311 LASER SAFETY This printer is certified as a Class 1 laser product under the U.S. Depart- ment of Health and Human Services (DHHS) Radiation Performance Standard according to the Radiation Control for Health and Safety Act of 1968. This means that the printer does not produce hazardous laser radia- tion.
- Page 312 Ozone is only generated while the printer is printing. UL Standards for Ozone The only existing standard for ozone emissions has been established by Underwriters Laboratory (UL). All Silentwriter SuperScript 660 family printers meet this standard when shipped from the factory to our customers.
- Page 313 The NEC SuperScript 660 meets the requirements of EPA ENERGY the Environmental Protection Agency's Energy Star STAR COM- Computers program for printers. The purpose of this PUTERS program is to promote the manufacturing and mar- AWARD keting of energy-efficient office automation equip- ment, thereby potentially reducing combustion- related pollution.