Marantz SR9600 User Manual
Marantz sr9600: user guide
Hide thumbs
Also See for SR9600:
- Service manual (231 pages) ,
- Specification (25 pages) ,
- Specification sheet (2 pages)
Table of Contents
Advertisement
Quick Links
Advertisement
Table of Contents

Related Manuals for Marantz SR9600


Summary of Contents for Marantz SR9600
- Page 1 Model SR9600 User Guide AV Surround Receiver...
-
Page 2: Important Safety Instructions
IMPORTANT SAFETY CAUTION INSTRUCTIONS RISK OF ELECTRIC SHOCK READ BEFORE OPERATING EQUIPMENT DO NOT OPEN This product was designed and manufactured to meet strict quality and safety standards. There are, CAUTION: TO REDUCE THE RISK OF ELECTRIC SHOCK, however, some installation and operation precautions which you should be particularly aware of. DO NOT REMOVE COVER (OR BACK) Read these instructions. -
Page 3: Table Of Contents
RECORDING MACROS ..........15 • In highly humid or poorly ventilated environments. ATTENUATION TO ANALOG INPUT SIGNAL ....55 SHOW THE SR9600 STATUS ON THE RC3200B ..16 • Dusty. LISTENING THROUGH HEADPHONES ...... 55 WORKING WITH MODES ..........17 •... -
Page 4: Description
DVD’s, LD’s, and CD’s. When the THX mode of the SR9600 is on, three T h e T H X U l t r a 2 s p e c i f i c a t i o n p r o v i d e s... - Page 5 4. 96/24 5.1-channel sound with full-quality full- Dolby Surround encoded video cassettes and Circle Surround II, TruSurround XT, Dialog Clarity, motion video, for music programs and motion television programs with enhanced depth and TruBass, SRS, and symbol are trademarks picture soundtracks on DVD-video. spatiality.
-
Page 6: Features
It offers excellent transient response and superb and completely symmetrical. On the front panel of sonic transparency. the SR9600, buttons are kept to a minimum. Source selectors and volume controls are intuitively placed. The SR9600 is here to perform in your unrivaled... -
Page 7: Accessories
• 9 bands x 7 ch GEQ • 8 ch level meter • DSD direct conversion • DSD to PCM converter • MRAC (Marantz Room Acoustic Calibration) • Improved station name input method, 50 presets • Auto adjust function for speaker distance settings (delay time) •... -
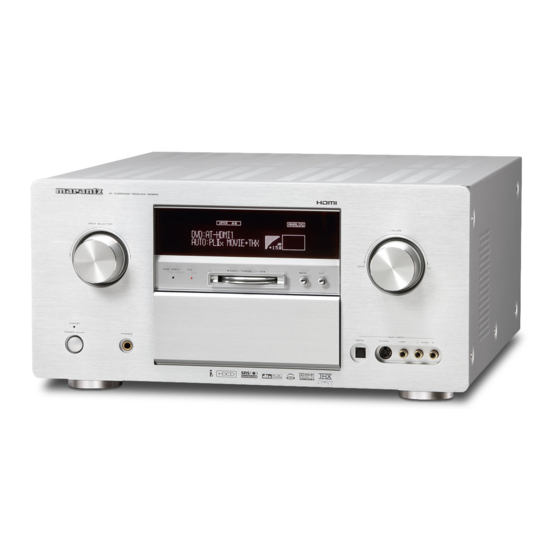
Page 8: Front Panel
AUX1 INPUT jacks system and tuner function. MULTI (Multiroom) button This jack may be used to listen to the SR9600’s These auxiliary audio/video input jacks accept the Press this button to activate the Multiroom system. output through a pair of headphones. Be certain... -
Page 9: Fl Display And Indicator
SURROUND mode / i.LINK indicator When you want to use the controls behind the front This indicator is illuminated when the SR9600 is in panel door, open the door by gently pressing on This indicator is illuminated to show that the... -
Page 10: Rear Panel
“THROUGH” and an HDMI device is Connect these jacks to optional audio power These are the analog audio inputs and outputs. connected to the SR9600.(See page 44) i.LINK connector amplifiers or video display devices to listen and There are 9 audio inputs (6 of which are linked to... - Page 11 By sending the pure DVD component video signal The SR9600 can be powered by 120 V AC only. directly, the DVD signal forgoes the extra processing that normally would degrade the...
-
Page 12: Remote Controller Rc3200B
A Select buttons for navigation bar the remote control unit and the infrared sensor of These buttons control the navigation bar in LCD the SR9600 should be less than about 16.4 ft (5 touch screen. Each function may also be provided Close until it clicks. -
Page 13: Activating The Rc3200B
THE BATTERY STATUS TURNING ON THE DISPLAY AND THE BACKLIGHT ACTIVATING THE RC3200B OPERATING DEVICES The battery icon indicates the status of your RC3200B’s display can be activated in two different When the RC3200B is switched on for the first time To operate devices on your RC3200B you have to batteries. -
Page 14: A/V Amp
This button is used to activate the Cinema Re- Power on and off EQ™. Press it again to deactivate. (see page 50) These buttons are used to turn the SR9600 on or off. This button is used to select the Auto digital input, fixed digital input or analog input. -
Page 15: Multi Room A/B
TONE ADJUST (PAGE 6/8) SPEAKER A/B (PAGE 7/8) MULTI ROOM A/B SOURCE (PAGE 2/6) MULTI ROOM A/B MULTI ROOM A/B (PAGE 1/6) Treble + and – Spk-A on and off DVD, TV, CD, These buttons are used to adjust the tone of high- These buttons are used to turn speakers A on and VCR1, DSS, CD-R, frequency sound. - Page 16 MULTI ROOM A/B TUNER 1 (PAGE 3/6) MULTI ROOM A/B TUNER 1 KEY (PAGE 4/6) MULTI ROOM A/B TUNER 2 (PAGE 5/6) MULTI ROOM A/B TUNER 2 KEY (PAGE 6/6) wed Jun 01 4:40 Multi room B MULTI-B : Tuner 1 Tuner 1 FM and AM Tuner 1 FM and AM Tuner 2 FM and AM...
-
Page 17: Tuner 1/2
This button is used to display a list of preset stations on the OSD menu system. Tap Next. Power on and off The device screen with Macro labels appears. These buttons are used to turn the SR9600 on or off. wed Jun 01 4:40 -- MACRO --... -
Page 18: Show The Sr9600 Status On The Rc3200B
A message screen appears. Press the page up and page down buttons to button. The RC3200B communication with the SR9600 is go to different screens of the same device or capable of two-way, It can display the status of the press the Home button to go to the Home SR9600. -
Page 19: Working With Modes
Select the desired mode from the Mode Note: WORKING WITH MODES ADJUSTING THE SETTINGS screen. • The backlight cannot stay active longer than the RC3200B starts up in the Use mode. This mode is The RC3200B settings can be adjusted in the LCD. - Page 20 CALIBRATE REVERT Adjust the Time Calibration is successful. Calibrate the LCD touch screen if the position you Tap “+” or “–” once to adjust the time 1 minute Warning: touch on the screen does not match the intended up or down. •...
-
Page 21: Learning Commands
THE LEARN SEQUENCE Press and hold the button on the existing LEARNING COMMANDS remote control unit you want to learn to the Set the RC3200B to the Use mode. If an IR code or a brand is not in the database, you RC3200B. -
Page 22: Rc3200B Setup
You can find more information and updates to the window-cleaning solution. • 16 MB of free hard disk space screens. software at “http://www.marantz.com”. Do not use a corrosive detergent or an abrasive Never use an actual pen, pencil or other sharp • Free serial port RC3200Setup is a visual editor for creating and sponge. -
Page 23: Connections
Surround left and right speakers CONNECTIONS CONNECTING SPEAKERS When the SR9600 is used in a surround setup, the preferred location for the surround speakers is on the side walls of the room, at or slightly behind the SPEAKER PLACEMENT POWERED listening position. -
Page 24: Connecting Audio Components
Caution: CONNECTING AUDIO COMPONENTS • Be sure to use speakers with the specified impedance as shown on the rear panel of the SR9600. CD RECORDER / MD DECK • To prevent damage to circuitry, do not let the bare speaker wires touch... -
Page 25: Connecting Video Components
FM(75Ω) SURR. VIDEO LEFT FM(75Ω) VIDEO LEFT INPUT-1 INPUT-2 OUTPUT OUTPUT (DVD) (DSS) the S-VIDEO or component jack on the SR9600, it is INPUT-1 INPUT-2 HDMI (DVD) (DSS) Ver 1.1 OUTPUT-1 HDMI OUTPUT-1 OUTPUT-1 Ver 1.1 SURR. not necessary to connect the the VIDEO (composite) RIGHT SURR. - Page 26 MODEL NO. SR9600 FLASHER RECEIVER AC IN COAX An HDMI cable (sold separately) is used to connect DIGITAL the HDMI jack on the SR9600 with the HDMI jack on AC 120V 60H Z USB AUDIO RS232C DC OUT EMITTER OUT...
-
Page 27: Advanced Connection
Therefore you need to aim Hold down the MULTI button and the MENU the remote control only at the SR9600. Also, if a button on the front panel at the same time for Marantz power amplifier (some models excluded) -
Page 28: Connecting The Antenna Terminals
: MINIMUM 6 OHMS COMPONENT FRONT A AND B : MINIMUM 8 OHMS VIDEO OUTPUT-2 UNSWITCHED 1A 120W MAX Note: MODEL NO. SR9600 AC IN FLASHER RECEIVER COAX • Connect the shielded grounding wire (black) to the DIGITAL AC 120V 60H Z... -
Page 29: Connecting For Multiroom Listening
/MULTI SPK. /MULTI SPK. FRONT A FRONT A /SPK. C /SPK. C RIGHT RIGHT UNSWITCHED 1A 120W MAX LEFT LEFT MODEL NO. SR9600 MULTIROOM A FLASHER RECEIVER AC IN COAX SURR.BACK SURR.BACK FRONT B FRONT B /MULTI SPK. /MULTI SPK. -
Page 30: Connecting I.link Components
DIGITAL OUT jacks. • With some source devices, it takes time before sound is produced. This time is needed to detect the status of both the device and the SR9600. The amount of time will differ according to the connected player. -
Page 31: Connecting Other Equipment
EMITTER OUT shut power to the SR9600 off and turn it back on. M E S S A G E S W H E N A N i . L I N K D E V I C E I S... -
Page 32: Setup
ONSCREEN DISPLAY MENU SYSTEM LEFT button RIGHT button The SR9600 incorporates an onscreen menu system, which makes various operations possible by using the cursor ( , , ) and OK/ENTER buttons on the remote control unit or on the front panel. - Page 33 Note: • After you complete this portion of the setup, move cursor to “RETURN” with the cursor buttons and press the OK/ENTER button. MAIN MENU M A I N M E N U 1 . I N P U T S E T U P 2 .
-
Page 34: Input Setup
1 INPUT SETUP This menu is for setting the matching the output of connected audio devices and the input jacks of this receiver. 1 . I N P U T S E T U P F U N C I N P U T S E T U P •... - Page 35 1-1 FUNC INPUT SETUP 1-2 7.1 CH INPUT SETUP HDMI Select desired channel with the cursor (ASSIGNABLE DIGITAL INPUT) Assign the number of an HDMI input jack to the buttons. This menu is for adjusting the speaker levels for device. Using the cursor buttons, adjust the The 8 and F (Front) digital inputs can be assigned...
- Page 36 AUTO INPUT SEL: Deletes the character left of the cursor in the can be up to 10 characters long, including spaces. Select whether to automatically set the SR9600 assigned as an input source. “RENAME” area one character at a time.
-
Page 37: Spkr (Speaker) Setup
Note: 2 SPKR (SPEAKER) SETUP • After you complete this the portion of the setup, After you have installed the SR9600, connected all press the OK/ENTER button. The cursor will the components and determined the speaker move to “RETURN” and press the OK/ENTER layout, it is now time to perform the settings in the button to go to the Sub-menu. - Page 38 Either press the MRAC button on the front Measurement results are displayed. Check Since settings are displayed on the monitor during panel of the SR9600, or select “2. SPKR the speaker system. Speaker settings that would be difficult to configure setup, turn the monitor on.
- Page 39 S U R R . L L A R G E 1 0 0 - 1 . 5 for the SR9600. Other microphones do not C E N T E R L A R G E S U B Y E S 2 5 0 + 1 .
- Page 40 When you use a subwoofer, you can select the create the proper sound space that the SR9600 • The setting for surr.back L and surr.back R cutoff frequency for the small speakers used.
- Page 41 (Note that this can be adjusted to any level between -12 and +12 dB in 0.5 dB increments.) Advanced Speaker Array (ASA) The SR9600 will now emit the pink noise from SURR.B SPKR: TOGETHER, CLOSE or APART the center speaker.
- Page 42 2-4 BASS PEAK LEVEL After you complete this portion of the setup, move the cursor to “RETURN” with , , cursor Select “2. SPEAKER SETUP” from the MAIN buttons and press OK/ENTER button to go to the MENU. 2. SPKR SETUP menu. Select “BASS PEAK LEVEL”...
-
Page 43: Surround Setup
3-1 CHANNEL LEVEL 3 SURROUND SETUP Select “3. SURR SETUP” from MAIN MENU This menu is for setting surround effect parameters with cursor buttons and press the OK/ for the various surround input signals so as to bring out the live audio effect of your speaker system. ENTER button. - Page 44 After you complete this portion of the setup, move speaker setting in the SPEAKER SIZE, then this In this mode, the SR9600 includes three controls This mode expands the sound image from the cursor to “RETURN” with the , , cursor setting will not appear.
-
Page 45: Video Setup
4-1 VIDEO AUTO ON 4-2 VIDEO COLOR BAR 4 VIDEO SETUP This menu is for synchronizing the SR9600 with Select “4. VIDEO SETUP” from MAIN MENU This menu is for configuring video settings. video components so that they can be powered 4 . -
Page 46: Preference
S E T U P T R I G - 4 : R E M O T E SR9600 or output it through the receiver to a TV The sleep mode is available when the multiroom D V D T A P E or projector. - Page 47 5-2 DC TRIGGER SETUP Note: • This setting can be changed when the SURR B is This unit has 4 DC trigger control jacks, which can set to “NONE” in the SPEAKER SIZE menu and be used to link with input functions for the main “SPEAKER C”...
-
Page 48: Acoustic Eq
6 ACOUSTIC EQ This display is for setting up the equalizer and changing the Equalizer mode. 6 . A C O U S T I C E Q . E Q . M O D E O F F • PRESET G. EQ 1 & 2 ADJ : P R E S E T G . -
Page 49: Audio Status
6-1 PRESET G. EQ 1 & 2 ADJ 6-2 CHECK AUTO 1 & 2 7 AUDIO STATUS These modes allow you to set a 9-band graphic These menus are for confirming the results of This menu provides current audio information. equalizer for each of the 7 channels. -
Page 50: Basic Operation (Playback)
↔ ↔ ↔ ↔ VCR2 ↔ ↔ ↔ ↔ ↔ • The video convert feature constantly monitors • As the input source is changed, the SR9600 will BASIC OPERATION ↔ ↔ ↔ ↔ TAPE ↔ ↔ ↔ ↔ ↔ CD-R ↔... -
Page 51: Selecting The Surround Mode
To select the auto surround mode during playback, buttons on the remote control unit. press the AUTO button on the front panel. To program the SR9600 for automatic standby, To increase the volume, turn the VOLUME knob To add the THX effect to the Auto Surround mode, tap the Sleep on the remote control unit. -
Page 52: Night Mode
Jun 01 4:40 and off. The tonal balance of a film soundtrack will projector, etc.) connected to the SR9600, a time lag A/V Amp be excessively bright and harsh when played back can occur between image signal processing and Mode over audio equipment in the home. -
Page 53: Surround Mode
AUTO 2 MODE Note: SURROUND MODE When this mode is selected, the SR9600 • When playing Dolby Digital Surround EX- (Dolby Digital, Pro Logic IIx MOVIE, Pro Logic IIx encoded software in 6.1 channels, it is required to determines whether the digital input signal is Dolby MUSIC, Pro Logic IIx GAME) select the THX Surround EX mode. - Page 54 The DTS Neo:6 decoder has near-discrete This mode cannot be used when an analog input stereo is input. player to the SR9600 digitally. This is because the properties in the frequency characteristics of the has been selected. With Dolby Digital and DTS sources, the 5.1 digital signal has been processed (such as the channels as well as in channel separation.
- Page 55 AUTO Dolby Surr.EX Dolby Digital EX 2 DIGITAL EX L, C, R, SL, SR, S, LFE mode selector on the SR9600 or the remote control 2 DIGITAL Dolby D (5.1ch) Dolby Digital 5.1 L, C, R, SL, SR, LFE Dolby D (2ch) Dolby Digital 2.0...
- Page 56 Notes: Output Channel Front Information Display Surround Mode Input Signal Decoding SL SBL • Dolby Digital (2 channel L/R): Speakers for signal SubW Signal Format Indicators Channel Status SR SBR with Dolby Surround are fully equipped. Virtual Dolby Surr.EX Virtual 2 DIGITAL EX L, C, R, SL, SR, S, LFE 2 DIGITAL...
-
Page 57: Other Function
LISTENING THROUGH HEADPHONES selected automatically. or DH3 is selected. This jack may be used to listen to the SR9600’s The L/R level can be set in the ±10 dB range. output through a pair of headphones. Be certain that AUTO POWER OFF Notes: the headphones have a standard 1/4”... -
Page 58: Video On/Off
SELECTING ANALOG AUDIO INPUT RECORDING AN ANALOG SOURCE OR DIGITAL AUDIO INPUT When no video signal is connected to the SR9600 You can select the display mode for the front panel In normal operation, the audio or video source or a DVD, etc., is connected directly to your TV, the display on the SR9600. -
Page 59: 7.1 Ch Input
PRE OUT SW (subwoofer) jack. The video input source for 7.1 channel input is set The SR9600 allows you to select speaker system A wed Jun 01 4:40 on the 7.1 CH INPUT SETUP menu. (See page 33) AV SURROUND RECEIVER SR9600 and speaker system B for the front L/R channels. -
Page 60: Basic Operation (Tuner)
Tuner 1 Tuner 1 Tap and hold the Tuning for 1 sec or Tuner 1 : Key/RDS Tuner 1 : Main AV SURROUND RECEIVER SR9600 Tuner 1 : Main This receiver incorporates two tuners with more. VOLUME VOLUME INPUT SELECTOR completely independent remote control buttons. -
Page 61: Preset Memory
Tuner 1 Tuner 1 Tuner 1 Tuner 1 : Main Tuner 1 : Main Tuner 1 : Key/RDS AV SURROUND RECEIVER SR9600 AV SURROUND RECEIVER SR9600 For each station, you can memorize the frequency VOLUME INPUT SELECTOR VOLUME and reception mode if desired. - Page 62 A → B → C → 1 → A using the following procedure. channel to be entered using alphanumeric D → E → F → 2 → D AV SURROUND RECEIVER SR9600 AV SURROUND RECEIVER SR9600 characters. G → H → I → 3 → G...
-
Page 63: Multiroom System
10 seconds. OPERATION TO MULTI ROOM SPEAKER WITHOUT rooms other than the room in which the SR9600 is Select the input source using the INPUT THE REMOTE CONTROL UNIT. -
Page 64: Operation Of The Multiroom Outputs With The Remote Control From Multi A Or B Room
The remote control units of M U L T I S P K R : O F F other Marantz products can also be used to control S L E E P T I M E R : 9 0 m i n . -
Page 65: Troubleshooting
Marantz authorized dealer or the Marantz Service Center in your country. Ca not select the CSII mode. The input signal is incompatible. -
Page 66: Hdmi
SR9600 is not correctly set. explained on page 34. Power to the SR9600 is off. Turn on the power to the SR9600. (When the SR9600 is on The i.LINK output of the source Set i.LINK output so that it turns on, as standby, HDMI connections component (DVD, etc.) is not on. -
Page 67: Technical Specifications
Should the operation or display seem to be abnormal, GENERAL reset the unit with the following procedure. AV SURROUND RECEIVER SR9600 AV SURROUND RECEIVER SR9600 With the SR9600 turned on, press and hold the Power Requirement ......AC 120 V 60 Hz VOLUME VOLUME INPUT SELECTOR... - Page 68 You can find your nearest authorized distributor or dealer on our website. U.S.A. Marantz America, Inc. 1100 Maplewood Drive, Itasca, IL 60143, U.S.A. EUROPE Marantz Europe B.V. P.O. Box 8744, 5605 LS Eindhoven, The Netherlands Manufactured under license from Dolby Laboratories. “Dolby”, “Pro Logic”, “Surround EX” and the double-D symbol are trademarks of Dolby Laboratories.