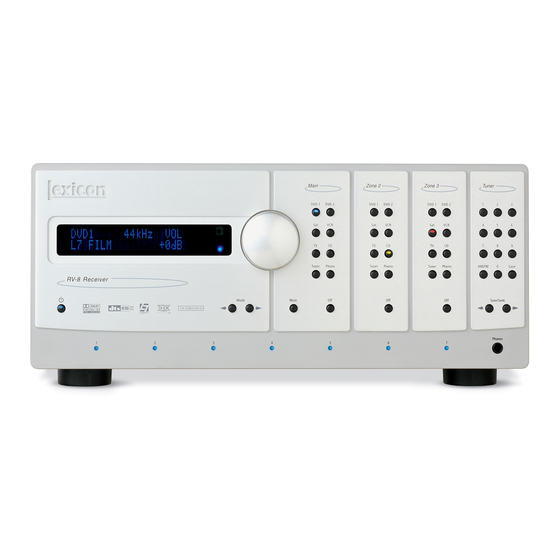
Lexicon RV-8 User Manual
Lexicon rv-8: user guide
Hide thumbs
Also See for RV-8:
- User manual (262 pages) ,
- Service manual (248 pages) ,
- Software upgrade instructions (12 pages)
Table of Contents
Advertisement
Quick Links
Advertisement
Chapters
Table of Contents
Troubleshooting

Related Manuals for Lexicon RV-8


Summary of Contents for Lexicon RV-8
- Page 1 Power Amplifier RV-8 Receiver User Guide User Guide...
-
Page 2: Important Safety Instructions
IMPORTANT SAFETY INSTRUCTIONS Read these instructions. 11. Only use attachments/accessories specified by the • Do not install the unit in an unventilated rack, or directly manufacturer. above heat-producing equipment such as power Keep these instructions. amplifiers. Observe the maximum ambient operating 12. - Page 3 "DTS," "DTS-ES," "Neo:6, " and “DTS 96/24” are trademarks of Digital Theater Systems, Inc. Sales Fax: 781-280-0495 Service Fax: 781-280-0499 "Lexicon," "LOGIC7," and the L7 logo are registered trademarks of Harman International Industries, Inc. U.S. Patent Nos. D454,553; D454,860; 5,796,844; 5,870,480 and other worldwide patents issued and pending. Product Shipments 16 Progress Road Billerica, MA 01821-5730 USA Hammerhead is a trademark of Analog Devices, Inc.
-
Page 4: Introduction
Lexicon DOCUMENTATION CONVENTIONS This document contains general safety, installation and operation instructions for the RV-8. It is important to read this user guide before attempting to use this product. Pay par- ticular attention to safety instructions. The following symbols are used in this document:... -
Page 5: Table Of Contents
Section 1: Getting Started About the RV-8 ........1-2 Highlights •... - Page 6 Introduction Lexicon Section 3: SETUP 5.1 2-CHANNEL • 5.1 MONO LOGIC • 5.1 MONO SURR • 5.1 MONO • (continued from page iii) FILM • MUSIC • • MUSIC • • 2-CHAN • 5.1a FILM • 5.1a MUSIC • 5.1a SPEAKER SETUP.
-
Page 7: Us Important Safety Instructions
Introduction RV-8 ENGLISH DEUTSCH IMPORTANT SAFETY INSTRUCTIONS WICHTIGE SICHERHEITSHINWEISE • Save these instructions for later use. • Bewahren Sie diese Anleitungen zur späteren Benutzung auf. • Follow all instructions and warnings marked on the unit. • Befolgen Sie alle Anleitungen und alle Warnhinweise auf dem Gerät •... -
Page 8: Es Instrucciones De Seguridad Importantes
Introduction Lexicon ESPAÑOL FRANÇAIS INSTRUCCIONES DE SEGURIDAD IMPORTANTES INSTRUCTIONS IMPORTANTES RELATIVES À LA SÉCURITÉ • Guarde estas instrucciones para futuras referencias. • Conservez ces instructions pour pouvoir vous y référer ultérieurement. • Siga todas las instrucciones y tenga en cuenta las advertencias que aparecen en la unidad y en las instrucciones de funcionamiento. -
Page 9: It Importanti Norme Di Sicurezza
Introduction RV-8 ITALIANO PORTUGUESE IMPORTANTI NORME DI SICUREZZA INSTRUÇÕES IMPORTANTES DE SEGURANÇA • Conservare le presenti norme per l’utilizzo futuro. • Guarde essas instruções para uso posterior. • Seguire sempre tutte le istruzioni e gli avvertimenti segnati sull’unità e nelle istruzioni •... -
Page 10: Dk Vigtig Information Om Sikkerhed
Introduction Lexicon DANSK SUOMI VIGTIG INFORMATION OM SIKKERHED TÄRKEITÄ TURVALLISUUSOHJEITA • Gem denne vejledning til senere brug. • Säilytä nämä ohjeet tulevaa käyttöä varten. • Følg alle anvisninger og advarsler på apparatet. • Seuraa kaikkia yksikköön merkittyjä ohjeita ja varoituksia. -
Page 11: No Viktig Informasjon Om Sikkerhet
Introduction RV-8 NORSK SVENSKA VIKTIG INFORMASJON OM SIKKERHET VIKTIGA SÄKERHETSFÖRESKRIFTER • Ta vare på denne veiledningen for senere bruk. • Spara dessa föreskrifter för framtida bruk. • Følg alle anvisningene og advarslene som er angitt på apparatet. • Följ alla anvisningar och varningar som anges på enheten. -
Page 12: Us Unpacking And Inspection
Introduction Lexicon Unpacking and Inspection Contenu de l’emballage et inspection After unpacking the unit, save all packing materials in case the unit Après avoir ouvert l’emballage, conservez-le pour tout retour. ever needs to be shipped. Thoroughly inspect the modules and Inspectez avec soin les modules et les matériaux d’emballage pour... -
Page 13: Section 1: Getting Started
About the RV-8 ........ - Page 14 The rear-panel houses two RS-232 connectors; one capa- ble of performing configuration downloads and flash memory soft- The RV-8 is one of the most advanced audio and video control ware upgrades and the other capable of supporting future develop- centers available.
-
Page 15: Getting Started
Headphone output with LOGIC7 processing • Two 32-bit DSP engines for custom processing Built to professional standards, the RV-8 is designed to serve as the • Separate DSP engine for decoding compressed audio sources control center in any high-quality home theater. Even the most •... -
Page 16: Installation Considerations
• Flash memory software upgrade capabilities • Install the RV-8 on a solid, flat, level surface such as a table or • Two internal expansion slots for future developments shelf. The RV-8 can also be installed in a standard 19-inch •... - Page 17 RF-emitting devices that might cause inter- ference. • Place the RV-8 on a thick rug or carpet or cover the RV-8 with a cloth, as this might prevent proper cooling. • Place the RV-8 on a windowsill or in another location in which it will be exposed to direct sunlight.
-
Page 18: Remote Control Battery Installation
3 in the illustration below. Make sure the batteries are correctly that prevents it from operating the RV-8. When this occurs, follow inserted observing the proper polarity. the instructions below to replace the batteries. Normal operation will resume when the new batteries are installed. - Page 19 Basic Operation Front-Panel Overview ........2-2 Rear-Panel Overview .
-
Page 20: Front-Panel Overview
Basic Operation Lexicon FRONT-PANEL OVERVIEW The RV-8 front-panel is shown above. The numbers in the front-panel illustration correspond to the numbered items that begin on the next page. -
Page 21: Basic Operation
A/D converters are overloading. A blue LED source. For instance, if the current input source is using the lights when the RV-8 is powered on and activated – even if the DVD1 input, press and hold the DVD1 input selection but- FRONT PANEL DISPLAY menu STATUS parameter is set to ton in the desired zone. - Page 22 LED on this button. Power is still supplied to Select the input in the Main Zone. When an input is selected, the RV-8 when it is in standby. When the RV-8 is in standby, a blue LED lights on the corresponding input selection button.
- Page 23 For into the headphone output, all Main Zone amplifier outputs instance, the RV-8 briefly activates mute when changing are muted. If amplifier outputs 3 and 7 are assigned to Zone 2 input sources or listening modes.
-
Page 24: Rear-Panel Overview
Lexicon REAR-PANEL OVERVIEW Never make or break connections to the The RV-8 rear-panel is shown above. The numbers in these rear-panel illustrations correspond to the numbered items that begin on page 2-7. CAUTION RV-8 unless the RV-8 and all associated... - Page 25 Basic Operation RV-8 REAR-PANEL OVERVIEW When a 5.1-channel analog audio source is present in the Main Zone, input signals are sent to the Main Zone audio output connectors as indicated in the table below. When a 5.1-chan- Note: nel analog source is present in the Main Zone, only the Front...
- Page 26 “Var” and These connectors are reserved for future upgrades. adjust the Zone 2 volume. 11.Phono Input Connectors Provide a phono level input, which can be assigned to any of the eight RV-8 inputs. A 2-channel analog bypass path is avail- able...
- Page 27 17.Zone 2 Digital Audio Output Connectors (S/PDIF) RV-8 is powered on, and deactivated when the RV-8 is turned off from the rear-panel or by putting the RV-8 into standby. The Provides digital audio output in Zone 2. One S/PDIF coaxial trigger output connector labeled 1 can be configured for and one S/PDIF optical (Toslink) connector is available.
-
Page 28: Tuner Overview
For example: Preset 01: WABC 90.90 0-3-0. FM or Preset 02: WXYZ 1030 AM. Two antennas are supplied with the RV-8: one for AM and one for FM stereo. At a minimum, use of the supplied antennas is recommended to ensure consistent tuner Note: performance. -
Page 29: Tuner Presets
Editing Presets Press the buttons on the remote control. If, for example, It is possible to customize the name of each preset on the RV-8. preset 1 is loaded and the button is pressed, the RV-8 will load preset 2 (or the next available preset). If preset 1 is loaded and the... -
Page 30: Amplifier Overview
Understanding the Amplifier The RV-8 features a 7-channel power amplifier with 140W per The EDIT PRESET menu options are as follows: channel. The RV-8 can be configured so that all amplifier channels • Selecting LISTEN TO PRESET will load the preset frequency. -
Page 31: Headphone Overview
(continued from page 2-12) Understanding the Headphones Amplifier Channel Status Headphones can be connected to the RV-8 via the Headphone output on the front-panel. The headphone output follows the sig- Each channel has a blue Channel Status LED on the front-panel that nal selected in the Main Zone. -
Page 32: Remote Control Overview
MAIN MENU MAIN MENU The MAIN MENU shown at the right repre- The RV-8 remote control is designed to provide full operation of the MODE ADJUST sents the beginning of the menu structure. It RV-8, performing commands such as menu navigation that are not... - Page 33 Basic Operation RV-8 Menu Navigation (continued from page 2-14) Arrow Navigation Function(s) To open a menu on the remote control, press the Menu arrow. • When a menu is open, pressing the Menu arrow selects the highlighted menu item, which opens another menu, opens a parameter drop-down menu, or selects the highlighted parameter setting.
- Page 34 Basic Operation Lexicon Horizontal Bar Graphs MAIN MENU SETUP MODE ADJUST INPUTS Selecting some menu parameters opens a horizontal bar graph, AUDIO CONTROLS SPEAKERS TUNER PRESETS I/O CONFIG which indicates the position at which the current parameter setting DISPLAYS SETUP falls within the entire parameter range.
- Page 35 Basic Operation RV-8 REMOTE CONTROL BUTTONS 1. SYSTEM POWER OFF 2. Displays the name of the selected device. 3. POWER ON 4. Device and function buttons 5. Light 6. Displays page number/currently selected device 7. LCD Page change 8. FAVORITE 9.
-
Page 36: Main Page
Basic Operation Lexicon BUTTON HOME MAIN PAGE1 MAIN PAGE2 ZONE2 PAGE1 ZONE2 PAGE2 Enters RV-8 standby mode. Activates the RV-8. Displays the MAIN Selects the Dolby Displays the Zone 2 Reserved for future Displays the Main Zone command bank, Digital listening Status. - Page 37 Basic Operation RV-8 BUTTON ZONE3 PAGE1 ZONE3 PAGE2 DVD1 PAGE1 DVD1 PAGE2 Enters RV-8 standby mode. Reserved for future expansion. Activates the RV-8. Toggles RT-10 power. Opens and closes the RT-10 disc tray. Reserved for future Displays the Status of expansion.
- Page 38 CD player. Selects the Phono Toggles between MODE Selects the Phono Selects the Phono Deactivates the RV-8. command bank, setting the input to input for the Main input for Zone 2. which includes auto, analog, or Zone.
- Page 39 Displays Zone 3 Page 1 command bank. command bank. 2 command bank. command bank. Displays the Home command bank. Scrolls through Favorite Channel pages. Increases Zone 3 volume level in 1dB incre- Increases RV-8 Main volume level in ments. 1dB increments. 2-21...
- Page 40 Adjust the AUDIO CONTROLS menu History-dependent modes. Main Zone FADER parameter towards the back. If the RV-8’s built-in tuner is the currently selected input, press to skip back to History-dependent the next available preset. History-dependent Activates the Trigger output connector labeled 1.
- Page 41 MODE Decreases Subwoofer output in 1dB increments. Scrolls downward through RV-8 listening modes. If the RV-8’s built-in tuner is the currently Skips to the beginning of the current chapter selected input, press to skip back to the next or track. Subsequent presses skip to the begin- available preset.
- Page 42 ZONE2 PAGE1 History-dependent If the RV-8’s built-in tuner is the currently selected input, press once to tune to the next available tuner frequency. Pressing for 2 seconds activates the seek mode, which searches for the next available radio station. To enter Scan Mode, press and hold until the display shows SCAN or SCAN .
- Page 43 DVD1 PAGE1 DVD1 PAGE2 When RT-10 playback is activated, scans If the RV-8’s built-in tuner is the currently through the disc in reverse direction. selected input, press once to tune to the next available tuner frequency. Pressing for 2 sec-...
- Page 44 MODE History- If the RV-8’s built-in tuner is the currently selected input, pressing this button will save dependent the currently selected tuner frequency into a preset slot. Also use this button when programming the remote. See page C-4 for additional information.
- Page 45 MODE To enter values 10 and above on the RT- If the RV-8 built-in tuner is the currently select- 10. Press once for numbers in the teens, ed input, toggles between AM/FM frequency twice for numbers in the twenties, and so bands.
-
Page 46: Understanding The Zones
Lexicon UNDERSTANDING THE ZONES TWO-LINE STATUS The RV-8 features three zones: the Main Zone, Zone 2 and Zone 3. The two-line status provides information about the zone from The Main Zone is designed to control audio and video signals in which the RV-8 last detected a change in status. -
Page 47: Status Menus
Zone 3. It appears in include a second page, pressing the STAT2 button closes the the on-screen and front-panel displays when the RV-8 detects a menu. If this occurs, begin again with step 1. Zone 3 change. -
Page 48: 2Ch Status
Basic Operation Lexicon 2CH STATUS D STATUS • Provides information about 2-channel input sources. • Provides information about Dolby Digital input sources. • Features L and R level meters. • Features L, C, R, SL, SR and LFE level meters. - Page 49 Basic Operation RV-8 STATUS 5.1a BYPASS STATUS • Provides information about DTS(-ES) input sources. • Provides information about 5.1-channel analog bypass input sources when the MAIN ADV menu ANALOG BYPASS parame- • Features L, C, R, SL, SR, SB and LFE level meters. The SB level ter is set to ON.
-
Page 50: Digital Status
Basic Operation Lexicon 2CH BYPASS STATUS DIGITAL STATUS • Provides information about 2-channel analog input sources • Provides information about digital input sources for which a when the MAIN ADV menu ANALOG BYPASS parameter is set sample rate is detected, but no audio is present in the input to ON. -
Page 51: Status Menu Parameter Descriptions
When the parameter setting is MATRIX, a matrix-encoded source is INPUT The selected input detected. When the parameter setting is NONE, a matrix-encoded MODE The activated listening mode source is not detected. The RV-8 cannot automatically detect matrix encoding in non-flagged input sources. INPUT TYPE ANLG SAMPLE RATE 96kHz BIT RATE 32 to 640kbps or 754 to 1509.7kbps... - Page 52 (-27dBFS). When the dialog normalization value of the an unknown type of digital audio source is present. incoming signal is higher or lower, the DIALOG OFFSET parameter indicates the amount of adjustment the RV-8 makes to normalize dialog to -27dBFS. MIX ROOM...
-
Page 53: Status Menu Level Meters
Basic Operation RV-8 SURR MIX LVL +0.0dB, -3.0dB, -6.0dB Indicates the relative surround channel level that was used during the mixing process. WORD LENGTH 16 bits, 20 bits, 24 bits Indicates the word length of the audio data present in the input signal. - Page 54 SETUP SETUP ..........3-2 INPUT SETUP .
- Page 55 SETUP Lexicon SETUP I/O CONFIG Selecting the MAIN MENU SETUP option opens the SETUP menu as SETUP I/O CONFIG shown below. SETUP menu option descriptions begin below and Opens the I/O CONFIG menu, which can be used to configure the continue throughout this section.
-
Page 56: Input Setup
SETUP RV-8 VCR INPUT SETUP DVD1 INPUT SETUP TUNER SETUP NAME NAME DVD1 DIGITAL IN NONE DIGITAL IN COAX-1 SETUP TUNER SETUP ANALOG IN ANALOG-2 ANALOG IN NONE ANLG IN LVL AUTO ANLG IN LVL AUTO Opens the TUNER SETUP menu, which can be used to configure... -
Page 57: Changing Input Names
SETUP Lexicon which input is selected. The parameter settings on the right side are adjustable. Default parameter settings differ from input to input. The INPUT SETUP menus on the previous page indicate factory-default parameter settings for each input. MAIN MENU... - Page 58 SETUP RV-8 DVD1 INPUT SETUP INPUT SETUP MAIN MENU SETUP DVD1 NAME NAME DVD1 DVD1 DVD1 INPUTS MODE ADJUST INPUTS DIGITAL IN COAX-1 DVD2 AUDIO CONTROLS SPEAKERS ANALOG IN NONE PRESS MENU V TO DVD1 INPUT NAME TUNER PRESETS I/O CONFIG...
-
Page 59: Assigning Audio & Video Input Connectors
ASSIGNING AUDIO & VIDEO INPUT CONNECTORS message. (Press the Menu arrow to close the message The RV-8 has eight configurable inputs, each of which can be without restoring the factory-default name of the selected assigned to its eight digital audio, eight analog audio, the built-in input.) - Page 60 Likewise, whenever the DVD1 input appears as a step in a menu path, any other input can be substituted. DIGITAL IN Please note the following: COAX-1 to 4, OPTICAL-1 to 4, NONE • When no digital audio input connector is assigned, the RV-8 will SETUP INPUTS DVD1 DIGITAL IN...
-
Page 61: (Continued From
The SELECT parameter to DIGITAL (page 3-18). RV-8 has eight configurable inputs, in addition to the built-in tuner and the phono connector, which can be assigned to any of its eight •... - Page 62 Input level adjustment is not available when analog bypass is on. When the AUTO parameter is set to OFF, the RV-8 does not provide automatic adjustment of analog audio input levels. Rather, input Note: levels must be adjusted with the ANLG IN LVL MANUAL parameter (next page).
- Page 63 AUTO GAIN parameter reflects the setting of the ANLG IN LVL Note: menu MANUAL parameter.) When the AUTO parameter is set to ON, the RV-8 will not make adjustments that exceed the ANLG IN LVL When the AUTO parameter is set to ON, the AUTO GAIN menu MANUAL parameter setting.
- Page 64 S-video input connector for the selected indicate input levels for both analog and digital audio input input. The RV-8 has eight configurable inputs, each of which can sources. However, ANLG IN LVL menu input level adjustments only be assigned to any of its five composite or five S-video input affect analog audio input sources.
- Page 65 The RV-8 has eight configurable inputs, each of which can be assigned to any of its three component video input connectors. Alternatively, COMPONENT IN can be assigned to VIDEO. This will cause the composite or S-video signal selected for the VIDEO IN parameter to be converted to component output.
-
Page 66: Selecting Preferred Listening Modes
• If the DVD1 input is selected and a 2-channel source is present, the RV-8 activates the LOGIC7 FILM listening mode. If a Dolby Digital source becomes present, the RV-8 automatically acti- vates the 5.1 LOGIC7 FILM listening mode. - Page 67 USE LAST, whenever a new input is selected or a new 2-channel • The RV-8 automatically activates a DTS neo:6 listening mode if source is present, the RV-8 activates the listening mode that was a DTS neo:6 listening mode was activated the last time a last used with a 2-channel source.
- Page 68 Opens the D MODE menu shown above, for selecting a pre- ferred listening mode for Dolby Digital input sources. The RV-8 automatically activates the selected listening mode whenever a new input is selected or a new Dolby Digital source is present.
- Page 69 DTS(-ES) source is present. When set to USE LAST, whenever a new input is selected or a new DTS(-ES) source is present, the RV-8 activates the listening mode that was last used with a DTS(-ES) source.
- Page 70 5.1a MUSIC cannot be selected as the preferred listening mode for 5.1-channel analog sources. However, when the 5.1a parameter is set to USE LAST, the RV-8 will activate 5.1a MUSIC if this listening mode was activated the last time a 5.1-channel analog source was present.
- Page 71 SETUP Lexicon CONFIGURING ADVANCED ZONE SETTINGS DVD1 INPUT SETUP MAIN MENU SETUP INPUT SETUP DVD1 MAIN ADV NAME DVD1 MODE ADJUST INPUTS INPUTS DVD1 DVD1 INPUT SELECT DIGITAL DIGITAL IN COAX-1 AUDIO CONTROLS SPEAKERS DVD2 ANALOG BYPASS ANALOG IN NONE...
- Page 72 MAIN ADVANCED INPUT SELECT When the INPUT SELECT parameter is set to AUTO, the RV-8 will not select the assigned analog audio Controls the interaction of the digital and analog audio input input connector when a valid digital audio input connectors assigned for the selected Main Zone input.
- Page 73 When a PCM, Dolby Digital or DTS compatible with PCM (44.1kHz, 48kHz, can be used to assign an analog audio (-ES) source is present, the RV-8 auto- 88.2kHz and 96kHz), Dolby Digital and input connector for the selected input. matically selects the assigned digital DTS(-ES) sources.
- Page 74 Allows 2-channel or 5.1-channel analog sources to bypass A/D L/R channels will be sent to the Zone 2 S/PDIF conversion and internal processing. When set to ON, the RV-8 outputs. passes the analog input signal to the corresponding analog out- puts.
- Page 75 MAIN ADVANCED S-VIDEO 16:9 Controls the passage of anamorphic trigger signals present in some video sources. When set to AUTO, the RV-8 allows anamorphic video input signals to pass through the S-video switcher, enabling compatible display devices to automatically switch between anamorphic and non-anamorphic display modes.
-
Page 76: Display Setup
SETUP RV-8 MAIN ADVANCED (continued from page 3-22) MAIN MENU SETUP INPUT SETUP DVD1 MAIN ADV DVD1 INPUT SETUP MODE ADJUST INPUTS INPUTS DVD1 DVD1 INPUT SELECT DIGITAL NAME DVD1 AUDIO CONTROLS SPEAKERS DVD2 ANALOG BYPASS DIGITAL IN COAX-1 TUNER PRESETS... - Page 77 When video played back from a VCR is converted to component device is connected to the component video output connector. video by the RV-8, the resulting picture quality depends on both When set to ON, the display device shows the on-screen display as the quality of the VCR playback and the capabilities of the compo- a 480i video signal on a full blue-screen background.
- Page 78 ANLG. Connect the digital and analog outputs on the DVD player to the corresponding digital and analog inputs on eter settings. the RV-8. The unit will use the digital connector for the Main Zone, and the analog connectors for Zone 2. 3-25...
- Page 79 DIGITAL ANLG (Analog) DMIX (Downmix) • The ANALOG IN connector • The RV-8 automatically sets • Set the ZONE2 IN parameter to DMIX to send a downmixed ver- specified INPUT the ZONE2 IN parameter to sion of Main Zone audio to the Zone 2 audio output connectors.
- Page 80 Zone 2 analog and digital audio output connectors. The opens the ZONE2 ADVANCED menu shown above, which can be RV-8 applies these adjustments to input signals before passing used to configure advanced Zone 2 input settings. them to the Zone 2 analog and digital audio output connectors.
- Page 81 DIGITAL, Dolby Digital and DTS sources will not be passed to the Zone 2 digital audio outputs. When OFF is selected and a PCM source is present, the RV-8 will send the PCM audio to the Zone 2 digital audio output connectors. If a Dolby Digital or DTS source is...
-
Page 82: Speaker Setup
Selecting the SETUP menu SPEAKERS option opens the SPEAKER SETUP menu shown below, which can be used to configure the Main Zone audio output connectors for the desired speaker setup, set speaker distances, and calibrate output levels. The RV-8 amplifier outputs have seven speaker connectors labeled Front L/R, Center, Side L/R and Rear L/R. - Page 83 SETUP Lexicon In general, low frequencies will be redirected from speakers with the highest crossover points to speakers with the lowest crossover points. Low-frequency signals lower than the lowest crossover point will be redirected to the subwoofer. If the lowest crossover point is FULL, low- frequency signals, excluding LFE information, will not be redirected to the subwoofer.
- Page 84 FRONT L/R 40Hz FULL, 30 to 120Hz, THX 80Hz a crossover point for the Main Zone speaker and audio output connectors labeled Front L/R. When set to FULL, the RV-8 sends a CENTER 60Hz FULL, 30 to 120Hz, THX 80Hz, full-range audio output signal to these connectors.
- Page 85 Main Zone speaker and audio output outputs if the 5.1a BYPASS listening mode is activat- connector labeled Center. When set to FULL, the RV-8 sends a full- ed. To redirect center channel signals, configure the range audio output signal to this connector. Otherwise, the RV-8 speaker setup included within the associated DVD-A activates a crossover point at the selected setting.
- Page 86 Main Zone speaker and audio output and DTS-ES decoding are not available. connectors labeled Side L/R. When set to FULL, the RV-8 sends a full-range audio output signal to these connectors. Otherwise, the RV-8 activates a crossover point at the selected setting. Choose the setting closest to the low-frequency rating of associated speakers.
- Page 87 Dolby Digital Surround EX, THX Ultra2, THX crossover point for the Main Zone speaker and audio output Surround EX and DTS-ES decoding are not connectors labeled Rear L/R. When set to FULL, the RV-8 sends a available. full-range audio output signal to these connectors. Otherwise, the RV-8 activates a crossover point at the selected setting.
- Page 88 Opens the SUBWOOFER menu shown above, for selecting a crossover point for the Main Zone audio output connector labeled Sub. When set to FULL, the RV-8 sends a full-range audio output signal to this connector. Otherwise, the RV-8 activates a crossover point at the selected setting.
- Page 89 SETUP Lexicon MAIN MENU SETUP SPEAKER SETUP CUSTOM SETUP MODE ADJUST INPUTS CUSTOM SETUP CUSTOM SETUP FRONT L/R 40Hz SPEAKERS AUDIO CONTROLS SPEAKERS THX SETUP CENTER 60Hz The BGC parameter is not TUNER PRESETS I/O CONFIG SPEAKER DISTANCES SIDE L/R...
- Page 90 SETUP RV-8 Custom Speaker Setups (continued from page 3-36) TOGETHER MAIN MENU SETUP SPEAKER SETUP CUSTOM SETUP CLOSE MODE ADJUST INPUTS CUSTOM SETUP CUSTOM SETUP FRONT L/R 40Hz APART SPEAKERS AUDIO CONTROLS SPEAKERS THX SETUP CENTER 60Hz TUNER PRESETS I/O CONFIG...
- Page 91 THX THX ULTRA2 SUB ON, OFF speaker setup. The RV-8 ignores all CUSTOM SETUP menu param- ON, OFF eter settings and applies a THX 80Hz crossover point with a 12dB- per-octave filter to all output connectors, except the output...
- Page 92 Rear L/R. When set to THX 80Hz, the parameter descriptions. RV-8 activates these connectors and configures all Main Zone audio output connectors for a 7.1-channel THX speaker setup. When set to NONE, the RV-8 deactivates these connectors and configures the other Main Zone speaker and audio output connectors for a 5.1-...
- Page 93 Main Zone speaker and audio output SIDE RIGHT 0.0 ft 0 to 30 ft or 0 to 12 m connectors. The RV-8 features a speaker distance control that REAR RIGHT 0.0 ft 0 to 30 ft or 0 to 12 m allows distances to be entered for each speaker.
- Page 94 Zone speaker or audio output connectors labeled Side L/R. speaker distances. When set to FEET, the RV-8 measures speaker distances in feet. When set to METERS, the RV-8 measures speaker distances in meters. When the UNITS parameter setting is toggled, the RV-8 converts the current speaker distance to the closest avail- able value in the selected unit of measurement.
-
Page 95: Calibrating Output Levels
SETUP Lexicon MAIN MENU SETUP SPEAKER SETUP LEVELS CALIBRATION INTERNAL NOISE SPEAKER LEVEL ADJUST MODE ADJUST INPUTS CUSTOM SETUP INTERNAL NOISE TEST INTERNAL NOISE TEST !CAUTION! FRONT LEFT +0.0dB SPEAKERS AUDIO CONTROLS SPEAKERS THX SETUP EXTERNAL NOISE TEST HIGH AUDIO LEVELS CENTER +0.0dB... - Page 96 (a 75dB SPL meter reading). When the internal noise test is conducted, it is possible to select a SPEAKER LEVEL ADJUST menu parameter just as the RV-8 is about to automatically scroll to the next parameter, causing the RV-8 to send When the internal noise test is conducted, a calibration test signal the calibration noise to both speakers.
- Page 97 When the external noise test is conducted, the RV-8 activates a listening mode based on the Main Zone input source that is pres- ent. The table in the next column indicates the listening mode that is activated for each input source.
- Page 98 SETUP RV-8 SPEAKER LEVEL ADJUST Menu SIDE LEFT & RIGHT -18.0 to +12.0dB Conducting the internal or external noise test opens the SPEAKER SETUP SPEAKERS LEVELS CALIBRATION (TEST) SIDE LEFT SIDE RIGHT LEVEL ADJUST menu shown on page 3-42, which can be used to...
- Page 99 Determines whether the bass peak limiter is set with an internal or be used to set amplitude limits for all speakers to which low external source. When set to ON, the RV-8 activates an internal frequencies are redirected, including the subwoofer.
- Page 100 When set speaker and audio output connectors to which low-frequency to ON, the RV-8 restricts output signals to the level specified in the signals are redirected. This restriction is applied when the BASS BASS PEAK LIMITER menu LIMIT ADJ parameter.
-
Page 101: I/O Config
SETUP Lexicon I/O CONFIG REAR PANEL CONFIG MAIN MENU SETUP ANALOG INPUTS 8 STEREO INPUTS MODE ADJUST INPUTS AMP OUTPUTS AUDIO CONTROLS SPEAKERS TUNER PRESETS REAR PANEL CONFIG I/O CONFIG 5 ST & (1) 5.1 ANLG DISPLAYS SETUP 2 ST & (2) 5.1 ANLG... - Page 102 SETUP RV-8 2 ST & (2) 5.1 ANLG Input Connector Output Connectors Front L 2 ST & (2) 5.1 ANLG SETUP ANALOG INPUTS I/O CONFIG Front R Configures the analog audio input connectors as two stereo and Center two 5.1-channel connectors.
- Page 103 SETUP Lexicon I/O CONFIG AMP OUTPUTS MAIN MENU SETUP ANALOG INPUTS MAIN 7.1 MODE ADJUST INPUTS MAIN 5.1 & ZONE2 2.0 AUDIO CONTROLS SPEAKERS AMP OUTPUTS MAIN 5.1 & ZONE3 2.0 TUNER PRESETS REAR PANEL CONFIG I/O CONFIG DISPLAYS SETUP...
-
Page 104: Display Setup
SETUP RV-8 MAIN MENU SETUP DISPLAY SETUP ON-SCREEN DISPLAY MODE ADJUST INPUTS ON-SCREEN DISPLAY ON-SCREEN DISPLAY STATUS 2 SECONDS AUDIO CONTROLS SPEAKERS front-panel DISPLAY POSITION TUNER PRESETS I/O CONFIG A/V SYNC DELAY FORMAT NTSC DISPLAYS DISPLAYS CUSTOM NAME BACKGROUND SETUP... - Page 105 2 seconds whenever the input source line status is centered on the display device screen. When set to changes or the RV-8 receives a command. When set to ALWAYS BOTTOM, the two-line status appears near the bottom of the OFF, the on-screen display remains off at all times.
- Page 106 SETUP RV-8 MAIN MENU SETUP DISPLAY SETUP ON-SCREEN DISPLAY SECAM MODE ADJUST INPUTS ON-SCREEN DISPLAY ON-SCREEN DISPLAY STATUS 2 SECONDS NTSC AUDIO CONTROLS SPEAKERS FRONT PANEL DISPLAY POSITION TUNER PRESETS I/O CONFIG A/V SYNC DELAY FORMAT FORMAT NTSC NTSC DISPLAYS...
- Page 107 ALWAYS ON, the front-panel display remains on at all times. When set to 2 SECONDS, the front-panel display appears for 2 seconds whenever the input source changes or the RV-8 receives a command. When set to ALWAYS OFF, the front-panel display remains off at all times.
- Page 108 RV-8 is activated. When set to OFF, the custom name does not appear video signal delay. when the RV-8 is activated. The custom name can be entered in the DISPLAY SETUP menu EDIT CUSTOM NAME parameter. MAIN MENU...
- Page 109 Opens the EDIT CUSTOM NAME menu shown above, which can be used to create or edit a custom unit name. To customize the name of the RV-8: 1. Follow the EDIT CUSTOM NAME menu path to open the EDIT CUSTOM NAME drop-down menu shown above.
-
Page 110: Volume Control Setup
SETUP RV-8 VOLUME CONTROL SETUP SETUP VOLUME CONTROLS Selecting the SETUP menu VOLUME CONTROLS option opens the VOLUME CONTROL SETUP menu shown below, which can be used to configure Main Zone, Mute, Zone 2, Zone 3 and Headphone volume levels. -
Page 111: Trigger Setup
Sets the Headphone volume level that will be selected whenever headphones are plugged in to DTS neo:6 the RV-8. When set to LAST LVL, the headphones will activate at the last volume level that was MUSIC selected when they were last plugged in. When the headphones are unplugged, the volume will... - Page 112 LOCK OPTIONS FILM and deactivated with the remote control buttons The encoding is present. RV-8 ignores all other TRIGGER SETUP menu parame- For instance, the THX MUSIC SurEX listening mode MUSIC SURR ter settings. When set to OFF, the trigger output connector labeled “1” is not configured for...
-
Page 113: Tuner Setup
The tuner user interface will not allow illegal frequen- AUTOLOAD cies to be entered. It will always set at the closest valid frequency. For example, if the RV-8 has USA set CLEAR ALL as the current region, entering 107.8MHz will result in 107.9MHz being the actual tuner frequency. -
Page 114: Tuner Region Band Limit And Increments
SETUP RV-8 MAIN MENU SETUP TUNER SETUP MODE ADJUST INPUTS REGION HIGH SCAN SENS AUDIO CONTROLS SPEAKERS TUNER PRESETS I/O CONFIG AUTOLOAD DISPLAYS CLEAR ALL SETUP VOLUME CONTROLS TRIGGER TUNER SETUP TUNER SETUP LOCK OPTIONS SCAN SENS LOW, MED, HIGH... - Page 115 SETUP Lexicon PRESS MENU V MAIN MENU SETUP TUNER SETUP TO START AUTOLOAD MODE ADJUST INPUTS REGION AUDIO CONTROLS SPEAKERS SCAN SENS. AUTOLOAD TUNER PRESETS I/O CONFIG AUTOLOAD DISPLAYS CLEAR ALL SETUP VOLUME CONTROLS TRIGGER TUNER SETUP TUNER SETUP LOCK OPTIONS...
-
Page 116: Lock Options
SETUP RV-8 LOCK OPTIONS AUDIO CNTRL LOCKED, UNLOCKED SETUP LOCK OPTIONS SETUP LOCK OPTIONS AUDIO CNTRL Selecting the SETUP menu LOCK OPTIONS option opens the LOCK Controls AUDIO CONTROLS menu branch settings. When set to OPTIONS menu shown below, which can be used to lock and LOCKED, these settings cannot be adjusted. -
Page 117: Audio Controls
AUDIO CONTROLS AUDIO CONTROLS ........4-2... -
Page 118: Section 5: Tuner Presets
AUDIO CONTROLS Lexicon AUDIO CONTROLS Selecting the MAIN MENU AUDIO CONTROLS option opens the AUDIO CONTROLS menu shown below, which can be used to customize the Main Zone speaker and audio output connectors and control the balance of the Zone 2 and Zone 3 audio output connectors. The BASS, TRE- BLE, TILT EQ, LOUDNESS, BALANCE and FADER parameters affect the Main Zone audio output connectors. - Page 119 AUDIO CONTROLS RV-8 BASS Parameter Settings TREBLE Parameter Settings +6.0 +5.5 +6.0 +5.0 +5.5 +4.5 +5.0 +4.0 +4.5 +3.5 +4.0 +3.5 +3.0 +3.0 +2.5 +2.5 +2.0 +2.0 +1.5 +1.5 +1.0 +1.0 +0.5 +0.5 +0.0 +0.0 +0.0 +0.0 -0.5 -0.5 -1.0 -1.0...
- Page 120 AUDIO CONTROLS Lexicon AUDIO CONTROLS (continued from page 4-3) -3.0 to +3.0dB MAIN MENU AUDIO CONTROLS MAIN MENU AUDIO CONTROLS MODE ADJUST BASS +0.0dB MODE ADJUST BASS +0.0dB AUDIO CONTROLS AUDIO CONTROLS TREBLE +0.0dB AUDIO CONTROLS AUDIO CONTROLS TREBLE +0.0dB...
- Page 121 AUDIO CONTROLS RV-8 TILT EQ Parameter Settings LOUDNESS Parameter Settings +3.0 +3.0 +2.8 +2.8 +2.6 +2.6 +2.4 +2.4 +2.2 +2.2 +2.0 +2.0 +1.8 +1.8 +1.6 +1.6 +1.4 +1.4 +1.2 +1.2 +1.0 +1.0 +0.8 +0.8 +0.6 +0.6 +0.4 +0.4 +0.2 +0.2 -0.0...
- Page 122 AUDIO CONTROLS Lexicon AUDIO CONTROLS (continued from page 4-5) L< <|> >R B< <|> >F MAIN MENU AUDIO CONTROLS MAIN MENU AUDIO CONTROLS MODE ADJUST BASS +0.0dB MODE ADJUST BASS +0.0dB AUDIO CONTROLS AUDIO CONTROLS AUDIO CONTROLS TREBLE +0.0dB AUDIO CONTROLS TREBLE +0.0dB...
-
Page 123: Tuner Presets
TUNER PRESETS TUNER PRESETS ......5-2... -
Page 124: Section 6: Mode Adjust
TUNER PRESETS Lexicon STATION LOADED MAIN MENU TUNER PRESETS TUNER PRESETS PG 1 EDIT PRESET 1 PAGE 1 MODE ADJUST PAGE 1 0.00 F M FREQUENCY 0.00FM AUDIO CONTROLS PAGE 2 0.00FM BAND TUNER PRESETS PAGE 3 0.00FM SETUP PAGE 4 0.00FM... -
Page 125: Mode Adjust
MODE ADJUST MODE ADJUST ......... . . 6-2 Listening Mode Activation . -
Page 126: Listening Mode Activation
There are also several listening modes designed specifically for use with Headphones. MONO The RV-8 allows listening mode selection for all Main Zone sources. In some cases, the FILM RV-8 automatically activates a listening mode in response to certain commands. For this... -
Page 127: Mode Family Selection Buttons
L7 MUSIC 5.1 L7 MUSIC DTS(-ES) L7 MUSIC 5.1a L7 MUSIC select a preferred listening mode for 2-channel, Dolby Digital, DTS(-ES) and 5.1a input sources. The RV-8 auto- L7 TV MODE SELECTION L7 TV 5.1 L7 TV matically activates the selected listening mode whenever NOT AVAILABLE** a new input is selected or a new input source is present. - Page 128 MODE ADJUST Lexicon FILM MODE ADJUST FILM MODE ADJUST • A proprietary Lexicon listening mode. • A proprietary Lexicon listening mode. • Designed for enhanced playback of 2-channel stereo or matrix- • Based on the L7 FILM listening mode, but specifically encoded film sources.
- Page 129 MUSIC SURR MODE ADJUST MUSIC MODE ADJUST MUSIC SURR • A proprietary Lexicon listening mode. • A proprietary Lexicon listening mode. • Designed for playback of 2-channel stereo or matrix-encoded • Similar to the MUSIC SURROUND listening mode in other music sources.
-
Page 130: Plii
MODE ADJUST Lexicon PLII + PLII MOVIE MODE ADJUST %!PLII + THXI MODE ADJUST %!PLII MOVIE • Designed for playback of Dolby Surround-encoded sources. • Similar to the PRO LOGIC listening mode, but uses full-frequency stereo surround channels to realistically increase •... -
Page 131: Plii Music
MODE ADJUST RV-8 PLII MUSIC PRO LOGIC MODE ADJUST %!PLII MUSIC MODE ADJUST %!PRO LOGIC • Similar to the DOLBY PLII MOVIE listening mode. • Designed for playback of Dolby Surround-encoded sources. • Designed for playback of stereo music sources. -
Page 132: Cin
(rear channels will be in parallel). Derives five channels above 7kHz. when only side or rear speakers are present. The subwoofer channel is generated through bass management in the RV-8. • Applies THX re-equalization to simulate high-frequency rolloffs that occur in movie theaters. Most films are mixed for movie... - Page 133 The DTS neo:6 listening modes cannot be assigned as the pre- ferred listening mode for 2-channel sources. However, when the 2-CH parameter is set to USE LAST, the RV-8 will automat- ically activate a DTS neo:6 listening mode if a DTS neo:6 lis- tening mode was activated the last time a 2-channel source was present.
- Page 134 Generates early reflections to simulate small, intimate a proprietary reverb algorithm. This algorithm is inherited listening spaces. from Lexicon professional products, which a majority of • Sends early reflections to the front, side and rear channels. recording engineers rely on to add ambience to recordings.
- Page 135 This algorithm is inherited from • Unlike other room simulation listening modes, this mode uses Lexicon professional products, which a majority of recording a proprietary reverb algorithm. This algorithm is inherited engineers rely on to add ambience to recordings.
- Page 136 The PANORAMA listening mode must be calibrated to take full advantage of its effects. • Uses proprietary Lexicon algorithms to move the stereo image outward from the front speakers, producing a wider stereo field • For best results, it is recommended that you center the primary with greater depth.
- Page 137 MODE ADJUST RV-8 PANORAMA Calibration (continued from page 6-12) Note: MODE ADJUST PANORAMA CALIBRATION The SOURCE parameter controls the perceived direction of the sound, although both the front left To calibrate the PANORAMA listening mode: (continued ) and right speakers generate the calibration source signal.
- Page 138 MODE ADJUST Lexicon LISTENER POS Parameter Settings Front Left Front Right Front Left Front Right Front Left Front Right 60° L127 ..Center ..R127 L127 ..Center ..R127...
-
Page 139: Mono Logic
Designed for playback of mono sources. • Sends mono sources to the center channel. • Uses proprietary Lexicon reverb algorithms to realistically expand mono sources to use all channels, dramatically increasing the perceived width and sense of envelopment of Option/... - Page 140 FILM MODE ADJUST FILM MODE ADJUST 5.1 L7 TV • A proprietary Lexicon listening mode. • A proprietary Lexicon listening mode. • Designed for playback of 5.1-channel Dolby Digital-encoded • Based on the 5.1 L7 FILM listening mode, but specifically film sources.
- Page 141 THXI THXI ULTRA2 THXI SurEX • A proprietary Lexicon listening mode. • Designed for playback of 5.1-channel Dolby Digital film sources. • Based on the 5.1 L7 FILM listening mode, but specifically • Listening mode name differs depending on the encoding tailored for music sources.
- Page 142 Note: • THX Surround EX decoding is engaged when the SURROUND The RV-8 cannot automatically detect THX Surround EX parameter is set to ON, or the SURROUND EX parameter is EX encoding in non-flagged 5.1-channel Dolby set to AUTO and a flagged 5.1-channel Dolby Digital source Digital sources.
- Page 143 MODE ADJUST RV-8 MUSIC DIGITAL & DIGITAL EX MODE ADJUST THXI MUSIC MODE ADJUST %!DIGITAL %!DIGITAL EX • Designed for playback of 5.1-channel Dolby Digital music • Designed for playback of 5.1-channel Dolby Digital sources. sources. The DOLBY DIGITAL listening mode is recommended for Dolby Digital sources recorded with Dolby Digital Surround EX.
- Page 144 Note: • Dolby Digital Surround EX decoding is engaged when the EX The RV-8 cannot automatically detect Dolby Digital DECODING parameter is set to ON, or the EX DECODING Surround EX encoding in non-flagged 5.1-channel parameter is set to AUTO and a flagged 5.1-channel Dolby Dolby Digital sources.
- Page 145 OFF, -30dB to +12dB Note: CUSTOM Refer to page 6-34 When a 1.0 Dolby Digital input source is present, the Listening mode menu option and parameter descriptions begin on page 6-33. RV-8 automatically activates the 5.1 MONO LOGIC listening mode. 6-21...
- Page 146 MODE ADJUST Lexicon 5.1 MONO SURR 5.1 MONO MODE ADJUST 5.1 MONO SURR MODE ADJUST 5.1 MONO • Designed for playback of Dolby Digital-encoded mono sources. • Designed for playback of Dolby Digital-encoded mono sources. • Sends mono signals to all channels.
- Page 147 MODE ADJUST RV-8 DECODING The table below indicates the conditions in which DTS-ES Note: decoding is engaged. The table below is not applicable to the DTS-ES THX, • DTS-ES decoding is engaged when the ES DECODING DTS THX ULTRA2, and DTS THX MUSIC listening parameter is set to ON, or the ES DECODING parameter is set modes.
-
Page 148: Film
DTS-ES L7 FILM MODE ADJUST DTS-ES L7 MUSIC • A proprietary Lexicon listening mode. • A proprietary Lexicon listening mode. • Designed for playback of 5.1- and 6.1-channel DTS(-ES) film • Designed for playback of 5.1- and 6.1-channel DTS(-ES) music sources. - Page 149 MODE ADJUST RV-8 ULTRA2 & • When the DTS THX ULTRA2 listening mode is activated, ASA processing is applied to signals sent to the rear speakers. Refer MODE ADJUST ULTRA2 DTS-ES THX1 to the ASA parameter description on page 3-37 for more •...
- Page 150 MODE ADJUST Lexicon The table at the bottom of the previous page indicates the MUSIC conditions in which THX Ultra2 and DTS-ES decoding are MODE ADJUST DTS THX MUSIC engaged. • Designed for playback of 5.1-channel DTS music sources. •...
- Page 151 MODE ADJUST RV-8 2-CHAN MODE ADJUST DTS-ES MODE ADJUST 2-CHAN • Designed for playback of 5.1- and 6.1-channel DTS(-ES) • Designed for converting 5.1- or 6.1-channel DTS(-ES) sources sources. into 2-channel LOGIC7-encoded output signals. • Decodes 5.1 matrix or 6.1 discrete channels from DTS(-ES) •...
- Page 152 MODE ADJUST 5.1a FILM MODE ADJUST 5.1a MUSIC • A proprietary Lexicon listening mode. • A proprietary Lexicon listening mode. • Designed for enhanced playback of 5.1-channel analog film • Similar to the 5.1a L7 FILM listening mode, but specifically sources.
- Page 153 MODE ADJUST RV-8 5.1a SurEX 5.1a MUSIC MODE ADJUST 5.1a SurEX MODE ADJUST 5.1a MUSIC • Designed for playback of 5.1-channel analog music sources. • Converts 5.1-channel analog input signals into digital audio for • The 5.1a THX MUSIC listening mode is not available unless internal THX processing.
- Page 154 MODE ADJUST Lexicon 5.1a STANDARD 5.1a 2-CHANNEL MODE ADJUST 5.1a STANDARD MODE ADJUST 5.1a 2-CHANNEL • Designed for playback of 5.1-channel analog sources. • Designed for converting 5.1-channel analog input signals into 2-channel LOGIC7-encoded output signals. • Converts 5.1-channel analog input signals into digital audio for internal processing.
- Page 155 MODE ADJUST RV-8 5.1a BYPASS 2CH BYPASS MODE ADJUST 5.1a BYPASS MODE ADJUST 2CH BYPASS • Designed for playback of 5.1-channel analog sources, such as • Designed for playback of 2-channel analog sources. DVD-A or SACD players. • Analog audio input signals are sent to the Main Zone audio •...
- Page 156 Lexicon HEADPHONE HEADPHONE MODE ADJUST HEADPHONE MODE ADJUST HEADPHONE • A proprietary Lexicon listening mode. • A proprietary Lexicon listening mode. • Designed for enhanced playback of 2-channel sources through • Designed for enhanced playback of DTS(-ES)-encoded music headphones. or film sources through headphones.
-
Page 157: Listening Mode Menu Option & Parameter Descriptions
Simulates 7-channel playback in 5-channel speaker configurations. BASS ENHANCE ON, OFF When set to ON, the RV-8 provides an increased sense of Enhances stereo bass, which results in low-frequency reproduction spaciousness and envelopment through the surround speakers. that is less localizable and more realistic in the listening space. The... - Page 158 MODE ADJUST Lexicon BASS RT CNTR DLY SAMPLES 5ms to 48.6s -127 to +127 Works with the MID RT and SIZE parameters to adjust the amount Controls the relative time offset of the center channel. It is of time required for low-frequency information to decay below recommended that you set this parameter to +0 unless the center 60dB in level.
- Page 159 MODE ADJUST RV-8 Listening Mode Menu Option & Parameter Descriptions DIMENSION FRONT, NEUTRAL, REAR (continued from page 6-34) Controls the relative balance of the sound field, which can be useful with certain recordings to achieve a more suitable balance among all speakers. When set to FRONT, the sound field is balanced CUSTOM VS PRESET toward the front of the listening space.
- Page 160 Controls the balance of the selected stereo analog audio input Dolby Digital source recorded with or without Surround EX is connectors, compensating for audio input sources with audible detected. channel imbalance. • The RV-8 cannot automatically detect Dolby Digital Surround EX encoding in non-flagged 5.1-channel Dolby Digital sources. 6-36...
- Page 161 MODE ADJUST RV-8 Listening Mode Menu Option & Parameter Descriptions MASTER LEVEL -5dB to +5dB (continued from page 6-36) Adjusts the output level of 2-channel LOGIC7-encoded sources. LFE MIX -20.0dB or -10.0dB to +0.0dB MID RT 24ms to 24.3s Controls the output level of LFE information – the .1 channel in a Works with the BASS RT and SIZE parameters to adjust the amount 5.1- or 6.1-channel input source –...
- Page 162 Simulates high-frequency rolloffs that occur in movie theaters. To restore the factory-default version of the selected listening When set to ON, the RV-8 applies a high-frequency filter. When set mode: to OFF, the RV-8 does not apply a high-frequency filter. It is recommended that you set this parameter to ON for film sources, 1.
- Page 163 MODE ADJUST RV-8 Listening Mode Menu Option & Parameter Descriptions SIZE 4m to 20m or 30m (continued from page 6-38) Adjusts the length of the listening space within a 4 to 20 or 30m range (depending on the listening mode). Increase the size of the space to increase the reverb effect.
- Page 164 THX Surround EX encoding is detected. Controls the output level of the Main Zone audio output • The RV-8 cannot automatically detect THX Surround EX encod- connector labeled Sub. ing in non-flagged 5.1-channel Dolby Digital sources. A non- flagged source does not include information in the input signal that identifies THX Surround EX encoding.
- Page 165 MODE ADJUST RV-8 Listening Mode Menu Option & Parameter Descriptions (continued from page 6-40) SURROUND EX (continued) When the Shift command bank is activated, pressing the remote control THX button while a 5.1-channel Dolby Digital input source is present activates the THX, THX ULTRA2 or THX SurEX listening mode.
-
Page 166: Section 7: Troubleshooting & Maintenance
Troubleshooting & Maintenance Troubleshooting ......... . 7-2 Routine Maintenance . -
Page 167: Troubleshooting
The RV-8 does not power on. following steps to reprogram the zone’s audio codes. 1. Attempt to power on the RV-8 with the front-panel Standby a. Go to the SETUP mode by pressing the HOME and ENT button and remote control On button. - Page 168 One or more channels are outputting distorted The Standby LED is flashing rapidly. sound. 1. Power the RV-8 off. Allow the RV-8 to cool before powering it 1. Reduce system volume level. on again. 2. Make sure speakers have compatible impedance ratings.
- Page 169 D-2. Then follow the 5. Make sure the RV-8 is receiving an audio signal. To do this, instructions on the next page to restore factory-default follow the instructions that begin on page 2-28 to open the settings.
-
Page 170: Routine Maintenance
The bulleted items below describe routine maintenance that should be performed on a periodic basis. 2. To ensure that the RV-8 remote control is in the correct mode before proceeding, first press and release the HOME button. •... - Page 171 FACTORY SETTINGS message shown on the previous page appears in the on-screen and front-panel displays. When this message appears, press a front-panel or remote control button to restart the RV-8. • If the EXIT option is selected, the FACTORY SETTINGS menu will close and the two-line status (page 2-28) is shown in the on-screen and front-panel displays.
- Page 172 Appendix A Specifications/Declaration of Conformity Specifications ..........A-2 Declaration of Conformity .
-
Page 173: Specifications
Appendix A Lexicon SPECIFICATIONS Audio Input & Output Connectors Main Zone Audio Performance (continued) Analog Audio Inputs • 8 Stereo (RCA) or 5 stereo and one 5.1-channel or 2 *Signal-to-Noise Ratio • 105dB minimum, 22kHz bandwidth, “A” weighted stereo and two 5.1-channel connectors •... - Page 174 Appendix A RV-8 Video Input & Output Connectors Component Video Performance (continued) Video Inputs • 5 Composite (RCA), 5 S-video and 3 component Insertion Loss <3dB video (RCA) Bandwidth >150MHz Video Outputs • 5 Composite (RCA), (2 monitor, 2 Zone2, 1 Zone3),...
- Page 175 Appendix A Lexicon FM Tuner Performance Phono Performance (MM) Tuning Range 64MHz to 108MHz 50Hz to 20kHz, +0.5dB/-0.5dB, rumble filter -4dB Frequency Response <4uV, 1.6mV typical at 10Hz Usable Sensitivity >87dbmV, 93dbmV typical Selectivity THD + Noise Below 0.02%, 20Hz to 20kHz, 4.7mV input 50Hz to 16kHz, +0.1dB/-1.0dB...
-
Page 176: Declaration Of Conformity
The equipment identified here conforms to the Directive(s) and Standard(s) specified above. Standard(s) to Which Conformity is Declared: EN 55013:2001 Type of Equipment: Receiver EN 55020:2002 Model: Lexicon RV-8 EN 61000-3-2:2000 EN 61000-3-3:1995+A1:2001 Date: April 2004 EN 61000-3-11:2000 EN 60065:1998... -
Page 177: Menu Tree
Appendix B Menu Tree Menu Tree ..........B-2... - Page 178 FRONT PANEL DISPLAY SurEX SPEAKER DISTANCES A/V SYNC DELAY EDIT CUSTOM NAME THXI MUSIC LEVELS CALIBRATION CUSTOM NAME FRONT PANEL DISPLAY ON-SCREEN DISPLAY RV-8 DIGITAL EDIT CUSTOM NAME STATUS ALWAYS ON STATUS 2 SECONDS 5.1 2-CHANNEL BRIGHTNESS 100% POSITION 40Hz...
- Page 179 Appendix B RV-8 Menu Tree (continued from page B-2) Selecting the SETUP menu INPUTS option prompts the selection of the desired input (e.g., MAIN MENU SETUP INPUT SETUP DVD1). Selecting an input opens the corresponding INPUT SETUP menu shown below. The...
- Page 180 Appendix B Lexicon SETUP INPUT SETUP DVD1 INPUT SETUP MAIN MENU Selecting an INPUT SETUP menu item opens the correspon- DVD1 NAME DVD1 MODE ADJUST INPUTS ding listening mode menu shown below. These menus are DIGITAL IN COAX-1 SPEAKERS DVD2 AUDIO CONTROLS identical regardless of which input is selected.
- Page 181 Appendix B RV-8 Menu Tree (continued from page B-4) Selecting a SPEAKER SETUP menu option opens the SPEAKER SETUP MAIN MENU SETUP LEVELS CALIBRATION corresponding menu shown below and to the right (e.g., CUSTOM SETUP MODE ADJUST INPUTS INTERNAL NOISE TEST...
- Page 182 Appendix B Lexicon MAIN MENU SETUP SPEAKER SETUP MODE ADJUST INPUTS CUSTOM SETUP SPEAKERS AUDIO CONTROLS SPEAKERS THX SETUP TUNER PRESETS I/O CONFIG SPEAKER DISTANCES DISPLAYS LEVELS CALIBRATION SETUP VOLUME CONTROLS TRIGGER 0.0dB 0.0dB 0.0dB TUNER SETUP continued from page B-5...
- Page 183 Appendix B RV-8 Menu Tree (continued from page B-6) Selecting a MODE ADJUST menu listening mode opens the corresponding listening mode menu shown below and on the MAIN MENU MODE ADJUST next page. The parameters on the left side of these menus differ from listening mode to listening mode. The settings on...
- Page 184 Appendix B Lexicon FILM THXIMUSIC DTS-ES L7 FILM DTS-ES 2-CHAN 5.1a STANDARD VOCAL ENHANCE +0.0dB COMPRESSION VOCAL ENHANCE +0.0dB CENTER MIX +0dB OUTPUT LEVELS 5 SPKR ENHANCE LFE MIX +0.0dB 5 SPKR ENHANCE SURROUND MIX +0dB CUSTOM BASS ENHANCE OUTPUT LEVELS...
- Page 185 Appendix B RV-8 Menu Tree (continued from page B-8) 5 SPKR ENHANCE CALIBRATION CNTR DLY SAMPLES EFFECT LVL LIVENESS PANORAMA -127 to +127 -12 to +6dB 30ms to 20.2s PANORAMA CALIBRATION SOURCE LEFT & RIGHT SPEAKER ANGLE 30deg LISTENER POS...
- Page 186 EX ENCODIN G +3.0dB +0.0dB R SL SR SB LFE R SL SR Activating the RV-8 while pressing and holding the front- panel or remote control Mute button opens the FACTORY SETTINGS menu shown below. See page 7-5 for more information. DTS-ES...
- Page 187 Appendix B RV-8 MAIN MENU TUNER PRESETS TUNER PRESETS EDIT PRESET 1 MODE ADJUST PAGE 1 0.00 FM FREQUENCY 0.00 AUDIO CONTROLS PAGE 2 0.00 FM BAND TUNER PRESETS PAGE 3 0.00 FM SETUP PAGE 4 0.00 FM LISTEN TO PRESET STATION LOADED 0.00 FM...
-
Page 188: Remote Control Programming
Appendix C Remote Control Programming Remote Control Programming....... . C-2 Three-Digit Preprogrammed Codes . - Page 189 A macro can be configured to with the press of a single button. power on a TV or projector, RV-8, and RT-10 Disc Player, change to the appropriate inputs and outputs, dim lights and start a movie. It can be as simple or as comprehensive as desired.
- Page 190 However, these buttons can be pro- grammed with any desired macro. Up to 50 favorite channel buttons can be programmed into the RV-8 remote. Each of these buttons can send out up to 10 commands. See page C-9 for Favorite Channel Programming instructions.
- Page 191 An “activity-based” configuration centers on what you are doing at the time. If you are watching a DVD on your TV, and are using the RV-8 to control the sound, you may want to start by setting up the DVD device using the preprogrammed method described in the next column, and then add functions from the other devices you will be using while watching your DVD video to the DVD device.
- Page 192 Use DVD2, not DVD1, to access the DVD code code table. library. DVD1 has been preprogrammed to control the Lexicon RT-10 Disc Player. 6. The remote will be flashing “ENTER NUMBER.” Refer to the tables starting on page C-18 and find the manufacturer/brand of your device.
- Page 193 Appendix C RV-8 device). If the device turns off when the three-digit code is Auto Scan With Three-Digit Number entered, make note of the code. It will have at least some of the You can also program the remote control by sending out a series of functions in it that are needed to control the device.
- Page 194 Apart from the PAGE, HOME and FAV buttons, which cannot be turns off when you enter the three-digit code, make note of the taught, the RV-8 remote has the capability of learning up to 530 code. It will have at least some of the functions in it that are commands.
- Page 195 Device is selected, it will send out the learned signal as it changes to that Device's function pages. 5. Place the original remote control head to head with the RV-8 To program the one learned code onto the Device button: remote about 2 inches apart on a flat surface.
- Page 196 2 inches apart on a flat surface. To program Favorite Channel Buttons: 5. Select any of the 10 device buttons to program onto the RV-8 1. Go to the SETUP mode by pressing both the HOME and remote. Press the button on the original remote control to ENT buttons simultaneously for three seconds.
- Page 197 Appendix C RV-8 There are five pages of LCD screens for favorite channel program- ming. Scroll to other pages by pressing the PAGE or FAV button. In Note: the Favorite Channels macro, the following buttons can be used: 0- If the POWER or SYSTEM OFF buttons are pro- 9, ENTER, DISPLAY, POWER, SYSTEM OFF and INFO/PAUSE.
- Page 198 Appendix C Lexicon 7. Repeat from step 3 until you have programmed all of the Macros that you require. Note: 8. When programming is complete, press the HOME button. Exit Do not press the HOME button at the beginning of a from the SETUP mode by pressing the HOME button once macro, or it will not work.
- Page 199 “punch through” technique channel.) was used to assign the VOL to the RV-8. If the labels have been 17. Press 1, then 3, then 5. (Then press the ENT button if the cable changed, insert the changed names into the example.
- Page 200 3. Press the VOL button on the LCD for Volume Punch Through, the PLAY button for Transport Punch Through and the CH 4. To erase all of the macro buttons in the RV-8 remote, press the button for Channel Punch Through.
- Page 201 3. Press the FAV button. To erase “punch through” functions: 4. To erase all the favorite channel buttons in the RV-8 remote, 1. Go to the SETUP mode by pressing the HOME and ENT press the ALL button and then press the SURE? button at the buttons simultaneously for three seconds.
- Page 202 Appendix C Lexicon ing the PAGE button. Edit Text for Favorite Channel Buttons 5. To edit DEVICE button text, skip Steps 3 and 4 and press the To edit text for favorite channel buttons: PAGE button before selecting the Device button.
- Page 203 (in seconds). It can go up to 99 seconds. Save the time by pressing the button to the right of the time just assigned. 4. If you wish to erase all the learned functions in the RV-8 remote, press the ALL button and then press the SURE? button 4.
- Page 204 Use the rubber buttons beside the labels Down on the joystick simultaneously will make the LCD contrast on the screen. brighter. The RV-8 remote control is not waterproof. Never immerse it in water. Keep the LCD screen dry. Immediately wipe off any spilled liquid. Battery Life Do not expose the RV-8 remote to extreme temperatures.
- Page 205 Select the MAIN zone button. 5. The remote should flash ENTER NUMBER. The correct (default) audio codes for the RV-8 zones are as follows: MAIN zone is 001, ZONE 2 is 302 and ZONE 3 is 303. 6. Enter the correct code.
- Page 206 Appendix C Lexicon THREE-DIGIT PREPROGRAMMED CODES AUDIO Manufacturer Codes AUDIO INKEL Manufacturer Codes JCPENNY 076 216 JEFF ROWLAND ADCOM 082 092 225 161 269 JENSEN AIWA 018 104 170 202 203 213 211 188 AKAI 138 189 240 163 191 114 266 279...
- Page 207 Appendix C RV-8 AUDIO Manufacturer Codes Manufacturer Codes APEX DIGITAL REVOX DENON 007 080 ROTEL 074 083 085 026 027 SAMSUNG HARMAN KARDON SANSUI 040 048 110 119 065 228 SANYO 047 059 091 057 074 SCOTT 019 091 MAGNAVOX...
- Page 208 Appendix C Lexicon Manufacturer Codes Manufacturer Codes ALPHASTAR PANASONIC 142 060 AMPLICA PANSAT BIRDVIEW 129 113 051 126 PERSONAL CABLE PHILIPS 071 152 153 CAPETRONICS 023 026 CHANNEL MASTER 013 014 015 018 036 055 PRESIDENT 019 102 CHAPARRAL 008 009 012 077...
- Page 209 Appendix C RV-8 Manufacturer Codes Manufacturer Codes MARANTZ 012 031 067 069 AIWA 034 161 MARTA AKAI 016 043 046 124 125 146 MATSUI 027 030 AMPRO ANAM MEMOREX 003 010 014 031 034 053 072 101 102 134 139...
- Page 210 Appendix C Lexicon Manufacturer Codes Manufacturer Codes SEARS 003 008 009 010 013 014 081 101 017 073 112 ADMIRAL 072 081 161 160 SHARP 031 054 149 159 165 AKAL 197 146 SHINTOM AMARK 112 143 SIGNATURE AMPRO 073 167 157 183...
- Page 211 Appendix C RV-8 Manufacturer Codes Manufacturer Codes ORION FUTURETECH PANASONIC 034 056 080 092 164 197 008 009 034 056 073 074 130 144 155 160 161 165 004 091 157 183 PHILCO 197 003 024 056 059 060 063 064 164 004...
- Page 212 Appendix C Lexicon Manufacturer Codes Manufacturer Codes ADCOM 062 042 TELEFUNKEN 037 046 086 087 AIWA 059 065 088 089 105 122 170 187 TELERENT AKAI 085 195 202 TERA 231 232 AMEND TOSHIBA 007 015 030 040 062 101 138...
- Page 213 Appendix C RV-8 Manufacturer Codes Manufacturer Codes SANSUI 044 069 107 128 171 190 125 KYOCERA SANYO LOTTE SCOTT 069 102 LUXMAN 011 028 070 076 SHARP 026 031 051 066 SHERWOOD 003 019 051 096 112 115 119 166...
- Page 214 Appendix C Lexicon PHONO Manufacturer Codes Manufacturer Codes DENON 206 207 AIWA FUNAI ARCHER KENWOOD 152 013 AUTON MAGNAVOX 032 121 MARANTZ DRAPER SCREEN MITSUBISHI DWIN EVERQUEST OPTIMUS 049 013 EXTRON PANASONIC FAROUDJA PHILIPS FUJI PIONEER 106 117 121 JERROLD...
- Page 215 Appendix C RV-8 CABLE CABLE Manufacturer Codes Manufacturer Codes PARAGON 103 003 004 039 042 046 053 PHILIPS 006 012 013 020 085 095 AMERICAST PIONEER 103 034 051 063 076 105 ANTRONIX PRUCER ARCHER 005 007 014 BELL SOUTH...
- Page 216 Appendix C Lexicon TAPE Manufacturer Codes AIWA 015 071 100 114 CARVER 006 008 027 024 036 DENON 105 227 229 FISHER GOLDSTAR HARMAN KARDON 106 116 239 240 KENWOOD 005 013 023 026 064 145 146 181 190 LINN...
-
Page 217: Installation Worksheet
Appendix D Installation Worksheet Installation Worksheet........D-2... -
Page 218: Input Setup
Appendix D RV-8 INSTALLATION WORKSHEET INPUT SETUP DVD1 DVD2 TUNER PHONO NAME DIGITAL IN ANALOG IN ANLG IN LVL VIDEO IN COMPONENT IN 2-CH 5.1a MAIN ADV INPUT SELECT ANLG BYP S-VIDEO 16:9 S-VIDEO 4:3 OSD COMPONENT OSD LEGACY VIDEO... - Page 219 Appendix D Lexicon Installation Worksheet (continued from page D-2) INPUT SETUP DVD1 DVD2 TUNER PHONO ZONE2 IN ZONE2 ADVANCED ANLG IN LVL DIGITAL BYPASS DIG OUT RATE RECORD...
-
Page 220: Speaker Setup
Appendix D RV-8 SPEAKER SETUP CUSTOM SETUP THX SETUP SPEAKER DISTANCES LEVELS CALIBRATION THX 80Hz FRONT LEFT/RIGHT CENTER THX 80Hz SIDE LEFT/RIGHT THX 80Hz REAR LEFT/RIGHT SUBWOOFER THX 80Hz THX ULTRA2 SUB UNITS CAL NOISE BASS LIMITER BASS LIMIT ADJ... -
Page 221: Display Setup
Appendix D Lexicon Installation Worksheet (continued from page D-3) DISPLAY SETUP TRIGGER SETUP HEADPHONE L7 SETTING SETTING HEADPHONE 5.1 ON-SCREEN DISPLAY REMOTE ONLY HEADPHONE DTS HEADPHONE 5.1 If the REMOTE ONLY parameter is set to OFF, STATUS circle the inputs and listening modes selected for program operation. - Page 222 Appendix D RV-8 3-DIGIT PREPROGRAMMED CODES WORKSHEET COMPONENT MANUFACTURER CODE(S) USED DVD1 DVD2 PHONO...
- Page 223 Appendix D Lexicon PREPROGRAMMED LCD TEXT FOR OTHER DEVICES SYSTEM-OFF SYSTEM-OFF SYSTEM-OFF ON/OFF POWER ON/OFF POWER POWER ON/OFF VOL UP VOL UP VOL UP VOL UP VOL UP VOL DN VOL DN VOL DN VOL DN VOL DN SKIP+ CH UP...
- Page 224 Appendix D RV-8 SYSTEM-OFF SYSTEM-OFF SYSTEM-OFF ON/OFF POWER POWER ON/OFF POWER ON/OFF VOL UP VOL UP VOL UP VOL UP VOL UP VOL DN VOL DN VOL DN VOL DN VOL DN CH UP CH UP CH UP TRACK +...
- Page 225 2CH STATUS Menu, 2-30 (ill.), B-10 (ill.) 2 ST & (2) 5.1 ANLG Option, 3-8, 3-49, B-2 Documentation Conventions, ii About the RV-8, 1-2 to 1-4 5.1 2-CHANNEL Listening Mode, 6-21, B-8 (ill.) , see Dolby AC Input Connector, 2-5, 6-2 5.1 L7 FILM Listening Mode, 3-13, 6-3, 6-16, B-8...
- Page 226 Index (continued) (continued) (continued) AUTO AZIMUTH Parameter, 1-2, 1-3, 6-4, 6-33, B-7, Calibration Instructions, PANORAMA, 6-11 to 6-13, CNTR DLY SAMPLES Parameter, 6-21, 6-27, 6-30, 6- 6-34 34, B-8, B-9 AUTO GAIN Parameter, 3-9, 3-10, B-4 CALIBRATION Menu, PANORAMA, B-9, (ill.) Codes, Preprogrammed Three-digit,...
- Page 227 CUSTOM PRESET Option, 6-35, (continued) (continued) DOLBY D Parameter, 3-13, 6-3 6-25, 6-26, 6-35 DOLBY D STATUS Menu, 2-30 (ill.), B-10 (ill.) DTS(-ES) Encoding, ii, 2-34, 6-25, DOLBY DIGITAL EX Listening Mode, 6-19 to 6-20, 6- DTS(-ES) Input Sources, ii, 2-28, 2-31, 2-34, 3-46, 6- DC Protection, 2-12 3, 6-27, 6-36 Declaration of Conformity, A-5...
- Page 228 PHONO, 2-15, B-3 FACTORY SETTINGS Menu, 7-5 (ill.), B-10 (ill.) SAT, 2-18, B-3 FACTORY SETTINGS Message, 7-5 (ill.), B-10 (ill.) Highlights, RV-8, 1-3 to 1-4 TUNER, 2-18, B-3 FADER Parameter, 2-22, 4-2, 4-4, 4-6, B-6, D-5 High-pass Filter Graph, 3-30 (ill.)
- Page 229 (continued) (continued) (continued) TEST, 3-42 to 3-43, B-6 Levels Dolby or Dolby Digital, 2-30, 3-13, 3-15, 6-2, 6- 3, 6-19, 6-20 IR Receiver, 1-4, 2-3 (ill.), CALIBRATION Menu, 3-42 (ill.), 3-44 (ill.), B-5, B- 6 (ills.), D-4 DTS NEO:6, 3-14, 6-3, 6-8, 6-9 IR IN Connector, 1-5, 2-3, 2-14, 7-2 Input, 2-35, 3-6, 3-9, 3-10, 3-11, 3-27, B-8 DTS(-ES), 2-30, 3-13, 3-16, 6-23 to 6-27...
- Page 230 Index (continued) (continued) ON Parameter, 2-13, 3-57, B-2, D-5 Messages Macro Buttons, Remote Control, 2-17 (ill.), 2-26 Two-Line Status, 2-28, 6-3 FACTORY SETTINGS, 7-5 Erasing, C-13, C-14 Understanding, 2-28 FULL MUTE ON, 7-2 Manufacturing Codes, Three-Digit Video Input Connectors, 2-7, A-3 INTERNAL NOISE, 3-42 Video Output Connectors, 2-7, 3-49, A-3 MODE SELECTION NOT AVAILABLE, 6-3...
- Page 231 (continued) (continued) (continued) LOGIC Listening Mode, 6-2, 6-15, B-7 (ill.) ON-SCREEN Trigger, 1-4, 2-9, 2-14, 2-22 to 2-25, 3-2, 3-58, 3-59, SURROUND Listening Mode, 6-2, 6-15, B-7 (ill.) Display, 2-10, 2-15, 2-16, 2-28, 2-35, 3-2, 3-5, 3- 11, 3-23, 3-24, 3-43, 3-47, 3-48, 3-49, 6-2, 6-4 Zone 2 Audio, 1-2, 1-3, 2-7, 2-8, 2-17, 3-26, 3- 28, 4-2, 4-6, A-2 DISPLAY Menu, 2-12, 2-13, 2-18, 3-23, 3-47, 3-...
- Page 232 Index (continued) (continued) (continued) Function Buttons, C-8 SPEAKER LEVEL ADJUST Menu, 3-42, B-6 Drop-Down Menus, 2-14, 2-15 Menu, 2-14 “Punch Through” Functions, C-12 SPEAKER DISTANCES Menu, 3-40, B-5 Preferred Listening Mode Selection, 3-2, 3-3, 3- Favorite Channels, C-9 REAR PANEL 13 to 3-17, 6-2, 6-3, Macro Buttons, C-10 CONFIG Menu, 3-2, 3-8, 3-48, 3-49 (ill.), B-2...
- Page 233 Parameter, THX SETUP Menu, 3-38, B-5 RS-232 Connectors, 1-2, 2-9, A-3 OSD 4:3 Parameter, 3-23, B-4 SPEAKERS Menu, 3-33 (ill.), B-5 (ill.) RV-8 Output Connectors, 2-8, 2-9, 3-23, A-3 SIDE LEFT Parameter About the, 1-2 to 1-3 Performance Specifications, A-3...
- Page 234 Index (continued) (continued) (continued) Stereo Input Sources, 1-3, 6-4, 6-5, 6-7, 6-8, 6-12, Control, C-19 to C-29 THX-Certified, 3-38, 3-39, 6-6, 6-8, 6-19, 6-25, 6-26 Speakers 6-14, 6-33 Three-digit Preprogrammed Codes Worksheet, D-6 BASS ENHANCE Parameter, 6-33 Subwoofer Center, 3-32, 6-34, 6-36, 7-2 Channel, 2-24, 5-8, 5-13 80Hz Crossover Point, 3-29, 3-30, 3-38, 3-39 Menu, 3-32 (ill.), A-8 (ill.)
- Page 235 (continued) (continued) TREBLE Parameter, 2-19, 2-21, 4-2 to 4-4, B-6, D-5 SETUP Worksheet, D-5 USE LAST Setting, 3-14 to 3-17, 6-9 Tree, Menu, B-2 to B-11 Scan Mode, 2-11, 2-24, 2-25 Using Learning Method, Remote Control, C-7 Trigger Station Access, 2-10 Using Preprogrammed Codes, Remote Control, C-5 1, see Configurable Status, 2-29...
- Page 236 Index (continued) (continued) Off Button, 2-5 Current, 2-2, 2-28 Headphone, 3-2, 3-57, 3-58 PWR ON, Z2, 3-58 INTERNAL NOISE TEST, 3-42 Two-Line Status, 2-28 LOUDNESS Parameter, 2-19, 2-21, 4-2, 4-4, B-6, Understanding, 2-28 Video Input Connectors, 2-7, A-3 Main Zone, 2-3, 2-4, 2-18, 2-20, 2-22, 2-23, 3- Video Output Connectors, 2-8, A-3 57, 4-4, 6-31 Volume Level, 2-8, 2-20, 2-22, 3-57...
-
Page 237: Limited Warranty
This warranty provides specific legal rights. Additional rights recommended. the owner. may be provided by some states. Harman Specialty Group Customer Support Telephone: 781-280-0300 3 Oak Park Telephone: 781-280-0300 Fax: 781-280-0490 Bedford, MA 01730-1413 Sales Fax: 781-280-0495 www.lexicon.com Service Fax: 781-280-0499... -
Page 238: Customer Support
3 Oak Park Bedford, MA 01730-1413 USA 781-280-0300 781-280-0490 www.lexicon.com Customer Support Telephone: 781-280-0300 Sales Fax: 781-280-0495 Service Fax: 781-280-0499 Product Shipments 16 Progress Road Billerica, MA 01821-5730 Part No. 070-15838 | Rev 0 | 04/04...