Table of Contents
Advertisement
Advertisement
Table of Contents

Related Manuals for Crestron Lighting Design


Summary of Contents for Crestron Lighting Design
- Page 1 Crestron Lighting Control System Design Guide...
- Page 2 This document was prepared and written by the Technical Documentation department at: Crestron Electronics, Inc. 15 Volvo Drive Rockleigh, NJ 07647 1-888-CRESTRON All brand names, product names and trademarks are the property of their respective owners. 2003 Crestron Electronics. Inc.
-
Page 3: Table Of Contents
Step 6: Control Processor Selection ................24 Step 7: Network Block Selection................28 Step 8: Accessories Selection ..................29 Basic Lighting System Interconnections ................. 30 Ordering a Crestron Lighting Control System................. 31 Hardware ........................31 Programming ......................31 Example Lighting System......................32 Merchandise Returns / Repair Service .............. -
Page 5: Lighting Control System Design
Introduction A lighting control system is as unique as the home it supports. Crestron offers the equipment and flexibility of design required for every one-of-a- kind solution to home automation needs. The designer can create a complete lighting system consisting of traditional wiring with local intelligence, up to a system that incorporates distributed, high-voltage wiring with centralized and/or distributed intelligence. -
Page 6: Centralized Design
Centralized Design The high-voltage lighting, fans, motors and switch circuits are individually wired directly to the modules in the Crestron home automation enclosure. The modules are controlled by low voltage user interfaces in the living area. This greatly simplifies the high-voltage wiring while creating a flexible and efficient design using keypad and touchpanel interfaces. -
Page 7: Distributed Design
Crestron Lighting Control System Distributed Design In the traditional distributed design wiring method, Crestron wall box dimmers can be retrofitted into a project after routine high-voltage wiring is completed. In addition to the traditional high-voltage wiring, a low-voltage communication wire is run from the dimmer to the nearest Cresnet connection. -
Page 8: Complete Crestron Home Design
Control System Crestron Lighting Complete Crestron Home Design A complete Crestron home design is a blend of distributed and centralized design in which central control intelligence and distributed local dimmers form a reliable whole house lighting control solution. Large rooms, stairways, and frequently used rooms are often remotely controlled using the astronomical time clock or whole-house presets. -
Page 9: Requirements For Design
Crestron Lighting Control System Requirements for Design Lighting system design begins with a collection of complete information. The successful lighting system plan begins with a lighting load schedule that you define and compile based on the information contained in a detailed floor plan that identifies the elements of the load schedule design, the location and types of user interfaces used (i.e., local dimmers, keypads or touchpanels), the control processor... - Page 10 7. Fixture Wattage (Watts or Power-Rating per Fixture) with regard to the controlled lighting zone. This is used to determine the number of fixtures that can be powered per each Crestron Dimmer Module channel, in order not to overload the dimmer beyond it’s own power rating. Volts rating for...
- Page 11 Accessories selection – based on the required accessories (third party telephone and alarm systems, etc.) NOTE: Crestron D3 Pro software is the ideal tool for specifying an equipment list. A fully documented help file supports the easy-to-use screens and views. It offers the designer a starting place for determining modules and enclosures.
-
Page 12: Step 2: Module Selection
AC line noise interference and lamp flicker are eliminated by an innovative zero-crossing detection technique and unique Crestron firmware. The red LEDs on the side of the module indicate the presence of voltage to the module output. The brightness of the LED corresponds to brightness of the lights. - Page 13 Crestron Lighting Control System CLX-1DIM4 is a workhorse module with one input feed and four controlled dimmers. Ideal for a small mix of loads where some loads are 500W or more. The single input feed limits the total output of all four controlled dimmer circuits to 1920 watts (16A).
- Page 14 Control System Crestron Lighting The CLX-4HSW4 switching module can switch four 16A lighting circuits as well as ½ HP (maximum) motors. Loads are switched on and off, but not dimmed. The maximum load is four controlled circuits per module and 1920 watts (16A) per controlled circuit (64A maximum total).
- Page 15 3 lbs. Weight Terminal Blocks (CLT-Series) The Crestron terminal block is mounted within an enclosure and has two functions. 1. Terminates the circuit feed (HOT and NEUTRAL) supplied by circuit breaker and distributes the controlled circuits (LOAD) to the fixtures.
-
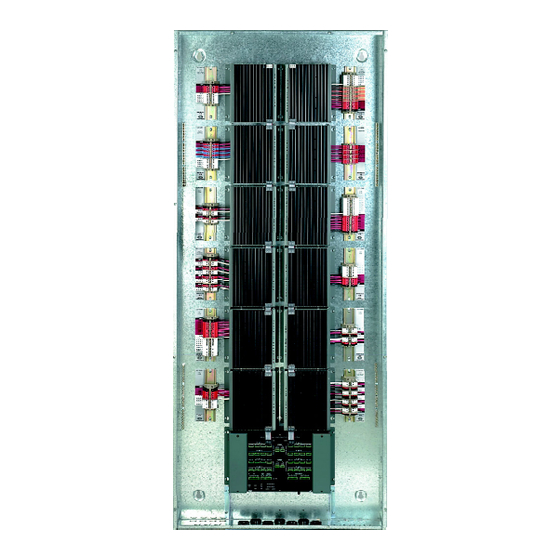
Page 16: Step 3: Enclosure Selection
There are occasions when a separate enclosure is desired for the PAC2. The processor can be located in a more accessible location with better temperature control and easier access to the wiring. In this situation, Crestron recommends using the CAEN-2x1 enclosure for the PAC2. - Page 17 Crestron Lighting Control System CAEN-Series Specifications CAEN Specifications 7x1* 4x1* 2x1* Module Capacity 25 ½” x 62” 14 ⅜” x 62” 25 ½” x 38 ⅞” 14 ⅜” x 38 ⅞” 14 ⅜” x 23 ½” Required Flush Mount Opening (W) x (H)
-
Page 18: Step 4: User Interface Selection
C2N-DB Series Wall Panels The C2N-DB6/8/12-series Decorator Wall Panels are wall-mounted, single-gang user interfaces that can be part of a Crestron solution. The panels are standard Cresnet devices providing fingertip control when the control system is properly programmed using Crestron’s SIMPL Windows, Application Builder, or D3 Pro software. - Page 19 Crestron Lighting Control System 6, 8, and 12 button C2N-DB Series Wall Panels Physical View of the C2N-DB Wall Panel Side View Front View Back View with buttons installed with buttons removed 1.53 in 1.67 in (3.89 cm) 1.79 in (4.24 cm)
- Page 20 “lighting scene” for particular activities. Keypads are Cresnet devices and programmable using SIMPL Windows or the Crestron D3 Pro software. The product name corresponds to the number of keypad buttons. For example, CNX-B6 is a six-button keypad and a CNX-B12 is a 12-button keypad.
- Page 21 The CLW-DIM is a stand-alone wall box dimmer that can also act as a Cresnet device that reports to a Crestron control processor. The CLW-DIM has four preset lighting levels that can be adjusted (refer to note below). The CLW-DIM also includes two isolated, non-polarized Cresnet wires (plus a ground wire) for connecting to the Cresnet network over a twisted pair wire with shield.
- Page 22 Control System Crestron Lighting Derating In a multi-gang installation, several dimmers are grouped in one horizontal wall box. When this is the case, the inner heat sink section is removed to permit the installation of a one-piece multi-gang wallplate. Removing the heat sink reduces the current carrying capability of the dimmers due to reduced heat dissipation.
- Page 23 Crestron Lighting Control System Physical View of CLW-SLVD (clockwise from top; Top, Side, and Front) Lighting Control System Design • 19 Design Guide – DOC. 5999A...
- Page 24 Switches The CLW-SW wall box switch can also act as a Cresnet device reporting to a Crestron control processor. The CLW-SW includes two isolated, non-polarized Cresnet wires (plus a ground wire) for connecting to a Cresnet system over a twisted pair wire with shield.
- Page 25 Crestron Lighting Control System NOTE: Refer to the latest version of the Installation Guide (Doc. 6134) for derating information in multi-gang applications, available on the Crestron website, www.crestron.com. Physical View of CLW-SW/SWS (clockwise from top; Top, Side, and Front) Physical View of CLW-SLVS (clockwise from top; Top, Side, and Front) Lighting Control System Design •...
- Page 26 Touchpanel pages can provide convenient control of every individual light in the residence from a single location. The integration of touchpanels and lighting control is a primary feature of Crestron lighting systems. The designer can create a complex control environment while presenting the user with easy and intuitive controls.
-
Page 27: Step 5: Wiring Plan
6.73 in (17.10 cm) Crestron touchpanels are available as either wired or wireless units, with screens from 3.8” diagonal to 15” diagonal. Many Crestron touchpanels also feature buttons that can be custom engraved and programmed to provide quick access to programmed functions. -
Page 28: Step 6: Control Processor Selection
CLX-1FAN4 Step 6: Control Processor The PAC2 has been specifically designed for the Crestron automation enclosure and the Crestron lighting system, although other Crestron processors can also be used. The PAC2 can be placed in its own enclosure for simplification of low-voltage wiring. - Page 29 If required, an extra power supply, attached to a CAEN-UMP plate, can be added to a separate CAEN enclosure. Crestron recommends the C2N-SPWS300 Power Supply; a 300-watt system power supply designed for large Cresnet control systems. It operates with an input of 100 to 240 VAC, 4A (maximum) and a noise rating less than 150mV.
- Page 30 Crestron's unique dual bus system, with its high-speed I/O bus architecture, provides blazing fast throughput, system wide. The two 40Mb/s Y-BUS expansion slots offer the option of installing any of the CNX-series cards listed in Crestron’s 2003 Product Catalog, and all C2-series control cards. The 300Mb/s Z-BUS expansion slot is designed for super high-speed control card applications such as 10/100 Ethernet, available via Crestron’s single-port C2ENET-1 and dual-port C2ENET-2 Ethernet...
- Page 31 Crestron Lighting Control System PAC2 2-Series Automation Control System Specifications (continued) SPECIFICATION DETAILS Ethernet (Optional Z-BUS Dynamic/Static IP Addressing cards) Full and Half Duplex TCP/IP and UDP/IP Built-in Firewall for Security (Dual Port Only) Built-in Network Address Translator (Dual Port...
-
Page 32: Step 7: Network Block Selection
Control System Crestron Lighting Step 7: Network Block Selection A CAEN-BLOCK, required in each enclosure that does not contain a PAC2 processor. The CAEN-BLOCK provides module connection and Cresnet communications. The unit has a left and right connector for communication with the CLX-Series modules. -
Page 33: Step 8: Accessories Selection
CAEN-UMP plates(s) to facilitate any required separation codes. CAEN-UMP is available in a variety of sizes, and occupies the same area as one, two or four Crestron lighting modules. Plate size corresponds to the number of module spaces and their arrangement within the enclosure. -
Page 34: Basic Lighting System Interconnections
Control System Crestron Lighting Basic Lighting System Interconnections A Crestron Lighting System 30 • Lighting Control System Design Design Guide – DOC. 5999A... -
Page 35: Ordering A Crestron Lighting Control System
Control System Ordering a Crestron Lighting Control System Hardware These are the steps for ordering a Crestron lighting control system, regardless of the size. Each system and module contains the appropriate installation literature and operation guide. Steps to order a lighting system: Survey all lights and loads to be controlled. -
Page 36: Example Lighting System
Control System Crestron Lighting Example Lighting System This example is based on the following typical wiring plan. 32 • Lighting Control System Design Design Guide – DOC. 5999A... - Page 37 Control System Enter the information into D3 Pro, and the software can generate the following load schedule reports. Load Schedule Project: AV Sample Residence Dealer: Crestron Creator: Crestron D3 Pro v1.2.1 Description: Date: 11/4/2003 System Number: 1 Controlled Ckt Controlled Ckt...
- Page 38 Control System Crestron Lighting Load Schedule w/ Panel Terminations Project: AV Sample Residence Dealer: Crestron Creator: Crestron D3 Pro v1.2.1 Description: Date: 11/4/2003 System Number: 1 Controlled Controlled Fixture Fixture Total Area Room Ckt Name Ckt No. Fixture Load Type...
- Page 39 Crestron Lighting Control System Circuits and Interfaces Lighting Control System Design • 35 Design Guide – DOC. 5999A...
- Page 40 Control System Crestron Lighting Module Wiring 36 • Lighting Control System Design Design Guide – DOC. 5999A...
- Page 41 Crestron Lighting Control System PAC2 Connections Lighting Control System Design • 37 Design Guide – DOC. 5999A...
-
Page 42: Merchandise Returns / Repair Service
(property or economic damages inclusive) arising from the sale or use of this equipment. CRESTRON is not liable for any claim made by a third party or made by the purchaser for a third party. - Page 43 Crestron Lighting Control System This page intentionally left blank. Lighting Control System Design • 39 Design Guide – DOC. 5999A...
- Page 44 Crestron Electronics, Inc. Design Guide – DOC. 5999A 15 Volvo Drive Rockleigh, NJ 07647 11.03 Tel: 888.CRESTRON Fax: 201.767.7576 Specifications subject to www.crestron.com change without notice.