Table of Contents
Advertisement
Available languages
Available languages
Quick Links
Advertisement
Table of Contents

Related Manuals for Nakayama EM4250


Summary of Contents for Nakayama EM4250
- Page 1 EM4250 026754 ART NO: WWW.NAKAYAMATOOLS.COM...
-
Page 2: Symbols Marked On The Product
Introduction Read and understand all instructions. Save these instructions. Failure to follow all instructions listed below may result in electric shock, fire and/or serious injury. The term ‘power tool’ in all of the warnings below refers to your mains-operated (corded) power tool. Know Your Lawn Mower Read this manual carefully, observing the recommended safety instructions before, during and after using your lawn mower. -
Page 3: General Safety Rules
2. General Safety Rules The purpose of the safety rules is to attract your attention to possible dangers. The safety symbols and the explanations with them, require your careful attention and understanding. The safety warnings do not by themselves eliminate any danger. The instruction or warnings they give are not substitutes for proper accident prevention measures. -
Page 4: General Identification
and make repairs before restarting and operating the lawnmower. If lawnmower starts to vibrate abnormally (check immediately): - Inspect for damage. - Replace or repair any damage parts. - Check for and tighten any loose parts. 25) Stop the mower: - Whenever you leave the lawnmower: 26) keep all nuts, blots and screws tight to be sure the equipment is in safe working condition;... -
Page 5: Technical Data
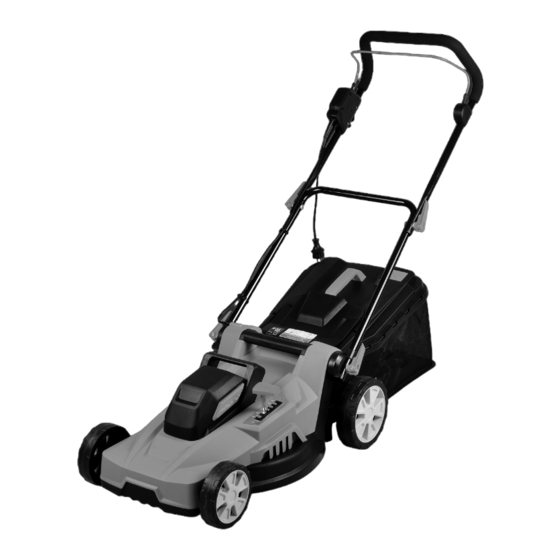
4. Technical Data Voltage/Frequency: 230V-50Hz Input Power: 2000W No Load Speed: 3500rpm Cutting Capacity: 420mm Cutting Height: 20-70mm Collection Bag: 5. Assembly Assembly The Folding Handle A) Fix the lower handlebars into the unit body with locking knobs as Fig. 2A,/Fig.2B/Fig.2C shown. B) Connect the upper handle and the lower handle with the locking knob (Fig.2D/Fig.2E/Fig.2F). -
Page 6: Adjustment Of Cutting Height
Assembly The Grass Catcher 1. To fit: Raise the rear cover and hitch the grass catcher on rear of mower. (Fig.3A/Fig.3B/Fig.3C) 2. To remove: grasp and lift the rear cover, remove grass catcher. Level indicator (not included in all models) There is a level indicator on the top of the grass catcher that shows whether the catcher is empty or full : - The level indicator inflates if the catcher is not full during the moving. -
Page 7: Safety Precautions
7. Safety Precautions A) Always operate with the deflector or grass catcher in the correct position. B) Always stop the motor before removing the grass catcher or adjusting the height of cutting position. 1. Before mowing, remove all foreign objects from the lawn which may be thrown by the machine. While mowing, stay alert for any foreign objects which may have been missed (Fig.5A). -
Page 8: Extension Cords
have to cut the lawn in two passes, lowering the blade another 1/3 of the length for the second cut and perhaps cutting in a different pattern than was used the first time. Overlapping the cut a little on each pass will also help to clean up any stray clippings left on the lawn. -
Page 9: Troubleshooting
b) if the motor stops suddenly c) if the blade is bent (do not align!) d) if the motor shaft is bent (do not align!) e) if a short-circuit occurs when the cable is connected. f) If the gears are damaged. g) If the V-belt is defective. - Page 10 Εισαγωγή Διαβάστε όλες τις οδηγίες ασφαλείας και τις προειδοποιήσεις. Η μη τήρηση αυτού μπορεί να οδηγήσει σε σοβαρό τραυματισμό. Ο όρος ηλεκτρικό εργαλείο που χρησιμοποιείτε στις οδηγίες ασφαλείας αναφέρετε σε εργαλεία που λειτουργούν με ρεύμα (καλώδιο) ή με μπαταρία (χωρίς καλώδιο). Φυλάξτε όλες τις οδηγίες ασφαλείας για μελλοντική χρήση. Διαβάστε...
- Page 11 2. Οδηγίες ασφαλούς χρήσης Σκοπός των κανόνων ασφαλείας είναι να επιστήσετε την προσοχή σας σε πιθανούς κινδύνους. Τα σύμβολα ασφαλείας και οι εξηγήσεις μαζί τους απαιτούν την προσοχή και την κατανόηση σας. Οι προειδοποιήσεις ασφαλείας δεν αφαιρούν από μόνες τους κανένα κίνδυνο. Οι οδηγίες ή οι προειδοποιήσεις δεν υποκαθιστούν τα υπόλοιπα μέτρα πρόληψης ατυχημάτων. ΠΡΟΕΙΔΟΠΟΙΗΣΗ: Η...
- Page 12 • Εάν το μηχάνημα παρουσιάσει μη φυσιολογικούς κραδασμούς. (ελέγξτε αμέσως). - Ελέγξτε όλες τις βίδες και τα παξιμάδια ότι είναι καλά σφιγμένα και ότι το μηχάνημα είναι σε καλή λειτουργική κατάσταση. - Ελέγξτε τον προφυλακτήρα ότι είναι σε καλή κατάσταση. - Αλλάξτε...
-
Page 13: Τεχνικά Χαρακτηριστικά
4. Τεχνικά Χαρακτηριστικά Τάση/Συχνότητα: 230V-50Hz Ισχύς εισόδου: 2000W Ταχύτητα χωρίς φορτίο: 3500rpm Ικανότητα κοπής: 420mm Ύψος κοπής: 20-70mm Κάδος συλλογής: 5. Συναρμολόγηση Συναρμολόγηση της ρυθμιζόμενης χειρολαβής Α) Συνδέστε την κάτω χειρολαβή χρησιμοποιώντας τους σφιγκτήρες ασφάλισης με την βοήθεια των εικόνων 2A, / 2B / 2C. B) Συνδέστε... -
Page 14: Ρύθμιση Του Ύψους Κοπής
Σύνδεση του κάδου συλλογής 1. Για να συνδέσετε τον κάδο: Σηκώστε το πίσω κάλυμμα και συνδέστε τον κάδο στο πίσω μέρος του μηχανήματος. (Εικ.3Α / Εικ.3Β / Εικ.3C) 2. Για να αφαιρέσετε τον κάδο: Σηκώστε το πίσω κάλυμμα και αφαιρέστε τον κάδο. Σύστημα... - Page 15 7. Επιπρόσθετες οδηγίες ασφαλείας Α) Χρησιμοποιείτε την μηχανή πάντοτε με τα εξαρτήματα ασφαλείας στην θέση τους. Β) Απενεργοποιήστε τον κινητήρα πριν αφαιρέσετε τον κάδο ή ρυθμίσετε το ύψος της θέσης κοπής. 1. Αφαιρέστε όλα τα αντικείμενα και τα εμπόδια από την περιοχή εργασίας για να αποφύγετε τον τραυματισμό. Κατά την διάρκεια...
- Page 16 πιο αργές ταχύτητες για να έχετε καλύτερο αποτέλεσμα. Όταν κόβετε γρασίδι μεγάλου ύψους, μπορεί να πρέπει να κόψετε το γρασίδι σε δύο περάσματα, χαμηλώνοντας την λεπίδα κοπής άλλο 1/3 του μήκους για το δεύτερο πέρασμα και ίσως κόβοντας σε διαφορετικό μοτίβο από αυτό του πρώτου περάσματος. Μια μικρή επικάλυψη μεταξύ των περασμάτων θα βοηθήσει...
-
Page 17: Συντήρηση Και Καθαρισμός
11. Συντήρηση και καθαρισμός Προσοχή: Πριν πραγματοποιήσετε οποιαδήποτε εργασία συντήρησης, επισκευής ή καθαρισμού στο ίδιο το μηχάνημα βεβαιωθείτε πως έχετε αποσυνδέσει το βύσμα του καλωδίου από την πρίζα. Μην βρέχετε το μηχάνημα με νερό. Η διείσδυση νερού ενδέχεται να προκαλέσει βλάβη στον ηλεκτροκινητήρα και στα ηλεκτρονικά...