Table of Contents
Advertisement
Available languages
Available languages
Quick Links
Advertisement
Table of Contents

Related Manuals for Bauknecht BLVE 7103


Summary of Contents for Bauknecht BLVE 7103
- Page 1 BLVE 7103 Benutzer- und Wartungshandbuch User and maintenance manual...
-
Page 3: Wichtige Sicherheitshinweise
WICHTIGE SICHERHEITSHINWEISE IHRE SICHERHEIT UND DIE ANDERER PERSONEN IST SEHR WICHTIG Diese Anweisungen sowie das Gerät beinhalten wichtige Sicherheitshinweise, die Sie durchlesen und stets beachten sollten. Dieses Symbol warnt vor möglichen Gefahren für die Sicherheit des Benutzers und anderer Personen. Alle Sicherheitshinweise werden von dem Gefahrensymbol und folgenden Begriffen begleitet: Weist auf eine gefährliche Situation hin, die bei mangelnder Vorsicht zu schweren GEFAHR... -
Page 4: Installation
INSTALLATION Prüfen Sie nach dem Auspacken, ob der Backofen etwaige Transportschäden aufweist und die Backofentür richtig schließt. Bei auftretenden Problemen wenden Sie sich bitte an Ihren Händler oder rufen die nächste Kundendienststelle an. Um eventuellen Schäden vorzubeugen, sollten Sie das Gerät erst unmittelbar vor der Installation von der Polystyrolunterlage nehmen. VORBEREITUNG DES UNTERBAUSCHRANKS •... -
Page 5: Störung - Was Tun
STÖRUNG - WAS TUN? Der Backofen heizt nicht auf: • Prüfen Sie, ob das Stromnetz Strom führt und der Backofen an das Netz angeschlossen ist. • Schalten Sie das Gerät aus und wieder ein, um festzustellen, ob die Störung behoben ist. Die Elektronikuhr funktioniert nicht: •... - Page 6 Reinigung der Backofenhinterwand und der katalytischen Seitenwände (falls mitgeliefert): WICHTIG: Verwenden Sie keine ätzenden oder scheuernden Reinigungsmittel, harte Bürsten, Topfkratzer oder Backofensprays, da dadurch die katalytische Emaillierung beschädigt werden und die Selbstreinigungsfähigkeiten verloren gehen können. • Lassen Sie den leeren Backofen zur Reinigung eine Stunde mit der Heißluftfunktion bei 200°C laufen. •...
-
Page 7: Auswechseln Der Glühlampe
ABSENKEN DES OBEREN GRILLELEMENTS (NUR BEI EINIGEN MODELLEN) Entfernen Sie die seitlichen Einhängegitter. Ziehen Sie das Heizelement (Abb. 6) etwas nach vorn und senken Sie es anschließend ab (Abb. 7). Um das Grillelement wieder korrekt einzusetzen, heben Sie es an und ziehen Sie es leicht zu sich her. Vergewissern Sie sich, dass es korrekt in den seitlichen Aussparungen sitzt. -
Page 8: Mitgeliefertes Zubehör
BEDIENUNGSANLEITUNG FÜR DEN OFEN FÜR DEN ELEKTRISCHEN ANSCHLUSS LESEN SIE BITTE DEN TEIL BEZÜGLICH DER INSTALLATION Bedienfeld Oberes Heizelement/Grill Kühlgebläse (nicht sichtbar) Typenschild (darf nicht entfernt werden) Innenbeleuchtung Rundes Heizelement (nicht sichtbar) Gebläse Drehspieß (falls mitgeliefert) Unteres Heizelement (nicht sichtbar) 10. -
Page 9: Beschreibung Des Bedienfelds
EINSCHIEBEN DER ROSTE UND ANDEREN ZUBEHÖRTEILE IN DEN OFEN Der Rost und die anderen Zubehörteile sind mit einem Blockiersystem ausgestattet, das ein versehentliches Herausziehen verhindert. Abb. 1 Schieben Sie den Rost mit dem erhöhten Teil „A“ nach oben zeigend waagerecht ein (Abb. 1). Kippen Sie den Rost auf Höhe der Blockierung „B“... - Page 10 BESCHREIBUNG DISPLAY Anzeigen der aktiven Heizelemente für die verschiedenen Funktionen Symbole für die Zeitverwaltung: Timer, Garzeit, Abschaltzeit, aktuelle Uhrzeit Informationen zu den ausgewählten Funktionen Automatische Funktion BROT/PIZZA gewählt Anzeige Backofentür geschlossen während des automatischen Reinigungszyklus (für dieses Modell nicht verfügbar) Backofen-Innentemperatur Pyrolyse-Funktion (für dieses Modell nicht verfügbar) Anbräunen...
-
Page 11: Schnelles Vorheizen
SCHNELLES VORHEIZEN Wählen Sie die Funktion Schnelles Vorheizen durch Drehen des „Funktionswahlknopfs“ neben dem Symbol Bestätigen Sie mit der Taste : Die Einstellungen erscheinen auf dem Display. Wenn die vorgeschlagene der gewünschten Temperatur entspricht, drücken Sie die Taste . Zum Ändern gehen Sie wie in den vorhergehenden Abschnitten beschrieben vor. - Page 12 TIMER Diese Funktion lässt sich nur bei ausgeschaltetem Ofen, beispielsweise für die Kontrolle der Kochzeit von Nudeln verwenden. Die maximal programmierbare Zeit beträgt 23 Stunden und 59 Minuten. Lassen Sie den „Funktionswahlknopf“ auf 0 und drehen Sie den „Navigationsknopf“, bis die gewünschte Zeit angezeigt wird.
- Page 13 Pizza Drehen Sie den „Funktionswahlknopf“ auf das Symbol : Auf dem Display erscheint „BREAD“ (Brot). Um die Funktion „PIZZA“ zu wählen, gehen Sie folgendermaßen vor: Drehen Sie den „Navigationsknopf“: Auf dem Display erscheint „PIZZA“. Drücken Sie , um die Funktion auszuwählen. Drehen Sie den „Navigationsknopf“, um die gewünschte Temperatur (zwischen 220°...
- Page 14 TABELLE FUNKTIONSBESCHREIBUNGEN FUNKTIONSWAHLKNOPF Zum Unterbrechen des Garvorgangs und Abschalten des Geräts. LAMPE Zum Ein-/Ausschalten der Innenbeleuchtung. Zur Beschleunigung des Auftauens von Speisen. Es wird empfohlen, das Gargut auf die mittlere Ebene zu geben. Es wird empfohlen, die Lebensmittel in ihrer Verpackung aufzutauen, um dem Austrocknen der Oberfläche vorzubeugen.
- Page 15 GARTABELLE Rezept Betriebsart Vorheizen Einschubebene Temperatur Zeit Zubehör (von unten) (°C) (Min.) 160-180 30-90 Kuchenform auf Rost Hefekuchen Ebene 3:Kuchenform auf Rost 160-180 30-90 Ebene 1:Kuchenform auf Rost Fettpfanne / Backblech oder 160-200 30-85 Gefüllter Kuchen Kuchenform auf Rost (Käsekuchen, Strudel, Ebene 3:Kuchenform auf Rost Obstkuchen) 160-200...
- Page 16 Rezept Betriebsart Vorheizen Einschubebene Temperatur Zeit Zubehör (von unten) (°C) (Min.) Hähnchen, Kaninchen, Ente 200-230 50-100 Fettpfanne oder Form auf Rost 1 kg Puter, Gans 3 kg 190-200 80-130 Fettpfanne oder Form auf Rost Fisch gebacken / in Folie 180-200 40-60 Fettpfanne oder Form auf Rost (Filet, ganz)
- Page 17 ERPROBTE REZEPTE in Konformität mit den Richtlinien IEC 60350:99+A1:05 +A2:08 und DIN 3360-12:07:07 Rezept Betriebsart Vorheizen Einschubebene Temperatur Zeit Zubehör und Anmerkungen (von unten) (°C) (Min.) IEC 60350:99+A1:05 +A2:08 § 8.4.1 15-25 Fettpfanne / Kuchenblech Mürbteigkekse (Shortbread) Ebene 3:Kuchenblech 20-30 Ebene 1:Fettpfanne IEC 60350:99+A1:05 +A2:08 §...
-
Page 18: Hinweise Zum Gebrauch Und Empfehlungen
HINWEISE ZUM GEBRAUCH UND EMPFEHLUNGEN So lesen Sie die Garzeittabelle Die Tabelle gibt die beste Garfunktion für ein bestimmtes Lebensmittel an, das auf einer oder mehreren Ebenen gleichzeitig gegart werden kann. Die Garzeiten gelten ab dem Moment, in dem Sie das Gargut in den Ofen geben, die (eventuell erforderliche) Aufheizzeit zählt nicht dazu. -
Page 19: Important Safety Instructions
IMPORTANT SAFETY INSTRUCTIONS YOUR SAFETY AND THAT OF OTHERS IS PARAMOUNT This manual and the appliance itself provide important safety warnings, to be read and observed at all times. This is the danger symbol, pertaining to safety, which alerts users to potential risks to themselves and others. All safety warnings are preceded by the danger symbol and the following terms: Indicates a hazardous situation which, if not avoided, will cause serious injury. -
Page 20: Safeguarding The Environment
INSTALLATION Unpack the oven and make sure that the oven has not been damaged during transport and that the oven door closes properly. In the event of problems, contact the dealer or your nearest After-sales Service. To prevent any damage, only remove the oven from its polystyrene foam base at the time of installation. -
Page 21: Troubleshooting Guide
TROUBLESHOOTING GUIDE Oven not working: • Check for the presence of mains electrical power and if the oven is connected to the electrical supply. • Turn off the oven and restart it to see if the fault persists. The electronic programmer does not work: •... -
Page 22: Maintenance
MAINTENANCE Use safety gloves. WARNING Ensure the oven is cold before carrying out the following operations. Disconnect the appliance from the power supply. REMOVING THE DOOR To remove the door: Open the door fully. Lift the catches and push them forwards as far as they will go (fig. 1). Close the door as far as it will go (A), lift it up (B) and turn it (C) until it is released (D) (fig. -
Page 23: Replacing The Oven Lamp
REPLACING THE OVEN LAMP To replace the rear lamp (if present): Disconnect the oven from the power supply. Unscrew the lamp cover (fig. 6), replace the lamp (see note for lamp type) and screw the lamp cover back on. Reconnect the oven to the power supply. To replace the side lamp (if present): Disconnect the oven from the power supply. -
Page 24: Instructions For Oven Use
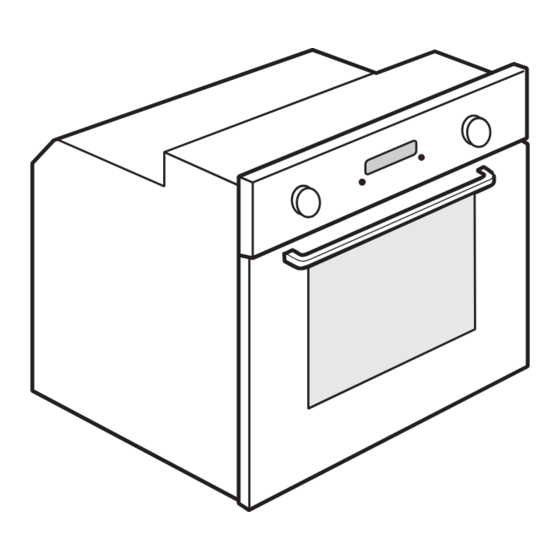
INSTRUCTIONS FOR OVEN USE FOR ELECTRICAL CONNECTION, SEE THE PARAGRAPH ON INSTALLATION Control panel Upper heating element/grill Cooling fan (not visible) Dataplate (not to be removed) Lamp Circular heating element (not visible) Turnspit (if present) Lower heating element (not visible) 10. -
Page 25: Control Panel Description
INSERTING WIRE SHELVES AND OTHER ACCESSORIES IN THE OVEN The wire shelf and other accessories are provided with a locking mechanism to prevent their unintentional removal. Fig. 1 Insert the wire shelf horizontally, with the raised part “A” upwards (fig. 1). Angle the wire shelf when it reaches the locking position “B”... -
Page 26: Description Of Display
DESCRIPTION OF DISPLAY Display of heating elements activated during the various cooking functions Time management symbols: timer, cooking time, end of cooking time, time Information regarding selected functions Automatic BREAD/PIZZA function selected Indication of door locked during automatic cleaning cycle (not available on this model) Internal oven temperature Pyrolisis function (not available on this model) Browning... -
Page 27: Fast Preheating
FAST PREHEATING Turn the “Functions” knob to the symbol to select the fast preheating function. Confirm by pressing : the settings are shown on the display. If the proposed temperature is that desired, press button . To change the temperature, proceed as described in previous paragraphs. -
Page 28: Selecting Special Functions
TIMER This function can be used only with the oven switched off and is useful, for example, for monitoring the cooking time of pasta. The maximum time which can be set is 23 hours and 59 minutes. With the “Functions” knob at zero, turn the “Browse” knob to display the desired time. Press button to start the countdown. - Page 29 SETTINGS Turn the “Functions” knob indicator to the symbol to access a submenu containing four display settings which can be changed. Clock Turn the “Functions” knob to the symbol : the word CLOCK appears on the display. To change the time of day, see the previous paragraph (SETTING THE TIME).
- Page 30 OVEN FUNCTION DESCRIPTION TABLE FUNCTIONS KNOB To stop cooking and switch off the oven. LAMP To switch the oven interior light on/off. To speed up defrosting of food. Place food on the middle shelf. Leave food in its packaging in order to prevent it from drying out on the outside.
-
Page 31: Cooking Table
COOKING TABLE Recipe Function Preheating Shelf Temperature Time Accessories (from bottom) (°C) (min) 160-180 30-90 Cake tin on wire shelf Leavened cakes Shelf 3: cake tin on wire shelf 160-180 30-90 Shelf 1: cake tin on wire shelf Drip tray/ baking tray or cake tin 160-200 30-85 on wire shelf... - Page 32 Recipe Function Preheating Shelf Temperature Time Accessories (from bottom) (°C) (min) Baked fish / en papillote 180-200 40-60 Drip tray or oven tray on wire shelf (fillet, whole) Stuffed vegetables (tomatoes, courgettes, 180-200 50-60 Oven tray on wire shelf aubergines) Toast 3 (high) Wire shelf...
- Page 33 TESTED RECIPES (in compliance with IEC 60350:99+A1:05 +A2:08 and DIN 3360-12:07:07) Recipe Function Preheating Shelf Temp Time Accessories and notes (from the bottom) (°C) (min) IEC 60350:99+A1:05 +A2:08 § 8.4.1 15-25 Drip tray / baking tray Shortbread Shelf 3: baking tray 20-30 Shelf 1: drip tray IEC 60350:99+A1:05 +A2:08 §...
-
Page 34: Recommended Use And Tips
RECOMMENDED USE AND TIPS How to read the cooking table The table indicates the best function to use for any given food, to be cooked on one or more shelves at the same time. Cooking times start from the moment food is placed in the oven, excluding pre-heating (where required). Cooking temperatures and times are purely for guidance and will depend on the amount of food and type of accessory used. - Page 36 Printed in Italy 05/2010 5019 410 01006...