Table of Contents
Advertisement
Quick Links
Advertisement
Table of Contents

Related Manuals for Airlink101 802.11g USB XRTM Adapter AWLL5026


Summary of Contents for Airlink101 802.11g USB XRTM Adapter AWLL5026
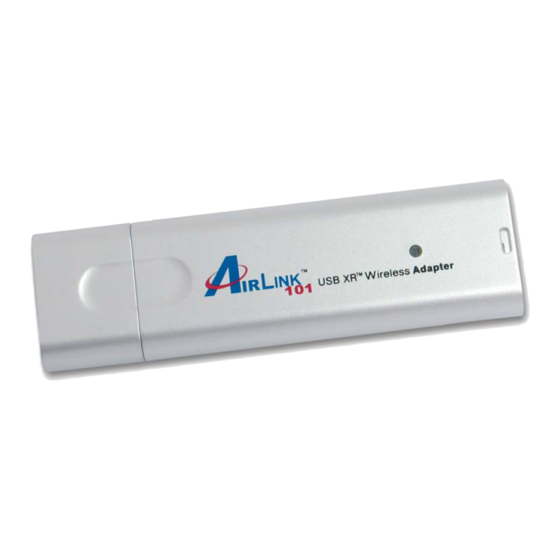
- Page 1 802.11g USB XR™ Adapter Model # AWLL5026 User’s Manual Ver. 1A...
-
Page 2: Table Of Contents
1. Introduction... 3 1.1 Package Contents ... 3 2. Installation... 4 2.1 Install Driver & Utility... 4 2.2 Verify Driver Installation... 9 3. Configure the USB Adapter... 11 4. Configure the Wireless Utility ... 16 4.1 Link Information... 16 4.2 AP List ... 19 4.3 Configure Encryption Settings... -
Page 3: Introduction
1. Introduction Thank you for purchasing the 802.11g USB XR™ Adapter. When used with other Airlink101™ MIMO XR™ wireless products, the wireless signal range extends farther than standard 802.11g devices. This Adapter supports 64/128-bit WEP data encryption that protects your wireless network from eavesdropping. -
Page 4: Installation
2. Installation 2.1 Install Driver & Utility This section provides instructions on how to install the 802.11g USB XR™ Adapter. The driver is installed along with the utility. Note: Do not connect the USB Adapter to your computer until you have reached the appointed step. - Page 5 Step 2 Click Next at the welcome screen. Step 3 Click Next to accept the default destination folder.
- Page 6 Step 4 Verify Yes, I want to restart my computer now is selected and click Finish to restart your computer. Step 5 After the computer is restarted, connect the USB Adapter to your computer’s USB port. Step 6 If Windows asks to connect to Windows Update, select No, not this time and click Next.
- Page 7 Step 7 Select Install the software automatically and click Next. For Windows 98SE and ME, select Search for the best driver for your device and click Next. Verify all the check boxes are checked and click Next. Step 8 Click Continue Anyway at the Windows Logo Screen. (For Windows 2000, click Yes at the Digital Signature Not Found prompt).
- Page 8 Step 9 Click Finish. (Restart the computer for Windows 98SE and ME).
-
Page 9: Verify Driver Installation
2.2 Verify Driver Installation To verify if the driver has been installed successfully, please perform the following steps. Step 1 Right-click on My Computer from your desktop and select Properties. Step 2 Select the Device Manager tab. (For Windows 2000/XP, select the Hardware tab first then click on Device Manager). - Page 10 Expand Network adapters from the list and verify that Airlink101 USB XR Adapter is listed and no yellow question mark is beside it. If Airlink101 USB XR Adapter is not listed, or you see a yellow question mark beside it, please re-install the driver again.
-
Page 11: Configure The Usb Adapter
3. Configure the USB Adapter This section describes how to connect your 802.11g USB XR™ Adapter to a wireless network. Note to Windows XP Users: You must disable the Wireless Zero Configuration Utility in order to use the bundled Wireless Utility. Please follow the steps below to disable XP’s wireless utility. Step 1 Double-click on the Wireless Network Connection Icon in the system tray and then click on Properties or Advanced. - Page 12 To open the USB Adapter’s utility go to Start > (All) Programs > Airlink101 USB XR Adapter Utility > Airlink101 USB XR Adapter Utility. Step 1 Go to the AP List tab, select the SSID (Network Name) of the wireless network...
- Page 13 Step 2 If encryption is not enabled for the selected access point / router, skip to Step 6. Otherwise, enter a Profile Name for your wireless setting and click Next.
- Page 14 Step 3 Verify that the Network Name matches the SSID of your wireless network and click Next. Step 4 Select the proper encryption setting for your wireless router or access point from the drop-down menu and click Next.
- Page 15 Step 5 Follow the on-screen instructions to complete the encryption settings. Click Complete when finished. Step 6 You should see a blue circle around the antenna icon indicating a valid connection. Step 7 Go to the Link Information tab and click on the More button. Step 8 Verify that you are receiving adequate Signal Strength and Link Quality and that you have been assigned a valid IP address (instead of all 0’s).
-
Page 16: Configure The Wireless Utility
If you do not have adequate Signal Strength, try re-orienting the Access Point and/or the USB Adapter to get a better reception. 4. Configure the Wireless Utility This section describes the various functions of the Wireless Utility that you can configure, including encryption settings. - Page 17 Click on the More button to see the details of the current network connection.
- Page 18 The Wireless Information displays the current wireless network you are connected to as well as various other statuses such as the Signal Strength and your assigned IP address.
-
Page 19: Ap List
4.2 AP List The AP List tab displays all the available Access Points detected by the USB Adapter. Simply select the desired Access Point you wish to connect to and click Connect. The Site Information displays a list of status for the selected AP, including the Channel number and the Encryption status. -
Page 20: Configure Encryption Settings
4.3 Configure Encryption Settings This section describes how to configure encryption settings for the USB Adapter. Note: The encryption settings you set for the Adapter must match the same settings of the Access Point/Wireless Router; otherwise, the encryption will not work properly. Step 1 From the AP List tab, select the Access Point/Wireless Router you want to connect to and click Connect. - Page 21 Step 3 Verify the Network Name (SSID) is correct and click Next. For WEP Settings: WEP Step 4 Select the appropriate Authentication Mode and Encryption settings and click Next.
- Page 22 WEP Step 5 Select the appropriate Input Method, Key (password), Key Index, and click Next. WEP Step 6 Click Complete to finish the settings.
- Page 23 For WPA Settings: WPA Step 4 Select WPA-PSK and the appropriate Input Method and click Next. WPA Step 5 Enter the WPA Key (passphrase) and click Next.
- Page 24 WPA Step 6 Click Complete to finish the settings. Step 7 You should see a blue circle around the antenna icon indicating a valid connection. A lock icon beside the antenna indicates the connection is encrypted.
-
Page 25: Profile Setting
4.4 Profile Setting The Profile Setting tab lists all the profiles you have created. You can create new profiles for different network environments. To add a new profile, follow the steps below: Step 1 Click on the Add button. - Page 26 Step 2 Enter a name for your new profile and click Next. Step 3 Enter the SSID (Network Name) of the wireless network you want to connect to and click Next.
- Page 27 Step 4 Configure any encryption setting if required and click Next. Step 5 Click Complete to finish the profile setting.
- Page 28 Step 6 Your new profile will be listed in the Profile List. Step 7 You can quickly select which profile you want to use from the Link Information tab depending on your network environments without having to reconfigure the settings each time.
-
Page 29: Static Ip Setting
4.5 Static IP Setting To change the IP address of the wireless adapter to Static IP, follow the steps below: Step 1 On Step 5 of 4.4 Profile Setting, under IP setting, select New Setting and click Next. Step 2 Select Static. -
Page 30: About
4.6 About The About tab shows the Utility, Driver, and Firmware version as well as the MAC address of the 802.11g USB XR™ Adapter. -
Page 31: Appendix
Appendix Federal Communication Commission Interference Statement This equipment has been tested and found to comply with the limits for a Class B digital device, pursuant to Part 15 of the FCC Rules. These limits are designed to provide reasonable protection against harmful interference in a residential installation. This equipment generates, uses and can radiate radio frequency energy and, if not installed and used in accordance with the instructions, may cause harmful interference to radio communications. - Page 32 Radio products with the CE marking comply with the R&TTE Directive (1999/5/EC), the Directive (89/336/EEC) and the Low Voltage Directive (73/23/EEC) issued by the Commission of the European Community. Compliance with these directives implies conformity to the following European Norms: •...
-
Page 33: Technical Support
AirLink101. All other product or service names are the property of their respective holders. AirLink101 products are protected under numerous U.S. and foreign patents and pending applications, mask work rights, and copyrights.