Table of Contents
Advertisement
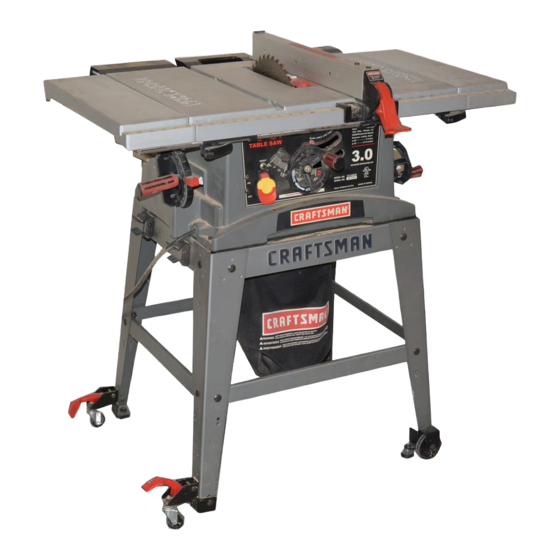
Operator's Manual
3.0 HP (Max. Developed)
10" Inch Blade
5000 R.P.M.
TABLE SAW
Model No.
137.248830
CAUTION:
Before using this Table Saw,
read this manual and follow
all its Safety Rules and
Operating Instructions
•
Safety Instructions
•
Installation
•
Operation
•
Maintenance
•
Parts List
Customer
Help Line
1-800-843-1682
Sears, Roebuck and Co., Hoffman Estates, IL 60179 USA
Visit our Craftsman website: www.sears.com/craftsman
Part No. 13724883001
Advertisement
Table of Contents

Related Manuals for Craftsman 137.248830


Summary of Contents for Craftsman 137.248830
- Page 1 CAUTION: Before using this Table Saw, read this manual and follow all its Safety Rules and Operating Instructions Sears, Roebuck and Co., Hoffman Estates, IL 60179 USA Visit our Craftsman website: www.sears.com/craftsman Part No. 13724883001 • Safety Instructions • Installation •...
-
Page 2: Specifications
To avoid electrical hazards, fire hazards or damage to the table saw, use proper circuit protection. This table saw is wired at the factory for 110-120 Volt operation. It must be connected to a 110-120 Volt / 15 Ampere time delay fuse or circuit breaker. To avoid shock or fire, replace power cord immediately if it is worn, cut or damaged in any way. - Page 3 I_ WARNING] Before using your table saw, it is critical that you read and understand Failure to follow these rules could result in serious injury or damage to the table saw. Good safety practices are a combination of common sense, staying alert and understanding how to use your power tool.
- Page 4 Do not release work before it has passed all the way past the saw blade. Do not rip work that is twisted, warped or does not have a straight edge to guide it along the fence.
- Page 5 100' 150' CHECK with a qualified electrician or service personnel if you do not completely understand the grounding instructions, or if you are not sure the saw is properly grounded. CORDS Use only 3-wire extension cords that have 3-prong grounding plugs and 3-pole grounding receptacles that accept the saw's plug.
- Page 6 RECOMMENDED ACCESSORIES [,A WARNINGJ Visit your Sears Hardware Department or see the Craftsman Power and Hand Tools Catalog to purchase recommended accessories for this power tool. WARNINGJ To avoid the risk of personal injury: • Do not use adjustable (wobble) type dadoes or carbide tipped dado blades;...
- Page 7 UNPACKING YOUR TABLE SAW...
- Page 8 Blade bevel ON/OFF switch lock knob Blade elevation & safety key handwheel Bevel angle pointer & scale Table Miter gauge Table saw bBase Rear outfeed table mounting holes extension Roller wheel locking lever Stand Leveling Dust collection foot Stationary wheel...
- Page 10 SAW MOUNTED TO WORK SURFACE (FIG. C) 1. If the leg set will not be used, the saw must be properly secured to a sturdy workbench using the four mounting holes at the base of the saw. 2. The surface of the table where the saw is to be mounted must have a hole large enough to facilitate sawdust fall-through and removal.
-
Page 11: Rip Fence
Fig. I 5. To tighten the arbor nut (5) place the open-end wrench jaws on the flats of the saw arbor to keep the arbor from turning. (Fig. J) 6. Place the box-end wrench (8) on the arbor nut (5), and turn clockwise (to the rear of the saw table). -
Page 12: Blade Guard Assembly
The right hand table extension is the one with the measuring scale (1) visible from the front of the saw when it is installed to the right hand side of the saw table (Fig. N). Unlock both front and rear cam locking levers (2) on the right hand side of the saw base. - Page 13 (2). • Hold the fence bracket (4) firmly against the front of the saw table. Move the far end of the fence until it is parallel with the miter gauge groove. • Tighten both screws and push the handle to lock.
- Page 14 ADJUSTING THE 90 ° AND 45" POSITIVE STOPS (FIG.Q-I, Q-2, Q-3) Your saw has positive stops that will quickly position the saw blade at 90 ° to the table. Make adjustments only if necessary. 90 ° Stop Disconnect the saw from the power source.
- Page 15 1. Remove the yellow switch key and unplug the saw. 2. Move the blade guard out of the way. 3. Raise the blade to the highest position and set at the 0 °...
- Page 16 With the key removed from the switch, unauthorized and hazardous use by children and others is minimized. 1. To turn the saw ON, insert key (1) into the slot in the switch (2). Move the switch upward to the ON position.
- Page 17 3. Place the workpiece flat on the table and against the fence. Keep the workpiece away from the blade. 4. Turn the saw ON and wait for the blade to come up to speed. 5. Slowly feed the workpiece into the blade by pushing forward only on the workpiece section (1) that will pass between the blade and the fence.
- Page 18 Keep the workpiece away from the blade. 4. Start the saw and wait for the blade (1) to come up to full speed. 5. Keep the workpiece (2) against the face of the miter gauge (3) and flat against the face of the gauge and flat against the table.
- Page 19 Blades/chippers must not exceed 1/2". 7. Check saw to ensure that the dado will not strike the housing, insert, or motor when in operation. IIIL W ARNING For your own safety, always replace the blade, blade guard assembly, and blade insert when you are finished with the dado operation.
- Page 20 1. Clean out all sawdust that has accumulated inside the saw cabinet and the motor. 2. Polish the saw table with an automotive wax to keep it clean and to make it easier to slide the workpiece. 3. Clean cutting blades with pitch and gum remover.
- Page 21 4. Splitter not in place 5. Dull blade 6. The operator letting go of material before it is past saw blade 7. Miter angle lock knob is not tight Blade does not raise or tilt Sawdust and dirt in raising and tilting...
-
Page 22: Parts List & View
IA WARNING Any attempt to repair or replace electrical parts on this Table Saw may create a HAZARD unless repair is done by a qualified service technician. Repair service is available at your nearest Sears Service Center. Always order by Model Number and I.D. number. - Page 23 -'_'. _> 26Ji7...
- Page 24 5/3_ =_13/32-3/64 21HH MITER GAUGE 3/8'_3/4-5/64 23PP BLADE 27QV PARTS BOX CARTON A-16 M10"1.5-12 M8"1.25-16 M8"1.25-16 24FS INSTRUCNON MANUAL MODEL NO. 137.248830 Size SCREWS M5"0.8-20 & WASHER M5"0.8-12 WASHER HD SCREW MB'1.0-12 HD. TAPPING SCREW M4"18-10 SCREW M5"16-16 SCREW M5"16-25 SCREW M4"16-16...
- Page 25 OT04 "4" OIPA...
- Page 26 0KRR SERRATED TOOTHED HEXAGON FLANGE NUT 243R LEFT FRONT WHEEL ASS'Y 243S LEFT REAR WHEEL ASS'Y 243T RIGHT FRONT WHEEL ASS'Y 243U RIGHT REAR WHEEL ASS'Y MODEL NO. 137.248830 Size ci_ 8X16-2.5 MSX1.25-30 M6X1.0-12 MSX1.25-12 M6X1.0 T=6 M8X1.25 , T=7.5...
- Page 28 MOTOR NAMEPLATE 0QEA BRACKET 0QEC ARBOR SHAFT ASS'Y 0QED SUPPORT PLATE 0QM2 BRUSH HOLDER ASS'Y 0QQT BRUSH ASS'Y 0QR0 BRUSH COVER 0R1Q MOTOR HOUSING 0R1S BEARING BUSHING 0R1Y ARMATURE ASS'Y 0R20 BAFFLE MODEL NO. 137.248830 SIZE _;,_4 M5X0.8-8 M5X0.8-30 M4X0.7-8 M5X12-60...
- Page 29 f_fJ €_ €_...
- Page 30 PUSH STICK Make from 1/2" or 3/4" wood or thickness less than width of material to be cut. CAUTION! Use only good strong wood or plywood. Use a jigsaw or ,.._J cut out. Cut off here to _--- push 1/2" wood. - 1/2"...
- Page 31 For repair-in your home-of lawn and garden equipment, or heating and cooling systems, no matter who made it, no matter who sold it! For the replacement Operator's Manuals that you need to do-it-yourself. For Sears professional installation of home appliances and items like garage door openers and water heaters.