Table of Contents
Advertisement
Operator's Manual
JCRHFTSMIIN°J
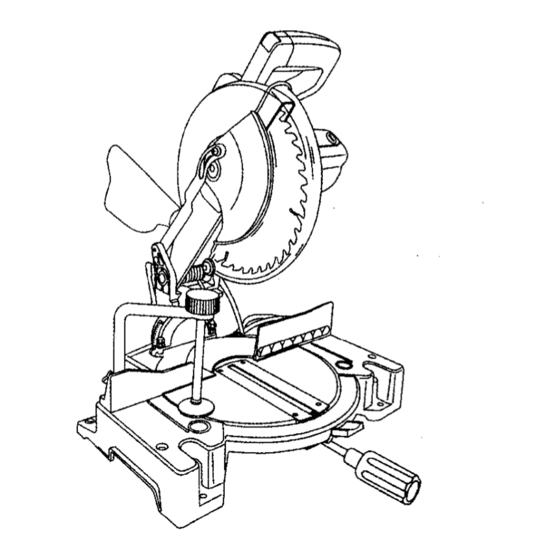
10 in. COMPOUND MITER SAW
WITH LASER TRAC _
Model No..137.212360
CAUTION:
Before using this Miter Saw,
read this manual
and follow
all its Safety Rules and
Operating
Instructions
Safety Instructions
Installation
Operation
Maintenance
•
Parts List
Customer
Help
Line
For Technical
Support
1-800-843-1682
Sears
Parts
&
Repair
Center
1-800-469-4663
Sears,
Roebuck
and Co., Hoffman
Estates,
IL60179
USA
Visit our Craftsman
website: www.sears.com/craftsman
Part No. 13721236001
Printed in China
Advertisement
Table of Contents
Troubleshooting

Related Manuals for Craftsman 137.212360


Summary of Contents for Craftsman 137.212360
- Page 1 Safety Rules and • Parts List Operating Instructions Sears Parts & For Technical Support Repair Center Customer Help Line 1-800-843-1682 1-800-469-4663 Sears, Roebuck and Co., Hoffman Estates, IL60179 Visit our Craftsman website: www.sears.com/craftsman Part No. 13721236001 Printed in China...
- Page 2 Carton Contents ........CRAFTSMAN ONE YEAR FULL WARRANTY If this Craftsman tool fails due to a defect in material or workmanship within one year from the date of purchase, call 1-800-4-MY-HOME®to arrange for free repair(or replacement if repair proves impossible).
- Page 3 WARNING ICONS Your power tool and its Operator's Manual may contain "WARNING ICONS" (a picture symbol intended to alert you to, and/or instruct you how to avoid, a potentially hazardous condition). Understanding and heeding these symbols will help you operate your tool better and safer.
- Page 4 GENERAL SAFETY INSTRUCTIONS The table on page 7 shows the correct BEFORE USING THIS P OWER TOOL size to use depending on cord length and Safety isacombination ofcommon sense, nameplate ampere rating.If in doubt, use the staying alert and knowing how touse your power next heavier gauge.
- Page 5 determine that it will operate properly and perform its intended function - check for alignment of moving pads, binding of moving parts, breakage of pads, mountingand any other conditionsthat may affect its operation. A guard or other part that is damaged should be properly repaired or replaced.
- Page 6 SPECIFIC SAFETY INSTRUCTIONS FOR T HIS stop before returningthe saw to the raised COMPOUND MITER SAW position. 20. MAKE SURE the blade has come to a DO NOT USE THIN KERF BLADES they complete stop before removingor secudng can deflect and contact guard and can cause the workpiece, changing the workpiece angle possible injury to the operator.
- Page 7 GROUNDING INSTRUCTIONS NOTE: When using an extension cord on a circuit with a #14 wire, the extension cord must IN THE EVENT OF A MALFUNCTION not exceed 25 feet in length. Before connecting BREAKDOWN, grounding provides a path of the motor to the power line, make sure the switch least resistance for electric currents and reduces is in the off position and the electric current is...
- Page 8 _e,][e,] :k'.,5.-,[e] -i i :[..,fzl _i elz| ii IVzTI,]; i _v_ i:1_| i munro_o] nk,'ln + l = 1 : lm:lntl = +o] :ir;1.-,_-_:lm i=]m¥_ SUPPLIED NOT SUPPLIED RECOMMENDED ACCESSORIES WARNING • Use only accessories recommended this miter saw. Follow instructions that Blade Wrench Adjustable Wrench...
- Page 9 UNPACKING YOUR MITER SAW 2. Place the saw on a secure stationarywork surface. IA WARNING I 3. Separate all parts from the packingmaterial. Check each of the illustrationsshown below To avoid injury from unexpected starting or to make certain all items are accounted for, electrical shock, do not plug the power cord before discardingany packing material into a source of power during unpacking and...
- Page 10 Safety Lock-Off Button Cover Plate Bevel Positive Stop Locking Lever Miter Angle Hand Hold for -Miter Lock Handle Pointer Transportation ON/OFF Arbor Laser On/Off Switch Latch Bevel Lock Handle Miter Rear Extension Stay Table Insert Hand Holdfor Transportation...
- Page 11 COMPOUND MITER SAW TERMS on machineand legible. WRENCH STORAGE - Convenient storage to ARBOR LOCK - Allows the user to keep the blade from rotating while tightening or loosening prevent misplacingthe blade wrench. the arbor bolt during blade replacement removal. WOODWORKING TERMS ARBOR - The...
- Page 12 INSTALLING THE MITER HANDLE (FIG. A) INSTALLING THE DUST BAG (FIG. C) 1. Thread the miter handle (1) into the hole (2) Squeeze the metal collar wings (2) of the dust bag(1). located at the front of the miter table. Place the dust bag neck opening around Fig.
- Page 13 Fig. E REMOVING OR INSTALLING THE BLADE ] A, WARNING] Only use a 10-inch diameter blade. To .avoid injury from an accidental start, make sure the switch is in the OFF position and plug iS not connected to the power source outleL Removing Blade (Fig.
- Page 14 NOTE: Pay a ttention to the pieces removed, the table and check for any contact with noting their position and direction they f ace. the metal base or the tum table. Wipe the blade collars clean ofany s awdust before installing the new blade.
- Page 15 BEVEL STOP ADJUSTMENT (FIG. M, N, O) then secure by tightening the miter handle. 5. If the miter angle desired is not one of the I& WARNING I nine positive stops, simply lock the miter table into position by turning the miter handle in the To avoid injury from unexpected starting clockwise direction.
- Page 16 90 ° Bevel Indicator (Fig. N) MOUNTING THE MITER SAW (FIG. P, Q) 1. When the blade is exactly 90° to the table, I A, WARNING} loosenthe bevel indicatorscrew (5) using a #2 Phillipsscrewdriver. To avoid injury from unexpected movement: 2.
- Page 17 NOTE: Mountinghardware is not includedwith thistool. Bolts, nuts, washers, and screws must Laser Warning Label: Max output <SmW DIODE LASER: be purchas_l separately. IS30-670nm, Complies with 21CFR 1040.10 and 1040. 11. For portable use, place the saw on a 314 in. thickpiece of plywood.Boltthe base of the miter saw securely to the plywoodusingthe mounting holes on the base.
- Page 18 SAFETY INSTRUCTIONS FOR BASIC SAW saw is missing,bent, damaged or broken in OPERATION any way, or any electricalparts don't work, turn the saw off and unplugit. BEFORE USING THE MITER SAW • Replace bent, damaged, missingor defective parts beforeusing the saw again. •...
- Page 19 PLAN YOUR WORK • Make sure there are no gaps between the • Use the right tool. Don't force a tool or workpiece, fence and table that will let the attachment to do a job it was not designed workplace shift after it is cut. to do.
- Page 20 TURNING SAW ON (FIG. T) BODY AND HAND POSITION (FIG. S) To reduce the likelihood of accidental starting, a thumb activated lock-OFF switch is located on WARNING top of the switch handle. The lock-OFF switch (1) must be pushed in before the trigger switch (2) can be activated and the miter saw started.
- Page 21 BEVEL CUT ( FIG. V) Fig. X 1. When a bevel cutis required, loosenthe bevel lock handle (1). 2. Tilt the cuttinghead to the desired angle as shown on the bevel scale (2), The blade can Hold-Dow_ be positionedat any angle, from a 90° straight cut (0 °...
- Page 22 NOTE: The chart below references a In order to accurately cut crown molding for a 90 ° Inside or outside corner, lay the molding compound cut for crown molding ONLY with its broad back surfaceflat on the saw table. WHEN THE ANGLE BETWEEN THE WALLS EQUALS EXACTLY 90°.
- Page 23 MAINTENANCE LOWER BLADE GUARD Do not use the saw without the lower blade DANGER I guard. The lower blade guard is attached to the saw for your protection. Should the lower guard To avoid injury, never put lubricants on the become damaged, do not use the saw untilthe blade while it is spinning.
- Page 24 WARNING] To avoid injury from accidental starting, always turn switch OFF and unplug the tool before moving, replacing the blade or making adjustments, TROUBLESHOOTING GUIDE - MOTOR PROBLEM PROBLEM CAUSE SUGGESTED CORRECTIVE ACTION Brake does not 1. Motorbrushes not sealed or lightly 1.
- Page 25 NO. 137.212360 ill WARNING l When servicing use only CRAFTSMAN replacement parts. Use of any other parts many create a HAZARD or cause product damage. Any attempt to repair or replace electrical parts on this Miter Saw may create a HAZARD unless repair is done by a qualified service technician. Repair...
- Page 26 MODEL NO, 137.212360 10 in. COMPOUND MITER SCHEMATIC FOR SAW X3T1 X3R9 X3RA X3RB (3TO X3WB X3T2 X3Q1 X3T_ X3RR4 X3SM -X3RS X3RT X3SS X3ST ..26 ..
- Page 27 10 in. COMPOUND MITER SAW MODEL NO. 137.212360 PARTS LIST AND SCHEMATIC FOR MOTOR I.D. Description Size I.D. Description Size X3P0 HEX. SOC. HD. CAP SCREW X3QJ LABEL X3PK LABEL X3QK BRUSHASS'Y X3PL BRUSHHOLDER ASS'Y X3QL FLOW GUIDE X3PM BRUSHCOVER X3QM CR.
- Page 28 Congratu/ations on making a smart purchase. Your new Craftsman _ product is designed and manufactured for years of dependable operation. But like all products, it may require repair from time to time. That's when having a Repair Protection Agreement can save you money and aggravation.
- Page 29 Your Home For expert troubleshooting and home solutions advice: manage home www.managemyhome.com For repair - in your home - of all major brand appliances, lawn and garden equipment, or heating and cooling systems, no matter who made it, no matter who sold ,t! For the replacement parts, accessories and owner's manuals that you need to do-it-yourself.