Table of Contents
Advertisement
Quick Links
Extron Electronics, USA
Extron Electronics, Europe
1230 South Lewis Street
Beeldschermweg 6C
Anaheim, CA 92805
3821 AH Amersfoort, The Netherlands
800.633.9876 714.491.1500
+800.3987.6673 +31.33.453.4040
FAX 714.491.1517
FAX +31.33.453.4050
www.extron.com
© 2006 Extron Electronics. All rights reserved.
All manuals and user guides at all-guides.com
Extron Electronics, Asia
Extron Electronics, Japan
135 Joo Seng Rd. #04-01
Kyodo Building, 16 Ichibancho
PM Industrial Bldg., Singapore 368363
Chiyoda-ku, Tokyo 102-0082
+800.7339.8766 +65.6383.4400
Japan
FAX +65.6383.4664
+81.3.3511.7655 FAX +81.3.3511.7656
User's Guide
RGB 580xi
Universal Remote Interface
with Audio and ADSP
™
68-536-01 Rev. E
11 06
Advertisement
Table of Contents

Related Manuals for Extron electronics RGB 580x


Summary of Contents for Extron electronics RGB 580x
- Page 1 Anaheim, CA 92805 3821 AH Amersfoort, The Netherlands PM Industrial Bldg., Singapore 368363 Chiyoda-ku, Tokyo 102-0082 11 06 800.633.9876 714.491.1500 +800.3987.6673 +31.33.453.4040 +800.7339.8766 +65.6383.4400 Japan FAX 714.491.1517 FAX +31.33.453.4050 FAX +65.6383.4664 +81.3.3511.7655 FAX +81.3.3511.7656 www.extron.com © 2006 Extron Electronics. All rights reserved.
- Page 2 In no event will Extron Electronics be liable for direct, indirect, or Reparaciones/mantenimiento • Solicitar siempre los servicios técnicos de personal calificado. En el interior no hay partes a las que el usuario deba acceder. Para...
- Page 3 All manuals and user guides at all-guides.com • • • • • • • • • • •...
-
Page 4: Table Of Contents
All manuals and user guides at all-guides.com Table of Contents Chapter 1 • Introduction ............1-1 About the RGB 580xi ............1-2 Features ..................1-2 Chapter 2 • Installation and Setup ........2-1 Installation Overview ............2-2 Under-desk/-table/-podium mounting ........2-3 Application Diagrams ............ - Page 5 All manuals and user guides at all-guides.com Table of Contents, cont’d Optional Cable Cubby AAP Devices ......A-6 RGB 580xi Remote Interface Optional RGB 580xi AAP Replacement Cables ..A-6 Appendix B • Mounting Template ........B-1 Dimensions ................B-2 All trademarks mentioned in this manual are the properties of their respective owners.
-
Page 6: About The Rgb 580Xi
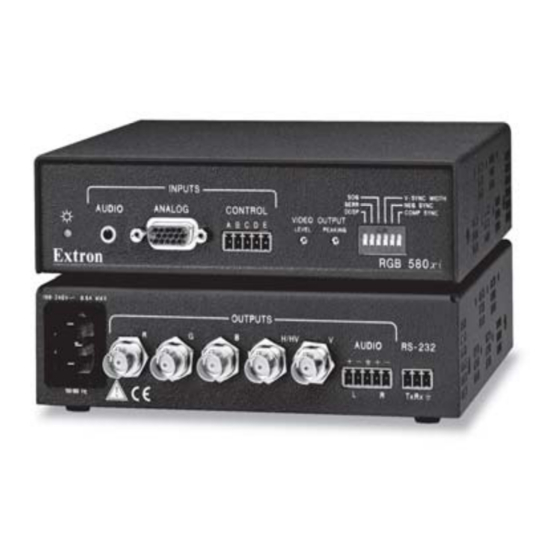
All manuals and user guides at all-guides.com Introduction About the RGB 580xi RGB 580xi Remote Interface The Extron RGB 580xi is an analog, remote-mountable computer video interface that can be installed in a location that is hidden from the user’s view. It features a 300 MHz (< -3 dB) video bandwidth. -
Page 7: Installation Overview
All manuals and user guides at all-guides.com Installation and Setup Installation Overview Under-desk/-table/-podium mounting Attach the under-desk mounting brackets Installation and service must be performed by CAUTION (part #70-077-01) to the interface with the six machine authorized personnel only. screws (provided in the mounting kit), as shown below. To install and set up an RGB 580xi, follow these steps: This procedure may also apply to table or podium mounting applications. -
Page 8: Application Diagrams
All manuals and user guides at all-guides.com Installation and Setup, cont’d Application Diagrams The RGB 580xi can be hidden from view and remotely connected to a computer through various Extron AAP and Cable Cubby (CC) AAP devices that are installed in office furniture or walls. -
Page 9: Front Panel Features And Cabling
All manuals and user guides at all-guides.com Installation and Setup Front Panel Features and Cabling Contact closure control connector — Connect an optional contact closure device to this female 5-pole captive screw connector. Making contact closure between pins A and B transmits a channel signal through the RS-232 port. -
Page 10: Rear Panel Features And Cabling
All manuals and user guides at all-guides.com Installation and Setup, cont’d 1 — DDSP (Digital Display Sync Processing) — This feature Rear Panel Features and Cabling may be necessary for digital display devices such as LCD, DLP (digital light processing) and plasma displays. Use this 100-240 0.5A MAX. -
Page 11: Front Panel Adjustments
All manuals and user guides at all-guides.com Installation and Setup, cont’d Front Panel Adjustments passes through long cables. Set the level at the maximum setting for cable lengths over 500 feet for all computer Video signals passing through long cable runs (over 125 feet) signals of 15 kHz to 135 kHz. -
Page 12: Aap Device Features
All manuals and user guides at all-guides.com Installation and Setup, cont’d Follow steps through in the Installation Overview DDSP disables the horizontal shifting control. section of this chapter. Input select button — Pressing this button results in contact closure between pins A and B of the contact closure control AAP Device Features connector on the front panel of the RGB 580xi. -
Page 13: Cable Cubby Aap Device Features
All manuals and user guides at all-guides.com Installation and Setup, cont’d RGB 580 xi CCSI AAP Horizontal shift (green) Horizontal shift ground (gray) – Horizontal shift (brown) Contact closure (light blue) – Contact closure (purple) LED connector (J2) — Insert wires into and tighten the screws on the 3.5 mm, 3-pole captive screw connector. -
Page 14: Troubleshooting
All manuals and user guides at all-guides.com Installation and Setup, cont’d To cable the captive screw connectors, refer to the following Troubleshooting diagrams and orient the wires according to the view angle of Turn on the input devices (computer, audio device) and output the captive screws. -
Page 15: Chapter 3 • Remote Control
All manuals and user guides at all-guides.com Installation and Setup, cont’d If the image still does not display correctly, call Extron’s S3 RGB 580xi Remote Interface Sales & Technical Support Hotline. Chapter Three Remote Control RS-232 Programmer’s Guide Control Software for Windows ®... -
Page 16: Rs-232 Programmer's Guide
No response is required from the host. The interface-initiated messages are listed here (underlined). (C) Copyright 2001, Extron Electronics, RGB 580xi, Vx.xx The interface displays the copyright message when it first powers on. Vx.xx is the firmware version number. -
Page 17: Control Software For Windows
By default the installation creates a C:\RGB302 directory, and it places two icons (RGB 302+304 Control Pgm and RGB 302+ 304 Help) into a group or folder named “Extron Electronics”. Using the software To run the control program, follow these steps:... -
Page 18: Contact Closure Remote Control
RGB 580xi Remote Interface key, click on the Help menu from within the control program, or double-click on the RGB 302+304 Help icon in the Extron Electronics group or folder. Contact Closure Remote Control For contact closure, connect a contact closure remote control device to the front panel’s contact closure female 5-pole captive... -
Page 19: Specifications
All manuals and user guides at all-guides.com Specifications, Parts, and Accessories Specifications Output level ........TTL: 4 V to 5 Vp-p, unterminated Input impedance ......510k ohms Video — RGB 580xi Output impedance ....... 75 ohms Gain ..........0.35 V to 1.45 Vp-p Max. -
Page 20: Included Parts
All manuals and user guides at all-guides.com Specifications, Parts, and Accessories, cont’d Control/remote — interface Compliances ......... CE, FCC Class A, VCCI, AS/NZS, ICES MTBF ..........30,000 hours Serial control port ......RS-232, captive screw connector, 3 pole Warranty ........3 years parts and labor Baud rate and protocol .... - Page 21 All manuals and user guides at all-guides.com Specifications, Parts, and Accessories, cont’d Optional Cable Cubby AAP Devices RGB 580xi Remote Interface Description Part number RGB 580xi CCS AAP 9' 70-254-02 (black) RGB 580xi CCS AAP 12' 70-255-02 (black) RGB 580xi CCSI AAP 9' 70-256-02 (black) RGB 580xi CCSI AAP 12'...
- Page 22 All manuals and user guides at all-guides.com Dimensions for Mounting Dimensions For under-desk mounting, use the bracket mounting kit which is included with the RGB 580xi, and refer to the template illustration below. The template shown here is not drawn to scale and is to be used for dimensional reference only.
- Page 23 All manuals and user guides at all-guides.com...