
Related Manuals for Extron electronics RGB 203 Rxi


Summary of Contents for Extron electronics RGB 203 Rxi
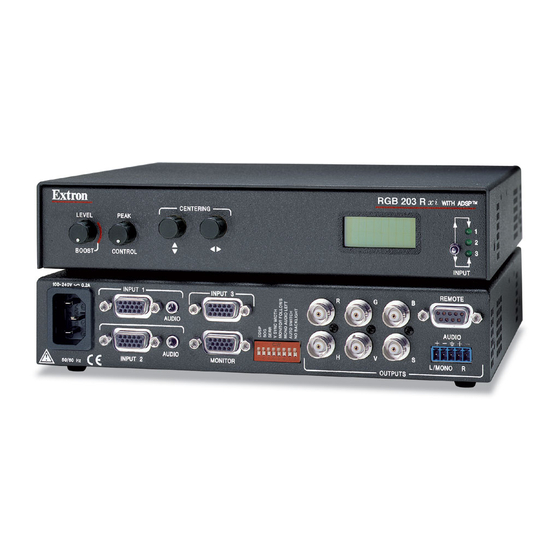
- Page 1 User Guide Interfaces RGB 203 Rxi Three Input, Universal Computer-Video Interface 68-655-01 Rev. D 12 10...
- Page 2 Precautions Safety Instructions • English Warning Power sources • This equipment should be operated only from the power source indicated on the product. This This symbol is intended to alert the user of important operating and maintenance equipment is intended to be used with a main power system with a grounded (neutral) conductor. The (servicing) instructions in the literature provided with the equipment.
- Page 3 CAUTION: A caution warns of things or actions that might damage the equipment. WARNING: A warning warns of things or actions that might cause injury, death, or other severe consequences. Copyright © 2010 Extron Electronics. All rights reserved. Trademarks All trademarks mentioned in this guide are the properties of their respective owners.
-
Page 5: Table Of Contents
Contents Introduction ..........Specifications ......... About the RGB 203 Rxi ........1 Features ............2 Reference Information ......Included Parts ..........22 Rear Panel Optional Accessories ........22 Cabling ............. Rear Panel Connections ........3 Control Software ........Control Software for Windows .... - Page 6 RGB 203 Rxi • Contents...
-
Page 7: Introduction
Local Monitor Document Camera Figure 1. Typical Application for the RGB 203 Rxi The RGB 203 Rxi is an analog computer-video interface with 300 MHz (-3 dB) video bandwidth. It comes in two models: RGB 203 Rxi with ADSP ™... -
Page 8: Features
Remote port to remotely control the interface. Front panel security lockout (Executive mode) — Locks out front panel control of horizontal and vertical shift and input selection. RGB 203 Rxi • Introduction... -
Page 9: Rear Panel Cabling
Rear Panel Cabling This section describes the rear panel cabling of the RGB 203 Rxi. The rear panels of both models are identical. Rear Panel Connections INPUT 1 INPUT 3 REMOTE 100-240 0.2A AUDIO AUDIO L/MONO INPUT 2 MONITOR OUTPUTS 50/60 Hz Figure 2. - Page 10 NOTE: Shorting the contact closure pin to override the front panel selection does not work if the interface is in auto switch mode (the rear panel DIP switch 7 is set to On). RGB 203 Rxi • Rear Panel Cabling...
- Page 11 (see figure 5). CAUTION: For unbalanced audio, connect the sleeves to the center contact ground. DO NOT connect the sleeves to the negative (-) contacts. Figure 5. Wiring the Captive Screw Connector for Audio Output RGB 203 Rxi • Rear Panel Cabling...
-
Page 12: Configuration
W IT IN P Figure 6. Removing RGB 203 Rxi Cover CAUTION: Before removing the cover, take steps to prevent electrostatic discharge, which can damage the circuit boards of the unit. Lift the cover off by sliding it straight back slightly and then lifting it straight up. -
Page 13: Sync Polarity Jumpers
Sync RS-232 Connector Figure 7. RGB 203 Rxi Internal Jumper Locations Replace the cover and reinstall the screws. Sync Polarity Jumpers The interface is factory configured for the output sync to follow the input sync. To force positive or negative sync, reconfigure the jumpers as follows: Locate jumper blocks J6, J7, and J20 on the printed circuit board (see figure 7). -
Page 14: Rear Panel Dip Switches
INPUT 2 OUTPUTS MONITOR 50/60 Hz Figure 8. RGB 203 Rxi Rear Panel NOTE: The default for all DIP switches is Off (down). DIP switches — This bank of DIP switches is used to configure the interface. The switches control: DDSP or ADSP —... - Page 15 This switch controls illumination of the LCD backlight. On — The LCD backlight is off, except for three seconds at power-up. Off — The LCD backlight is on while a signal is present at the selected input. RGB 203 Rxi • Configuration...
-
Page 16: Operation
Front Panel Controls and Indicators Figure 9 shows the front panel of the RGB 203 Rxi with EDID Minder. The model with ADSP is identical except that it does not have the Record button and LED (... -
Page 17: Centering Controls
The interface recalls the centering settings each time an input is selected. Centering adjustments only need to be set once for an application because the settings are saved even when the power is off. RGB 203 Rxi • Operation... -
Page 18: Edid Minder Controls
Disconnect power from the interface. Press and hold the Record button while reconnecting the power. The LED flashes red slowly three times. After the factory default firmware is restored, the LED returns to solid green. RGB 203 Rxi • Operation... - Page 19 Rotary switch settings and resolutions Rotary Switch Resolution Position User-recorded EDID 800x600 1024x768 (default) 1280x720 1280x768 1280x800 1280x1024 1360x768 1366x768 1400x1050 1440x900 1600x1200 1680x1050 1920x1080 1920x1200 Local monitor pass-through RGB 203 Rxi • Operation...
- Page 20 To use one of the pre-defined EDID files: Connect the RGB 203 Rxi to the source. Do not switch on the source device at this time. Set the first DIP switch ( ) to the required frequency (50 or 60 Hz).
-
Page 21: Lcd Display
(DDSP) on the rear panel is set to On (up, see Rear Panel DIP Switches page 8) and a centering control is rotated, the LCD displays , and the image N/A DDSP On does not shift on screen. RGB 203 Rxi • Operation... -
Page 22: Input Selection
LCD displays Exec Mode Off Front panel security lockout does not affect the ability of the user to control the interface with SIS commands (see page 24) or the RGB 201/203/580 Control Software (see page 23). RGB 203 Rxi • Operation... -
Page 23: Contact Closure Remote Control
VTG, and restore AC power to the interface. Call the Extron S3 Sales and Technical Support Hotline if needed (see the phone numbers listed on the back page of this guide). RGB 203 Rxi • Operation... -
Page 24: If The Image Is Not Displayed Correctly
Auto switch works for RGBHV and RGBS video inputs only. Auto switch does not work for RGsB video input. NOTE: DIP switch 2 The selection of RGsB video output on rear panel has no effect on auto switching. RGB 203 Rxi • Operation... -
Page 25: If The Interface Does Not Record Edid
If you are passing through EDID from a display connected to the local monitor output, make sure the rotary dial is set to position F and make sure the display is properly connected to the output connection. RGB 203 Rxi • Operation... -
Page 26: Specifications
Gain ..........Unbalanced output: 0 dB; balanced output: +6 dB Frequency response ......20 Hz to 20 kHz, ±0.05 dB THD + Noise ........0.03% @ 1 kHz, 0.3% @ 20 kHz at nominal level RGB 203 Rxi • Specifications... - Page 27 EMI/EMC ......... CE, C-tick, FCC Class A, ICES, VCCI MTBF ..........30,000 hours Warranty ........3 years parts and labor NOTE: All nominal levels are at ±10%. NOTE: Specifications are subject to change without notice. RGB 203 Rxi • Specifications...
-
Page 28: Reference Information
This section provides information about included parts and optional accessories. Included Parts Description Part Number RGB 203 Rxi with ADSP 60-508-01 RGB 203 Rxi with EDID Minder 60-508-02 IEC cord (1) 5-pole captive screw connector 100-457-01 Rubber feet (4) Disc with control software... -
Page 29: Control Software
The control program window appears. Figure 11. Control Program Screen for the RGB 203 Rxi Adjust the vertical and horizontal centering, as required. Using the Help System You can access the help program by double-clicking on the RGB 201 Help icon in the Extron... -
Page 30: Sis Commands
SIS Commands This section shows how to control the RGB 203 Rxi with Extron Simple Instruction Set (SIS) commands. The RS-232 protocol is 9600 baud, 1 stop bit, no parity, and no flow control. Connecting the Control Computer The rear panel Remote connector on the interface can be connected to the serial port of a computer or control system, or to a remote contact closure device. -
Page 31: Error Responses
Shift control range: -127 to +127 Controller firmware version (listed to two decimal places, “x.xx”) xxx.xx: frequency in Hz or kHz Input selected: 1 - 3 (for input 1 through 3) Part number ASCII to HEX Conversion Table Space RGB 203 Rxi • SIS Commands... -
Page 32: Command And Response Table For Sis Commands
Request for a part number X^ = for RGB 203 Rxi with 60-509-01 ADSP 60-509-02 for RGB 203 Rxi with EDID Query firmware version View the currently installed version of the firmware X# . RGB 203 Rxi • SIS Commands... -
Page 33: Mounting
Mounting This section shows how to mount the RGB 203 Rxi. Options include: Tabletop mounting Under-desk mounting Through-desk mounting Rack mounting Follow the appropriate procedures in this section and in the instructions that come with the mounting kits. These instructions can also be downloaded from the Extron website (www.extron.com). -
Page 34: Rack Mounting
RSU 129 — 9.5 inch deep 1U universal rack shelf kit (part number 60-190-01) RSB 129 — 9.5 inch deep 1U basic rack shelf (part number 60-604-02) To mount the interface on a rack shelf, follow the instructions provided with the shelf accessories. RGB 203 Rxi • Mounting... - Page 35 In the event of malfunction during the warranty period attributable directly to faulty workmanship and/or materials, Extron Electronics will, at its option, repair or replace said products or components, to whatever extent it shall deem necessary to restore said product...
- Page 36 Inside Asia Only +81.3.3511.7656 FAX Inside China Only +971.4.2991880 FAX Inside USA/Canada Inside USA/Canada Inside Europe Only Only Only +65.6383.4400 +86.21.3760.1568 +31.33.453.4040 +65.6383.4664 FAX +86.21.3760.1566 FAX +1.714.491.1500 +1.919.863.1794 +31.33.453.4050 FAX +1.714.491.1517 FAX +1.919.863.1797 FAX © 2010 Extron Electronics. All rights reserved. www.extron.com...