Table of Contents
Advertisement
Quick Links
Advertisement
Table of Contents

Related Manuals for Cortelco 2750


Summary of Contents for Cortelco 2750
- Page 1 OWNER’S INSTRUCTION MANUAL Four Line Auto-Attendant/Answering System MODEL 2750...
-
Page 2: Table Of Contents
UNPACKING AND INSTALLATION...4 Box Contents ...4 Telephone Part Identification ...5 Installation...6 1.3.1 Overview ...6 1.3.2 Before Installation ...6 1.3.3 Installation Configurations...6 1.3.3.1 Standard Configuration...6 1.3.3.2 Private Line ...6 1.3.3.3 Unconnected Lines ...6 1.3.3.4 Line 1 ...6 1.3.4 Phone Installation ...7 1.3.4.1... - Page 3 Record your OGM ...23 5.1.2.1 Reviewing your OGM..23 5.1.2.2 Erasing your OGM..23 5.1.2.3 Changing your OGM..23 5.1.3 Setting Your Telephone's Pickup Delay ...23 5.1.4 Setting Toll Saver...24 5.1.5 New Message Beep...24 5.1.6 Remote Code ...24 5.1.6.1 Setting the remote code...25 5.1.6.2...
- Page 4 5.3.15 Using Dial Pad...32 5.3.16 Recording a Memo or Conversation..33 5.3.16.1 Recording a Memo ...33 5.3.16.2 Recording a Telephone Conversation..33 5.3.17 Screening Calls ...33 TELEPHONE OPERATION...33 Making and Answering Calls ...33 Redial ...34 6.2.1 To redial the last phone number dialed ...34 6.2.2...
- Page 5 6.4.2 Outside Call with Intercom Station ...35 Transfer ...35 6.5.1 Attended Transfer...35 6.5.2 Blind Transfer ...35 6.5.3 Transfer Ring ...35 6.5.4 Personal Ring...36 Caller ID...36 6.6.1 Incoming call ...36 6.6.2 Call Waiting Caller ID ...36 6.6.3 Caller List ...36 6.6.3.1 Reviewing Calls ...36 6.6.3.2 Dialing Calls...37...
- Page 6 Phone Settings ...44 Answer Settings ...46 Memory Settings...47 Time and Date Settings ...47 Advanced Settings ...47 APPENDIX B - Installation Worksheet ...48 APPENDIX C - Toll Restriction Worksheet ...49 APPENDIX D - Trouble Shooting Guide ...50 FCC INFORMATION...51 TELEPHONE REPAIR...52 LIMITED WARRANTY...53...
-
Page 7: Thank You
Owner’s Instruction Manual. The 2750 is one of our new Series 7 Telephones. It is a stand alone 4-Line Telephone or part of a 4- Line system consisting of up to 16 stations of 2740's, 2742's, or 2750's. The 2740 is our base unit. It has 4 line buttons, Intercom, Conference, Page, Transfer, Mute, Headset, Flash, Redial, Hold, 5 memory dial buttons, 40 Number Personal Directory, Type II Caller ID, Speakerphone, and 2.5mm... - Page 8 3. Unplug this product from the wall outlet before cleaning. Use a damp cloth for cleaning. Do not use liquid or aerosol cleaners. 4. Do not use the telephone near water. For example, do not use near a bathtub, wash bowl, kitchen sink, laundry tub, swimming pool, or in a wet basement.
-
Page 9: Unpacking And Installation
UNPACKING AND INSTALLATION Box Contents The following items should be packed with your 2750. Please contact your dealer if any of them is missing. 2750 Phone (Main Body) Handset Handset Cord (Coiled Cord) Line Cord 7ft Short Line Cord 7”... -
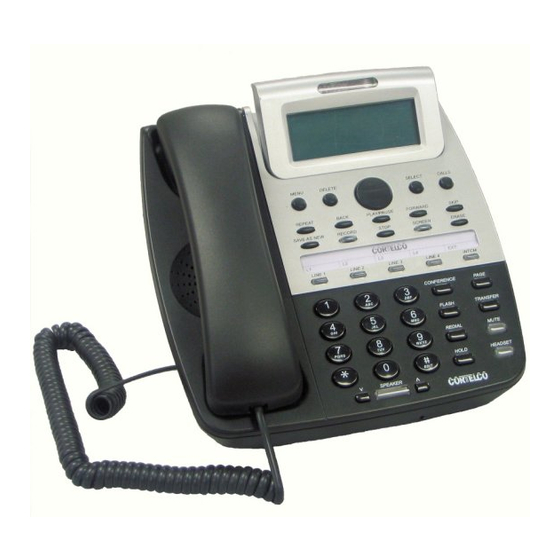
Page 10: Telephone Part Identification
Telephone Part Identification Telephone Base Handset Cradle Menu Button Delete Button Review Up/Down Btn Message Lamp Multi-Angle LCD Select Button Calls Button Voice Mail Buttons (Item 10) VM Buttons (See below) Line Buttons Intercom Button 2.5mm Headset Jack Conference Button... -
Page 11: Installation
Standard Configuration The 2750 is initially configured so that each line is common at all stations. In other words, Line 1 at each telephone is connected to the same incoming line; Line 2 at each station is connected to the same incoming line, etc. -
Page 12: Phone Installation
Connect the line cords. If you have RJ14 line jacks, you need only connect 4 wire line cords between the wall jacks and the jacks in the base of the 2750. If you have RJ11 line jacks, you will need 2 line couplers as discussed in Section 1.3.2. Note that the jacks on the 2750 are numbered L1/L2 and L3/L4. -
Page 13: Assign A Station Number
1.3.4.4 Assign a Station Number Station 01 must be the first extension number assigned. Station 01 is required for programming features on the 2750. Refer to Section 2.1 for detailed instructions on assigning station numbers. 1.3.5 Test Installation This procedure should be used at each telephone after initial installation. It may also be used if you are having problems with your system. -
Page 14: System Programming
SYSTEM PROGRAMMING Station Number Assignment Each station must be assigned a unique station number. 2750 telephones will not function correctly until a station number is assigned. To assign a number to a station: Press MENU. The display will read “Phone Setting”... -
Page 15: Line Configuration/Type
The status indicators of your 2750 telephone are designed to light when a fax machine, modem, or standard telephone is using a line. If the line status indicators of your 2750 telephones light when no telephone is using the line or do not light when a standard telephone is using the line, the loop voltage... - Page 16 installations. This value can be changed to either 24 volts or 12 volts or the feature can be turned off. To set Loop Voltage Detector Press MENU. Press DOWN ARROW repeatedly until “Advanced Setting” appears in the display. Press soft key under ENTER. Press DOWN ARROW repeatedly until “Loop Detect:”...
-
Page 17: Ringer Configuration
Press MENU to exit. If a line indicator at your 2750 telephone stays lit because there is no telephone line connected, and you wish to turn it off, do not use this feature, but set this line at this station to UNCONNECTED Ringer Configuration The ringers for each outside line are controlled individually at each telephone. -
Page 18: Off-Hook Ringing
After this the calling party will be connected. To respond to the calling party, either lift the handset or press the SPEAKER button. Note: When an intercom call is received while an outside call is in progress, the 2750 will ring with a single intercom ring regardless of the intercom ringer setting 2.6.1... -
Page 19: Automatic Line Selection
Automatic Line Selection The 2750 will automatically select an outside line or the intercom line whenever the handset is lifted or the SPEAKER button is pressed. To choose which line will be automatically selected: Press MENU. The display will read Phone Setting Press the soft key under ENTER. -
Page 20: Allowed Numbers
2.8.4 Toll restriction override After setting toll restrictions for a station, its toll restriction is automatically ON. This may be temporarily overridden without affecting the settings stored in the telephone. 2.8.5. Line restriction It is possible to restrict any or all of the lines at a particular station. That station will not be able to make any outgoing calls on the restricted lines, with the exception of the allowed numbers at that station and calls to 911. -
Page 21: System Privacy
Dialing Mode The 2750 can dial with either pulses or DTMF Tones. The mode is set at Station #01 for the entire system. If any of the incoming telephone lines have Pulse service, Pulse Dialing must be selected. If all the incoming lines have Tone Service, Tone Dialing should be selected. -
Page 22: Area Codes
Home Area Code This is the area code for the area where the 2750 is located. Only one Home Area Code may be entered. After the Home Area Code is entered, only seven digits will be displayed when a call is received from within the Home Area Code. -
Page 23: Memory Settings
3.1. Memory Features The 2750 can store up to 40 telephone numbers in its Personal Directory. These numbers can be dialed by pressing”#” followed by the arrow buttons. Characters other than numbers and telephone features may also be stored in the Personal Directory. See the sections below for more details. -
Page 24: To Store Caller Id Records
To Store the Centrex Prefix The Centrex prefix is the part of the telephone that is NOT DIALED to reach another Centrex number in your system. Storing this prefix allows other Centrex stations to be dialed from the caller list. The Centrex prefix will NOT be shown in the display or dialed when dialing from the caller list. -
Page 25: Message Waiting Lamp
PBX. 4.2.1 Message Waiting Line Selection The 2750 will only respond to messages on one line. By default, this is set to Line 1. Follow the instructions below to change this setting. Press MENU Press the soft key under ENTER Press DOWN ARROW repeatedly until “Telco VMWI”... -
Page 26: Hold Call Reminder
Hold Call Reminder This feature will prevent calls from remaining on hold for a long time. By default, the 2750 will sound an alert tone after a call remains on hold for 2 minutes. It will then sound an alert every 2 minutes thereafter while the call remains on hold. -
Page 27: Erase Toll Restrictions
Press the soft key under ERASE. After a brief pause, the display will read “Erasing Done!” 4.10 Reset Default Settings To reset the 2750 to factory default settings press MENU, MUTE, MUTE, 2, 7, 4, 1. ANSWERING SYSTEM Setting Answering Option The 2750 can function as an Answering Machine or as an Auto-Attendant. -
Page 28: Record Your Ogm
Follow the steps in 5.1.2. and the newly recorded OGM will automatically replace the old one. 5.1.3 Setting Your Telephone's Pickup Delay The Pickup Delay setting determines how long the phone will ring before picking up an incoming call. NOTE: Turning Toll Saver ON at this phone will override the Pickup Delay setting for incoming calls, however when a call is transferred from another extension in the system, it will follow the Pickup Delay setting. -
Page 29: Setting Toll Saver
Press MENU to exit 5.1.5 New Message Beep The 2750 may be set to beep once every 60 seconds when there are new messages in its answering system. To set the New Message Beep follow the directions below. Press MENU Press DOWN ARROW repeatedly until “Answer Setting”... -
Page 30: Setting The Remote Code
Auto-Attendant The 2750 may be set as an Auto Attendant. A 2750 set as an Auto Attendant will answer incoming calls and transfer them to other extensions in the system. Each Auto Attendant can only answer one line at a time, so busy offices may require more than one Auto Attendant. -
Page 31: Set Up The Auto Attendant
5.2.1 Set up the Auto Attendant Press MENU Press DOWN ARROW repeatedly until “Answer Setting” appears in the display. Press the soft key under ENTER. “Ans System: OFF” will appear in the display. Press the soft key under CHANGE repeatedly until “Ans System: AA” appears in display Press MENU to exit When the Auto Attendant is turned on, a symbol of a handset will appear in the upper left corner of the display. -
Page 32: Record The Auto Attendant Zero-Out Ogm
5.2.4 Record the Auto Attendant Zero-Out OGM This is the message callers hear if they press “0” while listening to the Auto Attendant Message. Press MENU Press DOWN ARROW repeatedly until “Answer Setting” appears in the display. Press the soft key under ENTER. “Ans System: ON” will appear in the display. Press DOWN ARROW repeatedly until “OGM Setup”... -
Page 33: Setting More Than One Phone As An Auto Attendant
Setting Separate Auto Attendant OGM's for Different Lines. The 2750 is preset to play the AA Day OGM on all lines, but it is possible to have a different Auto Attendant OGM for one or more lines. In order to use this feature, first follow the instructions above to record additional Auto Attendant OGMs. -
Page 34: Choosing The Zero-Out Action
When the caller dials “0” during an Auto Attendant message, the default setting is that it plays the Zero-Out OGM. However, it is possible to choose a different Zero-Out action. The 2750 may be set to transfer to a particular extension, ring all the phones with a particular distinctive ring, or even disallow the caller to zero-out. -
Page 35: Transfer Directly To Voice Mail
While listening to the Auto Attendant OGM, the caller may dial “8” followed by the desired extension number to transfer directly into that extension's voice mail. This presumes that the extension is a 2750 with the Answering System turned on. -
Page 36: Activation
5.3.1 Activation When the Voice Mail system is on, a symbol of a handset will appear in the display. 5.3.2 Message Notification When a message is received, the large red LED above the display will light and the handset symbol will flash in the display. -
Page 37: Jump Backward
5.3.8 Jump Backward During message playback, press BACK to move back 2 seconds in the current message. 5.3.9 Jump Forward During message playback, press FORWARD to move forward 2 seconds in the current message. Press FORWARD twice to move to the next message. 5.3.10 Saving a Message as New During message playback, press SAVE AS NEW to save the current message as new. -
Page 38: Recording A Memo Or Conversation
The 2750 allows the voice mail memory to be used to record a memo or a conversation. Note: The 2750 does not sound any warning beeps to alert the other party that the conversation is being recording. To comply with laws or regulations concerning telephone call recording, the other party should be informed of the recording. -
Page 39: Redial
If there is an active call on one line and a call comes in on another line, the incoming line lamp will flash and the 2750 will sound a double ring every 15 seconds. If the incoming line is set to ringer off, the double ring will not sound. -
Page 40: Outside Calls
Dial the desired two-digit station number to transfer the call to that station. If the desired station does not answer, it will stop ringing after one minute. To re-engage the call press the flashing LINE button. The call can be answered at any telephone by pressing the flashing LINE button. -
Page 41: Personal Ring
The Caller ID feature works in conjunction with Caller ID service offered by your local telephone company. The 2750 will store the last 50 calls received. This feature requires a subscription to Caller ID service from the telephone company. This service must be ordered separately for each line. Also note that call waiting caller ID may not be available in all areas. -
Page 42: Dialing Calls
Voice Mail (Message Waiting) The 2750 supports external Voice Mail indicators. This requires a service subscription. When using external VM, the LCD will display a message to alert you that there is a message and its line. Each... -
Page 43: Accessing Messages
See Section 4.2.1 to select the message waiting line. The telephone company will supply either FSK or Stutter Dial tone. The 2750 is set to FSK by default. See Section 4.2.2 to change the message waiting type. -
Page 44: Line Reserve
The Line Reserve feature enables the line currently in use to be reserved. When that line becomes free, the 2750 phone will sound a triple ring and that line will be reserved. Line reserve will be cancelled if the line is not taken off hook within 15 seconds. It may also be cancelled by making or receiving a call on another line or by pressing the reserved line button. -
Page 45: Timer Reset
6.16 Headset The 2750 is equipped with a 2.5mm headset jack, and a built-in headset amplifier, along with a dedicated HEADSET button. To use this feature, plug a telephone headset with a 2.5 millimeter plug into the headset jack. There is no need to buy a headset with a separate amplifier. The headset can be used to make or answer an outside call, an intercom call or a page. -
Page 46: Intercom While Idle
One ring will sound. Then an alert tone will sound followed by the caller’s voice. Press SPEAKER or HEADSET or lift the handset. 6.20.3.3 Intercom Handsfree One ring will sound followed by a triple alert tone. The 2750 will then automatically answer the intercom call on speakerphone. 6.20.3.4 Answering an Intercom Call while on an Outside Call Press INTCM. -
Page 47: Blocking
All Page. This will create a private intercom conversation. 6.22 Room Monitoring The Room Monitoring feature allows the speakerphone of a 2750 to be activated to monitor sounds in another location. To activate Room Monitoring, place an intercom call to the monitoring telephone. Press MUTE to prevent sounds from being heard at the monitored phone. -
Page 48: Line Status And Calls On Hold
Standard telephones cannot use the intercom feature to communicate with 2750 telephones. Fax Machines and Modems You may connect modems or fax machines to any of your lines, and the line indicators of the 2750 telephones will light when these devices are using a line. -
Page 49: Appendix A
Menu Tree TOP LEVEL PHONE SETTING ANSWER SETTINGS MEMORY SETTINGS TIME/DATE SET ADVANCED SETTINGS Phone Settings MENU OPTION Station # Do Not Disturb Ringer Settings L1 Ringer L2 Ringer L3 Ringer L4 Ringer Off Hook Ring Intercom Prefs Intcm Pages Line Type Auto Seize Distinctive Ring... - Page 50 MENU OPTION Local Code 4 Local Code 5 Local Code 6 1 Plus 7 Code 1 1 Plus 7 Code 2 1 Plus 7 Code 3 1 Plus 7 Code 4 1 Plus 7 Code 5 1 Plus 7 Code 6 Caller ID Store L1 CID Store L2 CID Store...
-
Page 51: Answer Settings
Answer Settings MENU OPTIONS Ans System OGM Setup Ans OGM AA Day OGM AA Night OGM AA Zero-Out OGM Pickup Delay AA Delay Toll Saver Message Length Night Timer Set Start Remote Code New Message Beep Advanced Setting AA OGM 2 AA OGM 3 AA OGM 4 AA OGM 5... -
Page 52: Memory Settings
MENU OPTIONS Zero Out Action Centrex Trnf Memory Settings MENU OPTIONS Select Location Time and Date Settings MENU OPTIONS TIME AM/PM DATE Advanced Settings MENU OPTIONS Erase Memory Erase Settings Erase Toll Restr Enter Code Erase Ans System Version Info System Test Key Test LCD Test... -
Page 53: Appendix B - Installation Worksheet
Station 08 Station 09 Station 10 Station 11 Station 12 Station 13 Station 14 Station 15 Station 16 Station Type: 2740, 2750, 2742, 2743 APPENDIX B Line 1 Line 2 Tel. # _______ Tel. # _______ Common Common Private Common... -
Page 54: Appendix C - Toll Restriction Worksheet
4th Restriction Restriction If you set restrictions at a particular telephone, you will most likely also want to store some allowed exceptions at that telephone. For example, if you restrict long-distance calls, you will probably want to store some allowed area codes such as “1800” to allow all 1800 calls. When you enter allowed numbers, “*”... -
Page 55: Appendix D - Trouble Shooting Guide
Press soft key “Change” to assign this telephone a station number. the Display reads “Station #??” There is no dial tone on the Replace the handset from another 2750 telephone. If this solves the problem, then contact handset, but the speakerphone Technical Support for assistance. works. -
Page 56: Fcc Information
FCC part 68 rules. The modular telephone outlet or jack to which your 2750 telephone must be connected is a USOC RJ11C or RJ14C. The Facility Interface code (FIC) for your 2750 telephone is 02LS2 which is a 2- wire, Local Switched Access, Loop-start. -
Page 57: Telephone Repair
DO NOT ATTEMPT TO REPAIR THIS PRODUCT YOURSELF. Telephones manufactured by CORTELCO must be returned to us for repair. You can return your telephone to CORTELCO for repair or replacement in accordance with our LIMITED WARRANTY. CORTELCO warrants THIS PRODUCT against defects in material and workmanship in accordance with our LIMITED WARRANTY. -
Page 58: Limited Warranty
CORTELCO with the product and loss of parts. The warranty is voided in the event any unauthorized person alters or repairs the unit. Telephone companies use different types of equipment and offer various types of services to customers.