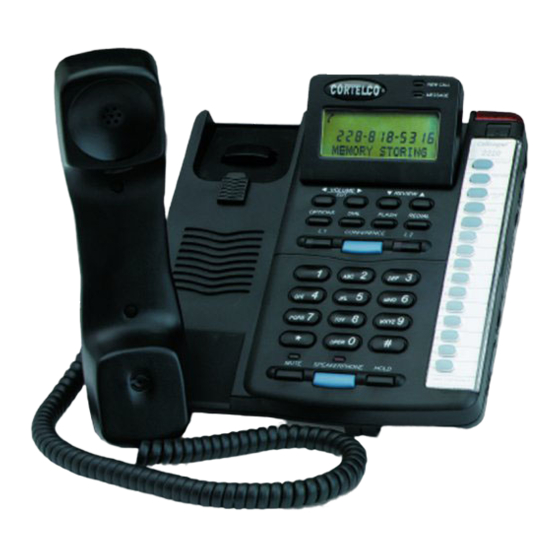
Cortelco 2220 Owner's Instruction Manual
Colleague caller id type ii 2 line multi-feature telephone
Hide thumbs
Also See for 2220:
- Owner's instruction manual (32 pages) ,
- Instructions (3 pages) ,
- Specification (2 pages)

Related Manuals for Cortelco 2220


Summary of Contents for Cortelco 2220
- Page 1 Owner’s Instruction Manual Colleague Caller ID Type II 2 Line Multi-Feature Telephone Model 2220...
-
Page 2: Thank You
Thank you for purchasing the Colleague 2220 Telephone We want you to know all about your new Telephone - how to install it, the features it pro- vides, and the services you can expect from its use. We have included this information in your Owner’s Instruction Manual. -
Page 3: Table Of Contents
Contents IMPORTANT SAFETY INSTRUCTIONS .........6 TELEPHONE PART IDENTIFICATION ........8 TELEPHONE PART IDENTIFICATION ........9 DISPLAY ..................9 TELEPHONE USAGE ..............10 INSTALLATION ....................10 90V/24V MESSAGE WAITING LAMP ............11 WALL MOUNT INSTRUCTIONS ..............11 FACTORY PRESETS ..................12 SETUP ........................ 13 USING YOUR TELEPHONE ............14 RECEIVING A PHONE CALL ............... - Page 4 FLASH BUTTON ..................... 16 CALL WAITING DISPLAY ................17 RINGER VOLUME ..................17 CONFERENCE BUTTON ................17 TONE BUTTON (*) ..................17 CONTRAST BUTTON ..................17 HEADSET COMPATABILITY ............... 18 DATA PORT ...................... 18 Using the Directory ..............18 STORING A NEW DIRECTORY ENTRY ............ 18 USING KEYPAD TO ENTER NAME ............
- Page 5 CALLBACK ...................... 22 DIAL/OPTIONS BUTTON ................22 MESSAGE ERROR..................23 NO DATA SENT ....................23 PRIVATE CALLS ..................... 24 UNKNOWNCALLS ..................24 MAINTENANCE INFORMATION ..........26 TELEPHONE REPAIR ...............26 FCC INFORMATION ..............27 LIMITED WARRANTY .............28...
-
Page 6: Important Safety Instructions
IMPORTANT SAFETY INSTRUCTIONS Always follow basic safety precautions when using your telephone equipment to reduce the risk of fi re, electrical shock, and injury. Read and understand all instructions in the Owner’s Instruction Manual. Read all warnings and follow all instructions marked on the product. Unplug this product from the wall outlet before cleaning. -
Page 7: Save These Instructions
Unplug the telephone from the wall outlet and refer servicing to qualifi ed service personnel under the following conditions: When the line cord is frayed or plugs damaged. If liquid has been spilled into the telephone. If the telephone has been exposed to rain or water. If the telephone does not operate properly by following the operating instructions. -
Page 8: Telephone Part Identification
TELEPHONE PART IDENTIFICATION Handset Hook Message LED Ringer 1 Switch Dial Button New Call LED Ringer 2 Switch Review Up/Down Options Button 2.5 mm Headset Jack Button Line 1 Button 90V Msg Indicator Headset On/Off Switch Conference Button Adjustable Display RJ9 Headset Jack Handset Cord Jack Contrast Button... -
Page 9: Telephone Part Identification
TELEPHONE PART IDENTIFICATION DISPLAY 1 Extension in Use Icon - This icon displays, along with the MESSAGE LED whenever any phone is using the phone line. 2 Voice Mail Message Waiting - When using Central Offi ce Voice Mail, this icon displays and the MESSAGE LED illuminates when a new message is waiting. -
Page 10: Telephone Usage
Connect the LINE jack of your answering machine to the wall modular line jack of either Line 1 or Line 2. Connect either the LINE jack (Line 1) or the DATA jack (Line 2) of your 2220 to the PHONE jack of your answering machine. Connect the other jack on the 2220 to the wall modular line jack of Line 1 or Line 2. -
Page 11: 90V/24V Message Waiting Lamp
90V/24V MESSAGE WAITING LAMP If your phone is installed behind a Message Waiting enabled PBX, you will need to set the MW switch in order to receive the Message Waiting indication. Remove the directory cover by moving the holding clip up, and pulling the clear cover up. -
Page 12: Factory Presets
FACTORY PRESETS The following table shows the factory settings for your unit: Display Setting Language English Area Code 4 Area Codes, No Setting Access Code No Setting Flash 600 mSec Line 1/Line 2 Line 1 Tone/Pulse Tone Dialing Note: After you have set up the unit completely for the fi rst time, use the Volume/Edit button to review or reprogram the Settings. -
Page 13: Setup
Press the REVIEW DOWN (˅) button to confi rm the selection. When [SET AREA CODE] appears, use the procedure below to set your local area codes. The 2220 can accept up to 4 local area codes. Use the numeric keypad to enter the fi rst area code (3 digits). -
Page 14: Using Your Telephone
When [SELECT LINE 1/2?] appears, “1. L_1” and “2. L_2” will fl ash. This al- lows Line 1 or Line 2 to be selected as the prime line. The prime line is accessed automatically when the handset is lifted or the SPEAKERPHONE button is pressed. -
Page 15: Speakerphone Button
SPEAKERPHONE BUTTON Note: AC Adaptor must be used to ensure proper function. Receiving Incoming Calls When the phone rings and the callers information shows on the display, press and release the SPEAKERPHONE button and speak normally into the built-in microphone from a distance of 5-6 inches. The volume of the caller’s voice may be adjusted by pressing the VOLUME button. -
Page 16: Volume Button
To Dial A Phone Number In Memory Lift the handset or press SPEAKERPHONE and wait for a dial tone. Press the desired memory button. The number will be displayed and dialed automatically. VOLUME BUTTON A built-in amplifi er feature allows you to increase the listening volume in the receiver of the handset when speaking with your party. -
Page 17: Call Waiting Display
Press the FLASH button again and release. You are connected to the fi rst caller again and the second call is placed on hold. Note: If you also have subscribed to Call Waiting Caller ID service, please see the Call Waiting Display section on the following page CALL WAITING DISPLAY If you have Call Waiting Caller ID service and receive a call while you are on a call, your... -
Page 18: Headset Compatability
HEADSET COMPATABILITY This telephone will accept a 2.5mm headset or an RJ9 type headset. To enable headset mode, move the switch on the right side of the phone (see Page 7 for switch location) to the ON position. The SPEAKERPHONE button is used to connect or disconnect from a call. -
Page 19: Finding Items In The Directory
FINDING ITEMS IN THE DIRECTORY Press the DIRECTORY button to see the Directory List. Use the REVIEW UP (˄) or REVIEW DOWN (˅) buttons to scroll through the di- rectory. To see the listings that begin with a letter, press the key corresponding to that letter. -
Page 20: Caller Id Features
CALLER ID FEATURES MESSAGE LIGHT An indicator marked NEW CALL will light to let you know there are new calls received. If you have a voice mailbox service with your telephone company, another indicator marked MESSAGE will fl ash to alert you to dial your telephone company to check your new messages. -
Page 21: Reviewing Calls
REVIEWING CALLS When the NEW symbol is fl ashing on the Stand-By screen, you have new incoming calls. Press the REVIEW UP (˄) or REVIEW DOWN (˅) button to review the incoming stored calls. The NEW symbol attached to each call will be removed after you review the call. If the NEW symbol is still fl... -
Page 22: Deleting Calls
DELETING CALLS To delete an individual call: When reviewing calls, you can delete an individual call by pressing the DELETE button twice. The display will be erased line by line and the rest of the records will be renumbered. To delete all calls: When reviewing calls, press and hold the DELETE button for more than 4 seconds. -
Page 23: Message Error
For example: Your area code is 205 and you are reviewing telephone number 785-2883. When the desired number format is reached, press DIAL to dial the displayed number. Note: Since the display can only show 10 digits, when the format is changed to 11 digits, only the fi... -
Page 24: Private Calls
PRIVATE CALLS If the caller has blocked his number from being sent, [PRIVATE NUMBER] and his name will alternately display on the screen. If the caller has blocked his name from being sent, [PRIVATE NAME] and his telephone number will be displayed on the screen. If the caller has blocked both his name and number from being sent, [PRIVATE CALLER] will be displayed on the screen. -
Page 25: Troubleshooting
TROUBLESHOOTING If you have any problems with your telephone service, determine if the problem is with your unit or the telephone company lines BEFORE CALLING THE TELEPHONE COMPANY. Always disconnect the power adapter and telephone line and reconnect them before calling for service. The telephone company may charge you for a service call if the problem is caused by your telephone. -
Page 26: Maintenance Information
DO NOT ATTEMPT TO REPAIR THIS PRODUCT YOURSELF. Telephones manu- factured by CORTELCO must be returned to us for repair. You can return your telephone to CORTELCO for repair or replacement in accordance with our LIMITED WARRANTY. CORTELCO warrants THIS PRODUCT against defects in material and workmanship in accordance with our LIMITED WARRANTY. -
Page 27: Fcc Information
FCC INFORMATION Part 68 is a Federal regulation which requires equipment to be tested and registered with the FCC prior to its connection to the network. This equipment complies with Part 68 of FCC rules. On the bottom of the telephone is a label that contains, among other informa- tion, the FCC Registration Number and the Ringer Equivalence Number (REN) for this equipment. -
Page 28: Limited Warranty
LIMITED WARRANTY If you purchased this product new in the U.S. or Puerto Rico, CORTELCO warrants it against defects in material and workmanship for a period of fi ve (5) years from the date of original purchase. This warranty is in lieu of all other express warranties. During the warranty period, CORTELCO agrees to repair or, at its option, replace the defec- tive product, or any part of it without charge for parts or labor.