Yeedi K651G - Robot Vacuum Manual
- Instruction manual (28 pages) ,
- Instruction manual (164 pages)
Advertisement
Package Contents

Note: Figures and illustrations are for reference only and may differ from actual product appearance. Product design and specifications are subject to changes without notice.
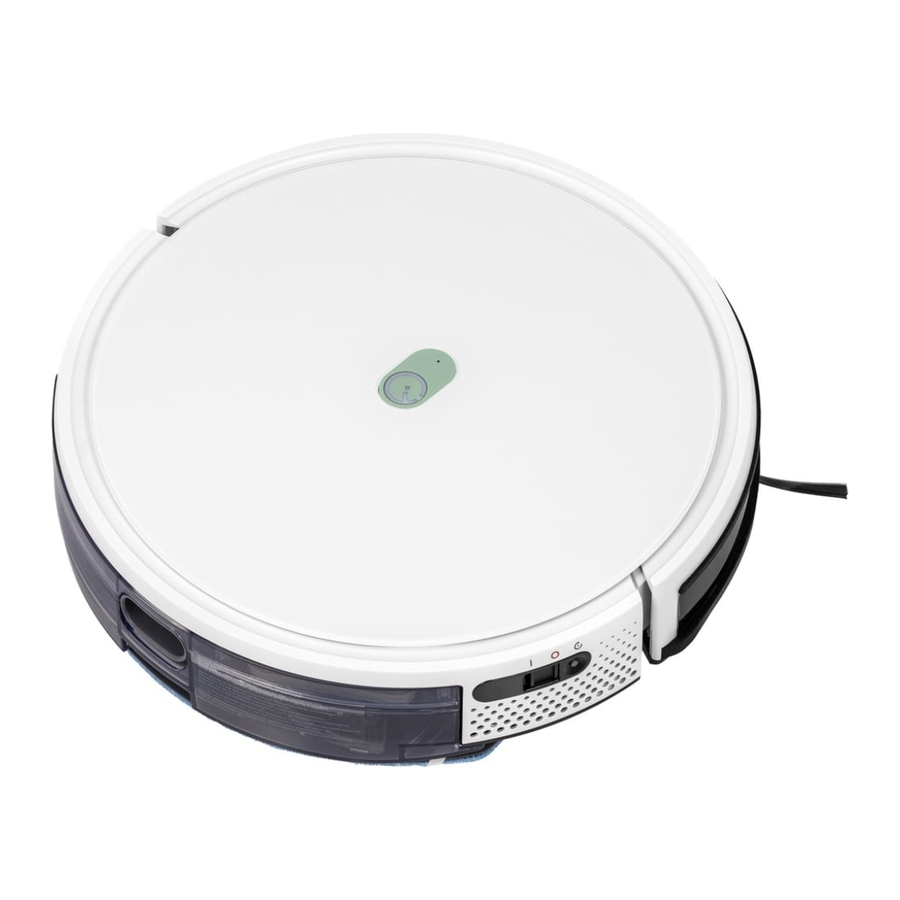
Product Diagram
Main Unit

Bottom

Dust Bin and Reservoir (Pre-installed)

Docking Station

Operating and Programming
Notes Before Cleaning

Tidy up the area to be cleaned by putting furniture, such as chairs, in their proper place.

It may be necessary to place a physical barrier at the edge of a drop to stop the unit from falling over the edge.

Put away objects including wires, cloths and slippers, etc. on the floor to improve the cleaning efficiency.

Before using the product on a rug with tasseled edges, please fold the rug edges under.

Please do not stand in narrow spaces, such as hallways, and make sure not to block Robot.
Quick Start
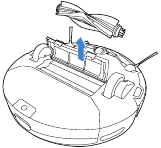
- Remove Protective Materials

- Install Side Brushes


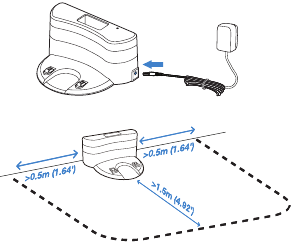
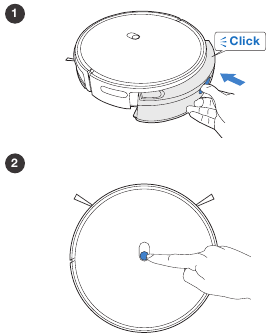
Charging the Unit
- Docking Station Placement
![]()
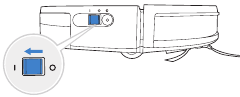
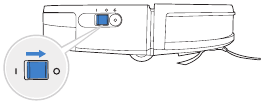
- Power ON
![]()
Note: I = ON, O = OFF
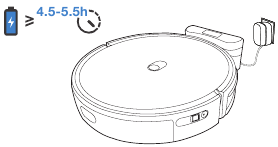
Robot cannot be charged when being powered OFF. - Charge Robot
![]()
* Empty the reservoir and remove the Cleaning Cloth Plate before charging Robot.
* It is suggested to avoid picking up or moving Robot during the cleaning for Robot to return to charge successfully.
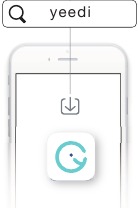
Yeedi App
To enjoy all available features, it is recommended to control your Robot via the Yeedi App.
Before you start, make sure that:
- Your mobile phone is connected to a Wi-Fi network.
- The 2.4GHz band wireless signal is enabled on your router.
- The Wi-Fi indicator light on Robot is slowly flashing.
![]()


Wi-Fi Indicator Light
 | Slowly flashing | Disconnected to Wi-Fi or waiting for Wi-Fi connection |
| Rapidly flashing | Connecting to Wi-Fi | |
| Solid | Connected to Wi-Fi |
Tips:
If you have any problems during the Wi-Fi setup process, refer to the Troubleshooting > Wi-Fi Connection section in this manual.
Operating the Unit
During the first cleaning, please supervise Robot and assist it should there be a problem.
- Start

- Start/Pause
The robot's Control Panel stops glowing after the robot is paused for a few minutes. Press the AUTO Mode Button on Robot to wake up the robot.

If the pause duration is shorter than 10 minutes, Robot will return to finish the cleaning where it left off. - Power OFF
![]()
* If Robot will not be used for a while, fully charge Robot and power OFF before storage. Charge Robot every 1.5 month to prevent battery drain.
* When Robot is not cleaning, it is recommended to keep Robot powered ON and charging.


Dust Bin & Reservoir
Note:
- To prolong the service life of the reservoir, it is recommended to use purified water or softened water.
- Please avoid using the mopping system on the carpet.
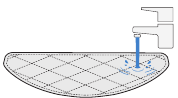
Add Water

Install Dust Bin & Reservoir
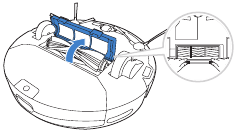
Tangle-free Brush
Tangle-free Brush is specifically designed to pick up hair without tangling. It is suggested to increase the vacuum power in yeedi App when using Tangle-free Brush.
- Release the Brush Cover
![]()
- Uninstall the Main Brush
![]()
- Install Tangle-free Brush
![]()

Maintenance
Regular Maintenance
To keep Robot running at peak performance, perform maintenance tasks and replace parts with the following frequencies:
| Robot Part | Maintenance Frequency | Replacement Frequency |
| Disposable Cleaning Cloth | / | Dispose after each use |
| Washable/Reusable Microfiber Cleaning Cloth | After each use | Every 50 washes |
| Reservoir | After each use | / |
| Side Brush | Once every 2 weeks | Every 3-6 months |
| Main Brush Tangle-free Brush | Once per week | Every 6-12 months |
| Sponge Filter/ High Efficiency Filter | Once per week | Every 3-6 months |
| Universal Wheel Anti-Drop Sensors Bumper Charging Contacts Docking Station Pins | Once per week | / |
Before performing cleaning and maintenance tasks on Robot, turn the robot OFF and unplug the Docking Station.
A multi-function Cleaning Tool is provided for easy maintenance. Handle with care, this cleaning tool has sharp edges.
Note: Yeedi manufactures various replacement parts and fittings. Please contact Customer Service for more information on replacement parts.
Dust Bin & Reservoir
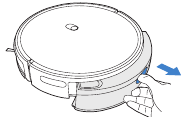
Uninstall the Dust Bin & Reservoir
Reservoir

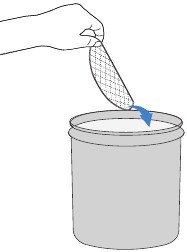
Washable/Reusable Microfiber Cleaning Cloth
Disposable Cleaning Cloth
Dust Bin

Main Brush

Side Brushes

Other Components

Troubleshooting
| No. | Scenario | Possible Cause | Solution |
| 1 | Robot is not able to connect to the home Wi-Fi network. | Incorrect home Wi-Fi username or password entered. | Enter the correct home Wi-Fi username and password. |
| Robot is not within range of your home Wi-Fi signal. | Make sure Robot is within range of your home Wi-Fi signal. | ||
| Network setup started before Robot was ready. | Turn ON Power Switch. Press the RESET Button. Robot is ready for network setup when its Wi-Fi Indicator light flashes slowly. | ||
| Robot does not support 5 GHz Wi-Fi. | Make sure the robot has been connected with 2.4 GHz WiFi network. | ||
| 2 | The unit is not charging | Robot is not switched ON. | Switch ON Robot. |
| Robot has not connected to the Docking Station. | Be sure that the robot's Charging Contacts have connected to the Docking Station Pins. | ||
| The Docking Station is not connected to the power supply. | Make sure the Docking Station is connected to the power supply. | ||
| The battery is completely discharged. | Please contact Customer Care for help. | ||
| 3 | The unit cannot return to the Docking Station | The Docking Station is not correctly placed. | Refer to Maintenance Section "Dust Bin & Reservoir" to correctly place the Docking Station. |
| The Docking Station is not correctly connected. | Make sure the Docking Station is correctly connected. | ||
| The Docking Station is manually moved during the cleaning. | It is suggested not to move the Docking Station during the cleaning. | ||
| Robot did not start cleaning from the Docking Station. | Make sure Robot starts cleaning from the Docking Station. | ||
| 4 | Robot misses cleaning spots to be cleaned, or repeats cleaning the area cleaned. | The cleaning cycle is interfered by small objects or barriers on the floor. | Remove power cords and small objects from the floor to ensure cleaning efficiency. Robot will automatically clean the area missed, please avoid moving Robot manually or block the path during the cleaning cycle. |
| Robot is working on slippery polished floors. | Make sure the floor wax is dried before Robot starts cleaning. | ||
| Robot is unable to reach certain areas blocked by furniture or barriers. | Tidy up the area to be cleaned by putting furniture and small objects in their proper place. | ||
| 5 | The unit gets stuck while working and stops | Robot gets stuck while working and stops. | Robot will try various ways to free itself. If it is unsuccessful, manually remove the obstacles and restart. |
| Robot might be stuck under furniture with an entrance of similar height. | Please set a physical barrier. | ||
| 6 | The unit is making too much noise when cleaning | Robot is tangled or blocked with debris. | Clean Robot as described in section Maintenance and restart. If the trouble persists, please contact Customer Care. |
Wi-Fi Connection
Before Wi-Fi setup, make sure Robot, mobile phone, and Wi-Fi network meet the following requirements.
Robot and Mobile Phone Requirements
- Robot is fully charged and the power switch of Robot is turned on.
- Wi-Fi status light slowly flashes.
- Turn off mobile phone's cellular data (you can turn it back on after setup).
Wi-Fi Network Requirements
- You are using a 2.4GHz or 2.4/5 GHz mixed network.
- Your router supports 802.11b/g/n and IPv4 protocol.
- Do not use a VPN (Virtual Private Network) or Proxy Server.
- Do not use a hidden network.
- WPA and WPA2 using TKIP, PSK, AES/CCMP encryption.
- WEP EAP (Enterprise Authentication Protocol) is not supported.
- Use Wi-Fi channels 1-11 in North America and channels 1-13 outside North America (refer to local regulatory agency).
- If you are using a network extender/repeater, the network name (SSID) and password are the same as your primary network.
Product Specifications
| Model | K651G | ||
| Rated Input | 19V  0.6A 11.4W 0.6A 11.4W | ||
| Docking Station Model | DN622.13 | ||
| Rated Output Voltage | 19V | Rated Output Current | 0.6A |
| Power Adapter Model | YJS015F-1900600G/DK18-190060H-V/TS-A011-190060E2 | ||
| Off/Standby Mode Power | Less than 0.50 W | ||
| Networked Standby Power | Less than 2.00 W | ||
| Frequency Bands and power | Operating frequency: 2412MHz - 2472MHz | ||
| Maximum transmitting power: 19 dBm. | |||
* Output power of the Wi-Fi module is less than 100mW.
Note: Technical and design specifications may be changed for continuous product improvement.

Documents / Resources
References
Download manual
Here you can download full pdf version of manual, it may contain additional safety instructions, warranty information, FCC rules, etc.
Advertisement
Thank you! Your question has been received!


Need Assistance?
Do you have a question about the K651G that isn't answered in the manual? Leave your question here.