Advertisement
- 1 Package Contents
- 2 Product Diagram
- 3 Operating and Programming
- 4 Maintenance
- 5 Indicator Light
- 6 Troubleshooting
- 7 Product Specifications
- 8 Documents / Resources
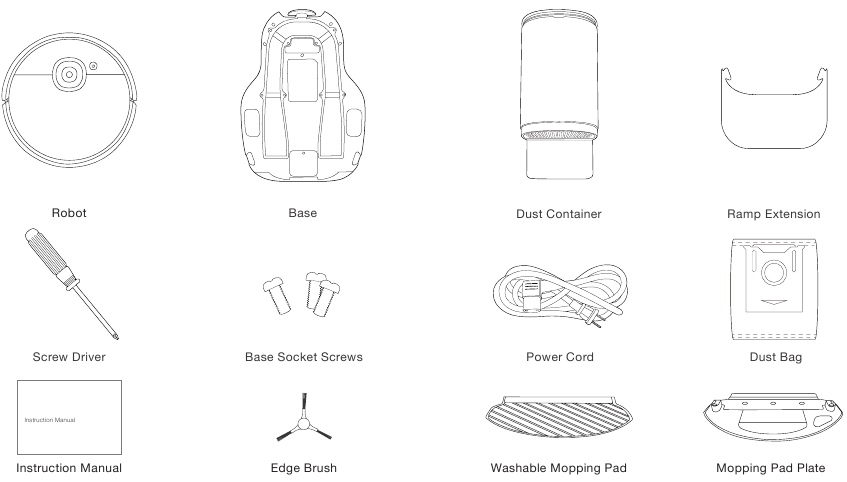
Package Contents
 Note: Figures and illustrations are for reference only and may differ from actual product appearance.
Product design and specifications are subject to changes without notice.
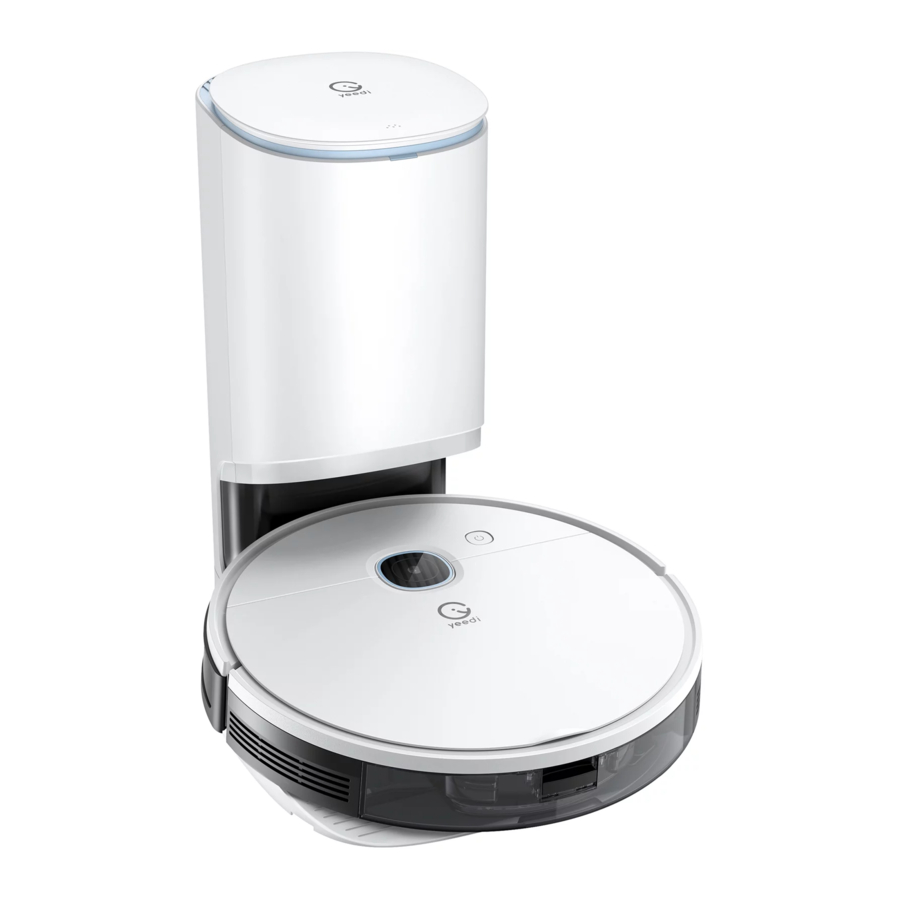
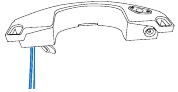
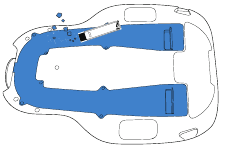
Product Diagram
Robot

Bottom View

Dust Bin

Reservoir

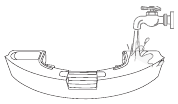
Self-empty Station

Self-empty Station (Back)
")
Self-empty Station (Bottom)
")
Self-empty Station (Top)
")
Power Cord

Operating and Programming
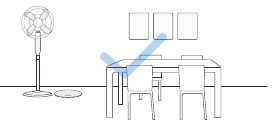
Notes Before Cleaning
Tidy up the area to be cleaned by putting furniture, such as chairs, in their proper place.
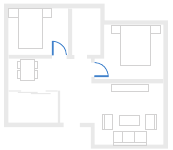
During the first use, make sure each room door is open to help Robot fully explore your house.
It may be necessary to place a physical barrier at the edge of a drop to stop the unit from falling over the edge.

Put away objects including wires, cloths and slippers, etc. on the floor to improve the cleaning efficiency.

Before using the product on a rug with tasseled edges, please fold the rug edges under.

Please do not stand in narrow spaces, such as hallways, and make sure not to block the Detection Sensor.
Preparation
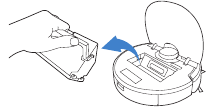
Please remove all protection materials on Robot and Self-empty Station before use.
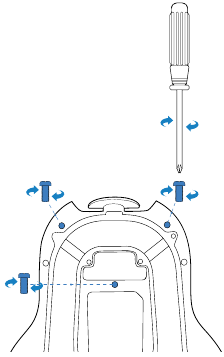
- Connect the Dust Container and the Base
![]()
- Tighten the Base Socket Set Screws
![]()
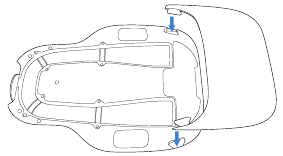
- Assemble Self-empty Station

- Install the Ramp Extension
![]()
- Self-empty Station Placement

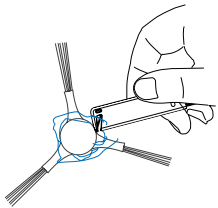
- Install Edge Brush

- Power ON
![]()
- Charge Robot


Note: When Robot completes the cleaning cycle or when the battery gets low, Robot automatically returns to the Self-empty Station to recharge itself. Robot can also be sent back to the Self-empty Station at any time by using the yeedi App or by pressing the AUTO Button on the robot for 3 seconds.
Empty remaining water from the Reservoir and remove the Mopping Pad Plate before charging Robot.
yeedi App
To enjoy all available features, it is recommended to control your Robot via the yeedi App.
Before you start, make sure that:
- Your mobile phone is connected to a Wi-Fi network.
- The 2.4GHz band wireless signal is enabled on your router.
- The Wi-Fi indicator light on Robot is slowly flashing.


Wi-Fi Indicator Light
 | Slowly flashing | Disconnected to Wi-Fi or waiting for Wi-Fi connection |
| Rapidly flashing | Connecting to Wi-Fi | |
| Solid | Connected to Wi-Fi |
 Tips: If you have any problems during the Wi-Fi setup process, refer to the Troubleshooting > Wi-Fi Connection section in this manual.
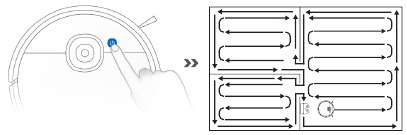
Start, Pause, Wake Up, Power Off
Start
Pause
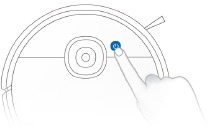
Note: The robot's Control Panel stops glowing after the robot is paused for a few minutes. Press the AUTO Mode Button on Robot to wake it up.
Wake Up

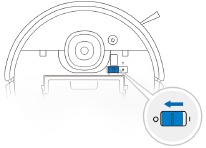
Power OFF
Note: When Robot is not working, it is recommended to keep it switched ON and charging.
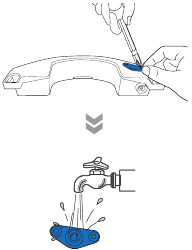
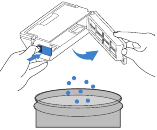
Mopping System
Note:
- To prolong the service life of the reservoir, it is recommended to use purified water or softened water for the mopping system.

- If you need to clean the carpet, please uninstall the Mopping Pad Plate first.

- Empty the reservoir after Robot finishes mopping.


Maintenance
Mopping System
Before performing cleaning and maintenance tasks on Robot, turn the robot OFF and unplug the Self-empty Station.
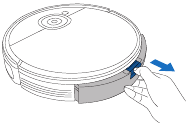
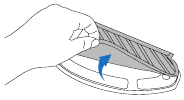
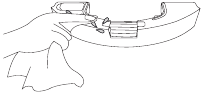
Dust Bin and Filters
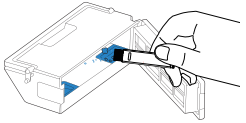
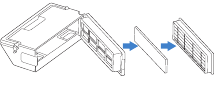
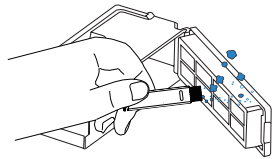
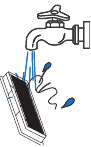

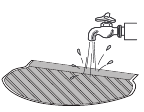
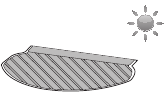
Note:
- Please rinse the filter with water as shown above.
- Do not use finger or brush to clean the filter.
- Be sure to dry out the filter for at least 24 hours after washing.
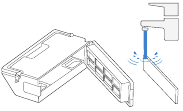
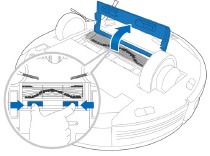
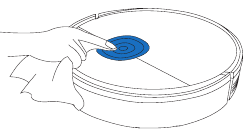
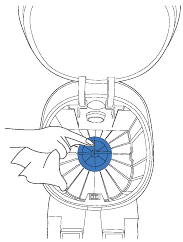
Main Brush, Edge Brush and Mapping Sensor
Note: A Multi-Function Cleaning Tool is provided for easy maintenance. Handle with care, this cleaning tool has sharp edges.
Main Brush


Edge Brush
Mapping Sensor
Other Components

Note: Before cleaning the robot's Charging Contacts and Self-empty Station Pins, turn the robot OFF and unplug the Self-empty Station.
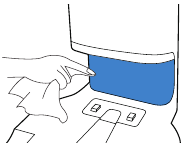
Self-empty Station
Note: Before performing cleaning and maintenance on Self-empty Station, unplug it first.
* For a proper maintenance, wipe with a clean dry cloth, and avoid using any detergent or cleaning spray.
Self-empty Station Pins
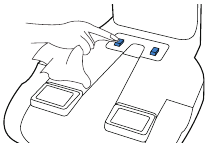
Infrared Signal Emitter
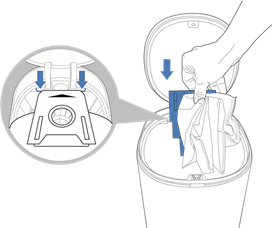
Dust Bag
- Dispose the Dust Bag

* The Dust Bag will be sealed by the handle so the dust will not leak.
- Clean the Blower Cover
![]()
- Install the Dust Bag
![]()
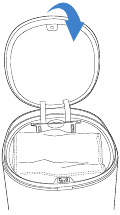
- Close the Dust Container Lid
![]()

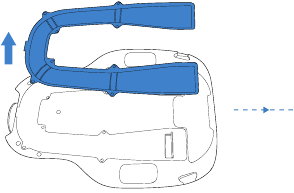
Dust Evacuation Tube
- Unscrew the Dust Evacuation Tube Cover
![]()
- Uninstall the Dust Evacuation Tube Cover
![]()
- Clean the Dust Evacuation Tube
![]()

Regular Maintenance
To keep Robot running at peak performance, perform maintenance tasks and replace parts with the following frequencies:
| Robot Part | Maintenance Frequency | Replacement Frequency |
| Washable Mopping Pad | After each use | Every 50 washings |
| Reservoir/Mopping Pad Plate | After each use | / |
| Edge Brush | Once every 2 weeks | Every 3-6 months |
| Main Brush | Once per week | Every 6-12 months |
| Sponge Filter/High Efficiency Filter | Once per week | Every 3-6 months |
| Universal Wheel Anti-Drop Sensors Bumper Mapping Sensor Charging Contacts Self-empty Station Pins | Once per week | / |
A multi-function Cleaning Tool is provided for easy maintenance. Handle with care, this cleaning tool has sharp edges.
Note: yeedi manufactures various replacement parts and fittings. Please contact Customer Service for more information on replacement parts.
Indicator Light
Robot
Robot will tell you something is wrong with an indicator light and voice report. More detailed support is available through the yeedi app and online website.
| Indicator Light | Scenario |
| AUTO Mode Button glows a solid WHITE. | The robot is cleaning. |
| The robot is paused while cleaning. | |
| AUTO Mode Button flashes WHITE. | The robot is charging. |
| The robot is starting. | |
| The robot is relocating. | |
| AUTO Mode Button glows a solid RED. | The robot has low battery. |
| AUTO Mode Button flashes RED. | The robot has a problem. |
Self-empty Station
The light effect of the Status Indicator on Self-empty Station corresponds to different conditions and solutions. For more support, please refer to yeedi App or the Troubleshooting Section of this manual.
| Light Effect | Status | Solutions |
| Indicator light off | The Self-empty Station is in standby. | / |
| Robot is in Do Not Disturb Mode. | / | |
| Glowing a solid WHITE | Robot returns to the Self-empty Station and starts to self-empty. | / |
| Robot is self-emptying. | / | |
| The Self-empty Station's suction power decreased. | Please check the Dust Bag. | |
| Glowing a solid RED | The Dust Bag is not installed. | Please install the Dust Bag. |
| The Self-empty Station failed to self-empty the dust. | Please check the solution in the App. | |
| The Dust Container Lid is not closed. | Please make sure the Dust Container Lid is firmly closed. |
Troubleshooting
| No. | Malfunction | Possible Causes | Solutions |
| 1 | Robot is not able to connect to the home Wi-Fi network. | Incorrect home Wi-Fi username or password entered. | Enter the correct home Wi-Fi username and password. |
| Robot is not within range of your home Wi-Fi signal. | Make sure Robot is within range of your home Wi-Fi signal. | ||
| Network setup started before Robot was ready. | Turn ON Power Switch. Press the RESET Button for 3 seconds. Robot is ready for network setup when it plays a musical tune and its Wi-Fi Indicator light flashes slowly. | ||
| 2 | Robot is not charging. | Robot is not switched ON. | Switch ON Robot. |
| Robot has not connected to the Self-empty Station. | Be sure that the robot's Charging Contacts have connected to the Self-empty Station Pins. | ||
| The Power Cord is not connected to the Selfempty Station. | Make sure the Power Cord is firmly connected to the Self-empty Station. | ||
| The battery is completely discharged. | Re-activate the battery. Switch ON. Place Robot on the Self-empty Station by hand, remove after charging for 3 minutes, repeat 3 times; then charge normally. | ||
| Make sure the Self-empty Station is connected to the power supply. | The Self-empty Station is not connected to the power supply. | ||
| 3 | Robot cannot return to the Self-empty Station. | The Self-empty Station is not correctly placed. | Refer to Preparation section to correctly place the Self-empty Station. |
| The Self-empty Station is disconnected or moved. | Please check if the Self-empty Station is connected to power. Do not move the Self-empty Station manually. | ||
| Robot is working in a dark environment. | Make sure to use Robot in a well illuminated environment. | ||
| Robot is paused for more than 60 minutes. | Avoid pausing Robot for over 60 minutes. | ||
| Robot did not start cleaning from the Selfempty Station. | Make sure Robot starts cleaning from the Self-empty Station. | ||
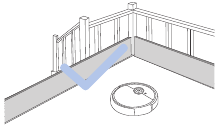
| The Ramp Extension is not installed. | Please install the Ramp Extension so the robot can return to charge successfully. | ||
| 4 | Robot returns to the Selfempty Station before it has finished cleaning. | Robot is working in a dark environment. | Make sure to use Robot in a well illuminated environment. |
| When the battery gets low, Robot automatically switches to Return to Charger Mode and returns to the Self-empty Station to recharge itself. | This is normal. No solution necessary. | ||
| Working time varies according to floor surface, room complexity and the Cleaning Mode selected. | This is normal. No solution necessary. | ||
| The cleaning area is not tidy. | Remove small objects from the floor and tidy up the cleaning area before Robot starts cleaning. | ||
| 5 | Robot gets stuck while working and stops. | Robot is tangled with something on the floor (electrical wires, curtains, Carpet fringing, etc.). | Robot will try various ways to free itself. If it is unsuccessful, manually remove the obstacles and restart. |
| 6 | Robot makes much noise when cleaning. | The brushes are tangled, or the dust bin is stuck. | Clear the debris stuck regularly. |
| 7 | The water is not coming out of the Reservoir when Robot is mopping. | The water inlet filter on the bottom of Reservoir is clogged. | Unscrew the water inlet on the bottom of Reservoir and clean the filter. |
| The Reservoir runs out of water. | Add water into the Reservoir. | ||
| The water outlets on the bottom of Robot are clogged. | Check the water outlets on the bottom and clean. | ||
| 8 | The reservoir drops out of place during cleaning. | The reservoir is not properly installed. | The reservoir is properly installed when it clicks into place. |
| 9 | The robot does not start emptying after returning to the Self-empty Station. | The Dust Container Lid is not closed. | Close the Dust Container Lid. |
| The Dust Bag is not installed to the Selfempty Station. | Install the Dust Bag and close the Dust Container Lid. | ||
| Manually move The robot to the Self-empty Station will not trigger self-emptying. | In order to make sure The robot starts self-empty successfully, avoid picking up and moving the Self-empty Station during the cleaning. | ||
| The robot returns to the Self-empty Station running Video Manager in the App. | This is normal. | ||
| Do Not Disturb mode is enabled in yeedi App. | This is normal. Disable Do Not Disturb mode in the App, or start self-emptying manually. | ||
| The Dust Bag is full. | Replace the Dust Bag and close the Dust Container Lid. | ||
| If the possible causes are excluded, it might be a component malfunction. | Please contact customer service. | ||
| 10 | The robot fails to self-empty the Dust Bin. | The Dust Bin is not installed. | Please install the Dust Bin with two Self-empty Outlets on the bottom. |
| The Dust Bag is full. | Replace the Dust Bag and close the Dust Container Lid. | ||
| The Self-empty Outlets on the Dust Bin is stuck by debris. | Uninstall the Dust Bin and clean the debris on the Selfempty Outlets. | ||
| Dust Evacuation Tube is blocked. | Clean the Dust Evacuation Tube. | ||
| 11 | There is debris in the Dust Container. | Fine particles are absorbed inside the Dust Container through the Dust Bag. | Clean the Dust Container Lid and inner wall. |
| The Dust Bag is damaged. | Check the Dust Bag and replace it. | ||
| 12 | The robot leaks dust or debris while cleaning. | The Self-empty Outlets are stuck by debris. | Uninstall the Dust Bin and clear the debris. |
| 13 | The Base is dirty. | Main Brush has debris on it and requires cleaning. | Clean the Main Brush. |
Wi-Fi Connection
Before Wi-Fi setup, make sure Robot, mobile phone, and Wi-Fi network meet the following requirements.
Robot and Mobile Phone Requirements
- Robot is fully charged and the power switch of Robot is turned on.
- Wi-Fi status light slowly flashes.
- Turn off mobile phone's cellular data (you can turn it back on after setup).
Wi-Fi Network Requirements
- You are using a 2.4GHz or 2.4/5 GHz mixed network.
- Your router supports 802.11b/g/n and IPv4 protocol.
- Do not use a VPN (Virtual Private Network) or Proxy Server.
- Do not use a hidden network.
- WPA and WPA2 using TKIP, PSK, AES/CCMP encryption.
- WEP EAP (Enterprise Authentication Protocol) is not supported.
- Use Wi-Fi channels 1-11 in North America and channels 1-13 outside North America (refer to local regulatory agency).
- If you are using a network extender/repeater, the network name (SSID) and password are the same as your primary network.
Product Specifications
| Model | DVX34 | |
| Rated Input | 20V  1A 1A | |
| Self-empty Station Model | CH1918 | |
| Rated Input(Charging) | For European Union Only | 220-240V~ 50-60Hz 0.3A |
| For Russia Only | 220V~ 50-60Hz 0.3A | |
| Rated Output | 20V 1A | |
| Power (Auto-Disposing) | 1000W | |
| Frequency bands | 2400-2483.5MHz | |
| Off Mode Power | Less than 0.50W | |
| Networked Standby Power | Less than 2.00W | |
Output power of the Wi-Fi module is less than 100mW.
Note: Technical and design specifications may be changed for continuous product improvement.

Documents / Resources
References
Download manual
Here you can download full pdf version of manual, it may contain additional safety instructions, warranty information, FCC rules, etc.
Advertisement
Thank you! Your question has been received!


Need Assistance?
Do you have a question about the Vac Station that isn't answered in the manual? Leave your question here.