Table of Contents
Advertisement
Quick Links
Repair
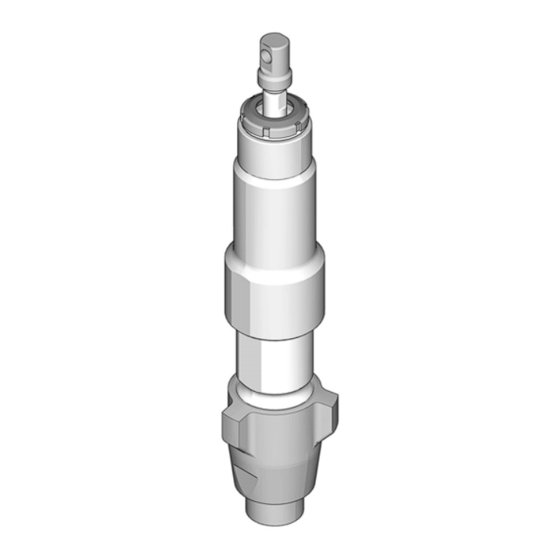
GH/EH 675 Displacement Pump
For professional use only.
Not approved for use in explosive atmosphere or hazardous locations.
For portable airless spraying of architectural paints and coatings.
Models: 17U996
Important Safety Instructions
Read all warnings and instructions in this manual and related manuals.
Be familiar with the controls and the proper usage of the equipment.
Save these instructions.
Use only genuine Graco replacement parts.
The use of non-Graco replacement parts may void warranty.
3A5443B
EN
Advertisement
Table of Contents

Related Manuals for Graco GH 675


Summary of Contents for Graco GH 675
- Page 1 Read all warnings and instructions in this manual and related manuals. Be familiar with the controls and the proper usage of the equipment. Save these instructions. Use only genuine Graco replacement parts. The use of non-Graco replacement parts may void warranty.
-
Page 2: Table Of Contents
Graco Standard Warranty ........ -
Page 3: Warnings
• Check hoses and parts for signs of damage. Replace any damaged hoses or parts. • This system is capable of producing 6750 psi. Use Graco replacement parts or accessories that are rated a minimum of 6750 psi. • Always engage the trigger lock when not spraying. Verify the trigger lock is functioning properly. -
Page 4: Trigger Lock
Trigger Lock Trigger Lock Always engage the trigger lock when sprayer Engage trigger lock. is stopped to prevent the gun from being triggered accidentally by hand or if dropped or bumped. If applicable, turn electric motor ON/OFF switch to OFF position. Wait 7 seconds for power to dissipate. - Page 5 Trigger Lock Hold a metal part of the gun firmly to a Remove pin then remove pump. grounded metal pail. Trigger the gun to relieve pressure. Solvent and oil-based fluids: follow local code. Use only conductive metal pails, placed on a grounded surface such as concrete.
-
Page 6: Disassemble Pump
Disassemble Pump Disassemble Pump Remove Pump Rod Adapter. Loosen and remove packing nut. Tap piston rod out of cylinder with a Unscrew cylinder from intake valve. plastic hammer being careful of the threads. Use a thin, soft rod if necessary. Do not clean or wipe the piston valve threads. - Page 7 Disassemble Pump Unscrew piston valve from piston rod. Remove and discard throat packing and glands from the cylinder. Remove piston from displacement rod. Clean and inspect parts. 3A5443B...
-
Page 8: Assemble Pump
Assemble Pump Assemble Pump If applicable, soak leather packings in Torque to 85 ± 5 ft-lb (115 ± 7 N•m). SAE 30W oil for one hour before assembly. Assemble throat packings and place in pump cylinder. Assemble packings and ball to piston and piston rod. - Page 9 Assemble Pump Apply liberal amounts of grease or oil to Gently guide displacement rod up piston packings. Grease top inch or two through throat packings. Tap bottom of of piston rod that will go through the piston valve as necessary with a leather cylinder throat packings.
- Page 10 Assemble Pump Torque foot valve to 290± 10 ft-lb (393 ± 11. Install pump rod adapter, torque to 35 ± 14 N•m). 5 ft-lbs (47 ± 7 N•m) 12. Storage 10. Install O-ring and Packing Nut. Torque packing nut to 25 ± 5 ft-lbs (34 ± 7 N•m). 3A5443B...
-
Page 11: Notes
Notes Notes 3A5443B... -
Page 12: Parts Diagram
Parts Diagram Parts Diagram Ref. Torque 35 ± 5 ft-lb (47 ± 7 N•m) 290 ± 10 ft-lb (393 ± 4 N•m) 85 ± 5 ft-lb (115 ± 7 N•m) Soak in SAE 30w oil for 1 hour prior to assembly Apply ThreadLocker 3A5443B... -
Page 13: Parts List
Parts List Parts List Part Description 001+ 17V630 ROD, displacement 17S991 NUT, packing 003* 16D490 GLAND, packing, male, throat 004* 17V024 PACKING, vee, leather 005* 17V207 PACKING, vee, blue 006* 16D484 GLAND, packing, female, throat 17S981 HOUSING, outlet, pump 008+ 17V630 ADAPTER, rod 009* 109205 PACKING, o-ring, PTFE... -
Page 14: Throat Packing Adjustment
Parts List Throat Packing Adjustment When pump packings begin to leak after much use, perform Pressure Relief Procedure, page 4, and tighten packing nut down until leakage stops or lessens. This allows approximately 100 gallons of additional operation before a repacking is required. -
Page 15: Graco Standard Warranty
Graco’s written recommendations. This warranty does not cover, and Graco shall not be liable for general wear and tear, or any malfunction, damage or wear caused by faulty installation, misapplication, abrasion, corrosion, inadequate or improper maintenance, negligence, accident, tampering, or substitution of non-Graco component parts. -
Page 16: Graco Information
For the latest information about Graco products, visit www.graco.com. For patent information, see www.graco.com/patents. TO PLACE AN ORDER, contact your Graco distributor or call 1-800-690-2894 to identify the nearest distributor. All written and visual data contained in this document reflects the latest product information available at the time of publication.