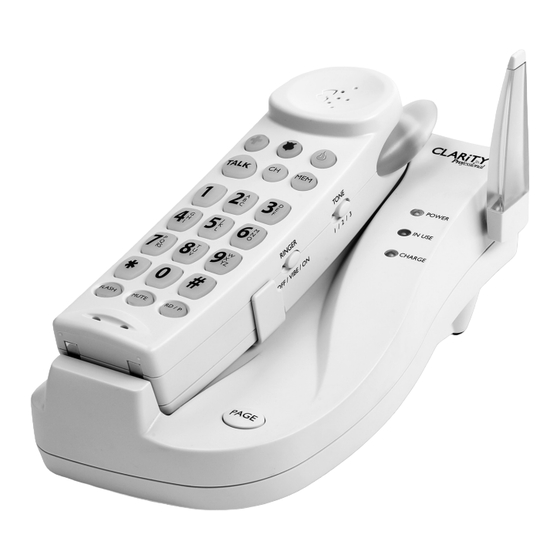
Clarity Professional C4205 User Manual
2.4 ghz cordless telephone featuring digital clarity power technology
Hide thumbs
Also See for Professional C4205:
- User manual (112 pages) ,
- Brochure (2 pages) ,
- Specifications (2 pages)
Table of Contents
Advertisement
Quick Links
Download this manual
See also:
User Manual
Advertisement
Table of Contents

Related Manuals for Clarity Professional C4205


Summary of Contents for Clarity Professional C4205
- Page 1 C4205 User Guide 2.4 GHz Cordless Telephone Featuring Digital Clarity Power Technology ™ Ç...
-
Page 3: Table Of Contents
TABLE OF CONTENTS Important Safety Instructions ...4 Features ...8 Choosing a Location ...10 Telephone Installation ...12 Handset Battery ...13 Telephone Handset Features ...15 Telephone Base Features ...17 Using Your Telephone ...21 Memory Storage ...23 Maintenance and Care ...25 Troubleshooting ...25 Regulatory Compliance ...28... -
Page 4: Important Safety Instructions
There may be a remote risk of electrical shock from lightning. 5. Do not use the telephone to report a gas leak in the vicinity of the leak. 6. Unplug this telephone from the wall outlets before cleaning. - Page 5 A. When the power supply cord or plug is frayed or damaged. B. If liquid has been spilled into the product. C. If the telephone has been exposed to rain or water. D. If the telephone does not operate normally by following the operating instructions.
- Page 6 IMPORTANT SAFETY INSTRUCTIONS F. If the telephone exhibits a distinct change in performance. 15. Never install telephone wiring during a lightning storm. 16. Never install telephone jacks in wet locations unless the jack is specifically designed for wet locations. 17. Never touch uninsulated telephone wires or terminals unless the telephone line has been disconnected at the network interface.
- Page 7 IMPORTANT SAFETY INSTRUCTIONS For Handset Unit: 3.6V 600mAHr NiMH Rechargeable Battery Sanik Battery Co. Ltd.: 3SNAAA60HSJ1 GPI International Ltd.: GP60AAAH3BMJZ For Base Unit: Four (4) AA alkaline batteries 2. Do not dispose of the battery in a fire as it may explode.
-
Page 8: Features
Telephone Base 1. Handset Page 2. Ringer Volume 3. Ringer Style 4. Ringer On/Off 5. Antenna/Visual Ringer FEATURES... - Page 9 Handset 1. Neckloop Jack 2. Handset Volume 3. Boost 4. Dial Pad 5. Emergency Buttons 6. Talk 7. Channel 8. Memory FEATURES 9. Flash 10. Mute 11. Redial/Pause 12. Handset Ringer Off/Vibe/On 13. Handset Tone 14. Belt Clip 15. Headset Jack 16.
-
Page 10: Choosing A Location
Return it to the place of purchase. Check to be sure that you have all items that come with your telephone. You should have a HANDSET, BASE UNIT, BATTERY, AC ADAPTER, TELEPHONE LINE CORD, BELT CLIP and OWNERS MANUAL. - Page 11 1. Plug one end of the supplied modular tele- phone line cord into the jack marked TEL located on the back of the telephone base as shown in the diagram. 2. Plug the modular telephone line cord’s other end into a modular phone jack.
-
Page 12: Telephone Installation
The base unit may be mounted on a standard wall plate. 1. Plug one end of the supplied short modular telephone line cord into the TEL jack located on the back of the base of the phone. 2. Insert the plug of the AC adapter into the jack marked DC 9V 400mA located on the back of the telephone base. -
Page 13: Handset Battery
12 hours before you use the phone for the first time. HANDSET BATTERY INSTALLATION The C4205 uses a 3.6Volt 600mAh NiMH rechargeable 3 cell (AAA Type) battery that is included with your unit. Handset Battery must be connected before... - Page 14 Talk Time: about four (4) hours Standby Time: about eight (8) days Low Battery When the handset battery gets low, there will be two (2) beeps every thirty (30) seconds. If the battery becomes low while you are on a call, you will be disconnected after about two (2) minutes.
-
Page 15: Telephone Handset Features
BOOST – Clarity Power On/Off The C4205 has a button that controls the loud- ness of the receiver. Once the BOOST button is pressed, an extra level of amplification is added over the entire range of the volume control. - Page 16 Ordering a Headset In the event you wish to purchase a headset for your C4205, please contact Plantronics at 1-800- 544-4660 for location near you. We recommend using the Plantronics M110 or M130 headset. Belt Clip You may choose to use the optional belt clip with your handset.
-
Page 17: Telephone Base Features
Ringer Style The base ringer style adjustments are located on the side of the telephone base. The style of ring can be adjusted by pressing the RING STYLE button. Six (6) styles are available allowing you to customize your ring. - Page 18 CAUTION: VOLUME WILL BE LOUD WHEN BOOST SWITCH IS SET TO “ON”. Pulse/Tone Slide the switch to the type of telephone service you have; TONE for touch-tone service or PULSE for rotary dialing. Please check with your local telephone company if uncertain of the type of service.
- Page 19 Redial/Pause Press the RD/P button to redial the last number dialed. Pressing the RD/P button while storing a telephone number will insert a four (4) second pause. This is commonly used when storing both the telephone number and an extension or PIN number.
- Page 20 5. Install desk/wall mount bracket to telephone base. To Replace Battery Backup Batteries 1. Disconnect telephone line cord and remove desk/wall mount bracket from telephone base. 2. Disconnect battery back-up connector from the telephone base. 3. Remove batteries from desk/wall mount bracket.
-
Page 21: Using Your Telephone
USING YOUR TELEPHONE Placing a Call 1. Press the TALK button (TALK button will illuminate GREEN) and dial the number you wish to call. 2. To end the call press the TALK button or place the handset in the base. - Page 22 To send a page signal from the base to the hand- set, press the PAGE button located on the base of the telephone. A series of rings will sound from the handset. To locate the handset if it is away from the base, press and hold the PAGE button for approximate- ly five (5) seconds.
-
Page 23: Memory Storage
When this occurs, the handset can no longer communicate with the base. MEMORY STORAGE The C4205 has ten (10) indirect, or two touch, memory storage locations on the telephone handset (0-9) that can be programmed to dial frequently called numbers of up to 16 digits. - Page 24 Adding an EMERGENCY Number 1. Unit must be in standby mode only. 2. Press the MEM button. 3. Enter the telephone number you wish to store. 4. Press the MEM button. 5. Press the emergency button on the dial pad that you wish to store the number to.
-
Page 25: Maintenance And Care
MAINTENANCE AND CARE The C4205 has been designed to give you years of dependable service with a minimum of care. To ensure the utmost in performance, follow these guidelines in caring for the unit: 1. Avoid dropping or knocking the unit. - Page 26 • AC outlet, the base and the telephone. Verify the telephone line cord is securely • plugged into the wall jack and the telephone. Make sure you are in the usable range of the • base station. You may have too many extensions on your •...
- Page 27 Phone Will Not Hold Charge: Make sure the charging contacts on the hand- • set and base are free of dust and dirt. Clean the contacts with a soft cloth. Make sure CHARGE LED on the base is lit • when handset is in the cradle.
-
Page 28: Regulatory Compliance
A plug and jack used to connect this equip- ment to the premises wiring and telephone net- work must comply with the applicable FCC Part 68 rules and requirements adopted by the ACTA. - Page 29 The telephone company may make changes in its facilities, equipment, operations or proce- dures that could affect the operation of the equip- ment. If this happens the telephone company will provide advance notice in order for you to make necessary modifications to maintain uninter- rupted service.
- Page 30 REGULATORY COMPLIANCE Customer-Owned Coin/Credit Card Phones: To comply with state tariffs, the telephone compa- ny must be given notification prior to connection. In some states, the state public utility commission, public service commission or corporation commis- sion must give prior approval of connection.
- Page 31 3. Connect the telephone equipment into an outlet on a circuit different from that to which the television, radio, or other receiver is connected. 4. Consult the dealer or an experienced Radio/ TV Technician for help. CAUTION: Changes or modifications not ex- pressly approved by the manufacturer responsible for compliance could void the user’s authority to...
- Page 32 (The term “IC:” before the certification/regis- tration number only signifies that the Industry Canada technical specifications were met.) The party responsible for regulatory compliance: Clarity, A Division of Plantronics, Inc. 4289 Bonny Oaks Drive, Suite 106 Chattanooga, TN 37406 Phone: 1-800-552-3368...
-
Page 33: Warranty And Service
Limited Warranty Clarity, a division of Plantronics, Inc. (“Clarity”) warrants to the original consumer purchaser that, except for limitations and exclusions set forth below, this product shall be free from defects... - Page 34 WARRANTY & SERVICE Implied Warranties Under state law, you may be entitled to the bene- fit of certain implied warranties. These implied warranties will continue in force only during the warranty period. Some states do allow limitations on how long an implied warranty lasts, so the above limitation may not apply to you.
- Page 35 In Canada Plantronics Service Center 8112 Trans-Canada Hwy. Ville St. Laurent. Que. Canada H4S 1M5 Tel: (800) 540-8363 (514) 956-8363 Fax: (514) 956-1825 Please use the original container, or pack the unit(s) in a sturdy carton with sufficient packing material to prevent damage.