
Related Manuals for Asko T411VD.T.U


Summary of Contents for Asko T411VD.T.U
- Page 1 INSTRUCTIONS FOR USE Tumble dryer T411VD.W.U TD85.11 T411VD.T.U Carefully read the instructions for use before using the dryer.
-
Page 2: Table Of Contents
Dear Customer, We thank you for purchasing this quality ASKO product. We hope it meets all your expectations. Scandinavian design combines pure lines, everyday functionality, and high quality. These are the key characteristics of all our products, and the reason why they are highly appreciated across the globe. -
Page 3: Important Safety Instructions
16. The interior of the machine should be cleaned periodically by an authorized ASKO service agent. 17. Do not place items exposed to cooking oils in your dryer. Items contaminated with cooking oils may contribute to a chemical reaction that could cause a load to catch fi... - Page 4 heat (cool down period). Avoid stopping a tumble dryer before the end of the drying cycle unless all items are quickly removed and spread out so that the heat is dissipated. 18. Clothes dryer installation must be performed by a qualifi ed installer. 19.
- Page 5 Use copper conductors only, if the terminal is acceptable only for connection to copper. To reduce the risk of electric shock, disconnect this appliance from the power supply before attempting any user maintenance other than cleaning the lint trap. Turning the controls to the OFF position does not disconnect this appliance from the power supply.
-
Page 6: Dryer Description
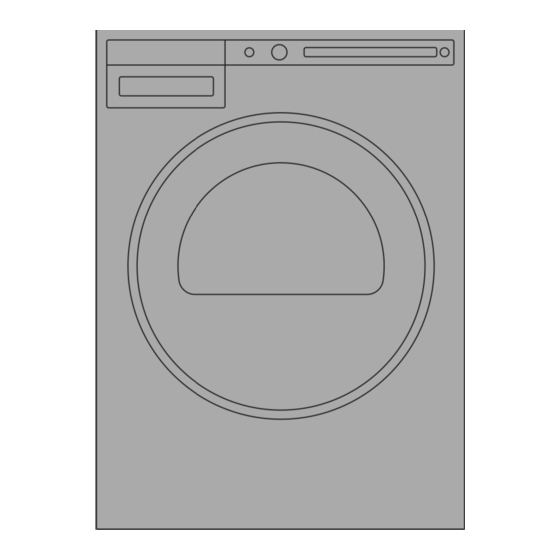
DRYER DESCRIPTION Main switch (ON/OFF) Program selector knob 2 3 4 5 Display unit Program selector buttons Button (start/pause/stop) Rating plate with information about the dryer (on the inside of the dryer door) QR and AUID code (on the inside of the dryer door) Dryer door Net fi... -
Page 7: Before Using The Appliance For The First Time
BEFORE USING THE APPLIANCE FOR THE FIRST TIME PACKAGING Remove all packaging. Please sort the materials in compliance with local recommendations (see chapter "DISPOSAL"). CLEANING Disconnect the dryer from the power mains and open the door towards you. Clean the dryer drum with a damp cloth and a mild detergent. -
Page 8: Installation And Connection
INSTALLATION AND CONNECTION DRYER PLACEMENT Free-standing appliance The dryer can be either free standing or installed onto The dryer may be placed adjacent to a washing a washing machine. machine. The dryer emits heat. Therefore, do not place it in a If the friction between the dryer feet and the fl... - Page 9 (A+B), supplied in the cardboard box in the dryer drum. Tipping guard part B is designed to fi t on ASKO washing machines and it may be hard or impossible to mount on appliances of other brands. If the...
- Page 10 How to stack a dryer onto the washing machine (ASKO): There is a cardboard box in the dryer drum, containing the vacuum feet and the tipping guard. The tipping guard consists of two metal parts (A + Use two screws to attach the A part to the back of the dryer.
- Page 11 CHANGING THE DOOR OPENING DIRECTION To change the direction of door opening, proceed as follows. Open the door fully. Undo the screws and remove the door. Use the screwdriver to remove the door lock cover and undo the screw on the door lock. Push the door lock upwards and remove it.
- Page 12 Undo the door hinge assembly (left) and the door latch assembly (right), switch their positions, and replace the screws (door hinge assembly to the right- hand side, door latch assembly to the left-hand side). Use the screwdriver to remove the plastic part more easily.
- Page 13 EVACUATION OF HUMID AIR Fitting the air exhaust hose to another opening Use the supplied air exhaust hose to convey the Instead of on the rear opening, the air exhaust hose humid air from the dryer is through an opening can be fi...
- Page 14 Connecting the air exhaust hose to a Extra equipment ventilation duct If the air exhaust hose is connected to an opening The air exhaust hose should be routed in shortest in the wall, infl ux of cool air may be prevented by and straightest possible way to the ventilation installing a ventilation grille.
- Page 15 The dryer may not be connected to the power The receptacle on the rear of the machine is mains using an extension cord. designed to accommodate ASKO washers ONLY (rated 208–240 V.) To use this receptacle, you must Do not connect the tumble dryer to an electrical use the readyfi...
-
Page 16: Tips Before Drying
TIPS BEFORE DRYING This chapter includes several tips on how to prepare the laundry from drying. LAUNDRY SORTING Sort the laundry according to: • type, • fabric thickness. For the most even drying, make sure the laundry is made of a similar material. CLOTHING 1. - Page 17 LAUNDRY SYMBOLS Observe the laundry symbols: Wash cycle Tumble dry cycle Normal wash cycle Machine dry Permanent Press or Wrinkle Normal setting Resistant setting Permanent Press or Wrinkle Gentle/Delicate setting Resistant setting Hand wash only Gentle or Delicate setting Do not wash Do not tumble dry Do not wring.
- Page 18 MATERIALS (FABRICS) SUITABLE FOR Static electricity DRYING IN A TUMBLE DRYER To reduce the risk of static electricity in the Material is suitable for tumble drying. laundry after tumble drying, you can: Clothes dried in a tumble dryer are softer and lighter •...
-
Page 19: Drying Process, Step By Step (1 - 7)
DRYING PROCESS, STEP BY STEP (1 – 7) WARNING! - To reduce the risk of electric shock or injury to persons, read the "IMPORTANT SAFETY INSTRUCTIONS" section before operating this appliance. STEP 1: SORT THE FABRICS See chapter "TIPS BEFORE DRYING" STEP 2: TURN ON THE MAIN SWITCH. - Page 20 STEP 4: CHOOSE THE DRYING PROGRAM. Choose the program by rotating the program selector knob in either direction. The program selector knob can be used when arrows appear on the display. Select the program based on the type and remaining moisture of the laundry you wish to dry. Anticipated program duration is indicated on the display.
- Page 21 Program Max. kg Description 12. TIME PROGRAM This program is used to dry thicker, multi-layered, non-sensitive cotton laundry. The program is also appropriate for smaller loads. If you set drying time that is too long, then it is possible for the laundry to dry excessively.
- Page 22 STEP 5: CHOOSING THE PROGRAM SETTINGS Using the program settings, the drying programs can be further adjusted to your wishes. Some program settings may not be available for your selected program. Selected program settings will remain stored after the end of the drying cycle and may be changed subsequently (except for delayed start which is not stored after the drying is complete).
- Page 23 5. Timed drying First, use the program selector knob to select the Timed Dry program. Press the button 5 to select a drying time from 30 minutes to 4 hours, in 15-minute steps. Use the button 6 (OK) to confi rm the Time 2:15 selected drying time.
- Page 24 STEP 6: CLOSE THE DOOR AND START THE DRYING PROCESS. Close the dryer door and press the Start/Pause/Stop button. Start (pressed briefl y – start/resume) Pause (pressed briefl y – drying temporarily suspended) Stop (press and hold for 3 seconds – stop or cancel) 2:20 Starting Remaining time...
- Page 25 STEP 7: END OF PROGRAM After the end of the drying program, the Start Cycle completed succsessfully display will indicate that the program has been successfully completed ("Cycle completed successfully"). Anti If you have selected the "anti-crease" creasing Cycle completed succsessfully option, the dryer will continue to operate after the end of the drying cycle for the amount of time specifi...
- Page 26 Favourite programs After the end of the drying program, Start Cycle completed succsessfully you can use the button 6 to store the program, including all extra settings, as your favourite program. Up to 4 favourite programs can be Make your list of four own favourite programs. stored.
-
Page 27: System Settings
SYSTEM SETTINGS In the main menu, use the program Enter System settings selector knob to select System Settings. Confi rm the selection by pressing the button 2. Then, use the program selector knob to scroll the list of settings that can be changed. •... - Page 28 PROGRAMS The main menu includes the entire set of programs that you can choose using the program selector knob. This setting allows only displaying the selected program in the main menu. Press the button 1 for to appear. Use Programs Sports wear Info Back...
- Page 29 RESET This means that all settings will return to the default settings and your own settings will be deleted. Confi rm the selection by pressing the Reset Info Back button 3 (YES). Press the button 6 to return to System Settings.
-
Page 30: Cleaning And Maintenance
CLEANING AND MAINTENANCE CLEANING THE NET FILTER IN THE DOOR Open the fi lter housing. Pull out the net fi lter. Gently scrape the fi lter to remove the lint lining (fi bres and threads). Replace the net fi lter. Close the fi... - Page 31 ADDITIONAL INFORMATION REGARDING CLEANING If you have inadvertently removed the entire net fi lter housing in the dryer door, replace it in the same position. Opening on the lower side of the door should occasionally be cleaned with a vacuum cleaner. If necessary, clean the fi...
- Page 32 CLEANING THE APPLIANCE EXTERIOR Wipe the dryer exterior using a soft damp cotton cloth and mild detergent. Do not use any cleaning agents that could damage the dryer (please observe the recommendations and warnings provided by the manufacturers of the cleaning agents). Wipe all parts of the dryer with a soft cloth until dry.
-
Page 33: Errors - What To Do
ERRORS – WHAT TO DO? Disturbances from the environment (e.g. the power grid) may result in various error reports (see Troubleshooting table). In such case: • Switch off the appliance, wait for 1 minute, switch the appliance back on, and repeat the drying program. •... - Page 34 E-3 - Pump failure. Please contact ASKO Service. condensate into the condensate tank Call a service technician. ERROR_4 Filter error. E-4 - Please clean filters or contact ASKO Service. Clean the filters. See chapter "CLEANING AND MAINTENANCE" or call a service technician. ERROR_5 Call a service technician.
- Page 35 INFORMATION before, during, and after the program (depending on the model) Error indication on the display What to do? EN: STEAM TANK IS EMPTY. PLEASE FILL WATER Fill the steam generator tank with distilled water. Pour the water through the filter tank of the steam generator in the condensate tank housing.
-
Page 36: Service And Guarantee
ASKO Products must 7. Repairs to parts or systems resulting from be fi led with ASKO within two (2) years from date of unauthorized modifi cations made to the ASKO purchase. Service will be provided during normal Product. - Page 37 DAMAGES AND IN NO EVENT FOR DAMAGES Art.No.: XXXXXX/XX Ser.No.: XXXXXXXX X kg IN EXCESS OF THE PRICE PAID FOR THE ASKO XXXX W XXX V ~ PRODUCT AS TO WHICH A CLAIM IS MADE. Some jurisdictions do not allow the exclusion or...
- Page 38 Limited Warranty, please contact ASKO Customer Care at 1-800-898-1879. After your purchase and prior to fi rst use of the ASKO Product, register your ASKO Product with ASKO by utilizing the address information below. Should you need...
-
Page 39: Technical Information
TECHNICAL INFORMATION TECHNICAL INFORMATION Height 845 mm Width 597 mm Depth 755 mm Weight (net) 45 kg Drum volume 145 l Maximum drying load See rating plate Speed 50–55 rpm Rated power See rating plate Drum material Stainless steel Housing material Hot-dip galvanized and powder coated sheet metal, or stainless steel sheet Placement/installation... -
Page 40: Program Table
PROGRAM TABLE The following table lists the power consumption and duration for several programs. The table shows the eff ect on drying parameters at varying spinning speeds during the washing cycle. Actual consumption can vary depending on the room temperature, humidity, load, changes in power supply, and selected options. The following requirements apply to the consumption values specifi... -
Page 41: Disposal
DISPOSAL Disposal / recycling of packaging Our product packaging is made of environmentally friendly materials that can be recycled, disposed of, or destroyed without any hazard to the environment. To this end, packaging materials are labelled appropriately. The symbol on the product or its packaging indicates that the product should not be treated as normal household waste. - Page 42 NOTES Customer Care Center, 1-800-898-1879, www.askousa.com...
-
Page 43: Quick Guide
QUICK GUIDE SORT THE FABRICS Sort the fabric by type and by how heavily soiled the laundry is. Observe the drying symbols on the laundry labels. Close the zippers, hook-and-loop fasteners and buttons. SWITCH ON THE MAIN ON/OFF SWITCH (ON/OFF) OPEN THE DRYER DOOR AND INSERT THE LAUNDRY. - Page 44 www.askousa.com TD85.11 SPO US/CA en (10-17)