Table of Contents
Advertisement
Quick Links
Matsushita Electric Industrial Co., Ltd.
Web Site : http://www.panasonic.co.jp/global/
YEFM285662 TAMACO0105-0
Printed in Taiwan
TILT
OPEN / CLOSE
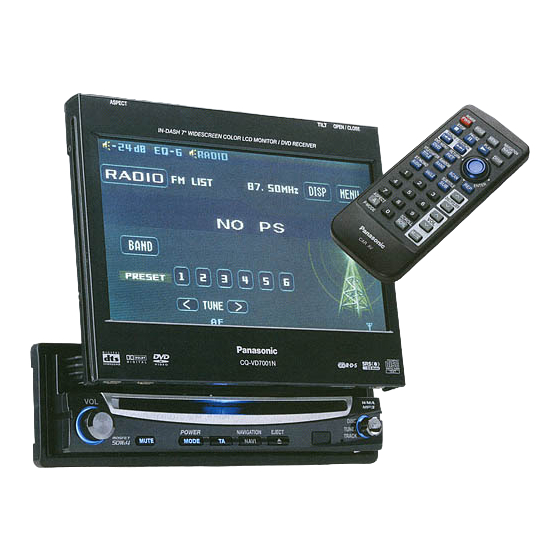
In-Dash 7" Widescreen Color LCD Monitor/DVD Receiver
POWER
NAVIGATION
PWR
MODE
MENU
NAVI
STOP
PAUSE
PLAY
DISP
TRACK / SEARCH
DVD MENU
RETURN
DVD
RET
TITLE/CHAPTER
RANDOM
TITLE
RAND
SCAN
REP
ST/ MONO
SUBTITLE
AUDIO
ANGLE
SUB
DISC/FOLDER
DISC/FOLDER
ASPECT
OPEN / CLOSE
1
2
3
ASP
CQ-VD7001N
TILT
O / C
TEXT
P·MODE
4
5
6
CQ-VD7001U
VOL
VOL
7
8
9
VOL
ASPECT
SCROLL
A
0
SCRL
MUTE
P-MODE
DISC
TUNE /
ENTER
POWER
NAVIGATION
EJECT
TRACK
MODE
TA
NAVI
MUTE
CAR AV
¡Please read these instructions carefully before using this product and keep this manual for future reference.
¡Bitte lesen Sie diese Bedienungsanleitung vor der Verwendung dieses Produktes aufmerksam durch und bewahren Sie sie danach
für spätere Nachschlagzwecke sorgfältig auf.
¡Prière de lire ces instructions attentivement avant d'utiliser le produit et garder ce manuel pour l'utilisation ultérieure.
¡Leest u deze instructie alstublieft zorgvuldig door voor u dit product in gebruik neemt en bewaar deze handleiding voor later gebruik.
¡Läs igenom denna bruksanvisning noga innan produkten tas i bruk. Spara bruksanvisningen för framtida behov.
¡Si prega di leggere attentamente queste istruzioni prima di usare questo prodotto e di conservare questo manuale per usi futuri.
¡Lea con atención estas instrucciones antes de utilizar el producto y guarde este manual para poderlo consultar en el futuro.
¡Læs venligst denne brugsvejledning grundigt, inden dette produkt tages i brug og gem den til senere konsultation.
CQ-VD7001N
Operating Instructions
Operating Instructions
Bedienungsanleitung
Bedienungsanleitung
Manuel d'instructions
Manuel d'instructions
Gebruiksaanwijzing
Gebruiksaanwijzing
Bruksanvisning
Bruksanvisning
Manuale di istruzioni
Manuale di istruzioni
Manual de Instrucciones
Manual de Instrucciones
Brugsvejledning
Brugsvejledning
Instrukcja obs¬ugi
Návod k obsluze
Használati utasítások
àÌÒÚÛ͈Ëfl ÔÓ ˝ÍÒÔÎÛ‡Ú‡ˆËË
TEXT
Advertisement
Table of Contents

Related Manuals for Panasonic CQ-VD7001N


Summary of Contents for Panasonic CQ-VD7001N
- Page 1 ¡Lea con atención estas instrucciones antes de utilizar el producto y guarde este manual para poderlo consultar en el futuro. Web Site : http://www.panasonic.co.jp/global/ ¡Læs venligst denne brugsvejledning grundigt, inden dette produkt tages i brug og gem den til senere konsultation.
-
Page 2: Safety Information
They contain instructions about how to use the sys- from improper connections and operations. The meanings of tem in a safe and effective manner. Panasonic assumes no re- the pictographs are explained below. It is important that you sponsibility for any problems resulting from failure to observe fully understand the meanings of the pictographs in order to the instructions given in this manual. - Page 3 The meanings of Avoid slanted or strongly curved surfaces for installation. If tem in a safe and effective manner. Panasonic assumes no the pictographs are explained below. It is important that you Observe the following cautions when using this...
-
Page 4: Notes On Use
¡ Storage temperature range: – 20 °C to 80 °C 1. LCD monitor/DVD player When the liquid crystal panel reaches high temperatures Q’ty: 1 or low temperatures, chemical changes occur within the ASPECT OPEN / CLOSE CQ-VD7001N TILT O / C P·MODE CQ-VD7001U TEXT Label Indications and Their Locations... -
Page 5: Table Of Contents
Features Contents CQ-VD7001N System Upgrade Panasonic welcomes you to our constantly growing family of electronic products owners. ■ In-Dash 7” Widescreen Color LCD Monitor/DVD English 5.1-channel Surround System We endeavor to give you the advantages of precise elec- Receiver tronic and mechanical engineering, manufactured with This unit has a built-in 4-channel amplifier. -
Page 6: Preparation
(VTR/AUX input level). Note: MODE LEVEL page 45) ¡Battery Information: Battery Type: Panasonic lithium battery (CR2025) Warning Battery Life: Approximately 6 months under normal use (at room temperature) ¡ When you connect external devices to Video Input Terminal (VTR), be sure to connect the side brake connection lead (aInstallation Instructions). -
Page 7: Name Of Controls And Functions
DVD MENU RETURN []] [[] [ENTER] w [VOL] TITLE/CHAPTER RANDOM i [}] [{] (DISC) TITLE RAND SCAN ASPECT OPEN / CLOSE CQ-VD7001N TILT O / C [] ] [[ ] (TUNE/ ST/ MONO SUBTITLE TEXT P·MODE AUDIO ANGLE CQ-VD7001U TRACK) DISC/FOLDER... - Page 8 [Only for CD Changer/DVD []] [[] Changer] [SUB] (SUB ¡Switching the subtitle language. [ENTER] ¡Determines an operation or item. TITLE) page 23, 37) [Only for DVD] [MODE] ¡Changes the modes such as sound and picture. page 16, 20, 35) CQ-VD7001N CQ-VD7001N...
-
Page 9: Touch Panel Operation Overview
CD Changer and DVD Changer is connected. VTR/AUX mode can be set to skip. page 48) (AUX mode is selected when no CD Changer, DVD ¡ Refer to the description of each mode for how to operate Changer is connected) the operation screen. CQ-VD7001N CQ-VD7001N... -
Page 10: General
OPEN / CLOSE MODE MODE MENU NAVI TILT TILT O / C O / C STOP PAUSE PLAY P·MODE DISP CQ-VD7001N TRACK / SEARCH []] [[] DVD MENU RETURN TITLE/CHAPTER RANDOM DISC TITLE RAND SCAN ENTER ENTER TUNE / ST/ MONO... -
Page 11: Before Disc Playback
Disc Size 12 cm The numbers indicate the number of languages, Video tracks, angles, etc., recorded on the disc. ASPECT ASPECT OPEN / CLOSE OPEN / CLOSE CQ-VD7001N CQ-VD7001N TILT TILT O / C O / C Format TEXT TEXT P·MODE... -
Page 12: Disc Player
Disc Player Basic Operations ASPECT OPEN / CLOSE CQ-VD7001N TILT O / C TEXT P·MODE [MODE] CQ-VD7001U Operations Compatible Compatible Compatible Operations DISC ENTER ENTER TUNE / POWER NAVIGATION EJECT TRACK POWER NAVIGATION Discs Discs Discs MODE MODE NAVI MUTE... - Page 13 ¡The language on the DVD settings takes priority when the power is turned on or the disc is loaded. ¡The number of languages and angles depend on the disc. Some discs have only one language/angle or have no lan- guage/angle. CQ-VD7001N CQ-VD7001N...
-
Page 14: Notes On Mp3/Wma
It is prohibited by copyright laws to copy, distribute and deliver copyrighted materials such as music without the approval of copyright holder except enjoying yourself personally. No warranty Above description complies with our investigations as of December 2004. It has no warranty for reproducibility and displayability of MP3/WMA. CQ-VD7001N CQ-VD7001N... -
Page 15: Radio
¡ Touch/press and hold for more than 2 seconds. Tuning ¡ The frequency blinks once, and a receiving station is saved in the memory. Auto presetting ASPECT OPEN / CLOSE CQ-VD7001N TILT O / C New stations overwrite existing saved stations. TEXT Stereo Indicator... -
Page 16: Rds (Radio Data System)
PTY on/off setting [1] – [6] ¡ Setting to TA on with the unit in another mode, it will ASPECT OPEN / CLOSE CQ-VD7001N automatically switch to radio mode and output the traf- TILT O / C ASPECT OPEN / CLOSE TEXT P·MODE... - Page 17 RAND SCAN Touch Touch Touch ST/ MONO SUBTITLE AUDIO ANGLE DISC/FOLDER DISC/FOLDER [1] – [6] PTY on/off setting ASPECT OPEN / CLOSE CQ-VD7001N TILT O / C TEXT ASPECT SCROLL P·MODE CQ-VD7001U SCRL MUTE []] [[] P-MODE DISC ENTER ENTER...
-
Page 18: Vtr
48) ¡If no operation is performed for 10 seconds or /[DISP] is touched/pressed, the operation buttons disappear. ¡VTR terminal is not used for the Panasonic car navigation Connecting with Panasonic Car Navigation System system (CN-DV2300N, option). Refer to NAVI SETUP (e.g. -
Page 19: Cd Changer Control
¡Connect the CD changer, and load a magazine (discs). Note: RADIO CH-C ¡DVD changer functions are designed for optional Basic Operations ¡Be sure to connect RCA cord of the Panasonic DVD Panasonic DVD changer unit. (CX-DH801N) RADIO CH-C Changer to CH/AUX-IN. Otherwise the changer cannot be Preparation: controlled through this unit. - Page 20 ¡The language on the DVD settings takes priority when the power is turned on or the disc is loaded. [RET] Returns to the previous display. ¡The number of languages and angles depend on the disc. Some discs have only one language/angle or have no lan- – guage/angle. CQ-VD7001N CQ-VD7001N...
-
Page 21: Settings
Touch desired setting. Touch in Operation Screen. : Press [MENU]. : Press [}], [{], []] or [[] to select, then [ENTER] to deter- mine. OPEN / CLOSE ASPECT CQ-VD7001N TILT O / C TEXT P·MODE CQ-VD7001U DISC ENTER ENTER TUNE /... - Page 22 If you forget it, you will be unable to use the TILT (Tilt angle adjustment) unit. In case you forget the ID code, please consult : puts forward hour your nearest Panasonic Service Centre. MINUTE ADJUST (Minute adjustment) MEMORY CLEAR : puts back minute...
- Page 23 : Select/adjust [MENU] [MENU] : Previous menu : Quit [ENTER] : Previous menu : Quit [ENTER] [MODE] []] [[] [}] [{] : Select/adjust : Determine [MODE] []] [[] [}] [{] : Select/adjust : Determine (Remote Control) (Remote Control) CQ-VD7001N CQ-VD7001N...
- Page 24 : Select/adjust [MENU] [MENU] : Previous menu : Quit [ENTER] : Previous menu : Quit [ENTER] [MODE] []] [[] [}] [{] : Select/adjust : Determine [MODE] []] [[] [}] [{] : Select/adjust : Determine (Remote Control) (Remote Control) CQ-VD7001N CQ-VD7001N...
- Page 25 : Select/adjust [MENU] [MENU] : Previous menu : Quit [ENTER] : Previous menu : Quit [ENTER] [MODE] []] [[] [}] [{] : Select/adjust : Determine [MODE] []] [[] [}] [{] : Select/adjust : Determine (Remote Control) (Remote Control) CQ-VD7001N CQ-VD7001N...
- Page 26 : Select/adjust [MENU] [MENU] : Previous menu : Quit [ENTER] : Previous menu : Quit [ENTER] [MODE] []] [[] [}] [{] : Select/adjust : Determine [MODE] []] [[] [}] [{] : Select/adjust : Determine (Remote Control) (Remote Control) CQ-VD7001N CQ-VD7001N...
- Page 27 : adjusted automatically NARROW : narrows the frequency bandwidth to be ASPECT SCROLL ASPECT OPEN / CLOSE received to prioritize noise reduction. SCRL MUTE CQ-VD7001N TILT O / C TEXT P-MODE P·MODE CQ-VD7001U WIDE : widens the frequency bandwidth to be DISC...
-
Page 28: Troubleshooting
¡Never try to repair the unit by yourself ST/ MONO SUBTITLE AUDIO ANGLE Panasonic shall not be liable for any accidents arising out of neglect because it is dangerous to do so. DISC/FOLDER DISC/FOLDER of checking the unit or your own repair after your checking. - Page 29 Refer to the guide provided with your disc.) used. The disc is still unfinalized. aFinalize the disc. A DVD-R or DVD-RW is not playable. Refer to “Before Disc Playback” page 18) or “Notes on Discs” page 59) for other cases. CQ-VD7001N CQ-VD7001N...
- Page 30 CD changer). If normal operation is not restored, call the store where ■ Remote control unit you purchased the unit or the nearest Panasonic Service Centre. The battery is inserted in the wrong direction. A wrong battery is inserted. The type of the file that is selected is not supported.
-
Page 31: Maintenance
Reset switch Panasonic Service Centre. The product should be serviced ¡ When not in use, keep disc in the case. At a time like this, insert the disc into the unit as far as it Insert a hard, slender stick into the hole and push the only by a qualified technician. -
Page 32: Language Code List
Track 2 Track 3 Track 7176 Galician 7879 Norwegian 9072 Chinese 7178 Guarani 7982 Oriya 9085 Zulu 7185 Gujarati 8065 Panjabi 7265 Hausa 8076 Polish 7273 Hindi 8083 Pashto, Pushto 7282 Croatian 8084 Portuguese 7285 Hungarian 8185 Quechua CQ-VD7001N CQ-VD7001N... -
Page 33: Specifications
Customer Care Centre ¡ All enquiries transactions and distribution facilities are ¡ For UK customers: 08705 357357 provided directly by Panasonic UK Ltd. ¡ For Republic of Ireland customers: 01 289 8333 ¡ It couldn't be simpler! ¡ Visit our website for product information ¡... - Page 34 ¡Lea con atención estas instrucciones antes de utilizar el producto y guarde este manual para poderlo consultar en el futuro. Web Site : http://www.panasonic.co.jp/global/ ¡Læs venligst denne brugsvejledning grundigt, inden dette produkt tages i brug og gem den til senere konsultation.
- Page 35 Receiver • PLEASE FOLLOW THE LAWS AND REGULATIONS This unit can be combined with other components like CQ-VD7001N shown below. For more details, refer to the operating OF YOUR STATE, PROVINCE OR COUNTRY FOR instructions for the connected devices. INSTALLATION OF THE UNIT.
- Page 36 (YEJVO1060) 30°. In case of difficulty, please consult your nearest authorized Round Head Screw Panasonic Service Centre. (5 mmø x 6 mm) Note: 1. This system is to be used only in a 12 V DC battery sys- Flat-Head Screw ¡The number in parenthesis underneath each accessory...
- Page 37 Mounting Spring e . Tapping Screw Clamp plate (option) Insert Trim Plate q. Hex. Nut (option) r Mounting Bolt After installation r Mounting Bolt (5 mmø) reconnect the negative (5 mmø) (–) battery terminal. CQ-VD7001N CQ-VD7001N...
- Page 38 Comes up to this point. Side Brake (Parking Brake) Push here to Power source side lead Connection Lead remove the (Blue/yellow stripe) clamp plates. * To remove Trim Plate q, pull it from right side to left side. CQ-VD7001N CQ-VD7001N...
- Page 39 ¡Be sure to insulate any exposed wires to prevent short circuiting with the car chassis. Bundle all cables, and prevent cable terminals from touching any metal parts. Reverse Lead ¡Note that if your car has a driving computer or a navigation computer, disconnecting the cable from the battery may CQ-VD7001N (Violet/white stripe) clear the memory. (Rear) When connecting the rear view camera, use the reverse lead.
- Page 40 Connection with CD Changer (CX-DP880N) Note: RGB Connector ¡ Refer to the operating instructions for the connected devices, in addition. To the Panasonic Car Navigation System. DIN Connector To the DIN connector of a CD changer/DVD Changer. (e.g. CX-DP880N, CX-DH801N).
- Page 41 To a clean, bare metallic part of the car chassis RGB Cord (Supplied with CN-DV2300N) Power Connector Battery Lead BATTERY 5 A (Supplied with CX-DH801N) CQ-VD7001N (Yellow) To the car battery, continuous +12 V DC (Rear) Remote Control Power Lead (Red) (not used) DIN Cord (black) RGB Connector...
- Page 42 Rear View Camera ¡ Please observe what shapes the connectors of the connecting devices are and where each of them is connected to in Control Unit (option) order to establish a proper connection. CQ-VD7001N Caution Rear Monitor (Rear) STAND BY (R)