
Related Manuals for Haier GE UltraFresh GFD55ESSN


Summary of Contents for Haier GE UltraFresh GFD55ESSN
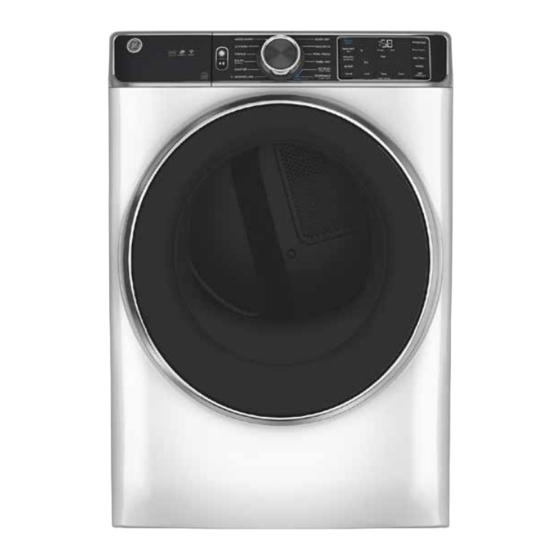
- Page 1 Technical Service Guide January 2021 UltraFresh Dryer GFD55ESSN GFD55GSSN GFD55ESPN GFD55GSPN GFD65ESSN GFD65GSSN GFD65ESPN GFD65GSPN GFD85ESSN GFD85GSSN GFD85ESPN GFD85GSPN GFV55ESSN 31-9349 Rev. 1 ~ 1/05/22...
-
Page 2: Safety Information
5. Locate the Warranty page. GE Appliances, a Haier Company Copyright © 2020 All rights reserved. This service guide may not be reproduced in whole or in part in any form without written permission from GE Appliances, a Haier Company. – 2 –... -
Page 3: Table Of Contents
Table of Contents Safety Information ........................2 Warranty ............................2 Table of Contents..........................3 Safety Requirements ........................6 Nomenclature ..........................7 Specifications Electric Models ......................8 Specifications Gas Models ......................9 Control Features ...........................10 Quick Start ...........................10 Wi-Fi Connect ........................10 Dryer Features ........................11 Stacking Instructions ........................17 Tools Needed ........................17 Installation Preparation ......................17 Remove the Leveling Dryer Legs ..................18 Install Spacers to Dryer Bottom ....................18... - Page 4 Dryer Components ........................25 Control Panel and Front RJ45 Access ..................25 Top Panel ..........................26 Door ............................26 Door Reversal ........................26 Misting Nozzle and Base ......................29 Misting/Steam Valve ......................31 Front Panel ...........................31 Front Drum Support ......................32 Drum/Tub Lamp ........................34 Sensor Rods .........................34 Drum .............................35 Electric Heater Assembly ......................36 Burner Assembly .........................37 Gas Valve ..........................37...
- Page 5 Diagnostics and Service Information ....................52 Consumer Fault Code Mode ....................52 Service Mode ........................52 Service Mode Tests ......................53 Fault Codes ..........................56 Electric Schematic ........................57 Gas Schematic ..........................58 Index .............................59 – 5 –...
-
Page 6: Safety Requirements
Safety Requirements GEA Factory Service Employees are required to use safety glasses with side shields, safety gloves and steel toe shoes for all repairs. Prescription Safety Glasses Brazing Glasses Safety Glasses must be ANSI Z87.1-2003 compliant Plano Type Safety Glasses Cut Resistant Sleeve(s) Electrically Rated Glove and Dyneema®Cut Resistant... -
Page 7: Nomenclature
Nomenclature Model Number G F D 8 5 E S S N 0 W W Brand Series/ Color G: GE Appliances Features WW: White Configuration F: Front Load Engineering Revision Fuel/Voltage E: Electric Alpha or Numeric G: Gas Platform P: Propane Model Year D: Dryer N: 2019... -
Page 8: Specifications Electric Models
Specifications Electric Models DC Voltage Output Board Component Connector Pin DC Volts 13.5 User Interface J601 Outlet Thermistor J302 Dryer Main Inlet Thermistor J302 Control Board 13.5 RJ45 J302 LED Lamp J303 Wi-Fi J604 13.5 Dryer User J101 Interface Board Dryer Wi-Fi Wi-Fi J103... -
Page 9: Specifications Gas Models
Specifications Gas Models DC Voltage Output Board Component Connector Pin DC Volts 13.5 User Interface J601 Outlet Thermistor J302 Dryer Main Inlet Thermistor J302 Control Board 13.5 RJ45 J302 LED Lamp J303 Wi-Fi J604 13.5 Dryer User J101 Interface Board Dryer Wi-Fi Wi-Fi J103... -
Page 10: Control Features
Control Features Quick Start 1. Clean lint filter. Loosely add items. Close door. NOTE: Dryer will not start with door open. 2. If the screen is dark, press the Power pad or turn the knob to “wake up” the display. 3. -
Page 11: Dryer Features
Dryer Features Models: GFD85 Models: GFD65 Models: GFD55 GFV55 (Continued next page) – 11 –... - Page 12 Power Press to “wake up” the display. If the display is active, press to put the dryer into idle mode. NOTE: Pressing Power does not disconnect the appliance from the power supply. Start and Pause Press Start to begin the cycle. NOTE: The door must be closed for the dryer to start the cycle.
- Page 13 Drying Cycles Sensor cycles automatically determine fabric dryness. Timed cycles run for the selected time. Mixed Loads For loads consisting of cottons and poly-blends. Cottons For cottons and most linens. NOTE: ENERGY STAR® models are tested on COTTONS cycle with default settings (Temp setting on Low, Level setting on Dry, and ecoDry default on).
- Page 14 Steam For slightly wrinkled dry garments. Significantly reduces wrinkles. After Refresh the STEAM Refresh cycle, the unit will beep (if Sound is selected) and display “00”. STEAM Refresh is recommended for small loads (3 to 5 garments). NOTE: Steam cycles are not intended for use with towels.
- Page 15 Options Reduce Static (on some models). When selected, the dryer will spray a mist of water onto the load, at the end of the drying cycle, to reduce static. This option is not available with BULKY, SANITIZE or STEAM cycles. Damp Alert (Damp Alert/WiFi Pad): This option causes the dryer to beep when clothes have dried to a damp level.
- Page 16 Options (Cont.) Wrinkle Care Use this option to minimize the wrinkles in clothes. It provides 1 hour of no-heat tumbling after the clothes are dry. If using the cycle Sound, and select the Wrinkle Care option, a signal will sound at the end of the drying time and several times during the Wrinkle Care cycle. This will remind the user that it is time to remove the clothes.
-
Page 17: Stacking Instructions
Stacking Instructions If planning to stack the washer and dryer, order • Closet doors must be louvered or otherwise Stacking Kit number GFA28KITN to be used for ventilated and have at least 60 square inches this dryer. of open area equally distributed. If the closet contains both a washer and a dryer, doors Kit sold separately. -
Page 18: Remove The Leveling Dryer Legs
Remove the Leveling Dryer Legs Install Spacers to Dryer Bottom 1. Carefully lay the dryer on its side. Use the 1. Locate a spacer on the bottom side with its packing material so not to scratch the finish holes over the leveling leg holes. Attach on the dryer. -
Page 19: Prepare The Washer And Dryer
32 Brackets for 32-Inch Washer and Dryer Prepare the Washer and Dryer Combinations 1. Place the washer in the approximate final Attach brackets to washer using four screws on installation location. each side. 2. Make sure the washer is level. Refer to the washer Installation Instructions for details. -
Page 20: Install Dryer And Bracket On Washer
Install Dryer and Bracket on Washer Finalize the Installation 1. Lift the dryer onto the top of the washer. Be CAUTION: Do not push on the dryer once sure to lift the dryer high enough to clear installed to top of the washer. Pushing on the the washer control panel. -
Page 21: Component Locator Views
Component Locator Views Top View Steam Valve Main Board Drum Belt Drum Wi-Fi Board Front View RJ45 Connector Front Drum Support – 21 –... -
Page 22: Bottom View (Gas)
Bottom View (Gas) Rear Drum Support Rollers High Inlet Limit T-Stat T-Stat Safety Outlet Valve T-Stat Thermistor Burner Assembly Bottom View (Electric) Inlet T-Stat High Limit T-Stat Electric Heater Outlet Assembly Thermistor – 22 –... -
Page 23: Main Board
Main Board J301 J302 Wi-Fi J605 Board J604 K504 K502 K501 J601 J101 J303 J502 J101 120 VAC in to Main Board J301 5 VDC Out to Sensor Rods With Nothing Touching Sensor Rods. Pins 1 to 5. J302 13.5 VDC Volts Out to RJ45. Pins 5 to 8. 5 VDC Out to Inlet Thermistor. -
Page 24: User Interface Board (Ui)
User Interface Board (UI) J101 J101 DC Voltage in from Main Board and Communication Out to Main Board Wi-Fi Board J103 DC Voltage in from Main Board and Communication Out to Main Board – 24 –... -
Page 25: Dryer Components
Dryer Components Warning: Sharp edges may be exposed when 3. Then slide the access panel to the left to reveal the RJ45 connector. servicing the dryer. Use caution to avoid injury. Wear Kevlar gloves or equivalent protection. Control Panel and Front RJ45 Access The control panel is held in place with four Phillips-head screws and five tabs. -
Page 26: Top Panel
6. Lay the control panel over to access and Door disconnect the RJ45 connector and the user interface (UI) wire connector from the control The door is fastened to the front panel using two panel. Notice the location of the mini manual. 1/4-inch hex-head screws. - Page 27 Step 1: Remove the Strike Plate and Door Step 3: Remove, Rotate and Replace the Assembly Handle and Hinges into the Opposite Sides • Open the dryer door. • Lift the handle and the hinge out of the door pockets. •...
- Page 28 • Rotate the handle and hinge and replace Step 5: Replace the Strike Plate and Door them back into the pockets on the opposite Assembly sides. • On the opposite side from where removed, replace the strike plate with its two screws using a T-25 Torx-head screw-driver.
-
Page 29: Misting Nozzle And Base
Nozzle Replacement Misting Nozzle and Base To replace the nozzle, order Nozzle Replacement The misting nozzle and base is located and Kit WE01X30097 and follow these instructions fastened to the inside of the dryer on the rear carefully. drum support. 1. - Page 30 3. Reinstall the mesh using the male part of the Base Replacement Nozzle/Mesh installation tool that comes in The mist nozzle base is mounted to the rear drum the kit. Place the new mesh onto the tool and support. If the mist nozzle base needs to be insert the mesh inside the nozzle base.
-
Page 31: Misting/Steam Valve
Misting/Steam Valve Front Panel The misting/steam valve is used during the Steam Removal of the front panel provides access to the Dewrinkle or Steam Refresh cycles. It provides sensor rods connection, and the drum lamp. The a mist of water that is sprayed into the drum, door switch is attached to the front panel. -
Page 32: Front Drum Support
5. Lift the front panel straight up to disengage Front Drum Support the two clips at the bottom of the panel and the four clips from the cabinet. There are two The drum support holds the front of the drum in on each side. - Page 33 Drum Roller Wheel Removal 1. Remove the control panel, control panel bracket, top cover and front panel (see Control Panel and Front RJ45 Access, Top Cover, Front Panel and Front Drum Support sections of this service guide). 2. Remove the triangle clip from the shaft that secures the roller wheel on it.
-
Page 34: Drum/Tub Lamp
Sensor Rods Drum/Tub Lamp The drum lamp assembly consists of a LED that The sensor rods consist of two sensors attached comes with its own harness attached. It has a to a plastic housing on the inside of the drum built-in light shield. -
Page 35: Drum
Sensor Rod Removal Drum 1. Remove the front panel to access the sensor The drum has two grooves where the drum sits rods and harness (see Front Panel Removal on top of drum rollers. There are two at the front under Front Panel in this section of this and two at the rear of the drum. -
Page 36: Electric Heater Assembly
Electric Heater Assembly Pull Idler Pulley to the Right The electric heater assembly has an upper and lower heater in the housing, which comes assembled together. It also has the inlet and high limit thermostats mounted to the left side of the heater housing. -
Page 37: Burner Assembly
4. Using a multi-meter, test resistance between Burner Assembly the two heater coils. This should read approximately between 36.2 W (ohms) to 40.3 The burner assembly consists of the gas valve, W (ohms). If open, check the heater harness burner, and inlet pipe. for damage. -
Page 38: Radiant Sensor (Flame Detector)
Gas Valve Removal Radiant Sensor (Flame Detector) 1. Ensure electric to the dryer has been The radiant sensor (flame detector) is attached disconnected. to the right side of the combustion chamber. The radiant sensor is used in gas dryers to ensure 2. -
Page 39: Igniter
Igniter The ignitor is located at the end of the burner assembly in the combustion chamber opening and has a maximum rating of 3.5 amps. The ignitor has an approximate resistance value of 40 to 400 Ω. The ignitor is attached to the gas valve bracket with one 1/4-inch hex-head screw. -
Page 40: Ignitor Circuit Operation
Ignitor Circuit Operation The glo-bar ignitor circuit is made up of the following components: a gas valve with safety and main valves, ignitor, and a flame detector. The safety valve is actuated by a double coil that comprises a safety coil (resistance approximately 1,400-ohms) and a booster coil (resistance approximately 580- ohms). -
Page 41: Blower Wheel
NOTE: Remember to rotate the nut to the right Blower Wheel clockwise (CW) to loosen the nut. The function of the blower wheel is to circulate incoming dry air through the heating system of the dryer and into the drum. The warm moist air is then blown outside through the vent duct. -
Page 42: Drive Motor
Long Vent Motor Drive Motor The long vent motor is similar to the standard The motor is a single-speed, 1/4-HP, 1750-RPM vent motor in that is has the single shaft going motor with an automatic reset overload protector. through the motor that has the belt pulley on the The overload protector is an internal component one end. -
Page 43: Inlet Thermistor
2. Remove the top panel, front panel, front drum Inlet Thermistor support, blower wheel and drum (see Top Panel, Front Panel, Front Drum Support, The inlet thermistor is located at the back of the Blower Wheel and Drum sections in this dryer. -
Page 44: Inlet Backup Thermostat
Inlet Thermistor Removal Inlet Backup Thermostat 1. Remove the rear panel to access the The inlet thermostat is located on the side of thermistor. the electric heater on electric model dryers. The thermostat opens at 255°F and closes at 232°F. On gas dryers, it is located on top of the combustion chamber. -
Page 45: High Limit Thermostat
Inlet Backup Thermostat Removal High Limit Thermostat 1. Remove the top panel, front panel, front roller The high limit thermostat is located on the side of support, blower wheel and drum (see Top the electric heater on electric model dryers. On Panel, Front Panel, Front Drum Support, gas dryers, it is located on top of the combustion Blower Wheel and Drum sections in this... -
Page 46: Outlet Thermistor
High Limit Thermostat Removal Outlet Thermistor 1. Remove the top panel, front panel, front roller The outlet thermistor is located on the back of the support, blower wheel and drum (see Top blower housing. Panel, Front Panel, Front Drum Support, Blower Wheel and Drum sections in this The thermistor has a negative temperature guide). -
Page 47: Outlet Thermostat
2. Disconnect the thermistor harness connector. Outlet Thermostat 3. Remove one 1/4-inch hex-head screw The outlet thermostat is located on the side of the securing the thermistor to the supply duct and blower housing on both gas and electric models. pull out from the blower housing. -
Page 48: Safety Thermostat
On gas dryers, continuity can be checked at Safety Thermostat the thermostat or from the normally open (N.O.) terminal on the K501 relay to the gas valve. If The safety thermostat is only found on the gas there's no continuity found, either the outlet or dryer. -
Page 49: Electronics
Electronics User Interface (UI) Board The user interface (UI) board is mounted to the control panel assembly under the plastic cover. It RJ45 consists of the display board; cycle select board Connector and the power/pause button board. They are all connected together and come as one part. -
Page 50: Wi-Fi Board
Wi-Fi Board Main Board The Wi-Fi board is powered by the main board The main board is located under the top panel, from the J602 connector. It is located/mounted mounted on a bracket on the left side. on the housing of the main board. Main Touch Board Diagnosing Board... - Page 51 Main Board Removal 1. Remove the Top Panel (see Top Panel in the Dryer Components section of this service guide 2. Disconnect harness connector from the main board. 3. Lift up the tab and slide main board toward the rear of the dryer and lift from main board bracket.
-
Page 52: Diagnostics And Service Information
Diagnostics and Service Information Consumer Fault Code Mode Consumer fault code mode provides a way for consumers to read the fault table from their dryers to provide them to the call takers. This will allow the service technicians to bring the correct parts to the service call. -
Page 53: Service Mode Tests
Service Mode Tests Test Test Name Description All LED’s On All LED's on the display will blink including "88" on the Seven Segment Display (SSD) at a rate of 1Hz Fault Codes • Pressing Start pad will blink the first fault code. •... - Page 54 Test Test Name Description Outlet • Press Start to begin test. Thermistor Test • Control will display outlet temperature in °F using Seven Segment Display (SSD). • Control will start drum motor during test. • Electric dryers will turn on the outer coils only during test. •...
- Page 55 Test Test Name Description Door Open/ • Press the Start button to begin test. Close Test • The control will display "dc" if the door is closed or "do" if the door is open. • Rotate the cycle knob to end current test and advance to next test. Door Latch •...
-
Page 56: Fault Codes
Fault Codes Fault Description Trigger Condition Action Code Inlet Thermistor Thermistor readings are • Check harness and connections. If Failure out of range. good, replace thermistor. Outlet Thermistor readings are • Check harness and connections. If Thermistor out of range. good, replace thermistor. -
Page 57: Electric Schematic
Electric Schematic RJ45 BLK-12 RED-12 PUR-20 INLET THERMISTOR PUR-20 BLK-12 OUTLET THERMISTOR BLU-20 BLU-20 PNK-20 LOWER ROD GRY-20 UPPER ROD J301 ORG-20 BLK WHT-20 RUN WINDING MOTOR (OFF) J604 J303 J601 START WINDING – 57 –... -
Page 58: Gas Schematic
Gas Schematic RJ45 PUR-20 INLET THERMISTOR PUR-20 OUTLET THERMISTOR BLU-20 BLU-20 PNK-20 LOWER ROD GRY-20 UPPER ROD J301 WHT-18 YEL-18 ORG-20 BLK WHT-20 RUN WINDING MOTOR (OFF) START WINDING J604 J601 J303 – 58 –... -
Page 59: Index
Index Blower Wheel 41 Nomenclature 7 Burner Assembly 22, 37 Outlet Thermistor 8, 9, 22, 46, 54, 56 Consumer Fault Code Mode 52 Outlet Thermostat 47, 48 Control Panel 25, 31, 32, 33, 49 Radiant Sensor 38 DC Voltage Output 8, 9 Resistance Values 8, 9, 43, 46 Door 21, 26, 27, 28, 32, 52, 55, 56 RJ45 8, 9, 21, 25, 26, 31, 32, 33, 49...